
Homemade California Sushi Rolls: Your Easy Step-by-Step Guide
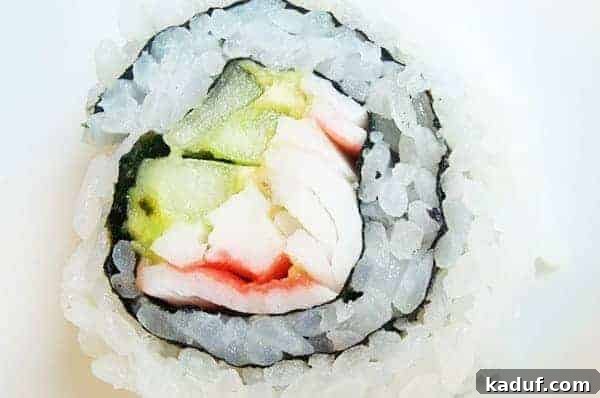
Discover the joy of crafting your own delicious California sushi rolls right at home. With simple ingredients like creamy avocado, crisp cucumber, and savory crab, wrapped in seasoned sushi rice and nori, you’re in for a treat!
While I may not hold a black belt in sushi preparation, I certainly consider myself a seasoned expert in the art of enjoying these delightful creations. California Rolls, with their perfect balance of flavors and textures, are undeniably among the most delicious bites on the planet.
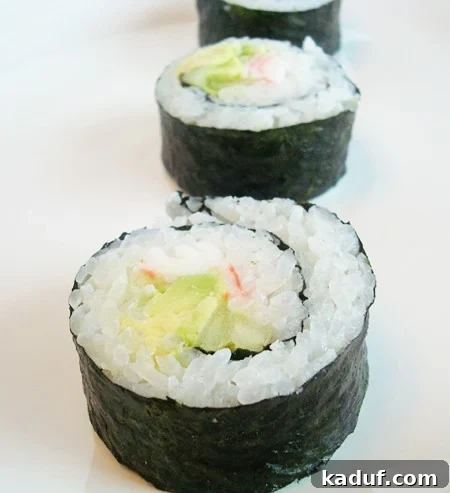
My journey into homemade sushi began years ago, inspired by a friend living in Japan. Despite the California Roll being an Americanized invention, the principles of fresh ingredients and careful assembly are universal. Since then, I’ve made them countless times, perfecting a simple, straightforward process that I’m excited to share with you. This guide will walk you through everything you need to know to create restaurant-quality California rolls in your own kitchen.
Why Make Your Own California Sushi Rolls?
There’s immense satisfaction in preparing your favorite dishes from scratch, and sushi is no exception. Beyond the sheer enjoyment of creating something delicious, making California rolls at home offers several advantages:
- Customization: You control the ingredients, allowing you to choose the freshest produce and adjust fillings to your exact preference. Want extra avocado? Go for it!
- Cost-Effective: Eating out at sushi restaurants can quickly add up. Homemade sushi is a significantly more economical way to satisfy your cravings.
- Healthy and Fresh: You know exactly what goes into your rolls, ensuring a wholesome and fresh meal free from preservatives often found in pre-made options.
- Fun Activity: It’s a fantastic culinary adventure, perfect for a cozy night in, entertaining guests, or even involving kids in a fun, hands-on cooking project.
I keep my California Rolls wonderfully simple: creamy avocado, crunchy cucumber, and savory imitation crab, all rolled up in perfectly seasoned sushi rice and sheets of roasted nori. While you can certainly get adventurous with additions like pickled ginger, sesame seeds, or even a spicy mayo drizzle, I find the classic combination to be utterly irresistible. The beauty of homemade sushi is that you can experiment to your heart’s content!
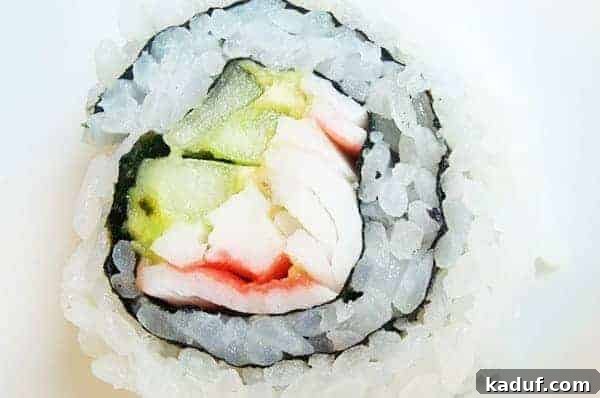
Initially, I was skeptical about making (and even eating) sushi, particularly the idea of seaweed. But one bite was all it took – I was completely hooked! To my surprise, my kids, who are notoriously picky eaters, devoured them with astonishing enthusiasm. It seems the appeal of fresh, colorful rolls transcends age.
If you’re hesitating to try making these culinary delights, consider this your gentle nudge. Homemade California rolls are not only incredibly healthy and satisfying but also surprisingly easy to master. Sharing this how-to guide feels like being a good friend, empowering you to create delicious, healthy meals for yourself and your loved ones.
A Quick Sushi Fact: Did you know that “sushi” doesn’t actually mean raw fish? The term refers to the method of preparing a Japanese dish with seasoned rice, often topped with seafood or vegetables. “Sashimi,” on the other hand, is the specific term for thinly sliced raw fish or seafood served without rice. So, if you’re not a fan of raw fish, California rolls are a fantastic entry point into the world of sushi!
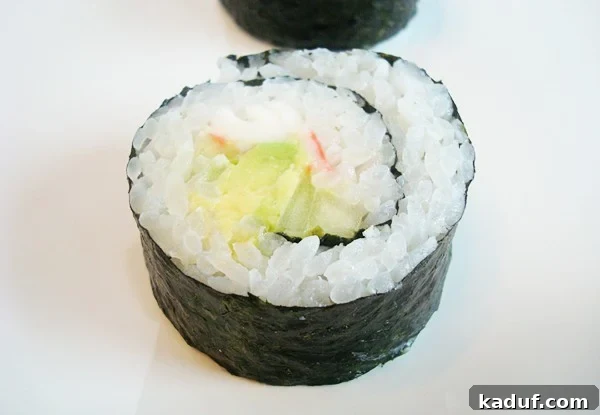
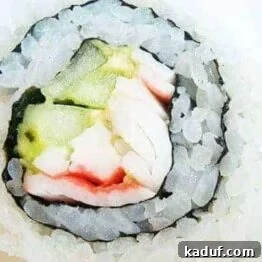
California Sushi Rolls: A How-To Guide
Yield: 4-5 California rolls
Prep Time: 30 mins
Cook Time: 20 mins
Total Time: 50 mins
Rating: 5 stars (10 ratings)
Pin Recipe
Rate This Recipe
Ingredients
For the Filling:
- 4 cups cooked and prepared sushi rice (recipe follows)
- 2 large avocados, cut into long, thin slices
- 1 large cucumber, peeled and cut into long, thin slices
- Imitation crab meat, cut into long, slender slices
Essential Supplies:
- Bamboo mat (makisu), for rolling
- Plastic wrap, for covering the mat
- 4-5 sheets nori, large squares of roasted seaweed (should be dark, nearly black, in color)
For the Sushi Rice:
- 2 cups sushi, short or medium grain rice (do not use long grain rice)
- 2 cups water, plus extra for rinsing rice
- 2 tablespoons rice vinegar
- 2 tablespoons sugar
- 1 tablespoon kosher salt
Instructions
Preparing the Sushi Rice:
- Place the rice into a mixing bowl and cover with cool water. Swirl the rice in the water, pour off, and repeat 2 to 3 times or until the water runs clear. This removes excess starch, crucial for the sticky, yet separate, texture of sushi rice.
- Combine the rinsed rice and 2 cups of fresh water in a medium saucepan. Place over high heat and bring to a rolling boil, uncovered.
- Once boiling, reduce the heat to the lowest setting, cover the pot tightly, and cook for exactly 15 minutes.
- Remove the saucepan from the heat and let it stand, still covered, for 10 minutes. This steaming process allows the rice to absorb any remaining moisture and become perfectly tender.
- While the rice rests, combine the rice vinegar, sugar, and salt in a small bowl. Heat in the microwave on high for 30 to 45 seconds, or until the sugar and salt are fully dissolved. Stir well.
- Transfer the cooked rice into a large wooden or glass mixing bowl. Pour the warm vinegar mixture evenly over the rice. Using a cutting motion with a spatula or rice paddle, gently fold the mixture into the rice, ensuring each grain is coated. Avoid mashing the rice.
- To cool the rice quickly, spread it out on a large rimmed baking sheet. Continuously fold and fan the rice until it reaches room temperature. As my friend Melanie always says, “fan and fold, fan and fold” – it’s surprisingly therapeutic! Once completely cooled, cover the rice with a damp towel to prevent it from drying out while you prepare your fillings.
Notes
Avocado & Lemon: If you’re concerned about your avocado slices browning before serving, gently toss them with a squeeze of fresh lemon juice. This simple trick helps preserve their vibrant green color.
Nori Availability: High-quality roasted seaweed (nori) is widely available. You can typically find it in the international aisle of most major grocery stores, large retailers, or, of course, any Asian market. Look for sheets that are dark green, almost black, and crisp.
Bamboo Mats: Similarly, bamboo rolling mats (makisu) are usually found alongside nori in grocery stores or specialty kitchen shops. They are essential for forming tight, even rolls.
Author: Mel
Course: Appetizer
Cuisine: Japanese
Method: Stovetop
Recommended Products
- Mixing Bowl
- Cookware Set
- 8-Inch Chef’s Knife
Assembling Your California Rolls: A Step-by-Step Visual Guide
Creating beautiful, tight sushi rolls is a skill that comes with practice, but it’s incredibly rewarding. I’ll guide you through making the classic “rice on the outside” California roll, and then show you a quick variation for “nori on the outside.” As my five-year-old would say, “Easy peasy, lemon squeezy!”
Preparation for Rolling:
Start by laying your bamboo mat flat. Cover it completely with a piece of plastic wrap, leaving about 2 inches of overhang on each side to tuck under and tape securely on the back.
This simple step is a game-changer. The plastic wrap acts as a barrier, preventing sticky rice from lodging in the mat’s crevices – a crucial detail you’ll appreciate during cleanup!
Layering the Rice and Nori (Rice on the Outside Method):
Flip your bamboo mat back over. Take a sheet of that crisp, dark nori and place it squarely on top of the plastic-wrapped mat.
Grab about half a cup of the cooled sushi rice and gently place it in the center of the nori. Using damp hands, spread the sticky rice evenly across the entire nori sheet, extending it to the very edges. Leave a small, approximately 1-inch, margin along the edge closest to you; this gap will help create a clean seal when rolling.
Now, carefully grab the nori sheet and flip it over, so the rice side is now facing down on the plastic wrap. This is how we achieve the “rice on the outside” style.
A quick peek to confirm the rice is beautifully laid out underneath.
Adding the Fillings:
Now comes the fun part: layering your delicious fillings. First, arrange the imitation crab meat in a neat line along the edge of the nori closest to you. Leave about a 1-inch margin at the very bottom; this space is essential for starting your roll tightly.
Next, add the thin slices of cucumber right on top of the crab.
Finally, crown your roll with the luscious avocado slices – my personal favorite! A word of caution: it’s easy to get carried away with fillings. Overloading the roll can make it incredibly difficult to achieve a tight, even roll. Aim for a balanced amount to ensure ease of rolling and perfect slices.
The Art of Rolling:
This is where the magic happens, and it might require a little patience and deep breathing initially. But I promise, with a bit of practice, you’ll be rolling like a pro! Gently lift the edge of the bamboo mat closest to you. Fold it over the fillings, guiding them into a cylinder shape with your fingers. Use your fingers to press the crab, avocado, and cucumber back towards the mat, ensuring they stay compressed and don’t slip out.
Continue to fold the mat over, applying consistent, firm pressure as you roll. Your goal is to create a tight, compact cylinder. Roll until the mat can no longer effectively roll without folding over on itself (we don’t want to roll the bamboo mat into the sushi, of course!). You’ll see this point in the picture below.
Carefully unfold the mat, leaving the partially rolled sushi tightly tucked. Lift the bamboo mat straight up and reposition it, ready to continue rolling.
This time, bring the bamboo mat over the roll again, further advancing the roll while pressing the mat firmly into the sushi with your fingers. The slight overhang of the mat in front of your fingers indicates that your California Roll is becoming perfectly tight and uniformly shaped.
Continue this “roll, lift, reposition, roll” process until you reach the end of the mat and your sushi is tightly and completely rolled. Wrap the bamboo mat around the finished roll one last time and give it a gentle, firm hug with your hands to ensure it’s perfectly uniform and compact. Avoid pressing too hard, or you might crush your masterpiece! Now, take a moment to admire your handiwork before you’re tempted to devour it whole. You can wrap the finished roll in plastic wrap and refrigerate it until you’re ready to serve, or proceed directly to slicing.
Slicing Your Sushi Rolls:
If serving immediately, transfer your tightly rolled sushi to a clean cutting board. For best results, use a very sharp knife, and keep a damp cloth nearby to wipe the blade between cuts. This prevents the rice from sticking and ensures clean, precise slices.
First, cut the roll in half. This creates more manageable lengths.
Then, cut each half into two, creating four even pieces.
Finally, cut each of those four pieces into two, resulting in eight perfect, bite-sized sushi pieces per roll. Remember, a sharp, slightly damp knife is your best friend here for clean, non-smushed cuts!
Alternative Rolling Method: Nori on the Outside
If you prefer the traditional look with the nori on the outside, the process is even simpler. After spreading the rice evenly on the nori, DO NOT flip it over. Instead, layer all your fillings (crab, cucumber, avocado) directly on top of the rice layer.
Proceed with the rolling technique exactly as explained above, pressing firmly to create a tight, uniform roll.
Once rolled, slice and serve immediately! Enjoy every single piece of your homemade sushi rolls – you earned it!
Serving Suggestions and Storage
Your freshly made California rolls are best enjoyed immediately to savor their fresh flavors and textures. Serve them with traditional accompaniments such as:
- Soy Sauce: A classic dipping sauce. Opt for low-sodium soy sauce if preferred.
- Wasabi: For a spicy kick. Mix a small amount into your soy sauce or dab directly onto each piece.
- Pickled Ginger (Gari): A refreshing palate cleanser between different types of sushi.
- Sesame Seeds: Sprinkle toasted sesame seeds over your rice-out rolls for added flavor and texture.
If you have any leftovers, wrap them tightly in plastic wrap and store them in an airtight container in the refrigerator for up to 24 hours. While still delicious, the rice and nori can dry out or change texture over time, so fresh is always best.
Final Thoughts
Making California sushi rolls at home is an incredibly rewarding culinary experience. It’s a chance to engage with your food, customize it to your liking, and impress friends and family with your newfound sushi-making skills. Don’t be intimidated by the process; embrace the learning curve, and soon you’ll be rolling perfect sushi like a seasoned pro. Gather your ingredients, prepare your workspace, and embark on this delicious adventure. Happy rolling!