
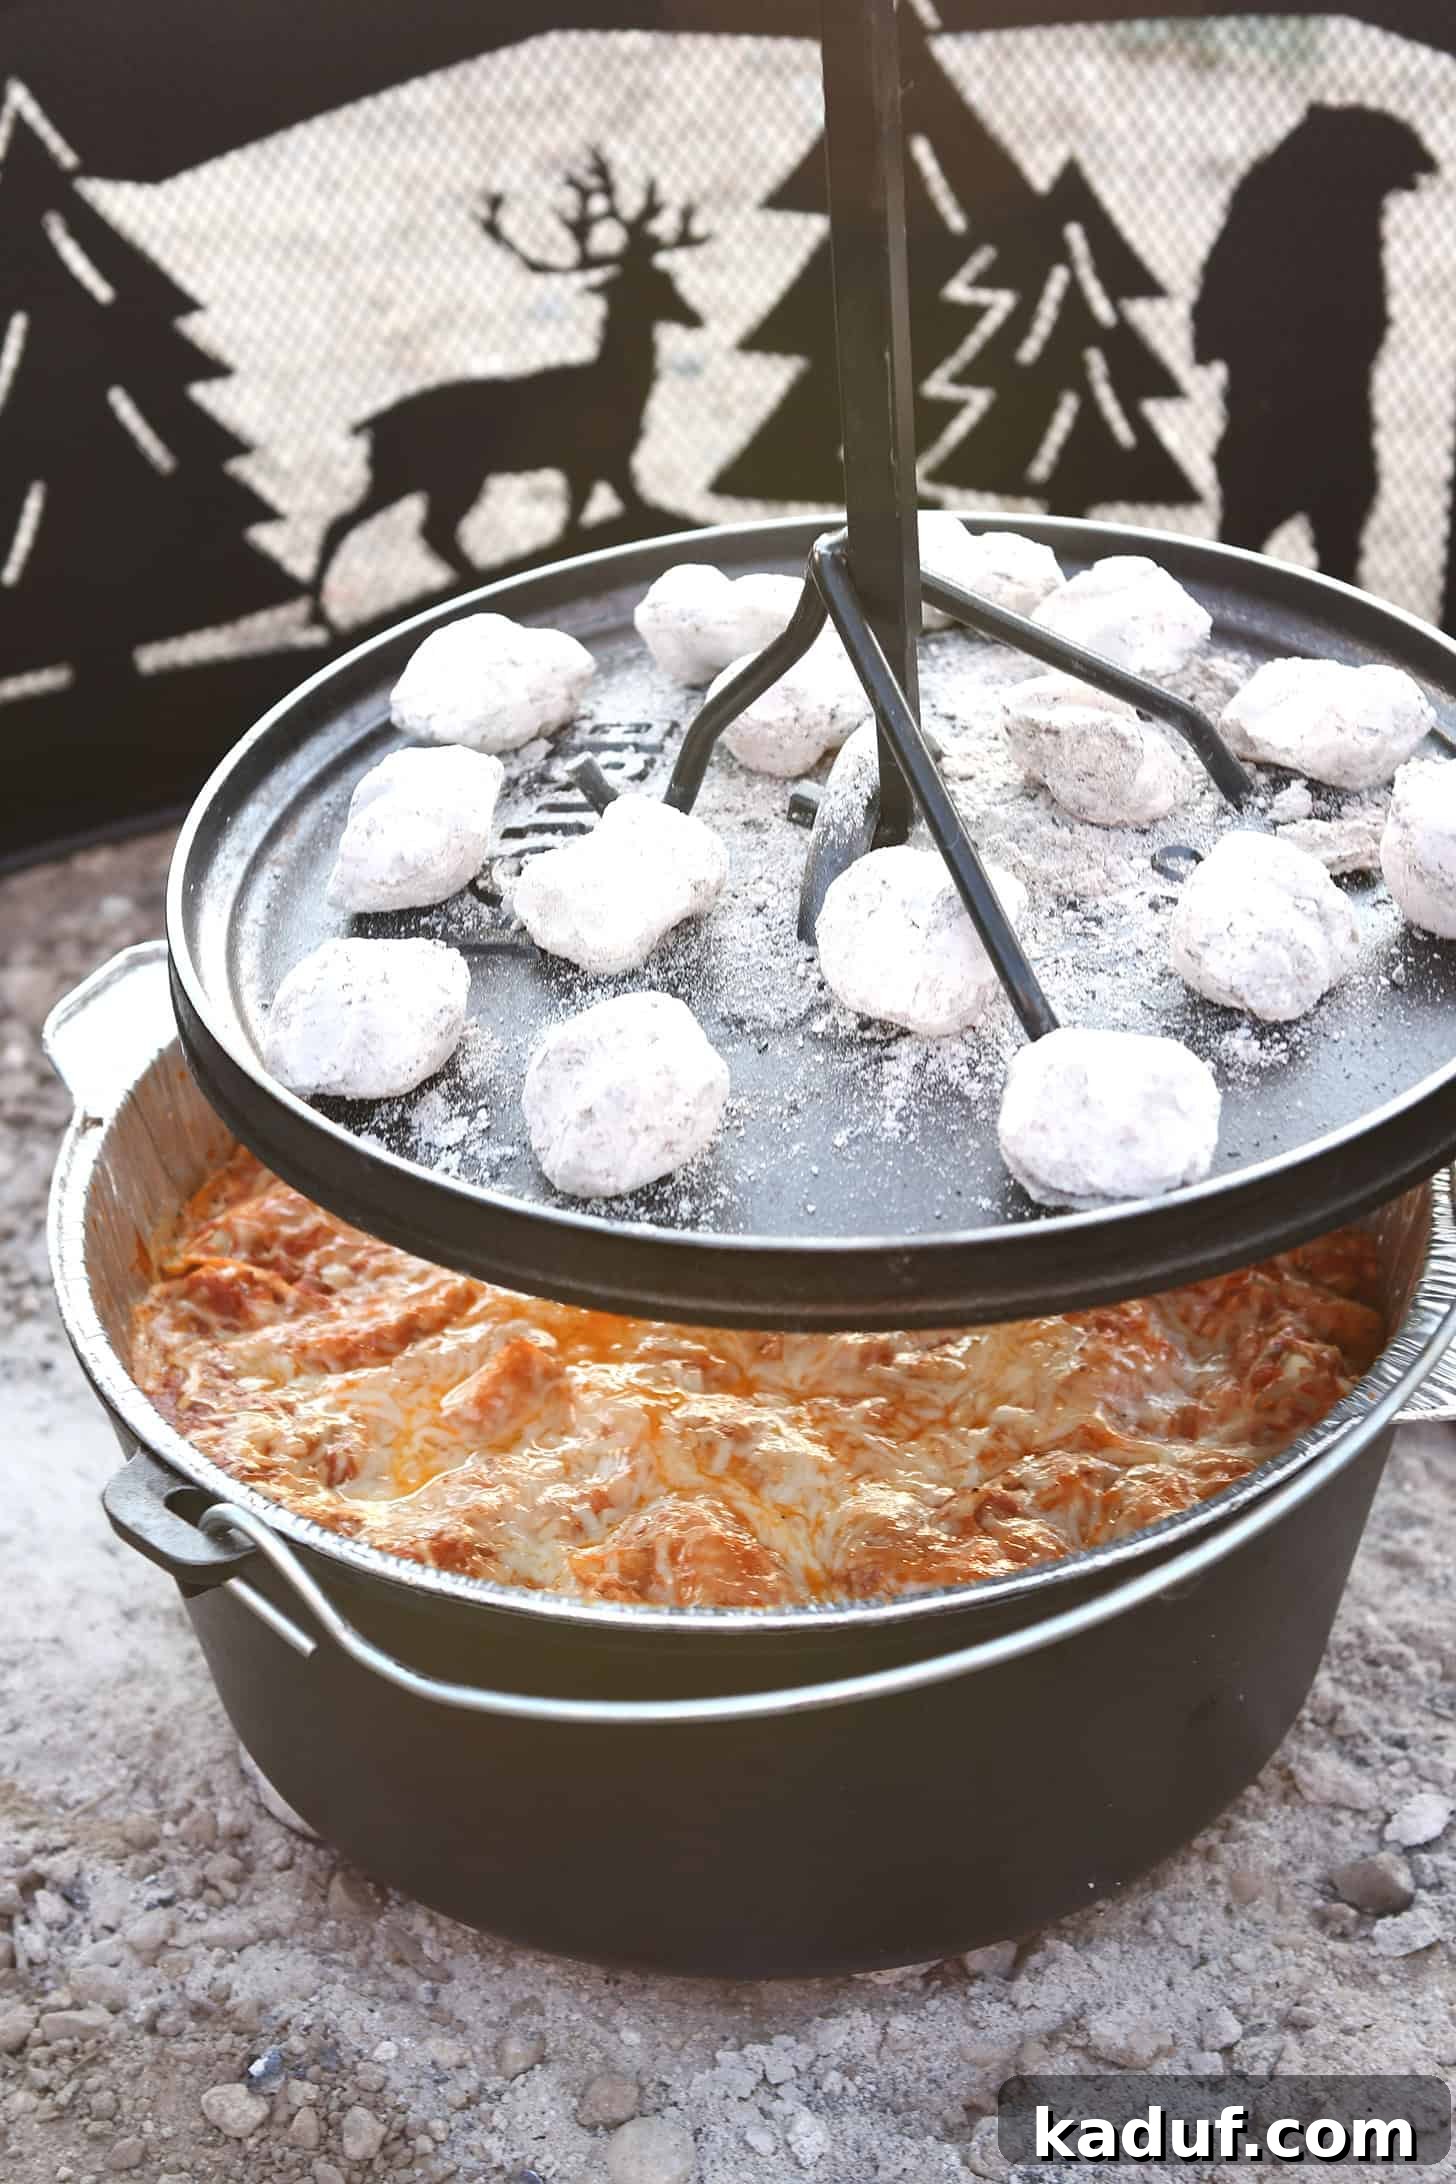
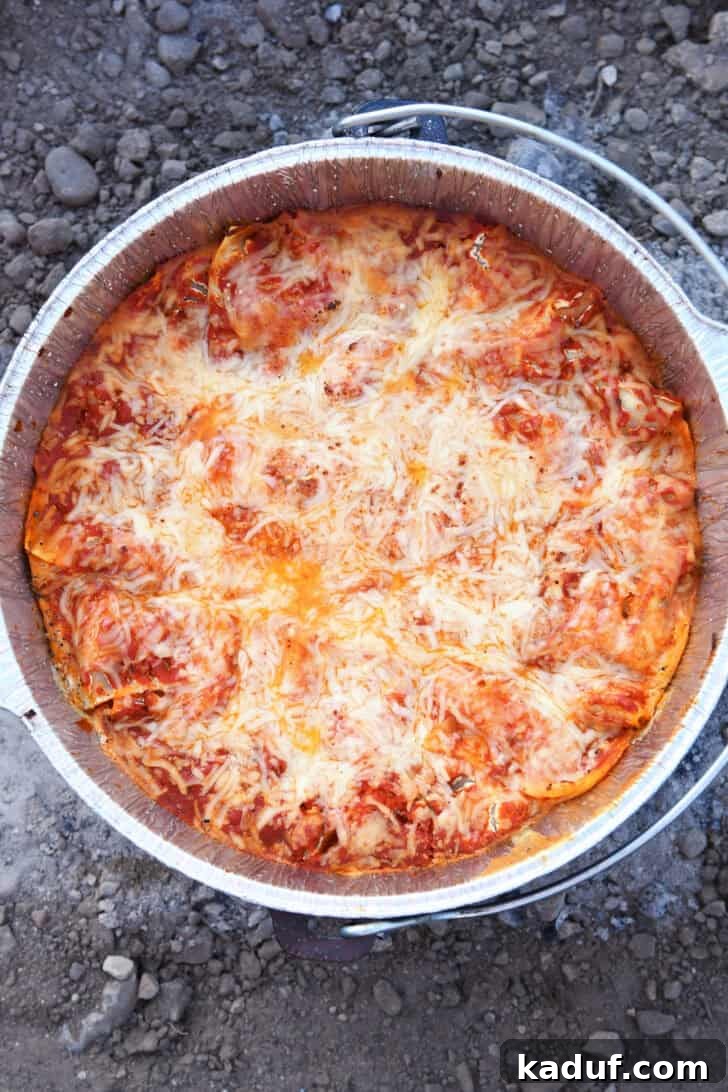
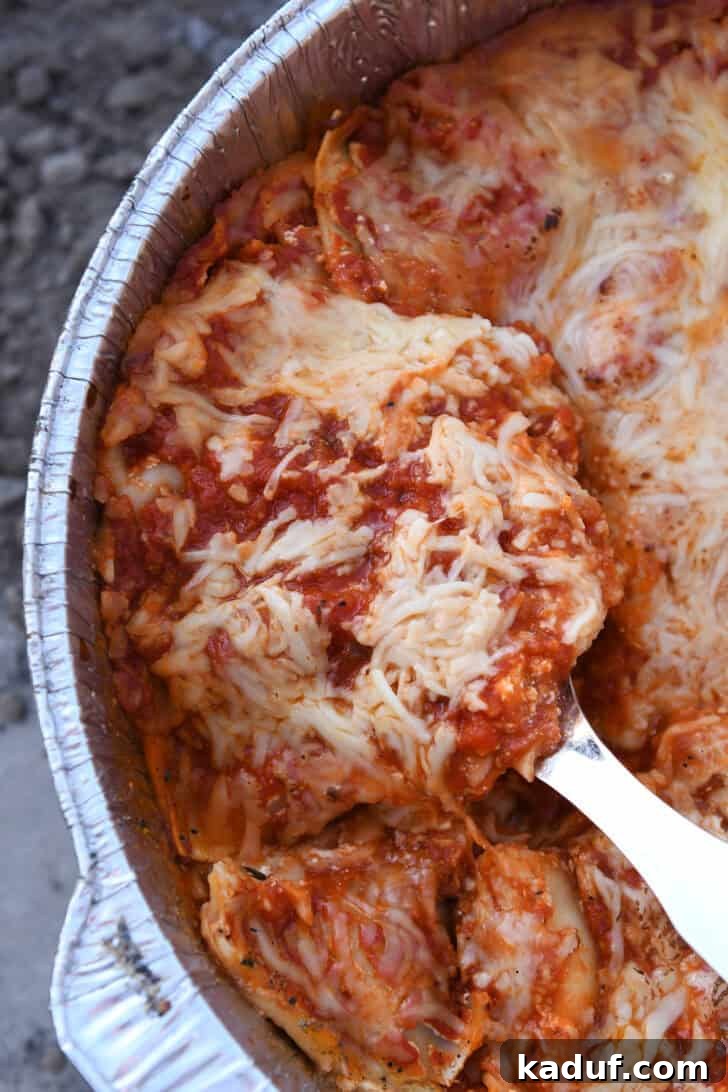
This Dutch oven lasagna is so easy to prep ahead of time and is perfect for camping (or cooking out at home!). It is flavorful, cheesy, and delicious!
Imagine the serene beauty of a starlit night, the gentle crackle of a campfire, and the tantalizing aroma of a rich, cheesy lasagna wafting through the crisp outdoor air. This isn’t just a fantasy; it’s the reality you can create with our incredible Dutch oven lasagna recipe. Forget complicated camping meals or bland pre-packaged options. This recipe is designed for both the adventurous outdoor chef and anyone looking for an effortlessly delicious meal in their own backyard. It’s consistently the highlight of our camping trips, a meal we eagerly anticipate, and for good reason: it truly is fantastic!
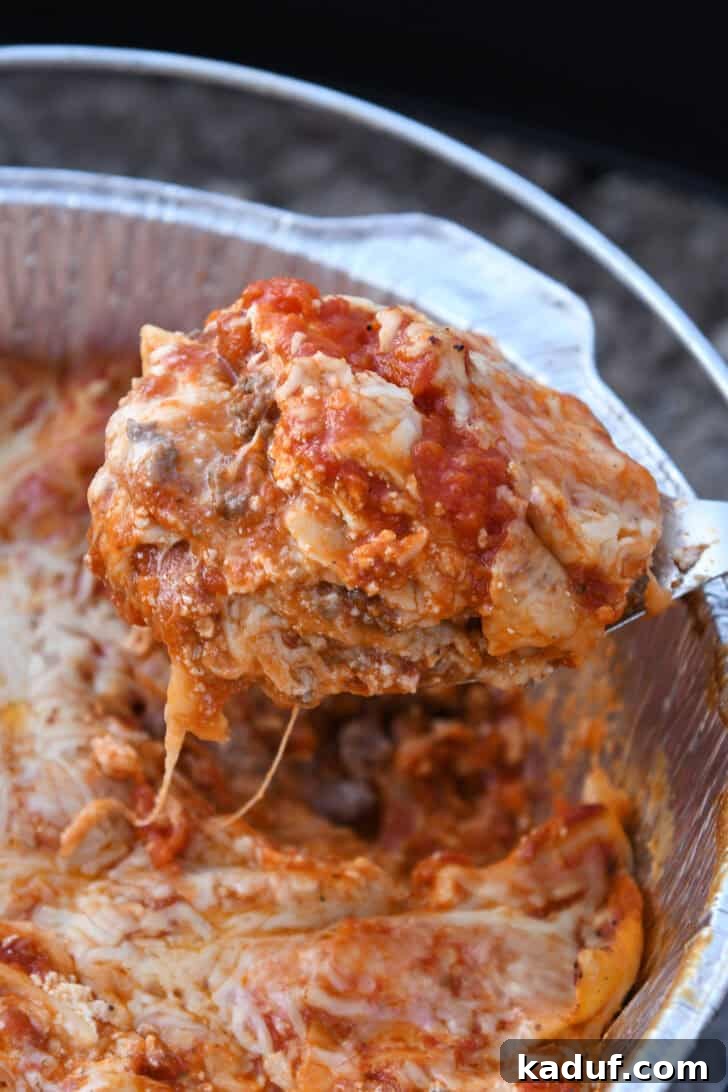
Mastering Meal Prep: Your Guide to Stress-Free Dutch Oven Lasagna
One of the greatest advantages of this Dutch oven lasagna recipe is its incredible adaptability for meal prepping. Whether you’re planning a multi-day camping expedition, a casual weekend barbecue, or simply want to streamline your weeknight dinner routine, preparing components in advance can save you significant time and effort when it matters most.
Here’s how you can expertly prep your lasagna for maximum convenience:
- Component Preparation: All individual elements of the lasagna can be prepared ahead of time. Cooked meat mixture, blended creamy cheese filling, and portioned shredded cheeses can be stored separately in airtight containers or durable freezer-safe Ziploc bags. This modular approach allows for quick and easy assembly on-site, minimizing mess and maximizing enjoyment during your outdoor cooking experience.
- Full Assembly (with Liner): For ultimate ease, you can fully assemble the entire lasagna ahead of time within a Dutch oven liner (we’ll discuss these game-changing liners in more detail below). Once assembled, simply cover the liner tightly and refrigerate it or store it in a cooler packed with ice. This method ensures your lasagna is ready to go straight from the cooler to the Dutch oven, eliminating any on-site assembly steps.
- Direct Dutch Oven Assembly (Not Recommended for Ahead-of-Time Prep): While assembling directly in your Dutch oven is fine if you plan to cook it immediately, it’s generally not recommended for advanced preparation. Raw lasagna ingredients can interact with the Dutch oven’s seasoned surface over time, potentially affecting its non-stick properties or even the taste of the lasagna. Always opt for a liner or separate component storage when prepping ahead.
Beyond the Campsite: This sensational lasagna isn’t exclusively for camping adventures! It’s equally perfect for any outdoor cooking scenario, from a cozy backyard gathering to a potluck in the park. You can even assemble the ingredients in a conventional baking dish and bake it in your home oven for an incredibly easy and comforting meal any day of the week.
The three core components that benefit most from advanced preparation include:
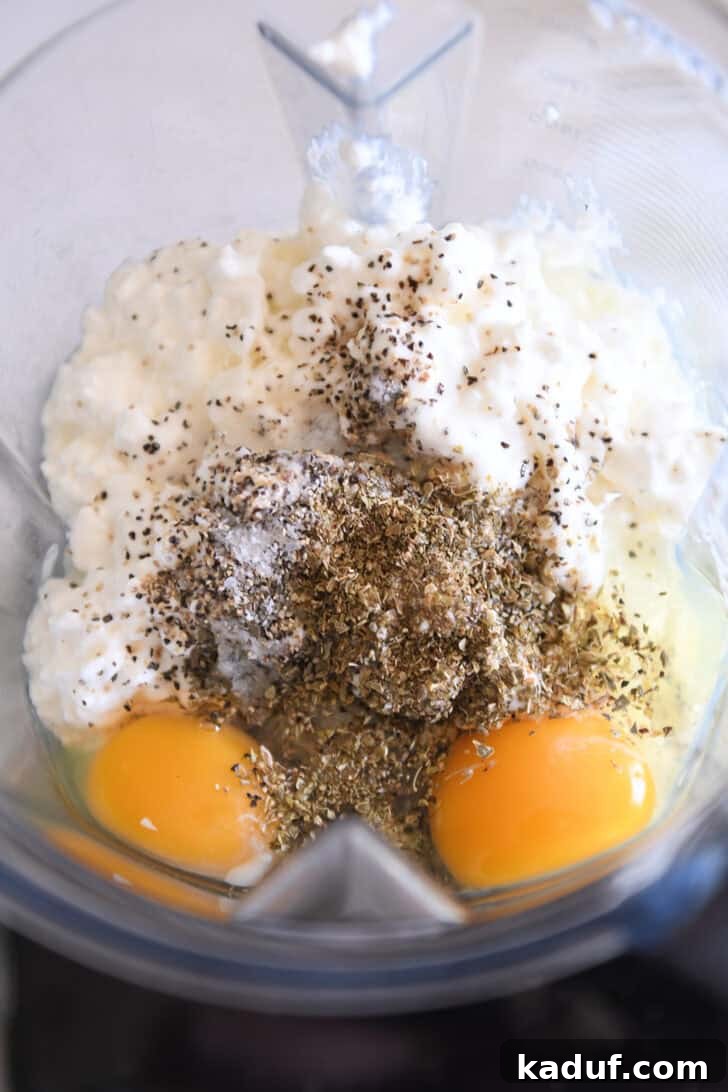
- The Creamy Filling: Blend your cottage cheese (or ricotta), eggs, and seasonings until smooth. This mixture can be stored for several days, ready to be spread between layers.
- The Flavorful Meat and Onions: Cook your ground beef and onions, drain the fat, and season. This can be refrigerated and simply reheated slightly or used as is when assembling.
- The Cheeses: Shredding your mozzarella and Parmesan ahead of time ensures all your cheesy goodness is ready for layering, saving precious minutes when you’re ready to build your lasagna.

Effortless Assembly: Crafting Your Dutch Oven Lasagna Layers
Assembling this Dutch oven lasagna is a straightforward process, especially when you leverage the convenience of modern camping kitchen tools. I cannot overstate how truly life-changing Dutch oven liners are. Discovering these brilliant inventions completely reignited my passion for Dutch oven cooking. Let’s be honest, few of us are “pioneer enough” to genuinely enjoy scrubbing stubborn, cooked-on bits from a heavy cast-iron Dutch oven in a chilly creek without hot water while deep in the wilderness. I own it. My ancestors might shake their heads, but all I can say is: Dutch oven liners, I adore you!
To begin assembling your culinary masterpiece, whether you’re at home or at the campsite:
- Prepare Your Vessel: Lightly grease your Dutch oven liner. If you’re cooking immediately and prefer not to use a liner, you can grease the Dutch oven directly.
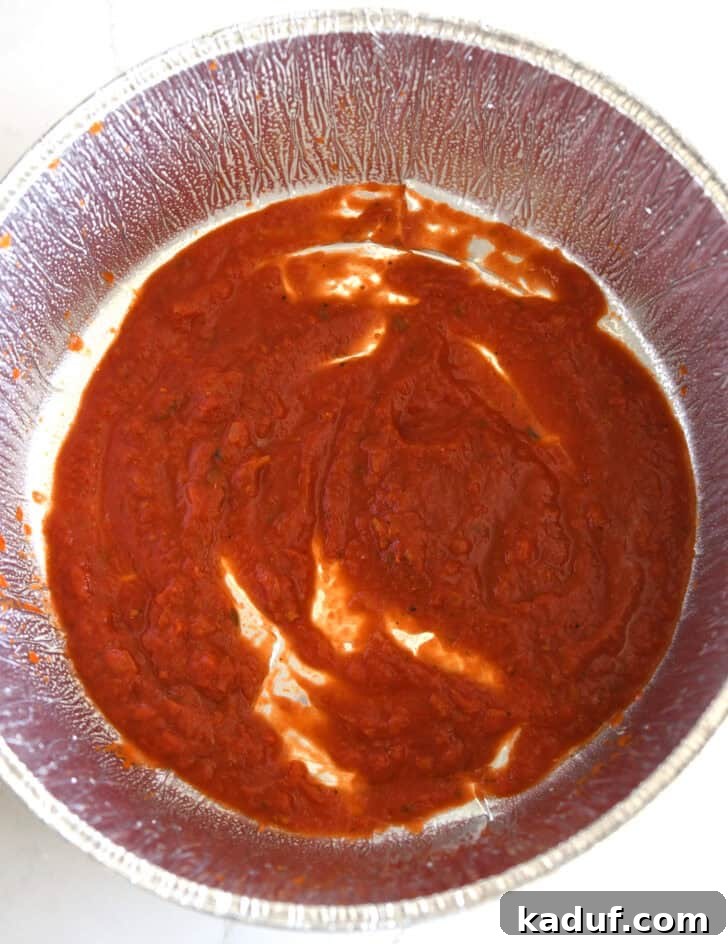
- Sauce Base: Spread about a cup of your chosen marinara or pasta sauce evenly across the bottom of the liner. This prevents the noodles from sticking and infuses flavor from the very first layer.
- First Layer Sequence: Begin building your lasagna with this satisfying sequence:
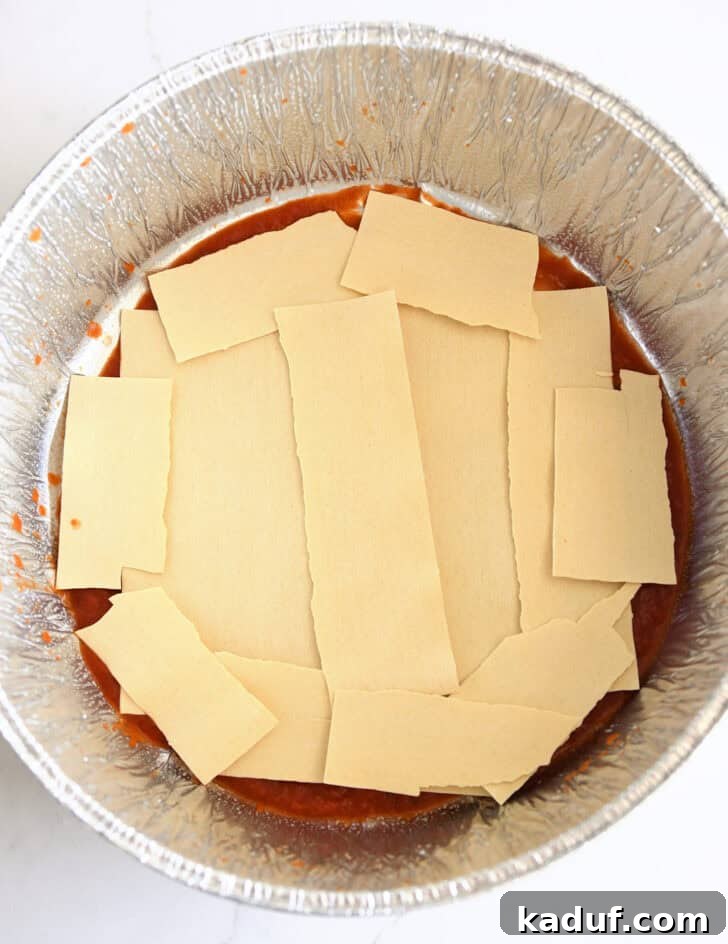
- Approximately 5 no-boil lasagna noodles, broken as needed to cover the bottom. Don’t worry about perfection here; irregular pieces fill gaps perfectly.
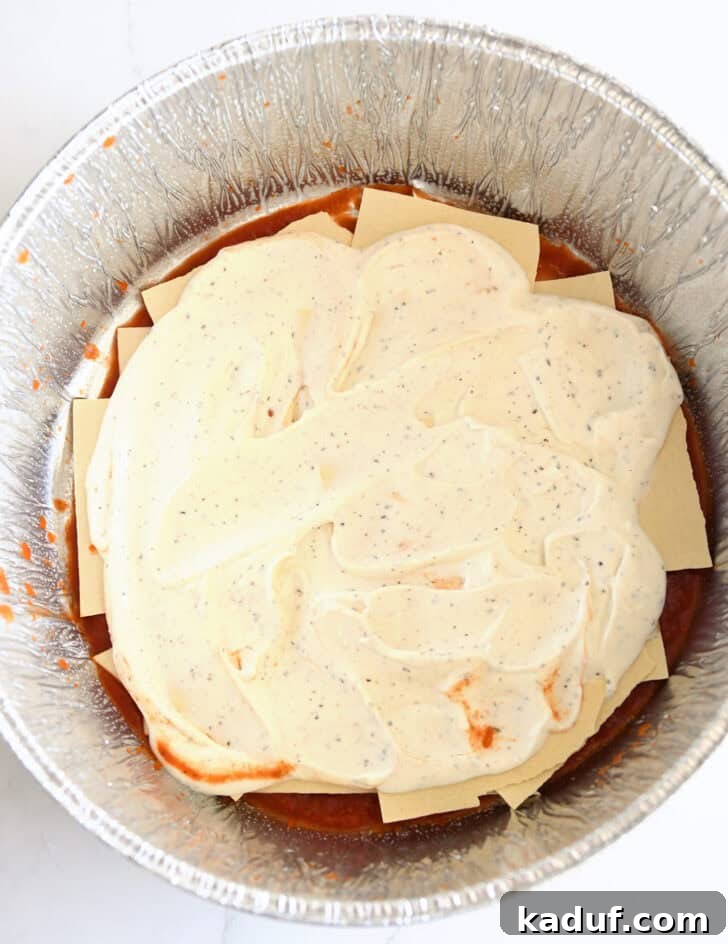
- One-third of the creamy cottage cheese mixture, spread evenly over the noodles.
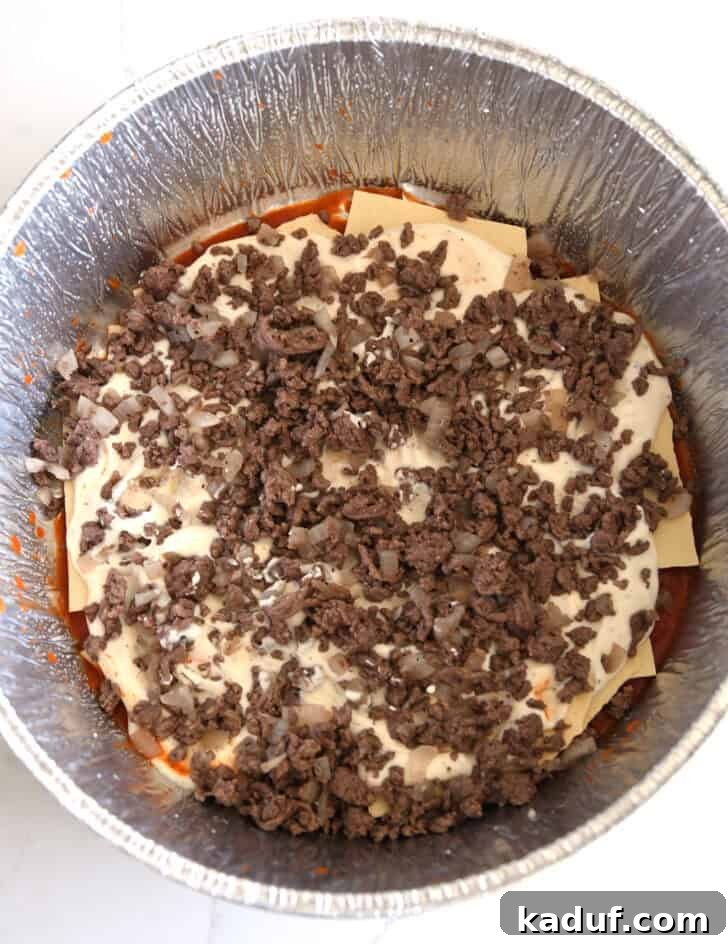
- Half of the savory meat mixture, generously distributed.
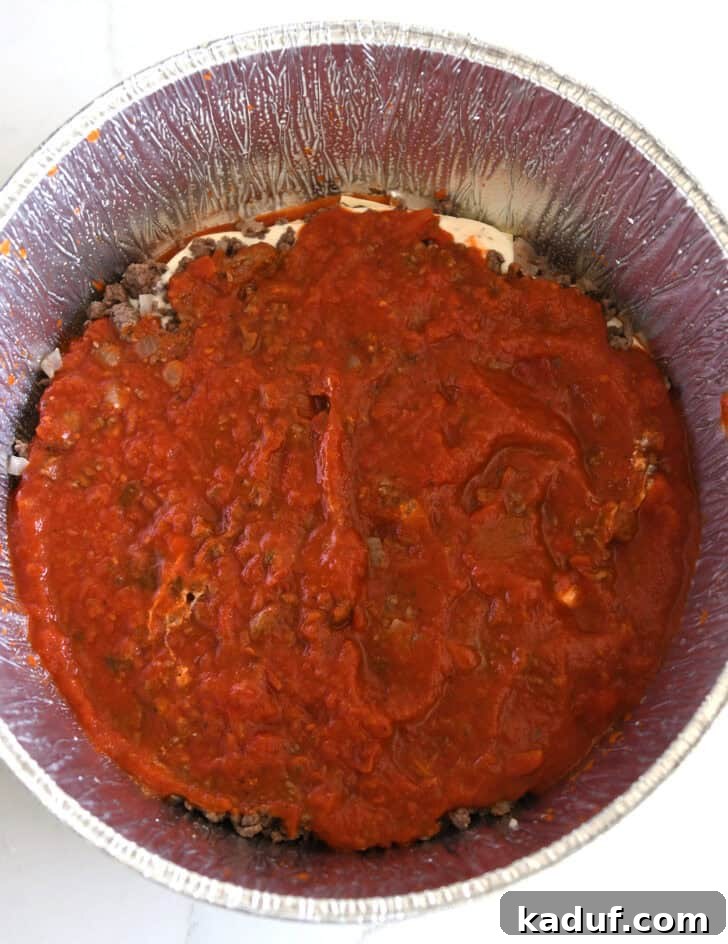
- One-third of the remaining pasta sauce, drizzled over the meat.
- One-third of the shredded mozzarella and Parmesan cheeses, sprinkled for optimal melt.
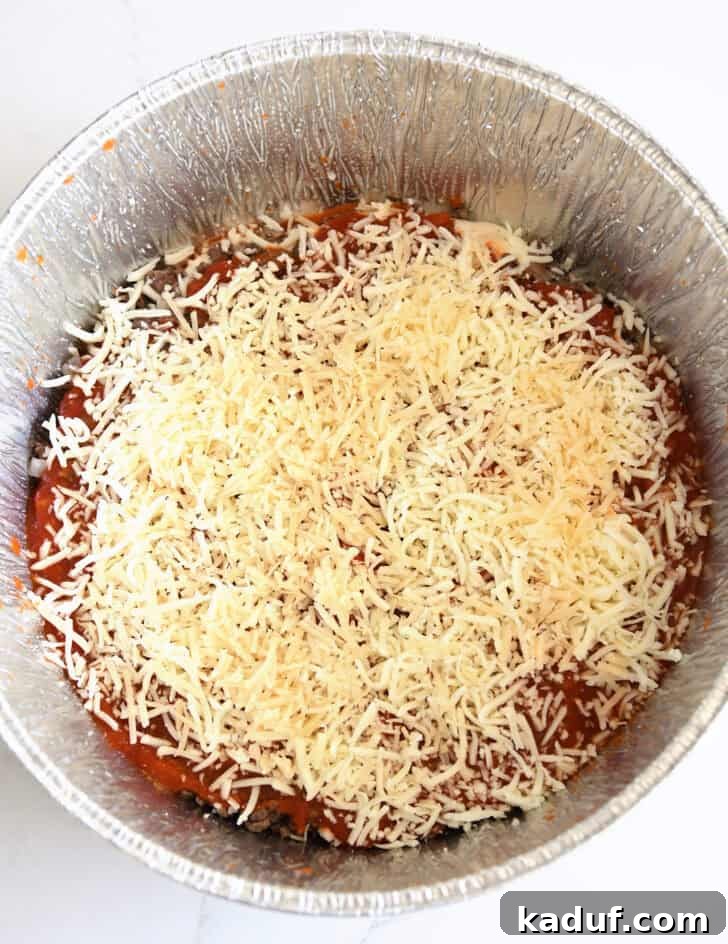
- Repeat and Finish: Repeat these delicious layers two more times. Note that the meat mixture will only be used one more time in the second layer, leaving the final top layer exclusively for sauce and cheese.
The Secret to Simplicity: We rely heavily on no-boil lasagna noodles and your favorite jarred pasta sauce to keep this meal incredibly easy. Choose a jarred sauce you genuinely love, as its flavor will be central to the lasagna’s overall deliciousness (Rao’s and Trader Joe’s are personal favorites for their quality and rich taste). For no-boil noodles, Barilla is a consistently excellent choice, and Trader Joe’s also offers a fantastic option.
Mastering the Heat: Cooking with a Dutch Oven and Charcoal Briquettes
Cooking in a Dutch oven over an open fire or with charcoal briquettes is a time-honored tradition that yields unbelievably flavorful results. The radiant heat from the coals creates an oven-like environment, perfect for baking, roasting, and simmering a wide array of dishes, including our magnificent lasagna. While there are many methods for outdoor heat sources, from wood coals to propane burners, we consistently find charcoal briquettes combined with a chimney starter to be the most reliable and convenient.
How to Prepare Briquettes for Perfect Dutch Oven Cooking:
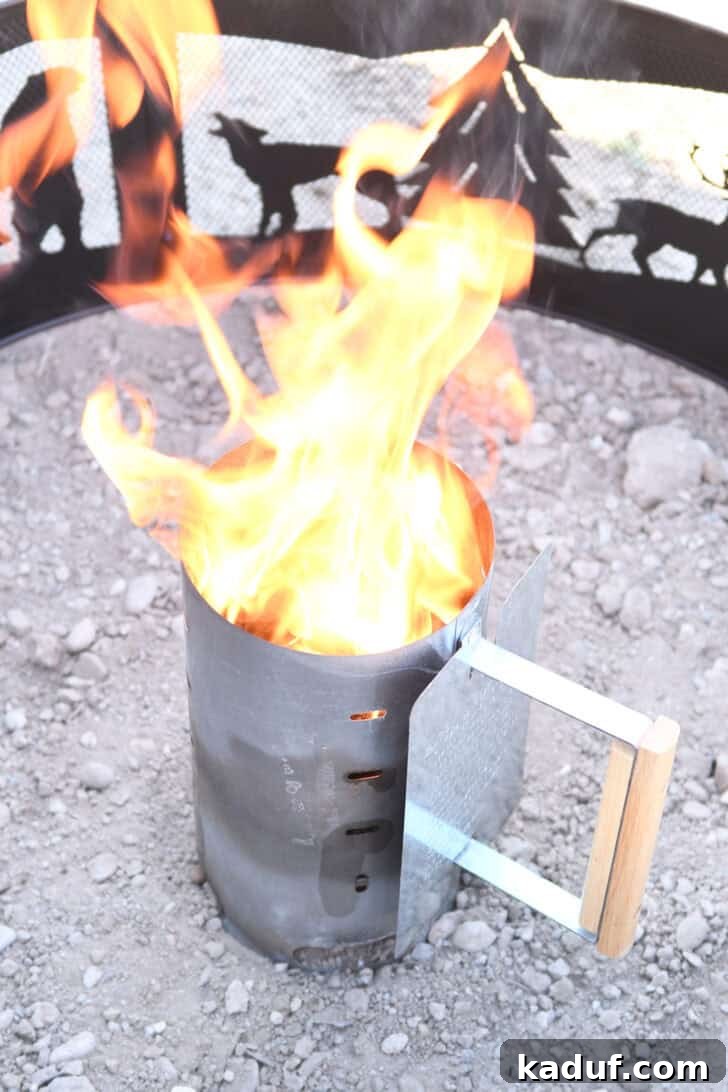
- Loading the Chimney Starter: Carefully place your charcoal briquettes into the top chamber of the chimney starter. Crumple a few sheets of newspaper or use a fire starter underneath the chimney starter’s base.
- Igniting the Coals: Light the paper or fire starter in several spots around the bottom of the chimney. The flames will naturally rise, igniting the charcoal briquettes from below. This method provides even heat distribution without the need for lighter fluid (though a small amount can be used if desired to speed up ignition).
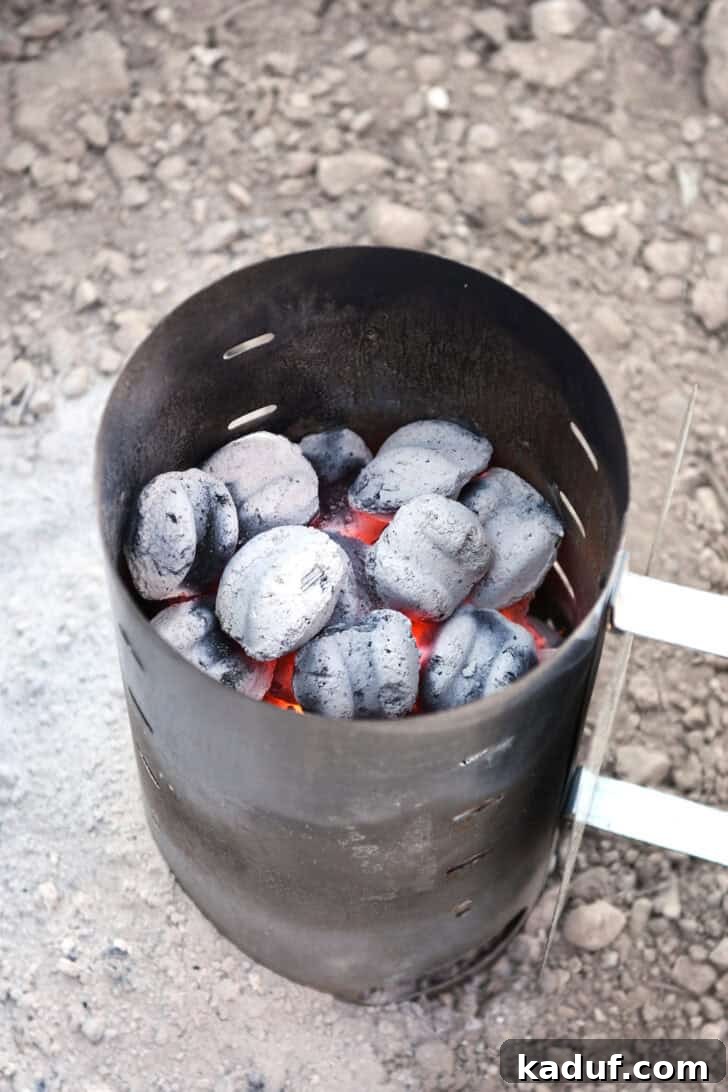
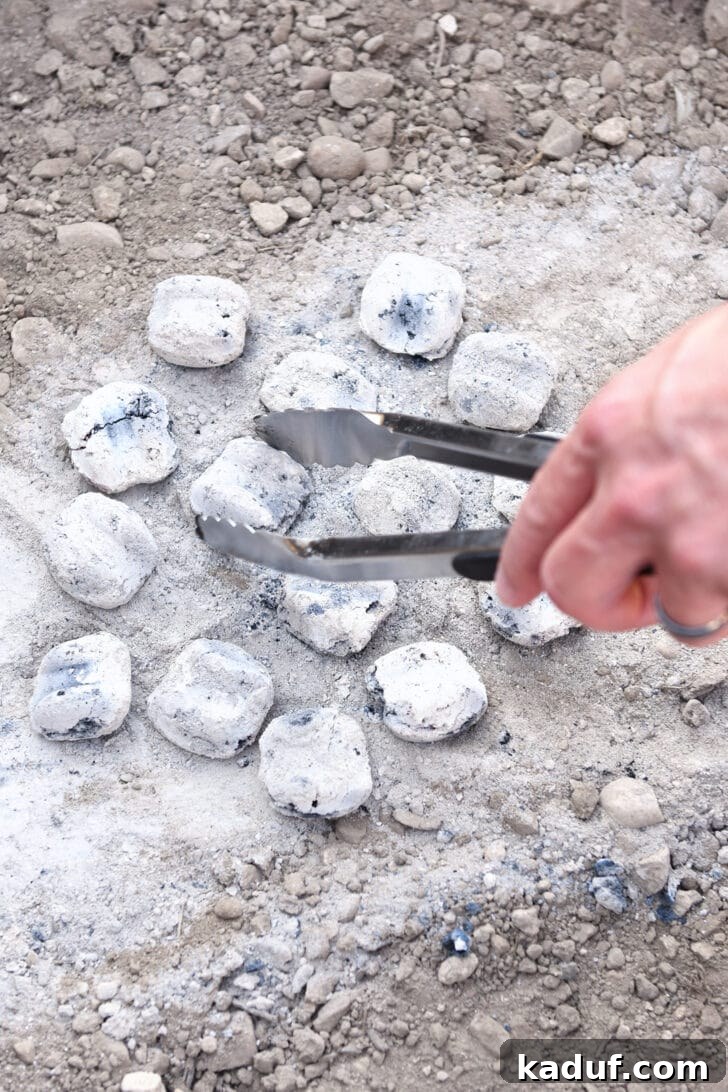
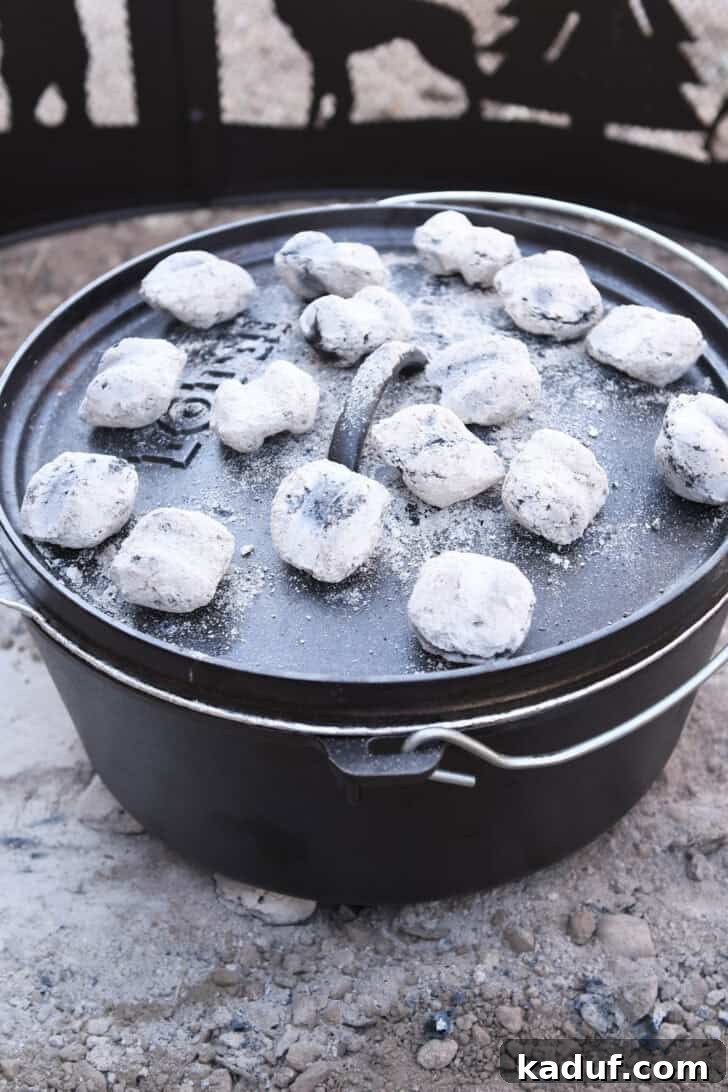
- Achieving Optimal Readiness: Allow the charcoal briquettes to heat for approximately 15-20 minutes. They are ready for cooking when they are mostly covered in a light gray ash. This indicates they are glowing hot and will provide consistent heat. Be careful not to let them heat for too long, as they can turn to crumbling ash and lose their structural integrity, making them difficult to handle.
- Understanding Heat Variables: The exact number of coals or briquettes required will vary based on several factors: the size of your Dutch oven, the specific recipe, and environmental conditions. Cooler temperatures, wind, or higher altitudes will typically necessitate more coals to maintain the desired cooking temperature. Conversely, hot, sunny weather can mean food cooks faster, requiring fewer coals or more frequent checks. A good rule of thumb is to add a few extra coals on top in colder conditions and slightly fewer on the bottom to prevent burning.
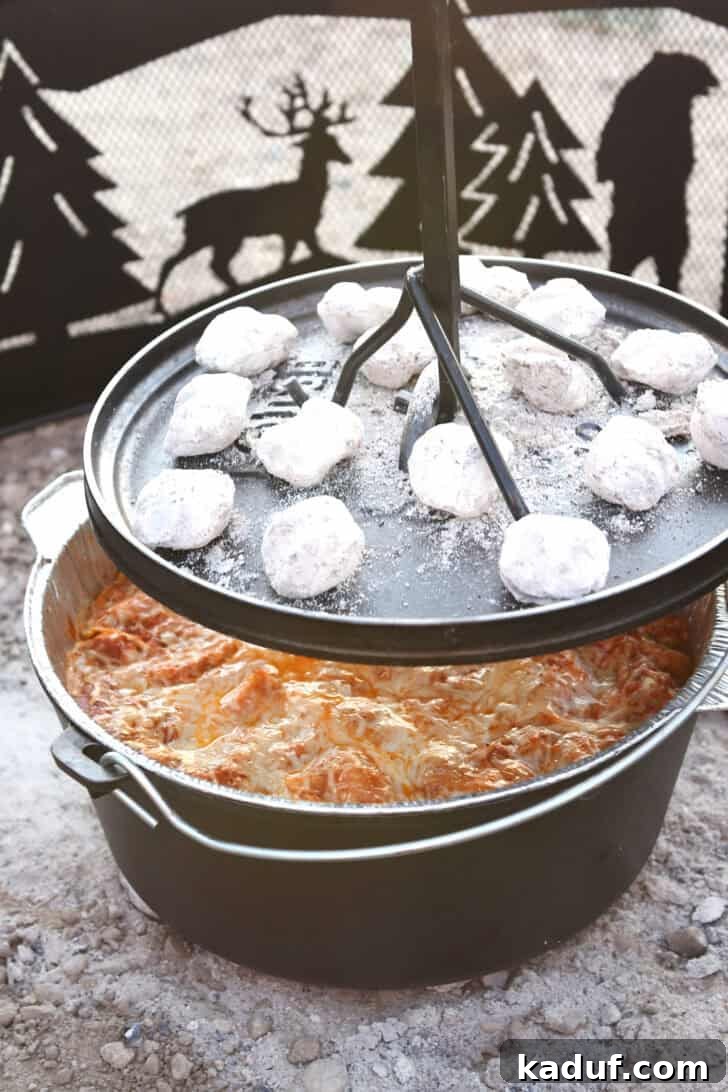
- Recommended Coal Distribution (12-inch Dutch Oven): For a standard 12-inch diameter Dutch oven (typically a 6-quart or a deep 8-quart), we recommend placing about 16-18 hot briquettes evenly on top of the lid and 10-12 hot briquettes underneath the Dutch oven. This distribution helps ensure even cooking, mimicking the top and bottom elements of a conventional oven. Remember that cooking times are always approximate and depend on the factors mentioned above, so checking for doneness is key.
Scaling Your Culinary Adventures: Adapting Lasagna for Various Dutch Oven Sizes
This particular Dutch oven lasagna recipe is meticulously crafted and tested for a deep 8-quart (12-inch diameter) Dutch oven, which provides ample space for generous layers and feeds a good-sized group. However, the beauty of Dutch oven cooking lies in its flexibility. With a few simple adjustments, you can successfully adapt this recipe to fit almost any size of Dutch oven you own.
Adjusting for Smaller Dutch Ovens:
If your culinary arsenal includes a smaller Dutch oven, such as a 6-quart (12-inch diameter) model, you’ll need to scale down the ingredients accordingly. A 6-quart Dutch oven has the same diameter but is a couple of inches less deep than its 8-quart counterpart. For this size, we recommend reducing all ingredients by approximately one-third. You can then assemble the lasagna into either two thick, satisfying layers or three slightly thinner layers, depending on your preference and the exact depth of your pot. The goal is to ensure the lasagna fills the Dutch oven without overflowing and that there’s enough room for the cheese to bubble beautifully on top.
Coal Count and Cooking Time Considerations:
Interestingly, a 6-quart Dutch oven with a 12-inch diameter will likely require a similar number of coals as indicated in the recipe for the 8-quart version, especially if the diameter is the same. The key difference will be the cooking time. Since the lasagna layers will be less deep, it will probably cook faster. Begin checking for doneness sooner than the specified time, perhaps starting at 30-35 minutes, to prevent overcooking. Always look for bubbling sauce, melted cheese, and tender noodles.
General Adaptation Principles for Any Size:
- Ingredient Ratios: Maintain the basic ratios of meat mixture, cheese filling, sauce, and noodles. If you reduce the overall volume, reduce each component proportionally.
- Layer Thickness: Adjust the number or thickness of layers to fit your Dutch oven. It’s better to have slightly thinner layers that cook evenly than to overfill the pot.
- Noodle Breakage: Don’t hesitate to break no-boil noodles to fit the contours of your Dutch oven. They don’t need to be perfect rectangles.
- Monitoring Heat: Always pay close attention to the heat. Smaller Dutch ovens or shallower lasagnas will cook more quickly. Larger, deeper Dutch ovens or colder conditions may require more coals or longer cooking times.
The Joy of Experimentation: Dutch oven cooking, particularly when adapting recipes, often involves a delightful amount of trial and error. Whether you’re a seasoned pro or just starting out, be prepared to adjust the number of briquettes mid-cook if needed – adding more for a hotter oven or removing some to cool it down. But remember, this hands-on approach is precisely what makes it such a highly rewarding way to cook! Not only do you feel like an absolute culinary rock star (at least, I certainly do!), but the food that emerges from a Dutch oven has a uniquely smoky, slow-cooked depth of flavor that is truly next-level AMAZING.
This Dutch oven lasagna is more than just a recipe; it’s a gateway to easy, cheesy, and absolutely spectacular outdoor dining. Its robust flavors and comforting layers make it a guaranteed crowd-pleaser.
It is genuinely perfect for memorable campouts, festive family reunions, or even larger group camps, like a church retreat or a scout gathering. The recipe’s scalability is one of its superpowers; it can easily be doubled, tripled, or even quadrupled (or more!) to cook in multiple Dutch ovens, ensuring everyone gets a taste of this deliciousness. In such larger-scale scenarios, those Dutch oven liners will undoubtedly prove to be your very best friend, simplifying cleanup immensely.
Our family cherishes the time we spend camping, and more importantly, we love eating exceptionally well while doing so. My ongoing mission is to share more of our tried-and-true, go-to recipes with you soon, including an unbelievably good chicken bacon ranch foil packet recipe that is absolutely to-die-for. But until then, I sincerely hope this incredible Dutch oven lasagna brings as much joy and deliciousness to your table, whether under the stars or in your own backyard, as it does to ours!
One Year Ago: Easy Chile Lime Shrimp Tacos
Two Years Ago: Quick and Easy Homemade Salsa
Three Years Ago: Loaded Fresh Basil and Sweet Corn Couscous Green Salad
Four Years Ago: Caramel Peanut Butter Almost S’mores Cookie Bars
Five Years Ago: BBQ Hawaiian Chicken Foil Packets {Grill or Oven}
Six Years Ago: 5-Minute Hot Fudge Sauce {Three Flavors!}
Seven Years Ago: Cuban Sandwiches {Slow Cooker or Instant Pot}
Eight Years Ago: Chicken Taco Salad {InstantPot, Slow Cooker, or Stovetop}
Nine Years Ago: Slow Cooker Baby Back Ribs with Root Beer BBQ Sauce
Ten Years Ago: Glazed Lemon Yogurt Sheet Cake

Dutch Oven Lasagna
Pin
Rate
Ingredients
- 1 ½ pounds lean ground beef
- 1 cup chopped onions
- ½ teaspoon salt
- ¼ teaspoon black pepper
- 4 cups cottage cheese or ricotta cheese
- 2 large eggs
- 1 teaspoon dried basil
- 1 teaspoon dried oregano
- 2 jars (28-ounces each) marinara or pasta sauce (see note)
- 1 box (9-ounces) no-boil lasagna noodles (see note)
- 3 to 4 cups shredded mozzarella cheese
- 1 cup shredded Parmesan cheese
Instructions
- In a 12-inch skillet over medium heat, cook the ground beef, onions, salt, and pepper, breaking the meat into small pieces, until the meat is no longer pink, 5 to 7 minutes. Drain excess grease. Set aside. If making ahead of time, let the meat mixture cool and then store in a Ziploc bag or covered container in the refrigerator or cooler with ice.
- To a blender, add the cottage cheese, eggs, basil, oregano, and a pinch of salt and pepper. Blend until smooth. Set aside. If making ahead of time, scrape the mixture into a covered container or Ziploc bag and store in the refrigerator or cooler with ice.
- *If you are planning to eat right away, start the briquettes/coals about 20 minutes before cooking the lasagna – see note below for a how-to.*
- To assemble the lasagna, lightly grease an 8-quart Dutch oven (see note for alternate sizes) or lightly grease an appropriately sized Dutch oven liner. Spread about a cup of the pasta sauce on the bottom.
- Layer the following:
5 noodles, give or take, to cover the bottom (break to fit, it doesn’t have to be perfect)
1/3 cottage cheese mixture
1/2 meat mixture
1/3 remaining sauce
1/3 of the mozzarella and Parmesan cheeses - Repeat those layers two more times (except for the meat, it will just be layered one more time). If using a Dutch oven liner, place the liner in the Dutch oven. Place the lid on top to cover.
- Place 10 to 12 hot coals in a circle a bit smaller than the diameter of the bottom of the Dutch oven and place the Dutch oven on top of the coals (it helps to do this in a fire pit or somewhere with some dirt so the Dutch oven can nestle and settle right on top of the coals).
- Place 15 to 18 hot coals evenly spaced on top of the Dutch oven lid. Cook the lasagna for 45 to 60 minutes until hot, bubbly, and cooked through. When removing the lid, do so carefully so ash doesn’t get into the lasagna.
- Serve immediately or let rest for a couple minutes to set up a bit more.
Notes
Jarred pasta sauce: use a brand/flavor you like as it will impact the overall deliciousness of the lasagna. I like the Rao’s brand of marinara.
Lasagna noodles: my preferred brand of no-boil lasagna noodles is Barilla or Trader Joe’s.
Preparing briquettes: there are a lot of ways to prepare coals or briquettes for Dutch oven cooking. A quick Google search will give lots of ideas. I always use briquettes + a chimney starter. Place the briquettes in the chimney starter and stuff a bit of paper underneath the chimney starter. Light the paper – the flames will move up and light the charcoal. (You can use lighter fluid to help this process along, if wanted.) The charcoal briquettes need about 15-20 minutes before they are ready to use for cooking (don’t let them go too long or they’ll turn to ash and crumble when you move them to the Dutch oven).
The exact number of coals/briquettes you’ll need is largely dependent on the size of Dutch oven you are using, as well as the environment where the cooking is taking place. Weather also makes an impact (if it is cold/windy, you’ll likely need more coals, whereas if it is hot and sun is beating directly onto the Dutch oven, the food can cook faster).
Dutch oven sizes: this recipe is written for a deep 8-quart (12-inch diameter) Dutch oven. If using a smaller Dutch oven, adjust the ingredients for the lasagna accordingly. A 6-quart (12-inch diameter) Dutch oven is a couple inches less deep than an 8-quart, so the ingredients could be reduced by about 1/3 and the lasagna could be assembled in two layers or three thinner layers. A 6-quart Dutch oven with a 12-inch diameter will use about the same number of coals as indicated in the recipe (however, the cooking time will likely be shorter since it isn’t as deep).
Dutch oven cooking can involve some trial and error whether you are just starting out or whether you’ve been doing it for a while. You may need to adjust the number of coals, add more or take some away during cooking, etc. Have fun with the process!
Serving: 1 serving,
Calories: 299kcal,
Carbohydrates: 4g,
Protein: 39g,
Fat: 13g,
Saturated Fat: 8g,
Cholesterol: 111mg,
Sodium: 914mg,
Fiber: 0.1g,
Sugar: 3g
Recommended Products
Recipe Source: from Mel’s Kitchen Cafe