Mickey Mouse Oreo Pops
- Makes 12 servings
- Prep 30 mins
- Total 1 hr 30 mins
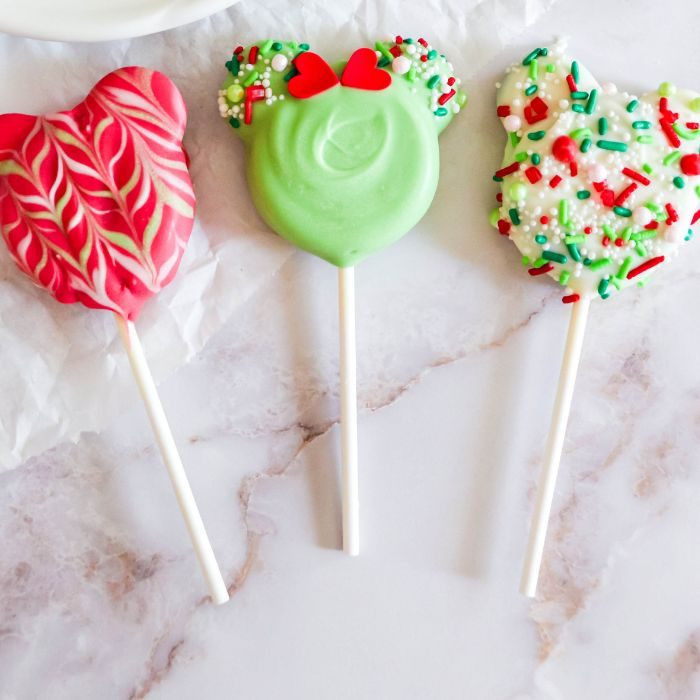
These Mickey Mouse Oreo Pops are what happens when your usual childhood cookie gets a glow-up and a VIP pass to the happiest kitchen on earth. We’re talking chocolate-dipped, sprinkle-covered, impossibly cute treats that look like they walked straight out of a theme park bakery—minus the long lines and $12 price tag.
The best part? No oven, no stress, and no artistic talent required (seriously—if you can stack cookies, you’ve got this). Whether you’re planning a birthday party, a holiday spread, or just feeling a little extra on a Tuesday, these pops bring instant smiles with every bite.
Because let’s be honest… everything is better on a stick. Especially Oreos.
If you enjoy chocolate covered desserts, we have a few more you might want to try out. Try our cakesickles or our caramel stuffed pretzels.
These Mickey Mouse Oreo Pops Are…
- Chocolate Dipped Mickey Mouse Oreo Cookies
- Fun Lollipop Treat
- Disney Lovers Approved (try our Disney churro toffee)
- Party Favor
- Fun Mickey Designs
- Minnie and Mickey Mouse Cookies
- No Bake
- Treat
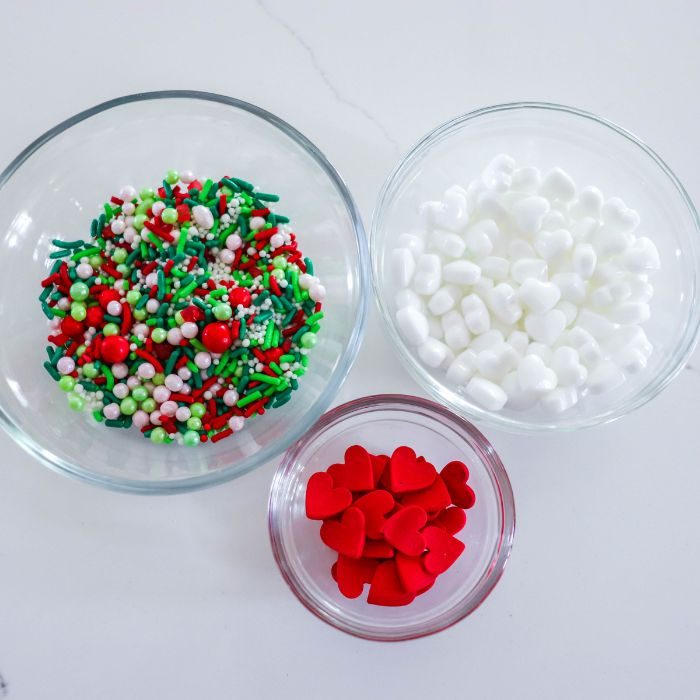
Ingredients You Will Need
Classic Oreos – So you can use any flavor or style of Oreos. We love Double Stuffed Oreo Cookies but you can use classics as well.
Mini Oreos – Reach for mini Oreos for the ears of the Mickey chocolate Oreos.
Candy Melts – Red candy melts, green, and white chocolate candy melts are what we used for dipping the Oreos in.
Sprinkles – we used candy hearts and Christmas sprinkles for decorating the cookies, as well as the colored chocolate.
Cake Pop Sticks – You can buy these at craft stores, Walmart, and other grocery stores. Or ship to your home and order off Amazon or other online stores.
How to Make
Full steps on how to make chocolate covered Oreos are in the printable recipe card at the bottom of the post. This is a visual walk through on how it is made.
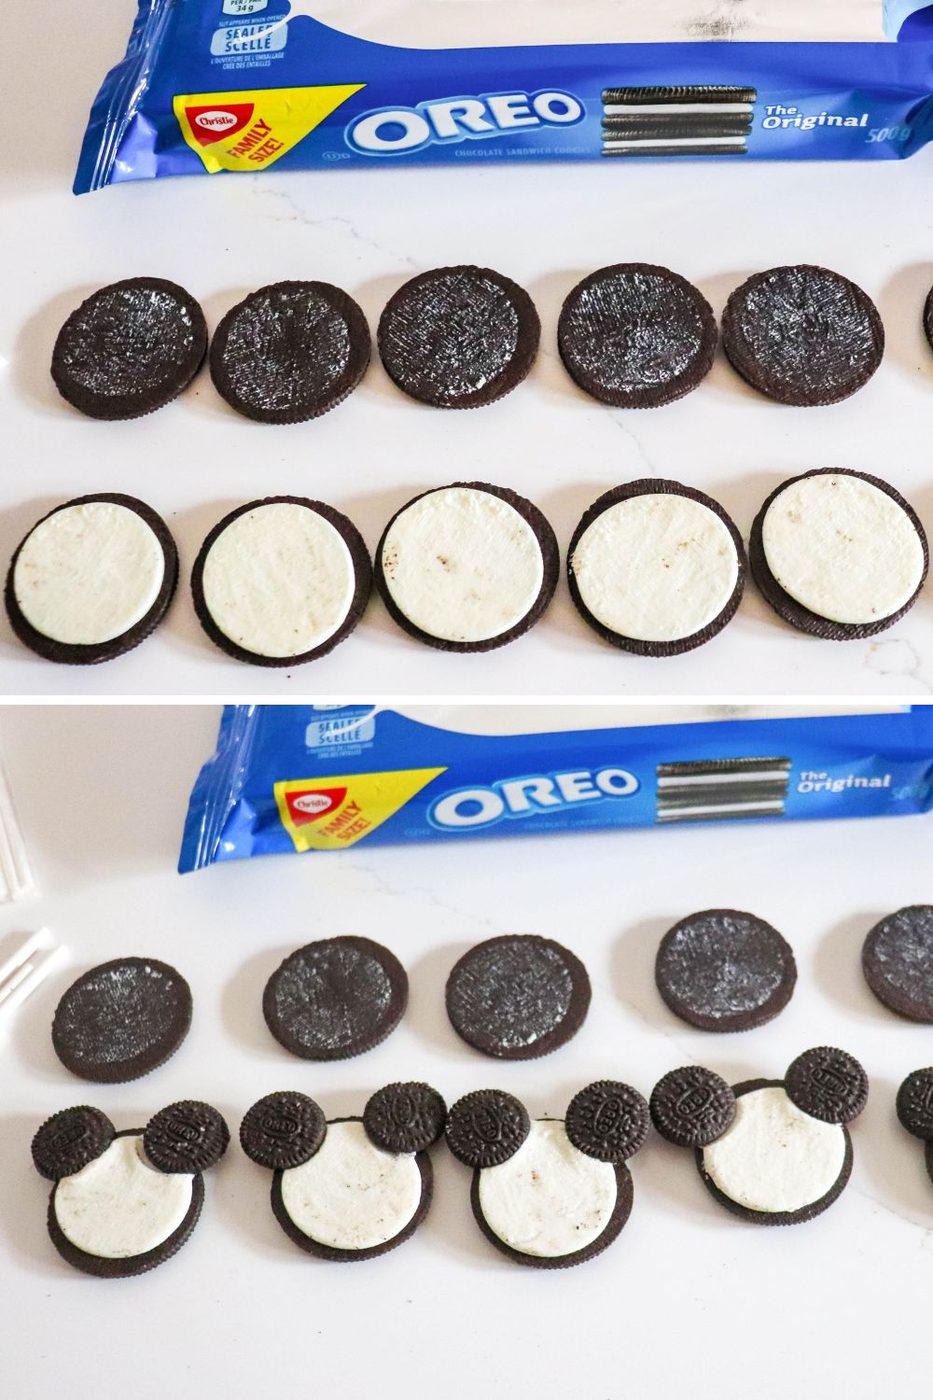
Step One: Make Mickey Heads out of Oreos
Open up the full size Oreos and twist them in half. Then place two mini Oreos into the filling of the larger Oreo on both top sides, to mimic ears.
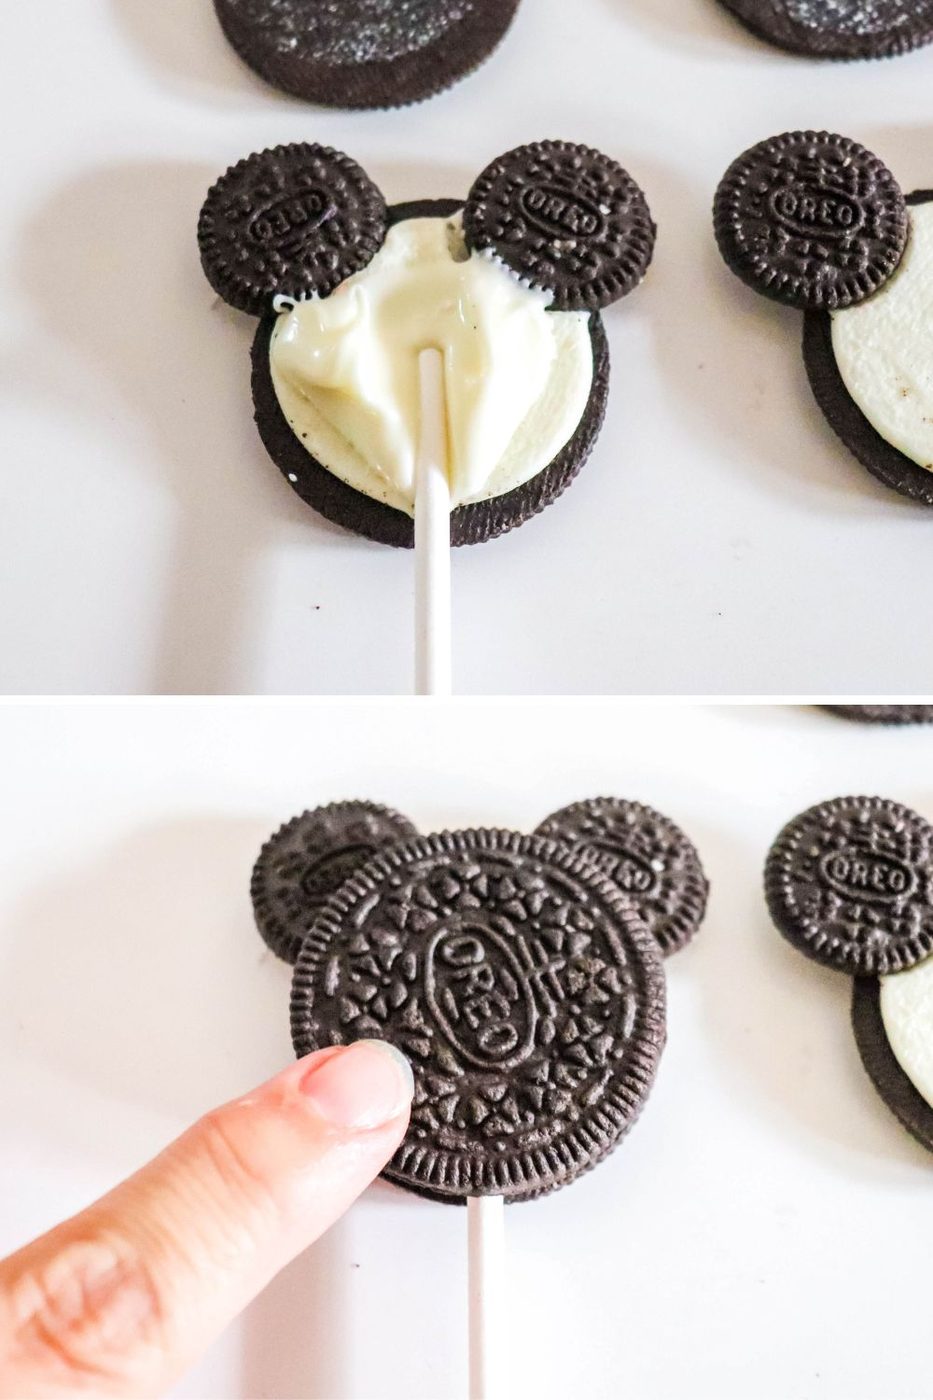
Step Two: Melt Chocolate And Assemble
Melt Chocolate as directed. We used a microwave safe bowl and then just heated up the candy melts that way. We used different bowls for each color.
Then you will add just a dollop of chocolate in the center of the Oreo with the filling. Place the stick on the Oreo and place the top Oreo to sandwich it back together. Allow the chocolate to harden so the cookies stick on to the stick.
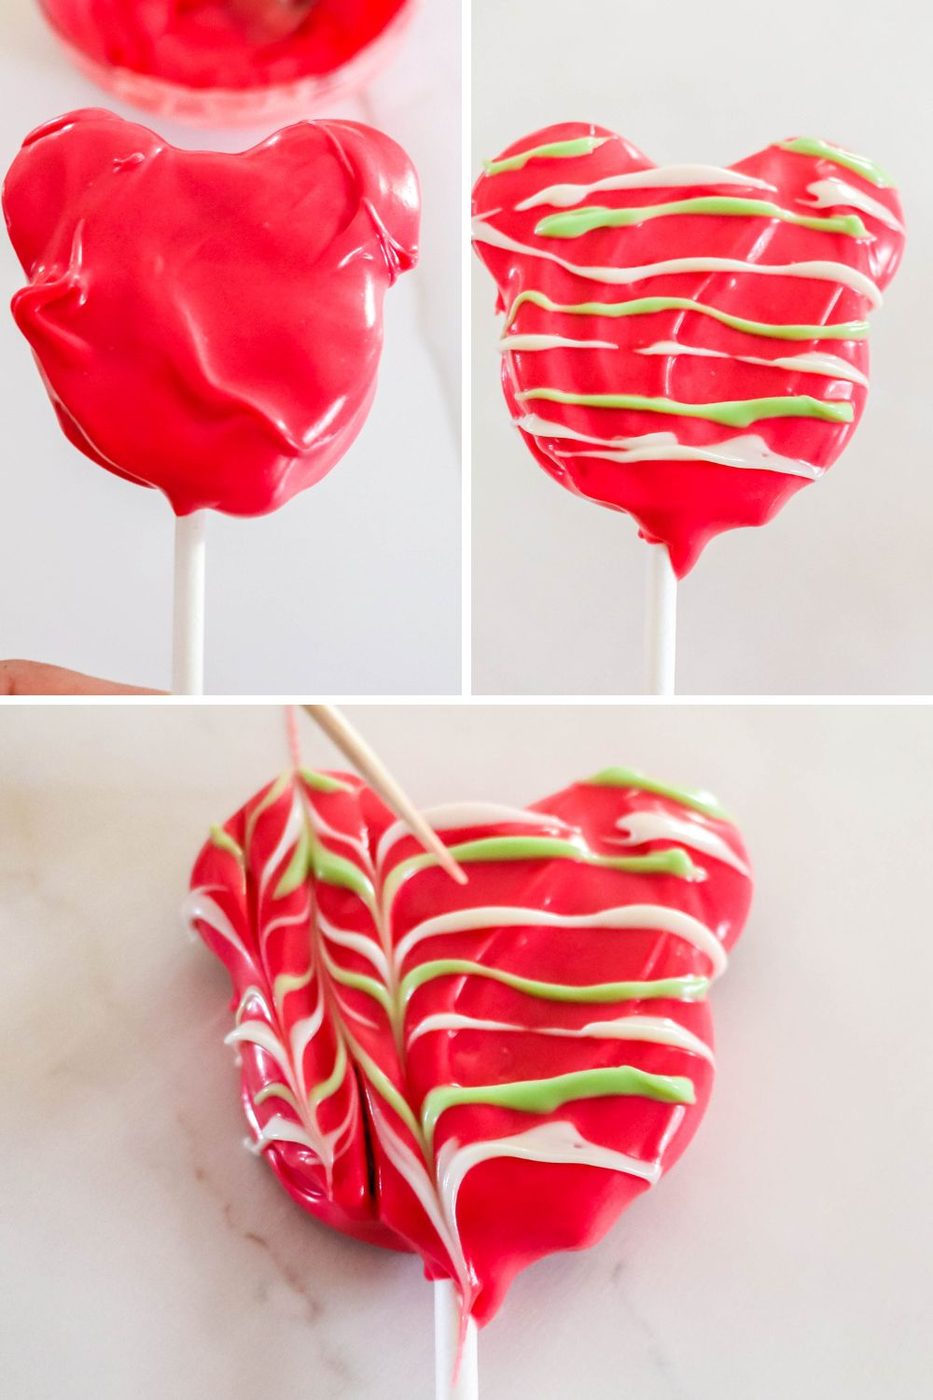
Step Three: Dip Oreos and Decorate
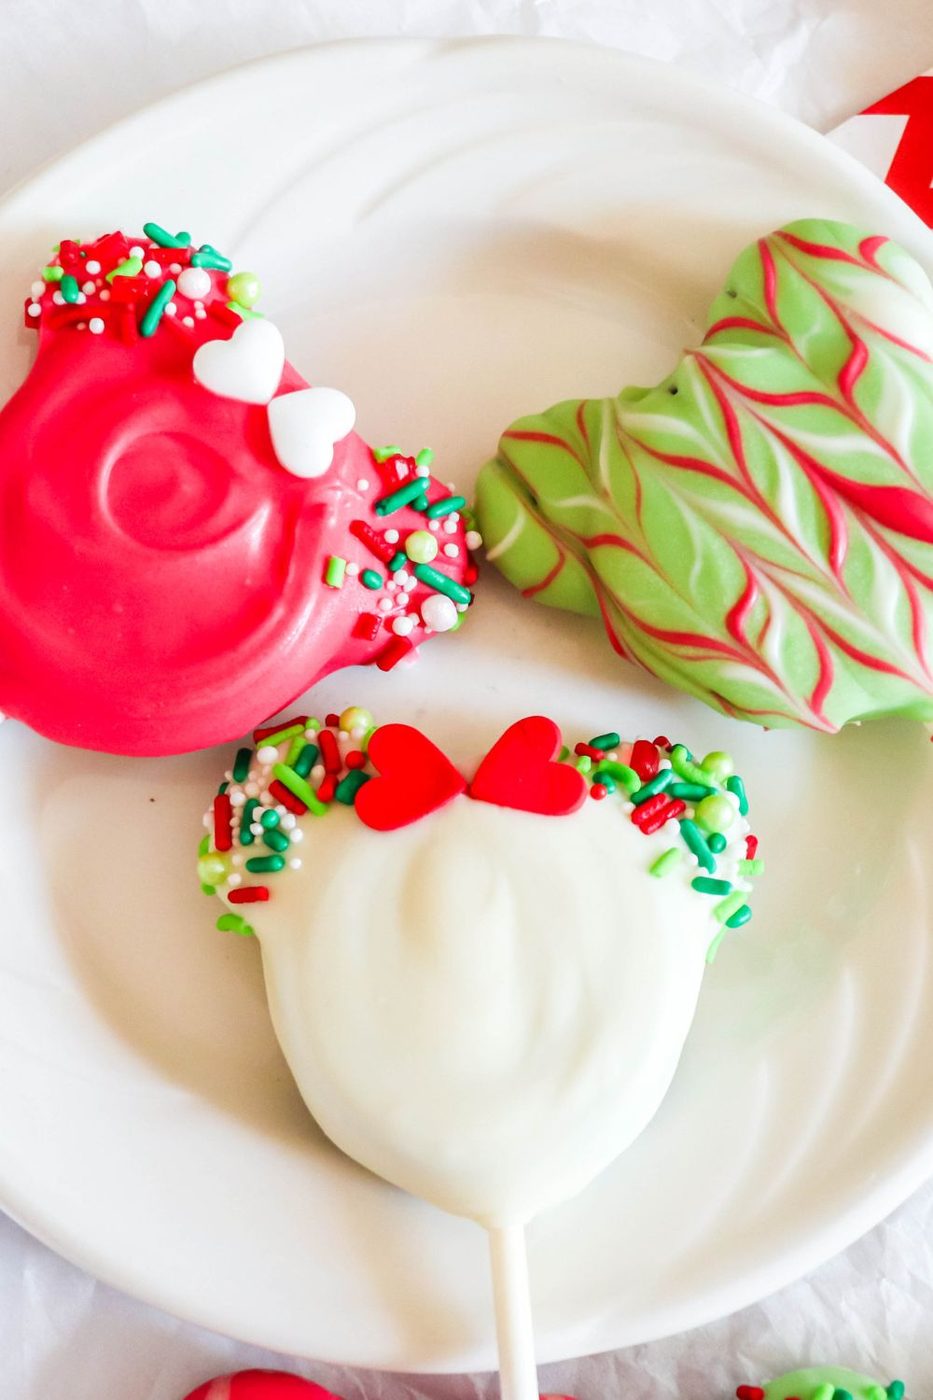
Now you will dip the Oreo in the color of chocolate you want. To create lines we poured some chocolate in a sandwich bag that we cut a small tip off in the corner.
Then drizzle the chocolate lightly over the Oreo, and then use a toothpick to create a zig-zag pattern.
Add on sprinkles while the chocolate is wet.
Expert Tip: Do one Oreo at a time when decorating as the chocolate will set up pretty quickly.
Tips for Success
- Line a baking sheet or counter with parchment paper or wax paper for placing the Oreos on once dipped in the melted chocolate.
- You can use chocolate chips instead of chocolate wafers for dipping. Just add a teaspoon of coconut oil or shortening to the chocolate when you melt it.
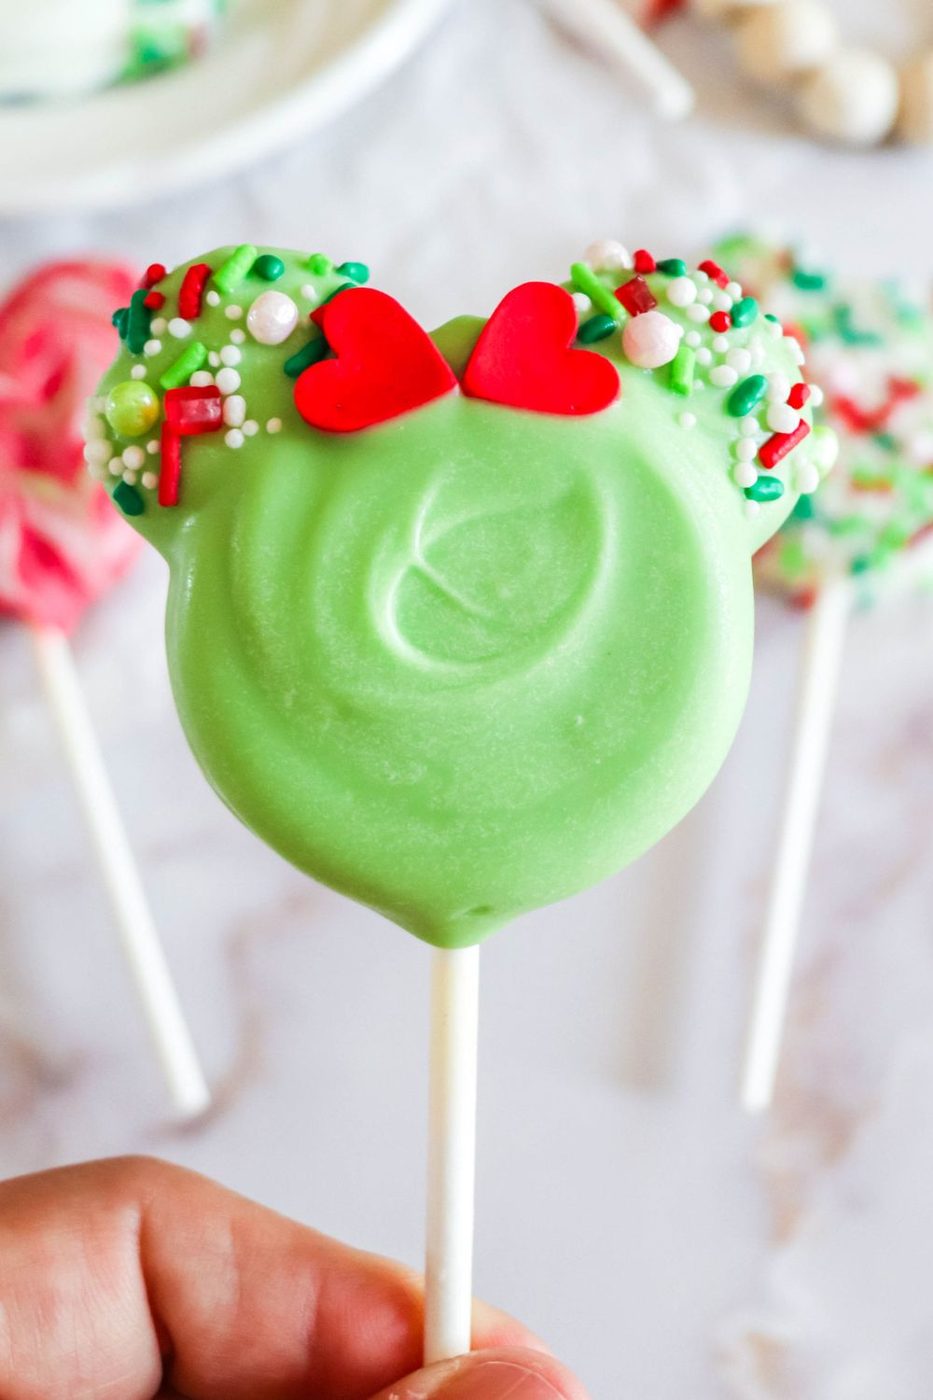
- The heart sprinkle works great for making a bow for Minnie Mouse in between the ears. And the Mickey Oreos we just left off the hearts to look more boyish.
- Decorate with chopped candy, crushed candy canes or peppermint candies, etc. You don’t have to do sprinkles if you don’t want.
- You could place the Mickey and Minnie Mouse Oreo pops in treat bags with twist ties and gift as a party favor or for a school party.
Storing
You can store these Christmas Mickey Mouse Oreos in an airtight container. They will store for up to three weeks easily. And you can make them a day or two in advance if you would like.
You can also freeze the Mickey treats in a freezer bag or container for 2-3 months. Then thaw on the counter when you want to eat some.
Practical notes
How long will Oreos dipped in chocolate last?Oreos dipped in chocolate will last up to three weeks when stored in an airtight container. You can place in a sealed Ziploc bag or in an airtight container once the chocolate has set up firmly.
How do you dip Oreos in chocolate without a mold?You can use a fork to dip Oreos or for this recipe we used the cake pop stick. Just dip it into the bowl of chocolate, lift up and shake off excess chocolate. Then place on a parchment or wax paper lined tray or counter to set up.
Want even more Christmas recipes to serve up your friends and family? Check out these recipes below.
Have you tried the recipe? If so, please leave a star ⭐⭐⭐⭐⭐ rating in the recipe card below or drop a comment. Also stay in touch with us through social media by following us on Facebook Pinterest or our Facebook Group
Recipe Card
Ingredients
Makes 12 servings
- 12 regular Sized Oreo Cookies
- 12 mini Oreo Cookies
- 6 ounces red candy melts
- 6 ounces green candy melts
- 6 ounces white candy melts
- 2 tablespoons Christmas sprinkles
- 1 tablespoon candy heart sprinkles, optional
Equipment
- Lollipop Sticks (cake pop sticks)
- Microwave safe bowl
Method
- Take the full size Oreos and untwist to remove the two halves of the cookies.
- Then on the half of the cookie with the cream filling you will add your mini oreos. Take the mini Oreo and twist it apart as well. Place the two halves on the top part of the large Oreo for the mickey ears.
- Then in a microwave safe bowl you will melt your white chocolate until it is fully melted.
- Add a little of the white chocolate to the center of the cream filled half of the Oreo. Place the lollipop stick on the white chocolate then place the other half of the large cookie on top, to sandwich it together.
- Let the white chocolate set up. This is going to keep the cookie secure on the stick.
- Melt the rest of your chocolates in separate bowls, and then dip the Mickey Oreos in the chocolate. You can add sprinkles, create zig zag designs, or decorate as you would like.
Zig Zag Design
- After you dipped your Oreo cookie in the chocolate, add the other two colors of chocolate into a Ziploc sandwich bag. Cut off a small part of the tip, and pipe lines across the dipped Oreo.
- Then with a toothpick you will lightly draw lines down the Oreo to drag the color just a bit. It creates a really pretty design.
Minnie Mouse Oreos
- For the Minnie Mouse Oreos you just take two of the heart sprinkles and place in the center between the ears. Then you can add other sprinkles on, or leave them plain.
Kitchen notes
Decorating– As you can see we did a handful of different designs. You are welcome to decorate your cookies anyway that you want. Holiday or Theme – Change up the colors of candy melts used to fit your theme you want. These make a great treat for birthdays and more. Store – Store in an airtight container at room temperature for up to 3 weeks. You can freeze the cookies for 2-3 months as well.