Instant Pot Keto Cheesecake
- Makes 1 Cheesecake
- Prep 10 mins
- Cook 45 mins
- Total 1 d 55 mins
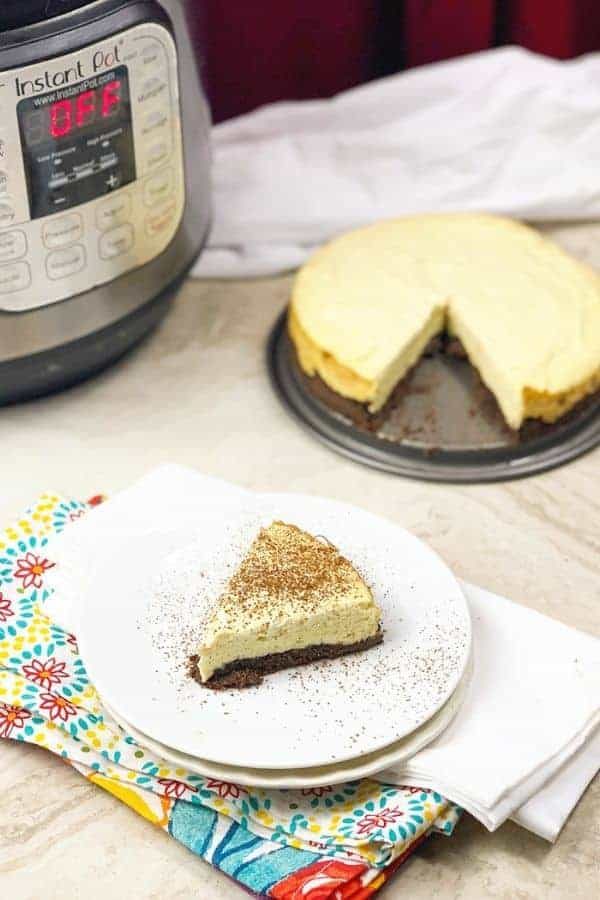
Keto cheesecake is one of our go-to desserts when we get a sweet craving. Our Instant Pot Keto Cheesecake recipe is easy, tasty, and satisfying to your sweet tooth. A gluten-free and sugar-free cheesecake that tastes like the real deal!
This low carb cheesecake is great for birthday parties, family gatherings, weeknight dessert, and a treat for a special occasion. While you have to allow the cheesecake to set up overnight, it is worth the wait. We have a sweet potato Instant Pot cheesecake recipe to try if you want as well.
Searching for More Instant Pot Finds
Keto Cheesecake
This low carb cheesecake recipe is. If you are on a low carb or on the ketogenic diet you will enjoy this Instant pot dessert.
How To Make Sugar Free Cheesecake Taste Like The Real Thing
When making a sugar free cheesecake, you might find it taste different than a classic cheesecake. The two key components are a buttery and light crust, and of course the cheesecake filling.
For the crust, we used blanched almond flour. We find this resembles a graham cracker crust texture, without all the extra carbs that we don’t want.
Then for the cream cheese filling, you use cream cheese of course, and we opted for the powdered erythritol sweetener. It helps to sweeten up the cheesecake while giving it that real taste, if you know what we mean.
What Type Of Pan Do You Use For Instant Pot Cheesecake
Reach for a springform pan. We used this Springform Pan that fits a 6 quart or 8 quart instant pot! Then we used a Grip Holder to ensure we wouldn’t drop our cheesecake. If you have followed the Instant Pot group you can see TONS of pictures of people dropping their cheesecake, and it gets ruined on the floor.
Instant Pot Springform Pan OXO Good Grips Pressure Cooker Bakeware Sling, Red Silicone Sealing Rings (Savory and Sweet)
Tools Needed For Instant Pot Low Carb Cheesecake
- Instant Pot – For Cooking Your Cheesecake!
- Sealing Rings – Great for swapping from savory dishes to sweet. That way your cheesecake doesn’t taste like last nights butter beans.
- Mixer – Use a hand mixer or stand mixer to blend up your cheesecake base!
- Good Grips Sling – Great for holding on to your cheesecake. This will help prevent it from falling or slipping out of your hands when you place it in pot, and remove it.
- Springform Pan – The side removes so you have that perfectly shaped cheesecake to slice and serve your family and friends.
Why Is our Cheesecake Lumpy
You need to start with softened cream cheese. If you do not allow the cream cheese to be softened, it will offer a cottage cheese texture, and be lumpy. When your cream cheese is softened, it will whip up nice and offer that velvety smooth texture you want.
Trust us we have had a lumpy cheesecake before, we learned our lesson so now we know! Always, always, always use softened cream cheese.
Ways To Serve Up This Sugar-Free Cheesecake
- Dust with cocoa powder
- Top with fresh fruit
- Drizzle with sugar-free caramel sauce or sugar-free chocolate sauce
- Top with a dollop of sugar-free jam
Dress up your cheesecake how you will, or eat it plain! We love it all ways, and the cocoa to us adds nice character to the cheesecake.
Keeping leftovers
You will need to store any leftover cheesecake in the fridge. Cheesecake will go bad if left out on the counter at room temperature. This cheesecake will store in the fridge sealed up for 4-5 days. Use your best judgment in terms of if the cheesecake has gone bad.
Ingredients
Makes 1 Cheesecake
- For the crust:
- 3/4 cup blanched almond flour
- 3 tbsp salted butter, melted
- 1 heaping tbsp powdered erythritol sweetener
- 2 tbsp unsweetened cocoa powder
- For the filling:
- 16 oz cream cheese softened
- 2/3 cup powdered erythritol sweetener
- 2 large eggs, room temperature
- 1/4 cup heavy whipping cream, room temperature
- 1 tbsp fresh lemon juice
- 1 tsp vanilla extract
Equipment
- Silicone Sealing Ring for Instant Pot Accessories
- Pressure Cooker Bakeware Sling
- KitchenAid Classic Plus Series 4.5-Quart Tilt-Head Stand Mixer, White
- Measuring Cups
- Instant Pot Cheesecake Pan
Method
For the crust:
- Combine melted butter and erythritol in a mixing bowl, and stir together. Add almond flour and cocoa, stirring until the butter is absorbed and forms a dough.
- Transfer the dough to the cheesecake pan.
- Firmly press down to form a flat and smooth crust covering the entire bottom of the pan.
- Put the pan to the freezer to chill the crust for 15 to 20 minutes
Make the filling:
- Add cream cheese and erythritol to a large bowl.
- Use a hand mixer to beat on low speed until well-mixed, about 1 minute.
- Add heavy cream, lemon juice, and vanilla extract.
- Beat on low speed until smooth, about 30 seconds.
- Add eggs one at a time, beating on low speed until just combined, about 30 seconds each. Don’t overmix the eggs.
- Remove the pan with chilled crust from the freezer.
- Pour the batter over the crust.
- Level the surface by shaking and tapping the pan a bit on the counter.
- Cover with foil
Cook and cool:
- Add 1 cup of water to the bottom of the pot.
- Place the trivet over the water, with its handles resting on the sides of the pot.
- Place the cheesecake pan into the sling and then on top of the trivet.
- Secure and seal the lid.
- Cook for 30 minutes at high pressure, and then 15-minute natural release.
- Manual release any remaining pressure.
- Carefully lift the lid.
- Remove the pan using the sling handles
- The top of the cheesecake should jiggle a little but not be liquidy.
- Allow the cheesecake to cool uncovered.
- After about an hour, lift it from the pot using the trivet’s handles to continue to cool on the countertop.
- Refrigerate for at least 24 hours covered.
- Slice and serve.