
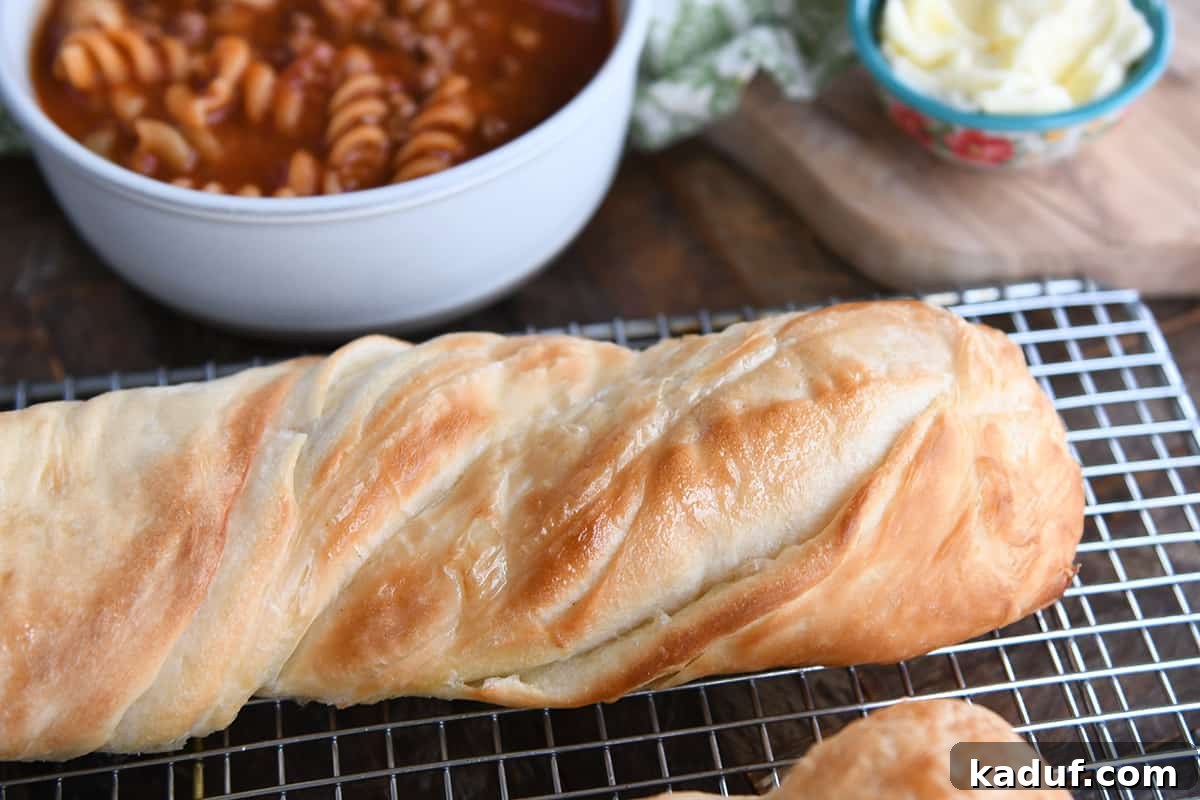
Unlock the secret to bakery-quality bread in your own kitchen with this incredible recipe for Easy Twisted Croissant French Bread. Forget the daunting, multi-day process of traditional croissants. This innovative method delivers all the flaky, buttery goodness and irresistible aroma of a classic croissant, beautifully twisted into a French bread loaf, all within a few hours. Prepare to dazzle your family and friends with a creation that looks sophisticated but is surprisingly simple to master. This bread isn’t just a treat; it’s a showstopper, promising a divine culinary experience with every golden, tender bite.

Crafting the Perfect French Bread Dough Foundation
The foundation of any exceptional bread begins with the dough, and for our Twisted Croissant French Bread, we employ a remarkably simple and forgiving French bread dough. This adaptable recipe is a variation of my highly acclaimed breadstick recipe, known for its incredible ease of handling and consistent, delicious results. Whether you’re a seasoned baker or just starting your bread-making journey, this dough is designed to be foolproof, ensuring a smooth and enjoyable experience as you create these magnificent loaves.
To begin, gather your ingredients and your preferred mixing method. A stand mixer, equipped with a dough hook, will make the process incredibly swift and effortless. However, don’t despair if you don’t own one; this dough is equally amenable to hand-mixing with a sturdy bowl and spoon, followed by a brief kneading session. The goal is to mix and knead the ingredients until a soft, smooth, and cohesive dough forms. It should be elastic and pliable, a joy to work with.
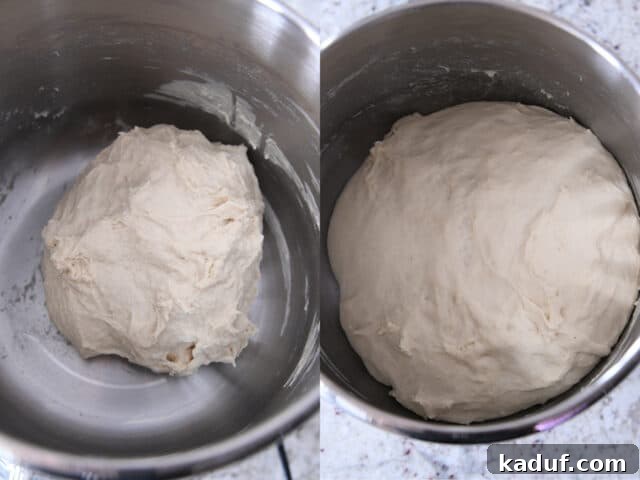
A Critical Dough Consistency Tip: Achieving the right dough consistency is paramount for success with this recipe. It’s vital not to over-flour the dough, which can lead to a stiff, unmanageable mass that will resist rolling and frustrate your efforts. Conversely, a dough that is too soft or excessively sticky can also present challenges. Strive for a delicate balance: a dough that feels soft to the touch and slightly sticky, yet effortlessly pulls away from the sides of your mixing bowl. When you touch it, it should leave only a light residue on your fingers, rather than being overly wet or clinging persistently. This ideal texture ensures smooth rolling and beautifully flaky layers later on.
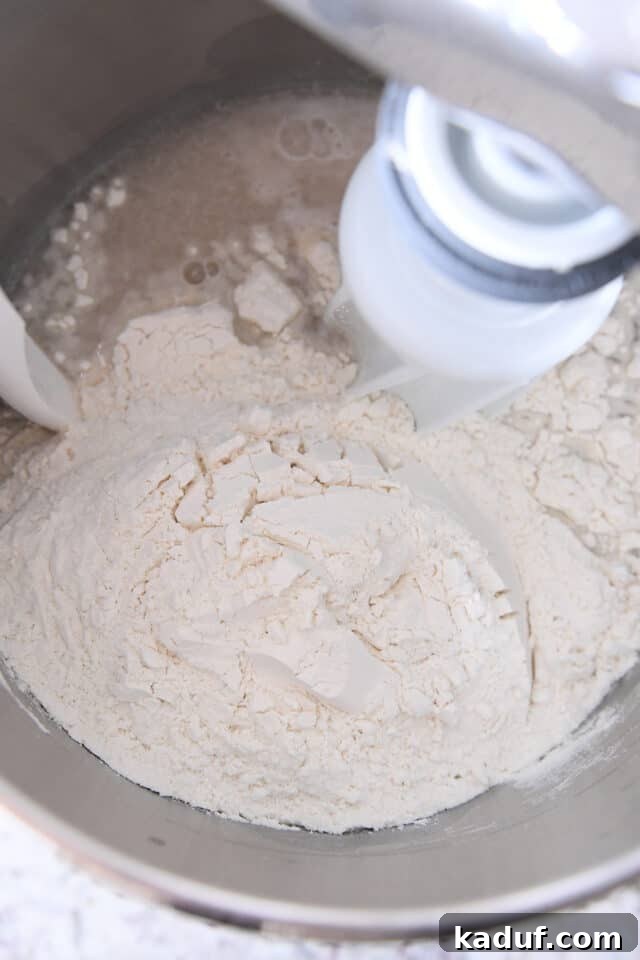
Once your dough reaches this perfect consistency, cover it lightly and allow it to rise in a warm, draft-free spot until it has gloriously doubled in size. This usually takes approximately one hour, depending on the ambient temperature and the activity of your yeast. This initial rise is crucial, developing the dough’s flavor and creating the airy structure that will eventually become those delightful layers.
Preparing the Essential Butter Packet for Flaky Layers
The secret to achieving the signature flaky layers of a croissant-style bread lies in the butter packet – a thin, evenly rolled sheet of butter that gets skillfully incorporated into the dough. This process, often referred to as lamination in classic croissant making, is simplified here to be easily achievable at home, delivering similar stunning results without the fuss. The key is to create a cold, pliable butter sheet that will remain distinct from the dough during the folding process, preventing it from melting into the dough prematurely.
To construct your butter packet, follow these straightforward steps:
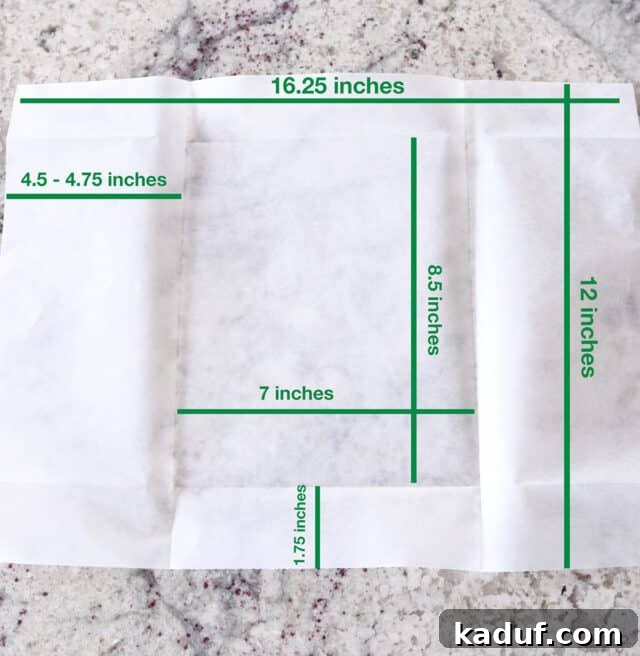
- Begin with a piece of parchment paper, ideally around 16 1/4 inches by 12 inches. Precision isn’t overly critical here, but aiming for these dimensions, often found in pre-cut parchment sheets, will simplify the subsequent steps.
- Fold the two shorter edges of the parchment paper inwards by approximately 4 1/2 inches each. These folds will slightly overlap in the center. Ensure you crease these edges firmly to create clear guides.
- With these initial folds held in place, fold the top and bottom edges over by about 1 3/4 inches.
- Once all edges are folded, you will have formed a neat parchment packet with a central rectangular area measuring approximately 8 1/2 inches by 7 inches. This enclosed space is where our butter will reside.
Don’t Let Perfection Be the Enemy of Good: While these measurements provide excellent guidance, remember that flexibility is key. Slight variations in your folds won’t derail the recipe. The primary objective is to create a secure parchment envelope that will completely encase the butter sheet, preventing it from escaping during the rolling process. Focus on creating a sealed packet, and you’ll be on your way to success.
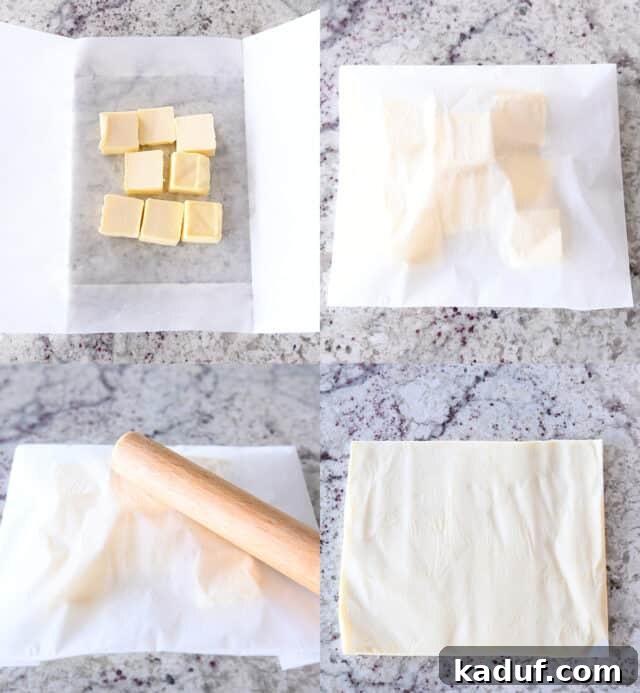
Below, you’ll find a visual reference chart illustrating the parchment paper folding technique and the approximate dimensions, ensuring you have a clear guide.
Next, take two sticks of good quality salted butter. Ensure the butter is at a cool room temperature – it should be pliable enough to press, but still firm and not oily or greasy. Cut the butter into several large pieces and arrange them in the center of your unfolded parchment paper. Carefully fold the parchment packet back up along your pre-creased lines. Flip the packet over so the neatly folded edges are now on the bottom, creating a stable surface.
Using a rolling pin, begin by gently tapping the butter. This initial tapping helps to soften and merge the butter pieces into a thick, uniform square without tearing the parchment. Avoid excessive force, as a torn parchment packet can lead to butter leakage. Once the butter has formed a thick square, transition to using the rolling pin to roll it out into a thin, even sheet. Apply short, quick rolls, ensuring the butter spreads to fill all edges of the parchment packet, maintaining a consistent thickness throughout. This evenness is crucial for uniform layers in your finished bread.
Crucial Chilling Step: Immediately after forming your butter packet, place it into the refrigerator to chill thoroughly. This step is non-negotiable! The butter must be cold and firm when you incorporate it into the dough. While the butter chills, you can proceed with preparing your bread dough, ensuring both components are at their optimal temperatures when it’s time to combine them.
Mastering the Art of Folding for Flaky Layers
Once your dough has completed its initial rise and your butter packet is perfectly chilled, it’s time for the magical process of lamination – incorporating the butter into the dough to create those coveted flaky layers. This stage requires a gentle yet confident touch to ensure the butter remains distinct and doesn’t fully blend with the dough. The contrast between the firm butter and the elastic dough is what creates the beautiful pockets and layers during baking.
Begin by lightly punching down your risen dough to release any excess air. Then, turn the dough out onto a lightly floured countertop. Using a rolling pin, carefully roll the dough into a rectangular shape, aiming for dimensions of approximately 18 inches by 11 or 12 inches. Strive for an even thickness across the entire rectangle.
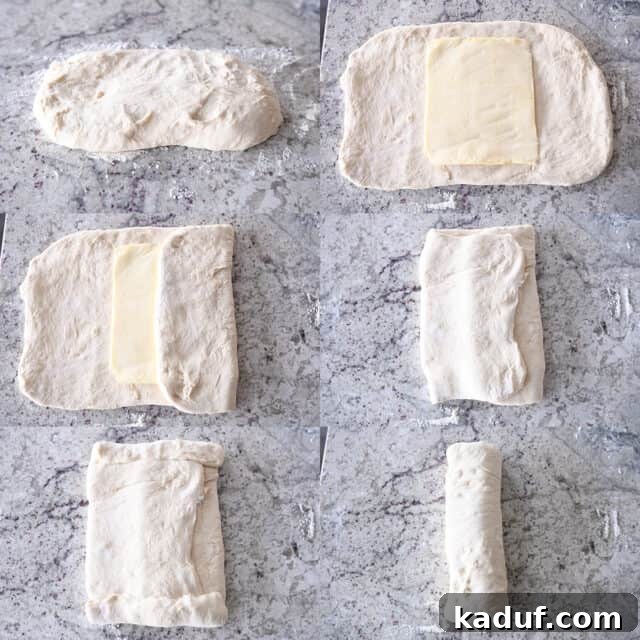
Retrieve your chilled butter packet from the refrigerator. Unfold the parchment paper, but keep the butter sheet resting on one half of the parchment. Carefully invert the butter sheet, placing it face down onto the center of your rolled-out bread dough. Then, gently peel the parchment paper away from the butter, leaving the firm, cold butter sheet perfectly positioned on the dough. Speed is your ally here; work efficiently to prevent the butter from warming too much.
Using the accompanying images as your visual guide, proceed with the first crucial folds. Take one short side of the dough rectangle and fold it inward, covering about halfway to two-thirds of the butter sheet. Next, take the other short side of the dough and fold it over, ensuring it slightly overlaps the first folded side by approximately one inch. This creates a neat, layered package. Now, fold the top and bottom edges of this dough package over by about 1/2 to 1 inch, pressing firmly but gently to seal the edges. This sealing prevents butter from escaping during subsequent rolling. Finally, fold the entire dough in half lengthwise to form a thick, rectangular loaf. This completes your first series of folds, encapsulating the butter within the dough.
The Art of Lamination: Repeated Rolling and Folding
With the butter now securely encased within your dough, the next stages involve repeated rolling and folding, which are fundamental to developing those exquisite, gossamer-thin layers characteristic of a croissant. This process is often called a “turn” in professional baking. Patience and a gentle hand are your best tools here.
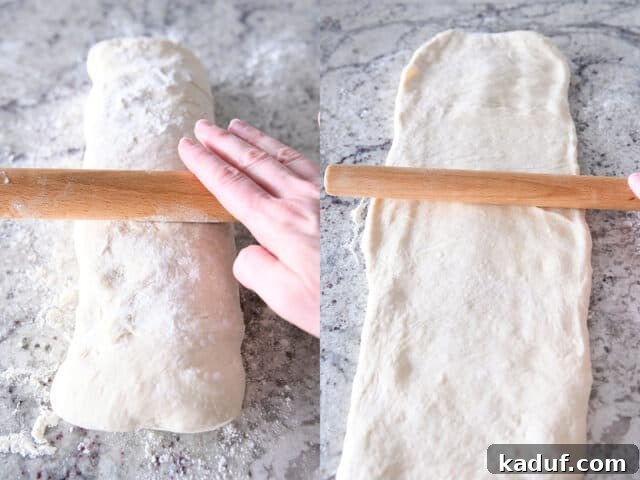
Take your thick, folded dough loaf and, working from the center outwards, carefully roll it into a long, thin rectangle, aiming for dimensions of approximately 8 inches by 22 inches. The dough might exhibit some resistance and tendency to spring back due to the gluten developing during kneading. If this happens, don’t force it! Simply cover the dough lightly and let it rest for 5-10 minutes. This resting period allows the gluten strands to relax, making the dough much more cooperative and easier to roll without tearing the delicate butter layers inside. Resume rolling once the dough feels more pliable.
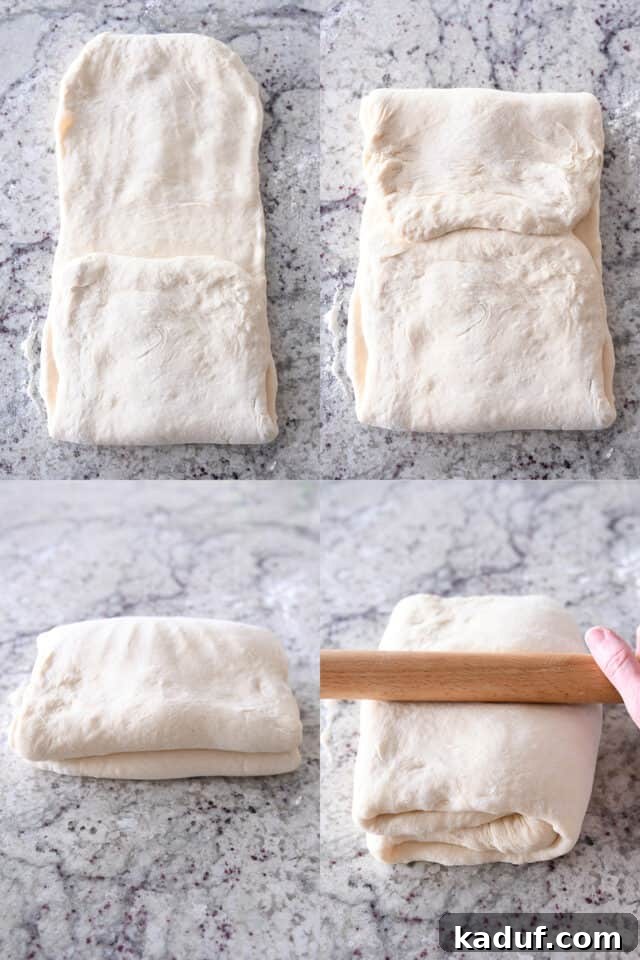
Once you have achieved your long rectangle, it’s time for another series of folds to build more layers. Refer to the pictures below for visual guidance. Fold one short edge of the long rectangle into the center. Then, repeat this action with the other short edge, bringing it towards the center so that the two folded edges meet neatly in the middle. Finally, fold the entire dough in half again, bringing one of the short sides over the other. This sequence of folds effectively doubles the number of butter and dough layers within your loaf, contributing to its ultimate flakiness.
After this intense folding, allow the dough to rest for another 2-3 minutes. This short break is crucial for the gluten to relax once more, ensuring that the dough will be easy to roll out into its final shape without excessive tension or tearing. You might notice small air bubbles forming on the surface of the dough – these are completely normal and a positive sign of the yeast activity and the developing layers. Resist the urge to pop them deliberately!
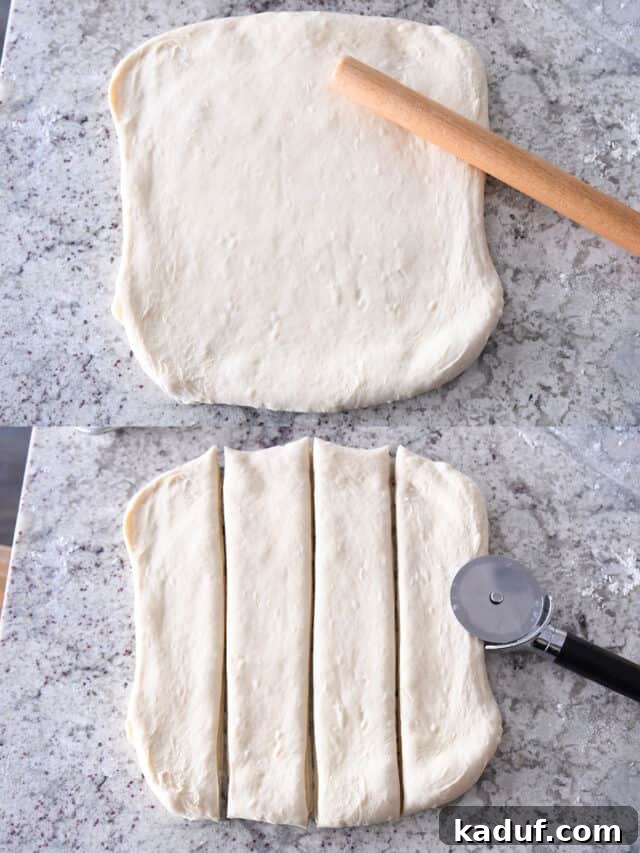
Finally, roll the folded dough into a 12-inch or 13-inch square. Again, if the dough resists, allow for a brief rest. Once you have your square, it’s time to transform it into individual loaves. Using a pizza cutter or a sharp knife, carefully cut the square into four even strips. These strips will become your twisted croissant French bread loaves.
Pro Tip: Get Creative with Sizes! For those who prefer smaller, individual servings, you can easily adapt this step. Cut the dough into even thinner or smaller strips to create delightful twisted croissant breadsticks. These smaller versions bake up just as beautifully and make for excellent appetizers or sides.
The Final Rise and Golden Bake
You’re now just a few steps away from enjoying your homemade Twisted Croissant French Bread. This final stage involves the crucial second rise (proofing) and the transformative bake that brings out all those incredible flavors and textures.
Take each dough strip and gently twist it 3-4 times along its length. The twists don’t need to be perfect; their rustic charm adds to the appeal of the finished bread. Place your twisted croissant loaves onto a half-sheet pan lined with parchment paper. I typically arrange two loaves per sheet pan, ensuring they are spaced a few inches apart to allow for proper air circulation and expansion during baking. This prevents them from sticking together as they grow.
Cover the sheet pan lightly with plastic wrap or a clean kitchen towel and allow the dough to rise until it is noticeably puffy. This second rise is vital for developing the final texture and lightness of the bread. For a slow, controlled rise that often enhances flavor, you can place the covered dough in the refrigerator for several hours or even overnight. If rising at room temperature, keep a close eye on it. A critical point here is to avoid letting the dough rise in an overly warm spot. Excessive warmth can cause the butter within the layers to melt prematurely, which will result in a less flaky, denser bread rather than the desired airy, layered structure. A cooler, consistent room temperature or a refrigerated rise is ideal for preserving those precious butter layers.
Once your loaves are beautifully puffy, they are ready for the oven. Preheat your oven to the specified temperature (typically 375-400°F). Bake until the loaves achieve a stunning golden-brown hue. As they bake, your kitchen will be filled with the most incredible, intoxicating aroma – a symphony of warm, fresh, buttery baked bread. This delightful fragrance is a true testament to the deliciousness that awaits you. Be prepared for your heart to skip a beat at the sight and smell of these magnificent creations emerging from the oven.

The Golden Finish: A Bonus Butter Brush
Even with the most careful baking, it’s quite common for some of the butter to escape and pool on the parchment-lined sheet pan as the bread bakes. While you might initially see this as a slight imperfection, it’s actually a wonderful bonus opportunity!
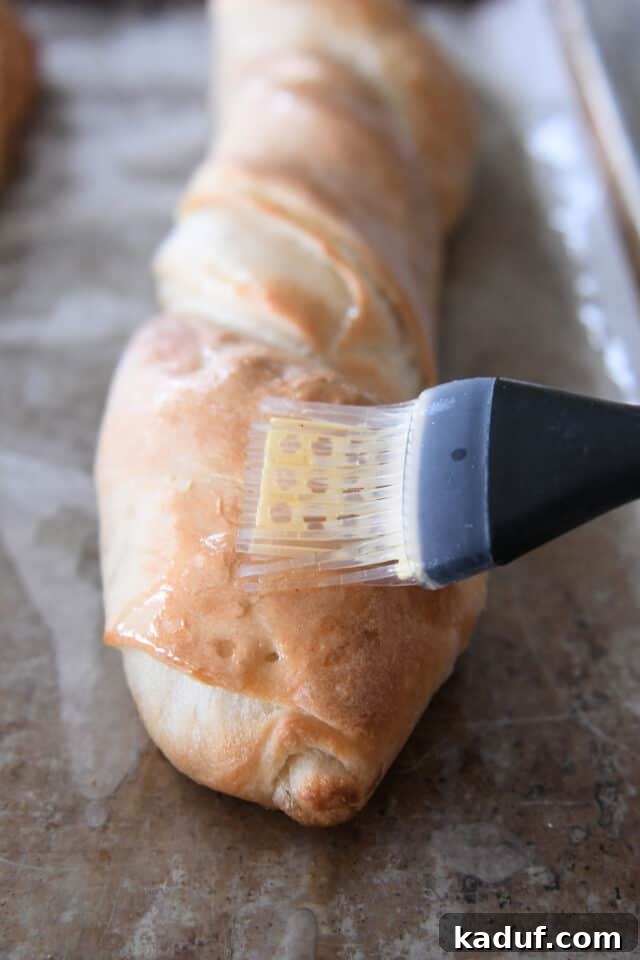
As soon as you pull your fragrant loaves from the oven, you’ll likely notice these small puddles of melted, golden butter. Don’t let this precious flavor go to waste! Grab a clean pastry brush and generously brush this melted butter directly over the tops and sides of your warm, freshly baked bread. This simple step adds an extra layer of rich buttery flavor, enhances the golden crust, and gives the bread an irresistible sheen. It’s a small detail that makes a significant difference, elevating the bread from delicious to absolutely divine. Your Twisted Croissant French Bread will not only taste amazing but will also look perfectly glazed and enticing.
A Culinary Masterpiece: The Most Incredible Bread Ever
This Twisted Croissant French Bread has truly become my ultimate secret weapon in the kitchen. In the past month alone, I’ve baked dozens of these loaves – for my family’s enjoyment, to impress company, and as heartfelt gifts for friends and neighbors. To simply call it a “showstopper” would be a profound understatement; it consistently garners rave reviews and leaves everyone utterly delighted by its exquisitely amazing flavor and texture.
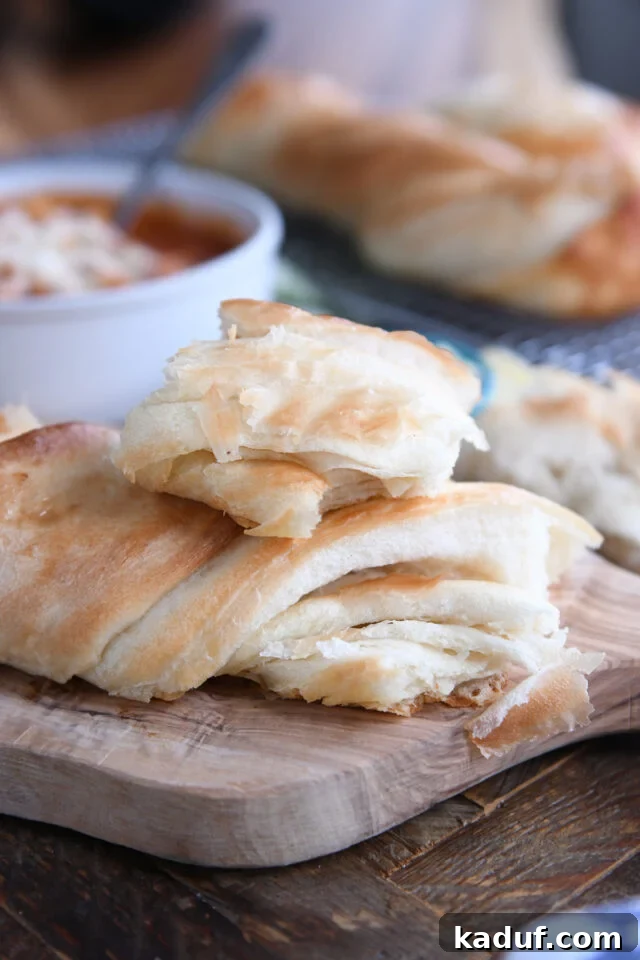
What makes this bread so extraordinary is its masterful combination of qualities. Each bite offers a harmonious blend of pillowy softness and delightful fluffiness, alongside the rich, distinctive flakiness and buttery depth that you’d expect from a classic croissant. It’s an experience that transcends ordinary bread, delivering a truly luxurious mouthfeel.
While you can certainly cut it into neat slices, we often find ourselves embracing the rustic charm of this bread, tearing off warm, irregular pieces to savor its fresh-from-the-oven goodness. Served warm, perhaps with a touch of extra butter or simply on its own, this bread is nothing short of decadent and utterly irresistible. It’s perfect for breakfast, brunch, alongside a meal, or as a stand-alone snack – a versatile treat that will elevate any occasion. Its inviting aroma and comforting taste make it an instant favorite, ensuring that it disappears quickly from any table it graces.
The Best of Both Worlds: Croissant French Bread vs. Traditional Croissants
For many avid bakers, the allure of homemade croissants is strong, yet the reality of their creation can be quite intimidating. I recall attempting traditional croissants just once in my life. While the result was undoubtedly good, the process spanned multiple days, involved intricate folding and chilling steps, and was, to be frank, incredibly stressful and time-consuming. It’s a labor of love that often feels more like a labor of sheer will!
This Twisted Croissant French Bread, however, offers a revolutionary alternative. It captures the essence of a traditional croissant – those ethereal flaky layers and rich buttery taste – but streamlines the entire process into a matter of mere hours, from start to finish. The simplicity and sheer deliciousness of this recipe are so profound that I genuinely believe I will never again feel the urge to embark on the arduous journey of making classic homemade croissants. This recipe achieves a similar level of delight with a fraction of the effort and stress, making it an absolute game-changer for home bakers.
I cannot overstate how excited I am for you to try this recipe. It is destined to transform your perception of home bread baking, proving that extraordinary results can be achieved without immense complexity. Prepare to elevate your baking skills and enjoy truly remarkable bread that will impress everyone who tastes it!
Note on Inspiration: The creative spark for this exceptional bread originates from the talented @mollyjwilk on Instagram, who developed a similar version using @thefoodnanny’s baguette recipe. My adaptation further simplifies the process by utilizing my easy breadstick recipe, increasing the yield to four perfectly sized small loaves, providing more detailed instructions for the butter packet dimensions, and refining the folding and rolling technique with an additional fold. The final touch of brushing any leaked butter onto the warm loaves is also a personal enhancement that truly elevates the flavor.
Visual Learner’s Delight: For those who benefit from visual guidance, I’ve created a quick how-to video of this bread, available on my Instagram. It offers step-by-step visuals to complement these written instructions.

Explore More Delicious Bread Recipes:
A year ago, we savored Swedish Pancakes. Two years ago, it was the versatile Easy Yogurt Flatbread. Three years back, we mastered Easy Homemade English Muffins {Whole Grain Option – No Mixer Needed!}. Four years ago, the delightful Super Easy S’Mores Chocolate Pie {or Tart} captured our hearts. Five years ago, we indulged in Incredible Fluffy Overnight Buttermilk Pancakes. Six years ago, it was the quick and tasty Chinese Cashew Chicken {30-Minute Meal}. Seven years ago, we enjoyed Double Chocolate Quick Bread. Eight years back, we opted for Healthier Banana Bread Chocolate Chip Oat Snack Bars. Nine years ago, the efficient Family Style Shrimp Scampi {20-Minute Meal} was a hit. And ten years ago, we celebrated with Chocolate Tres Leches Cake.

Easy Twisted Croissant French Bread
Pin
Rate
SaveSaved!
Ingredients
- 1 cup (227 g) salted butter, cool room temperature
- 2 cups warm water, 105-110 degrees F
- 1 tablespoon instant or active dry yeast
- 2 tablespoons granulated sugar
- 1 1/2 teaspoons salt
- 4 3/4 (675 g) cups all-purpose flour, more or less (see note)
Instructions
-
For the butter packet: grab a piece of parchment paper about 16 1/4-inches by 12-inches (doesn’t have to be exact, but should be close to those dimensions). Fold the two short edges of the parchment in toward each other about 4 1/2 inches. They will overlap a bit. Crease the edges well.
-
Keep those edges folded in and fold the top and bottom edges in about 1 3/4-inches. It should form a little parchment packet when folded with the center rectangle dimensions about 8 1/2-inches by 7-inches. See pictures in the post for a visual.
-
Unfold the parchment. Cut the butter into large pieces and place in the center of the parchment. Fold up the packet using the pre-creased folds and flip over so the folded edges are on the bottom.
-
Use a rolling pin, lightly tap the butter (too much aggression here and the parchment could rip) until it starts to flatten and merge into a thick square. Continue tapping or use the rolling pin to roll the butter into a thin sheet so it reaches all the edges of the parchment packet and has a relatively even thickness. Place in the fridge to chill while you make the dough.
-
For the dough: In the bowl of a stand mixer fitted with the dough hook, add the water, yeast and sugar, and let sit until foamy, 2-3 minutes. Add the salt and flour and mix until a soft dough forms that clears the sides of the bowl. Add more flour, a little at a time, if the dough is sticking to the dough hook or sides of the bowl.
-
{It’s REALLY important that this dough is not over floured and stiff or it will be hard to roll it out. On the flip side, a dough that is too soft and sticky can be problematic, too. Try for a dough that is soft and slightly sticky but easily clears the sides of the bowl. It should leave a light residue on your fingers but not be overly wet and sticky.}
-
Knead for 3-4 minutes until the dough is soft and smooth.
-
Cover the bowl or transfer the dough to a lightly greased bowl and cover. Let rise until doubled, about an hour.
-
Lightly punch out the dough and turn out onto a lightly floured counter. Roll into a rectangle about 18-inches by 11- or 12-inches.
-
Take the butter packet out of the refrigerator, and unfold the parchment (but leave the butter on the parchment paper). Place the butter packet face down on the center of the rolled out bread dough. Peel the parchment carefully off the butter leaving the butter sheet on the dough.
-
Work quickly and don’t over work the dough during the next couple steps of folding and rolling so the butter doesn’t get too soft!
-
Fold one short side of dough about halfway to 2/3 over the butter. Fold the other short side of dough over the butter, overlapping the first folded side by about an inch.
-
Fold the top and bottom edges over about 1/2- to 1-inch and press to seal.
-
Fold the dough in half (from right to left or vice versa) once more.
-
Starting in the center, roll the dough out into a long, thin rectangle, about 8-inches by 22-inches. If the dough springs back when rolling, let it rest for 5-10 minutes to let the gluten relax and roll again.
-
Fold one short edge of the long rectangle into the center. Repeat with the other short edge so they meet in the middle. Fold the dough in half (from one of the short sides).
-
Let the dough rest for 2-3 minutes. Prepare two half sheet pans by lining with parchment paper. Preheat the oven to 375 degrees F (400 degrees F for a darker crust).
-
Roll into a 12-inch or 13-inch square. If the dough springs back when rolling, let it rest for 5-10 minutes to let the gluten relax and roll again. Cut the square into four strips.
-
Take each strip, twist it 3-4 times and place on the prepared sheet pans (two strips per sheet pan, spaced several inches apart).
-
Cover and let rise until noticeably puffy (the dough can rise in the refrigerator overnight or for several hours – when taking out of the refrigerator, if it hasn’t risen enough, let it come to room temp and continue rising until nearly doubled). You don’t want to let these loaves rise in an overly warm spot or the butter will melt before it hits the oven and you won’t get the flaky, buttery layers.
-
Bake the loaves until nicely golden, 20-22 minutes.
-
Immediately out of the oven, use a pastry brush to brush any leaked butter on the sheet pan over the top of the loaves.
-
Serve warm or at room temperature. Bread can be sliced or torn into pieces.
Notes
Helpful Tip: to ensure the butter doesn’t get too soft or squeeze out of the dough when folding and rolling, make sure to work quickly and effectively once you start folding and rolling. Use quick, sure motions with the rolling pin and don’t over work the dough. Also, make sure you aren’t stretching the dough when folding it over. This could create super thin layers of dough that tear easily or cause the butter to peek through when rolling.