
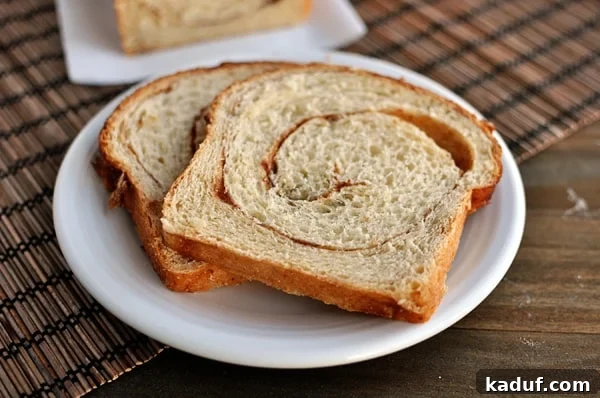
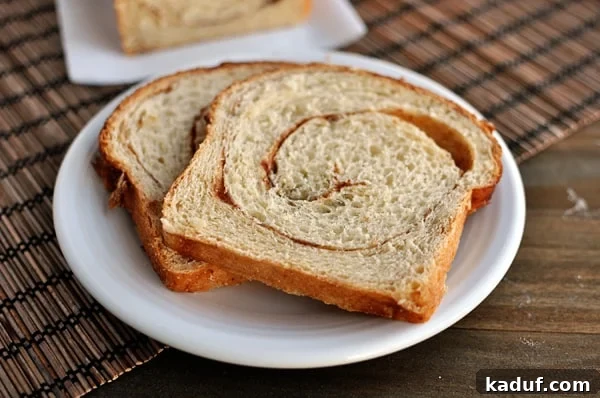
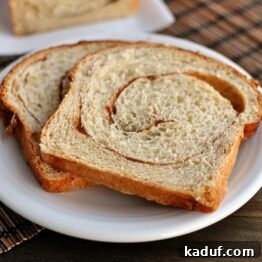
Experience the unparalleled joy of baking with this delightfully fragrant, homemade cinnamon swirl bread. Perfect fresh from the oven, and even more divine when toasted, this recipe promises to become a cherished favorite in your kitchen.
For years, I’ve passionately pursued two fundamental goals: to nurture kind, empathetic children, and to empower every home baker to master the art of yeast bread. While my first goal remains a beautiful, ongoing journey (especially the “sweet-smelling” part!), the second is a mission I’m dedicated to achieving through clear, encouraging, and foolproof recipes.
My journey to demystify yeast baking led me to create a series of step-by-step guides for various breads. We explored everything from crafting perfect homemade bagels and rustic ciabatta bread to understanding the basics of whole wheat bread. Then, life intervened, as it often does. The arrival of baby number five brought a brief hiatus to my detailed bread tutorials.
But now, I’m thrilled to be back, more committed than ever to proving that baking bread from scratch doesn’t have to be intimidating. It’s a skill anyone can conquer, and the rewards are immeasurable. Today, we’re diving into a beloved classic: the irresistibly delicious cinnamon swirl bread. This post focuses heavily on the crucial shaping and rolling techniques that ensure those iconic, perfect swirls.
For those new to yeast baking, or anyone looking to perfect their dough handling, I highly recommend revisiting this comprehensive guide on working with yeast. It covers everything from activating yeast to achieving the ideal dough texture, laying a solid foundation for all your bread-making adventures.
The Undeniable Charm of Homemade Cinnamon Swirl Bread
This cinnamon swirl bread isn’t just a recipe; it’s an experience. The moment its warm, sweet aroma fills your home, you’ll understand why it’s a staple in my kitchen. It’s more than just food; it’s comfort, a gesture of love, and a delightful treat all rolled into one.
I find myself baking this particular bread most often when I need a thoughtful homemade gift. Imagine welcoming a new neighbor with a warm loaf, celebrating a friend’s birthday with a sweet surprise, or adding a comforting touch to a take-in meal for a loved one. It’s also ideal for a new mom tray or as a heartfelt thank-you token. The versatility of this bread makes it perfect for any occasion where a homemade touch is appreciated.
While this bread is undeniably delicious fresh, its true magic shines when it’s transformed into toast. The warmth deepens the cinnamon flavor, and the edges crisp up beautifully. I often include a note with gifted loaves, explicitly stating: “This bread is divine as toast (or French toast!).” It’s a game-changer that elevates a simple breakfast into something truly special.
And for those lazy Saturday mornings, nothing beats having an extra loaf or two stashed in the freezer. Pulling out homemade cinnamon swirl bread and whipping up French toast “out of thin air” (or rather, from the freezer!) is the ultimate way to achieve instant rock star status with your family and friends. It’s convenience meets gourmet, without sacrificing an ounce of flavor or homemade goodness.
Crafting the Perfect Loaf: Dough and Technique
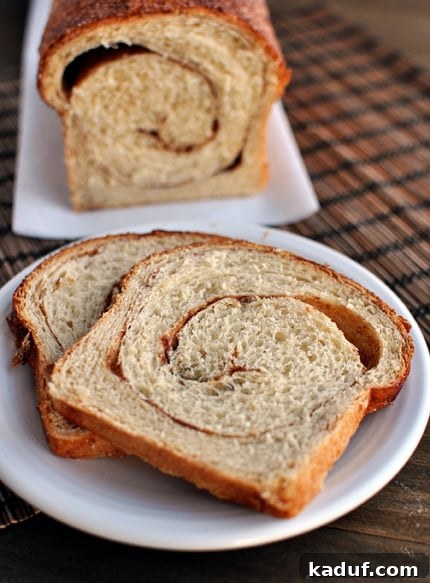
The dough for this cinnamon swirl bread differs significantly from my standard whole wheat bread recipes. This recipe calls for a richer, more tender dough, akin to a challah bread dough. This unique richness contributes to a softer crumb and a truly show-stopping texture, making it ideal for the delicate cinnamon swirls and ensuring every bite is a luxurious experience.
However, the beauty of this recipe extends beyond its specific dough. The detailed method for achieving those perfect cinnamon swirls is remarkably adaptable. You can easily apply these shaping and rolling techniques to your favorite whole wheat or even a more basic white bread dough. This means you can customize the base while still enjoying the stunning visual appeal and delightful flavor distribution of a perfectly swirled loaf.
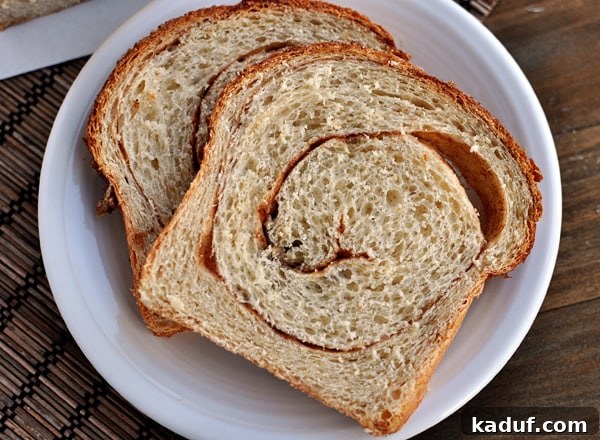
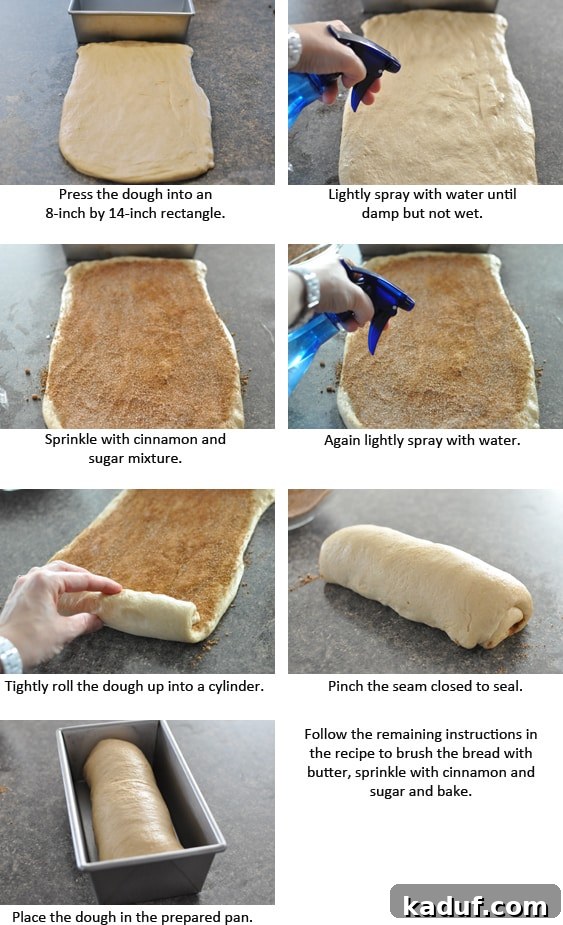
The key to those mesmerizing swirls lies in the precise shaping and rolling. The tutorial photos specifically guide you through this process, emphasizing how to roll the dough as tightly as possible. This meticulous rolling is crucial for preventing gaps in the swirl during baking, ensuring a beautiful, consistent pattern throughout each slice. Don’t worry if it’s not absolutely perfect on your first try; even with a few small gaps, the bread will still be incredibly delicious.
Upcoming Insights: The World of Wheat and Grinding
On a related note, I’m currently developing an in-depth tutorial exploring the fascinating world of wheat and home wheat grinding. Many might perceive this topic as mundane, but I assure you, it’s anything but! Grinding your own wheat opens up a new dimension of freshness, flavor, and nutritional benefits for your baked goods.
If you have any questions about wheat types, the benefits of fresh milling, choosing a grain mill, or any other aspect of this subject, please share them with me. I’ll be sure to address them in the upcoming post. Trust me, it’s going to be an incredibly informative and surprisingly fun deep dive into an essential element of exceptional baking!
One Year Ago: Rosemary Chicken and Wild Rice
Two Years Ago: Magical Layered Brownies
Three Years Ago: Delmonico Potato Bake
Cinnamon Swirl Bread Recipe
Yield: 3 loaves
Prep Time: 2 hours
Cook Time: 1 hour
Total Time: 3 hours
Pin Recipe
Ingredients
- 1 cup (212 g) granulated sugar
- ½ cup (106 g) packed light brown sugar
- 2 ½ tablespoons cinnamon
- 2 ½ cups warm milk, about 110 degrees or warm to the touch, but not hot
- 6 tablespoons (85 g) melted butter
- 3 large eggs
- 8 cups (1136 g) all-purpose flour (see note)
- 1 ½ tablespoons instant yeast
- 2 teaspoons salt
- Spray bottle filled with water
- 2 tablespoons (28 g) melted butter for brushing the top of the bread
Instructions
-
In a small bowl, mix together the granulated and brown sugar. Stir in the cinnamon. Measure out 4 tablespoons of this mixture and set it aside for sprinkling on the finished bread.
-
In a large liquid measuring cup or bowl, whisk together the warm milk, melted butter, and eggs until well combined. In the bowl of a stand mixer fitted with the dough hook attachment (or in a large bowl if kneading by hand), combine 6 cups of the all-purpose flour, instant yeast, salt, and ½ cup of the prepared cinnamon-sugar mixture. With the mixer on low speed, gradually add the milk mixture and mix until a cohesive dough forms. Increase the speed to medium, adding more flour, one tablespoon at a time, as necessary until the dough begins to clear the sides of the bowl but still remains slightly sticky to the touch. Knead the dough (in the mixer or vigorously by hand) until it becomes smooth and elastic, which typically takes about 6-8 minutes in a stand mixer or approximately 15 minutes if kneading by hand.
-
Transfer the kneaded dough to a large, lightly greased bowl. Turn the dough once to ensure it’s coated in grease, then cover the bowl tightly with greased plastic wrap. Allow the dough to rise in a warm place until it has doubled significantly in size, a process that usually takes about 1 to 1 ½ hours, depending on your kitchen’s temperature and humidity.
-
While the dough is rising, grease three 8 ½-inch by 4 ½-inch bread pans. Once the dough has risen, gently turn it out onto a lightly greased work surface. Divide the dough into three equal pieces. Working with one piece of dough at a time, gently press and shape it into an 8-inch by 14-inch rectangle. Lightly spray the entire surface of the dough with water – just 1-2 quick, light sprays. The goal is a very fine mist across the dough, not puddles of water. Evenly sprinkle the dough with one-third of the remaining cinnamon-sugar mixture, ensuring you leave a ½-inch border along one of the short edges of the rectangle. Gently press the cinnamon-sugar mixture into the dough with your fingertips. Once again, lightly mist the cinnamon-sugar-covered dough with water (1-3 sprays), being careful to avoid puddling.
-
Starting with the short edge that does not have the border, tightly roll the dough into a cylinder. The key here is to roll as snugly as possible to minimize any gaps in the final swirl. Don’t worry if it’s not absolutely perfect; minor imperfections are common. Once rolled, pinch the seam firmly closed along the entire length of the loaf. Place the rolled loaf, seam side down, into one of the prepared bread pans. Repeat this process with the remaining two pieces of dough. Cover the filled pans loosely with lightly greased plastic wrap and let them rise again until nearly doubled in size, which should take approximately one hour.
-
Preheat your oven to 350°F (175°C). Just before baking, very gently brush the tops of each risen loaf with the 2 tablespoons of melted butter. Then, evenly sprinkle the reserved 4 tablespoons of cinnamon-sugar mixture over the tops of the loaves. Bake for 40-60 minutes, or until the bread is golden brown and baked through (an internal temperature of 200-210°F or 93-99°C is ideal). If you notice the tops browning too quickly, loosely tent each loaf with a piece of aluminum foil to prevent over-browning. Once baked, remove the pans from the oven and let the loaves cool in the pans for precisely 10 minutes (cooling for too long can cause them to stick). After 10 minutes, carefully turn the loaves out onto a wire rack to cool completely before slicing and serving.
Notes
Halving the Recipe: This recipe can be easily halved to yield one loaf, which can be baked in a larger 9-inch by 5-inch bread pan.
Flour Amount Variation: As with all yeast dough recipes, the exact amount of flour required can vary significantly. Factors such as humidity levels, ambient temperature, and even altitude can impact how much flour your dough needs. For this reason, I always recommend judging the flour amount by the dough’s texture and feel rather than strictly adhering to the recipe’s specified quantity (unless a precise weight measure is provided, in which case a kitchen scale is invaluable). Use the 8 cups of all-purpose flour as a guideline, adding more only until the dough achieves a smooth, elastic, and slightly sticky consistency.
Understanding Yeast and Dough Texture: If you’re unsure about what a “perfectly floured dough” should look like or how to properly work with yeast, refer to this comprehensive yeast tutorial. Additionally, I’ve had excellent results using a blend of half all-purpose flour and half whole wheat flour in this recipe, offering a slightly heartier loaf without compromising texture.
Author: Mel
Course: Bread
Cuisine: American
Method: Bake
Recommended Products
Recipe Source: adapted from The Cook’s Country Cookbook