
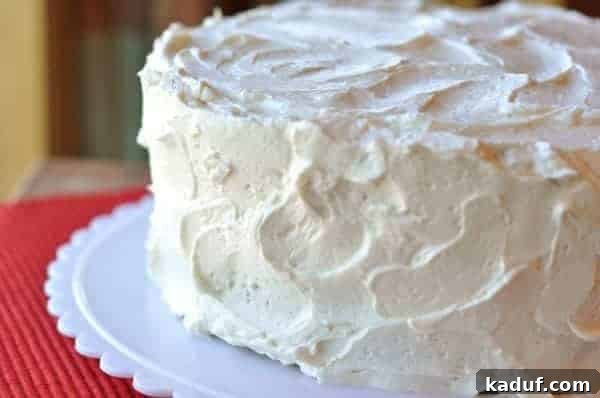
Welcome to the ultimate guide for what might just be the most exquisite frosting you’ll ever encounter. Forget everything you thought you knew about buttercream—the overly sweet, often greasy, and sometimes dense concoctions that can overpower a delicate cake. This isn’t just a recipe; it’s a revelation. This is the frosting that transforms desserts, elevating them from merely delicious to truly unforgettable. While it asks for a touch more foresight than your everyday powdered sugar and butter mixture, the unparalleled results are unequivocally worth every minute of preparation.
For years, many of us have been on a relentless quest for the perfect frosting. We’ve endured countless batches of traditional American buttercream that, despite their ease, often leave a cloying, sugary film on the palate. We’ve experimented with various meringue-based frostings, seeking that elusive balance of sweetness and texture. Yet, so often, the dream of a light, fluffy, and truly creamy frosting remains just out of reach. That is, until now. Prepare to have your culinary world, and particularly your dessert experience, utterly transformed by this incredible creation, often affectionately dubbed “Magical Frosting.”
Discovering the Pinnacle of Frosting Excellence
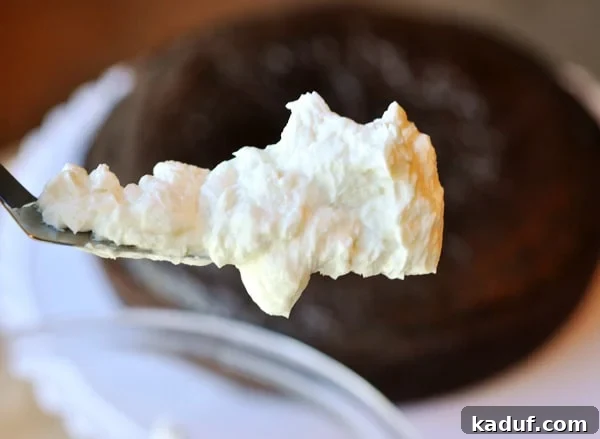
It’s rare to find something that truly leaves you speechless, especially in the realm of food where opinions flow freely. Yet, the first taste of this extraordinary frosting has that exact effect. It silences critics, converts skeptics, and instantly elevates itself to legendary status. This isn’t merely ‘good’ frosting; it’s quite simply the best frosting I have ever tasted in my entire life, redefining what creamy, sweet perfection truly means.
You might have seen variations of flour-based frostings circulating in the culinary world, sometimes known as Ermine Frosting or Cooked Flour Frosting. My own journey to this perfect recipe was not without its bumps. I previously attempted a popular version highlighted by a well-known blogger, and despite my best efforts, both attempts ended in disappointing disasters. I had almost resigned myself to the idea that these so-called “miracle” frostings were simply not for me. But fate, and a new recipe, intervened. When I stumbled upon this particular adaptation, I decided to give it one last chance, and the outcome left me truly stunned – weak and trembling from sheer delight, no less.
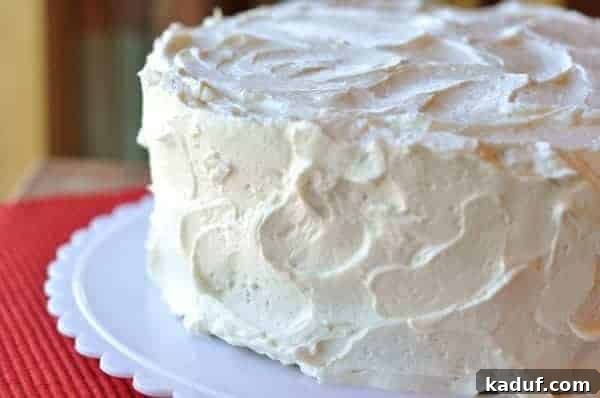
And for those who cherish indulgence, imagine this: there’s an equally divine chocolate version of this frosting. The thought alone is enough to send a shiver of pure bliss down your spine. I recently had the pleasure of lavishly spreading this frosting onto the most decadent cake I’ve baked to date, and the experience was nothing short of magical. The texture, a delicate web of fluffy, creamy sweetness, is simply beyond description. It adheres beautifully, melts harmoniously with each bite, and imparts a richness without any heaviness.
As a self-professed frosting hater, my endorsement of this recipe carries significant weight. I genuinely despise the pervasive greasy, filmy residue, and the overwhelming sweetness often found in traditional buttercreams. Even the more adventurous seven-minute or marshmallow frostings of the world have consistently left me wanting something more refined, less intense. But this frosting… ah, this frosting is a different breed entirely. It effortlessly earns its place in the coveted ‘Best Recipe’ category, without a shadow of a doubt. It’s the kind of discovery that makes you rethink your entire approach to dessert.
What Makes This Cooked Flour Frosting So Magical?
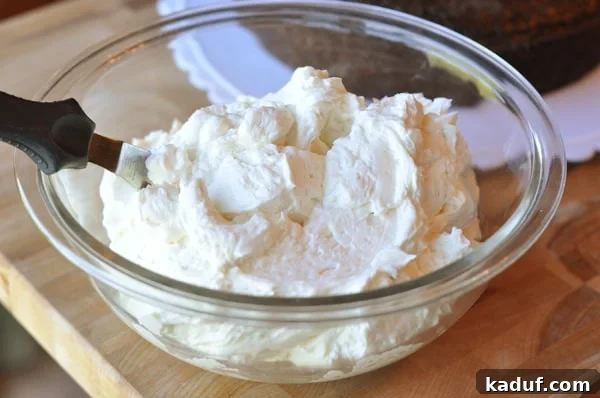
The secret to this frosting’s unparalleled texture and taste lies in its unique preparation method: a cooked flour base. Unlike traditional buttercreams that rely heavily on powdered sugar for structure, this recipe begins by cooking a mixture of milk, sugar, flour, and cornstarch into a thick, pudding-like paste. This paste is then cooled completely before being whipped with butter and vanilla. This crucial cooking step creates a stable, silky smooth foundation that is far less sweet than typical frostings and eliminates any grainy texture.
This method prevents the frosting from becoming overly sugary or greasy. The starch in the flour and cornstarch binds with the liquids, creating a velvety, almost custard-like base. When this base is later whipped with softened butter, it emulsifies beautifully, resulting in an incredibly light, airy, and luscious frosting that melts in your mouth without any of the undesirable film or cloying sweetness often associated with conventional buttercreams. It’s a game-changer for anyone who finds most frostings too heavy or sugary.
Why You’ll Fall in Love with This Buttercream Alternative
If you’re tired of dense, tooth-achingly sweet frostings, this magical recipe is your salvation. Here’s why it stands head and shoulders above the rest:
- Perfectly Balanced Sweetness: The cooked flour base allows for significantly less sugar than traditional recipes, resulting in a frosting that enhances your cake without overpowering it.
- Velvety Smooth Texture: Say goodbye to gritty powdered sugar. This frosting boasts an unbelievably smooth, melt-in-your-mouth consistency that is simply divine.
- Never Greasy: The carefully balanced ratio of cooked base to butter prevents any greasy mouthfeel, delivering a clean, rich flavor experience.
- Incredibly Light and Airy: Despite its richness, the whipping process incorporates air, creating a wonderfully fluffy texture that is a joy to eat.
- Remarkably Versatile: This frosting is ideal for decorating cakes, piping onto cupcakes, filling pastries, or simply enjoying by the spoonful.
My prolonged search for the absolute best frosting has officially concluded. While I’ll be honest, this recipe demands a touch more effort and requires a bit more planning than merely throwing butter and powdered sugar into a mixer, I am confident in promising you that the magnificent results are genuinely worth every single minute spent. The true challenge now, for me, is ensuring that any of this delectable frosting actually makes it onto the cake before my eager lips inhale it all!
The Ingredients You’ll Need
Crafting this phenomenal frosting requires a handful of common baking staples, emphasizing quality for the best outcome. Fresh, high-fat butter will yield the creamiest results, and pure vanilla extract is non-negotiable for its aromatic depth. The precise measurements of sugar, flour, cornstarch, and milk are crucial for achieving the perfect consistency of the cooked base, which is the heart of this magical confection.
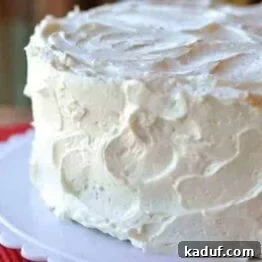
The Best Frosting {a.k.a. Magical Frosting}
4 cups frosting
1 hr 20 mins
10 mins
1 hr 30 mins
Ingredients
- 1 ½ cups (318 g) granulated sugar
- ¼ cup (36 g) all-purpose flour
- 3 tablespoons cornstarch
- ¼ teaspoon salt
- 1 ½ cups milk (I use 1% or 2%)
- 2 teaspoons pure vanilla extract
- 1 ½ cups (340 g) butter, cut into 24 pieces and softened at room temperature (I use salted butter)
Instructions
-
In a medium bowl, combine the granulated sugar, all-purpose flour, cornstarch, and salt. Whisk these dry ingredients together thoroughly to ensure they are well mixed and there are no lumps. Slowly whisk in the milk until the mixture is completely smooth and free of any lumps. Place a fine-mesh strainer over a medium saucepan and pour the milk mixture through the strainer into the saucepan. This step ensures an incredibly smooth base, preventing any flour lumps in the final frosting. Cook the mixture over medium heat, whisking constantly. It is crucial to whisk continuously to prevent scorching and ensure even thickening. Continue cooking until the mixture boils and thickens significantly, becoming somewhat difficult to whisk easily. This process can take anywhere between 5-10 minutes, varying based on your stove’s heat and the saucepan used. By the end, it should bubble quite vigorously (be cautious of splatters!) and achieve a considerably thick, pudding-like consistency.
-
Immediately transfer the thickened mixture to a clean, shallow bowl. Press plastic wrap directly onto the surface of the mixture to prevent a skin from forming. Allow it to cool completely to room temperature. This cooling step is paramount; if the mixture is even slightly warm, the frosting will not emulsify correctly and will likely separate. For best results, consider refrigerating the mixture overnight. If you opt for overnight chilling, ensure you remove it from the refrigerator with ample time to allow it to return to perfect room temperature before proceeding. Attempting to incorporate butter into a cold base will prevent proper absorption and result in a curdled, rather than fluffy, frosting.
-
Once the cooked flour mixture has reached a true room temperature (meaning no hint of warmth whatsoever!), place it in the bowl of a stand mixer fitted with the whisk attachment. Beat the mixture on low speed with the pure vanilla extract for about 30 seconds until well combined. Gradually add the softened butter, one piece at a time, allowing each piece to fully incorporate before adding the next. Continue beating until all the butter has been absorbed, which typically takes about 2 minutes. Increase the mixer speed to medium-high and let it work its magic. Beat the frosting for a full five minutes. During this time, the mixture will transform from a somewhat curdled appearance to an incredibly light, fluffy, and smooth frosting. The volume will increase noticeably. For optimal spreadability and stability, allow the finished frosting to sit at room temperature for about 1 hour to stiffen slightly. This rest period helps the frosting achieve a firmer yet still incredibly pliable consistency, making it easier to work with. If you desire a consistency suitable for piping intricate decorations, chilling it for an hour or so will likely provide the necessary firmness.
Notes
Frosting Storage & Rewhipping: While some recipes suggest this frosting can be refrigerated and rewhipped, my personal experience has been consistently disappointing. Each time I’ve tried to refrigerate and re-beat it, the frosting separates and loses its satiny, delicious texture. Therefore, in good faith, I recommend making and using this frosting fresh for optimal taste and consistency. You may find different results, but my experience dictates fresh use.
Piping the Frosting: For those who enjoy piping intricate designs on cakes (like I do for my kids’ birthday creations), I highly suspect that allowing the frosting to chill for an hour or so will give it the ideal firmness for piping. Although I haven’t personally tested it for piping yet, I will be trying it soon and will update this recipe with my specific observations and tips.
Decadent Chocolate Version: To create a rich chocolate frosting, simply add ¼ cup of unsweetened cocoa powder to the sugar, flour, cornstarch, and salt mixture in the first step. Once the frosting has been mixed for five minutes and is light and fluffy, gently fold in 3 ounces of semi-sweet chocolate that has been melted and then completely cooled to room temperature. This yields a delightful, lighter-colored chocolate frosting with a deep, terrific chocolate flavor. For an even more intense chocolate experience, I’ve found increasing the melted chocolate to 4 ounces, or even 5 ounces, produces spectacular results.
Mel
Dessert
American
Stovetop
Recommended Products
Recipe Source: Adapted slightly from Cook’s Country Oct/Nov 2010
Advanced Tips & Flavor Variations for Your Magical Frosting
Mastering this magical frosting is about more than just following steps; it’s about understanding the nuances that elevate it from great to extraordinary. Here are some advanced tips and exciting flavor variations to explore:
The Art of Patience: Cooling is Key
As emphasized in the instructions, the cooling of the flour-milk paste to absolute room temperature is non-negotiable. If it’s even slightly warm, the butter will melt, leading to a soupy, separated mess. To speed up the cooling process, spread the mixture thinly on a baking sheet, cover it with plastic wrap pressed directly onto the surface, and place it in the refrigerator for about an hour, stirring halfway through. Just be sure it’s truly room temperature before whipping with butter.
Storage and Rewhipping Realities
While this frosting is breathtakingly delicious when fresh, its unique composition makes it less forgiving for storage and rewhipping. As noted, attempting to refrigerate and re-beat it often results in separation and a loss of its characteristic satiny texture. For this reason, it’s best to prepare and use this frosting on the day it’s needed. If you must store it short-term, cover it tightly at room temperature for a few hours. If refrigeration is unavoidable, you can try gently re-whipping it with a splash of milk or cream, but be aware that the original light, fluffy texture may be difficult to fully recapture.
Achieving Piping Perfection
For those who love to decorate, this frosting has the potential for beautiful piping. After the final whipping stage, if the frosting feels a little too soft for intricate designs, simply refrigerate it for about 30-60 minutes. This chilling time will firm it up to a pipeable consistency. Keep an eye on it, as over-chilling can make it too stiff. If it becomes too firm, let it sit at room temperature for a few minutes or beat it briefly on low speed until it’s pliable again.
Decadent Chocolate Version: A Deeper Dive
The chocolate variation is a true indulgence. When adding cocoa powder in the first step, choose a high-quality unsweetened cocoa for the best flavor. For the melted chocolate addition, consider using semi-sweet or bittersweet chocolate chips or chopped baking chocolate. Ensure the melted chocolate is completely cool to avoid melting the butter in the frosting. For an extra rich, dark chocolate frosting, you can increase the cocoa powder to 1/3 or even 1/2 cup and use up to 5 ounces of melted bittersweet chocolate. This creates a deeply satisfying flavor profile that chocolate lovers will adore.
Beyond Vanilla: Other Flavor Ideas
The versatility of this base allows for endless flavor explorations:
- Citrus Zest: Add 1-2 tablespoons of finely grated lemon, orange, or lime zest during the final whipping stage for a bright, refreshing flavor.
- Almond Extract: Substitute half or all of the vanilla extract with almond extract for a delicate, nutty aroma.
- Coffee: Dissolve 1-2 teaspoons of instant espresso powder in the milk before cooking the paste for a rich coffee-flavored frosting, perfect for chocolate cakes.
- Fruit Purees: Carefully fold in a few tablespoons of thick, strained fruit puree (like raspberry or strawberry) at the end, ensuring it’s not too watery to maintain consistency.
Troubleshooting Common Issues
- Frosting Looks Curdled: Don’t panic! This is a common stage when adding butter. Keep beating on medium-high speed. The mixture will eventually come together and become smooth and fluffy. This can take longer than you expect, so be patient.
- Frosting Too Soft: If your kitchen is warm or your butter was too soft, the frosting might be a little loose. Refrigerate the entire bowl for 15-20 minutes, then re-whip.
- Frosting Too Stiff: If it’s too firm, let it sit at room temperature for 10-15 minutes, then beat again on low speed until it reaches the desired consistency.
Pairing Your Magical Frosting
This versatile frosting pairs beautifully with an array of desserts. Its light and balanced sweetness make it an ideal companion for rich chocolate cakes, classic vanilla bean cakes, or vibrant red velvet creations. It’s equally spectacular on cupcakes, providing a delightful contrast to the cake’s crumb without overwhelming the palate. You can also use it as a filling for layer cakes or even delicate sandwich cookies, adding a touch of gourmet elegance to any sweet treat.
Embrace the Magic
This truly magical cooked flour frosting represents a pinnacle in home baking. It offers a sophisticated alternative to traditional buttercreams, promising a dessert experience that is light, fluffy, creamy, and perfectly sweet. While it may require a little extra care and attention, the extraordinary results are an undeniable reward. So, gather your ingredients, follow these steps with patience, and prepare to be utterly captivated by the best frosting you’ve ever had. Your cakes, and your taste buds, will thank you.