
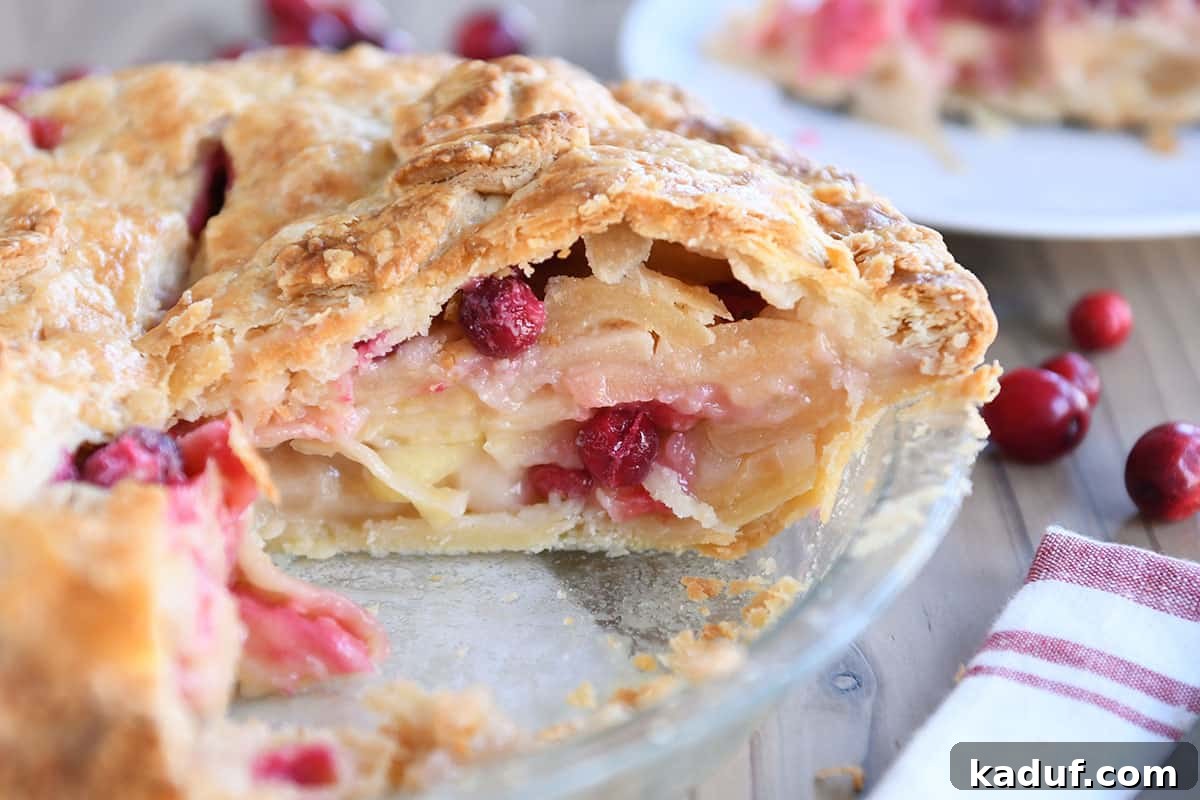
Indulge in the ultimate holiday dessert with this extraordinary Apple Cranberry Pie. Combining the tender sweetness of apples with the vibrant, tart burst of cranberries, all enveloped in a rich, caramelly filling and a perfectly flaky crust, this pie is destined to become your new Thanksgiving tradition. It’s a symphony of flavors and textures that truly shines on any dessert table.
For years, I’ve held a deep affection for classic apple pie. It’s a timeless dessert, comforting and familiar. However, a couple of years ago, a delightful revelation occurred in my kitchen: the addition of tart cranberries to this beloved classic. This simple twist transformed a well-loved recipe into something truly spectacular. The result was an apple cranberry pie that not only captured the hearts of everyone at our Thanksgiving feast but also quickly eclipsed all other desserts, claiming the coveted title of “favorite pie.”
The initial success was so overwhelming that I dedicated the following year to meticulously refining the recipe. I tweaked proportions, experimented with techniques, and baked countless pies, all in pursuit of perfection. This rigorous testing ensured that every bite was an exquisite balance of flavors – from the comforting sweetness of baked apples to the tangy pop of cranberries, all bound together by a luscious, caramel-infused filling. It became a staple, gracing our Thanksgiving table once again, and even making a festive appearance at Christmas.
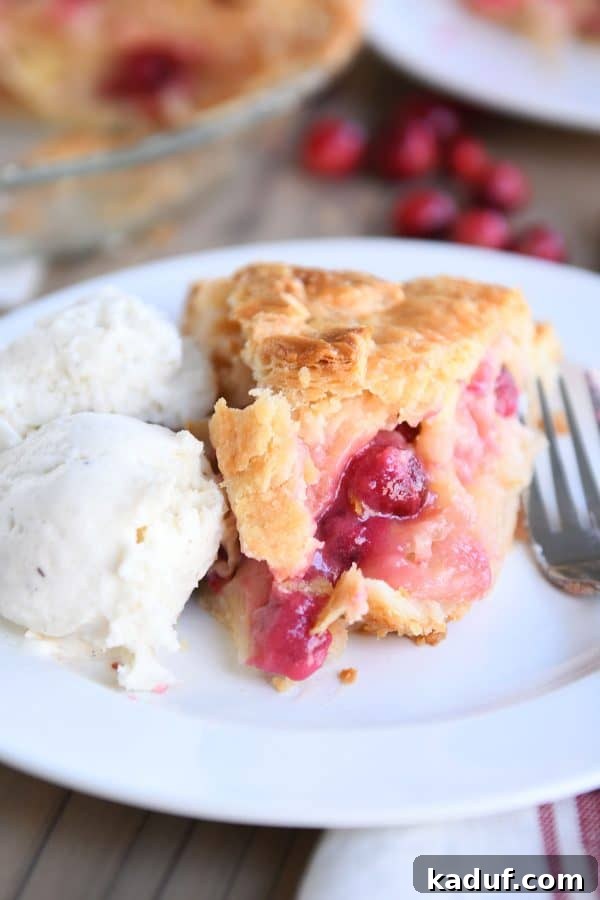
Last year, despite my best intentions, the demands of life intervened, and I couldn’t share this exceptional recipe with you. It’s a common tale in the world of blogging, where creativity often juggles with chaotic schedules. I truly apologize for the delay, because this isn’t just *a* pie; it’s *the* pie that deserves a place at your Thanksgiving celebration. This year, I’m making amends. I’m presenting this recipe with ample time for you to incorporate this incredible Apple Cranberry Pie into your holiday menu. Trust me, you’ll be so glad you did.
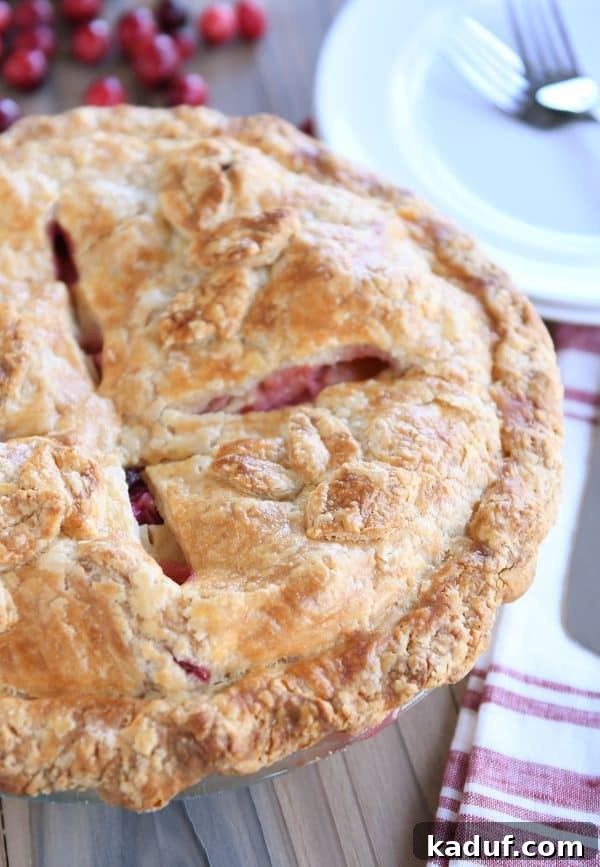
Why This Apple Cranberry Pie is a Holiday Must-Have
While apple pie has always been a beloved classic, the addition of cranberries elevates it to an entirely new level. The magic lies in the delightful contrast they bring. Apples provide a comforting sweetness and tender texture, while cranberries introduce a gloriously tart counterpoint. This bright acidity cuts through the richness of the sweet, caramelly filling, creating a harmonious and incredibly complex flavor profile that tantalizes the taste buds. It’s a combination that’s not just good; it’s extraordinary, leaving a lasting impression long after the last bite.
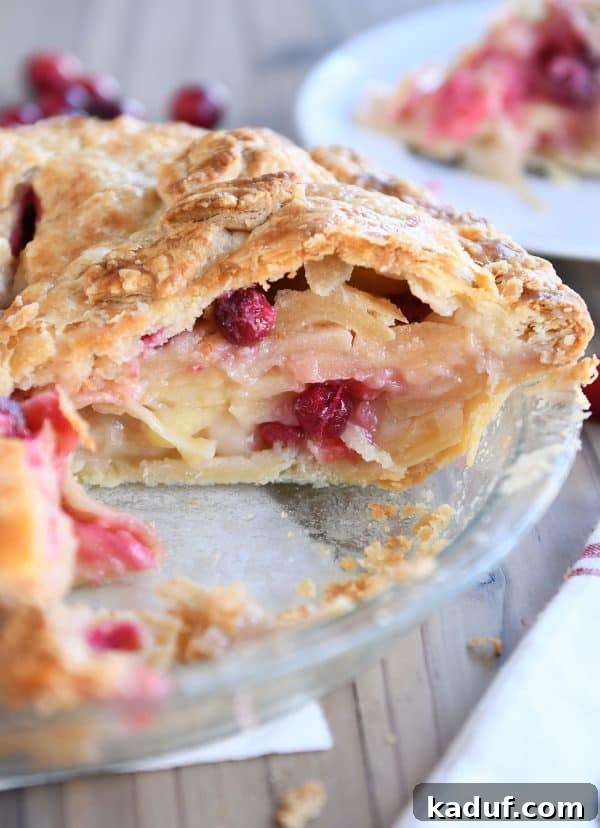
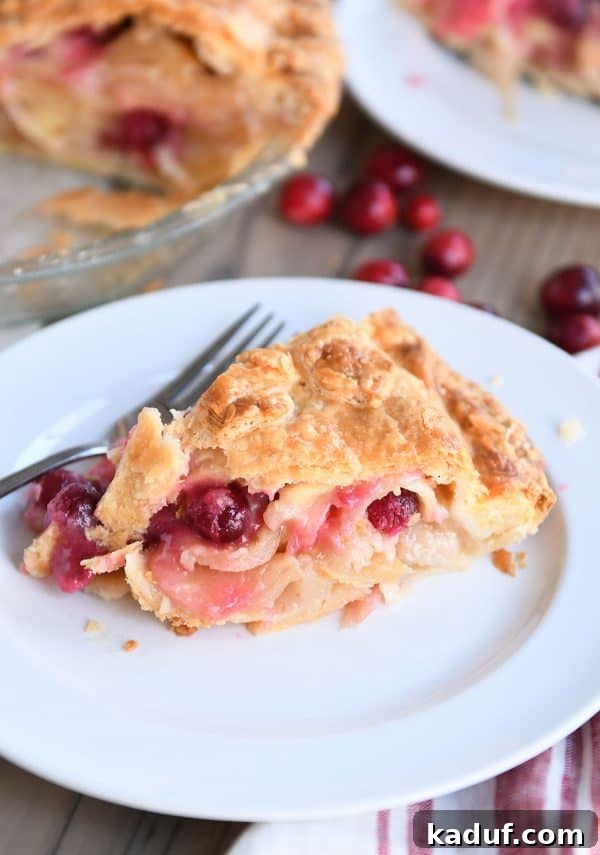
This dynamic duo of apple and cranberry isn’t just about flavor; it’s also about visual appeal. The cranberries burst during baking, releasing their vibrant red juices, which then mingle with the golden apple slices and caramel sauce. The result is a stunning interior that’s as beautiful to look at as it is delicious to eat. It’s a true celebration of seasonal produce, perfectly encapsulating the essence of autumn and holiday feasting.
Another essential ingredient that contributes to this pie’s unique charm is almond extract. I admit, I’ve historically been hesitant to use almond extract, often finding its flavor too dominant in many recipes. However, in this particular pie, a subtle hint of almond extract adds an unexpected depth and warmth without overpowering the primary fruit flavors. It’s that secret ingredient that makes people wonder, “What *is* that special flavor?” Don’t be tempted to skip it, unless, of course, you have an allergy. It truly makes a difference, much like its role in my favorite cherry pie recipe, where it provides a necessary aromatic backdrop.
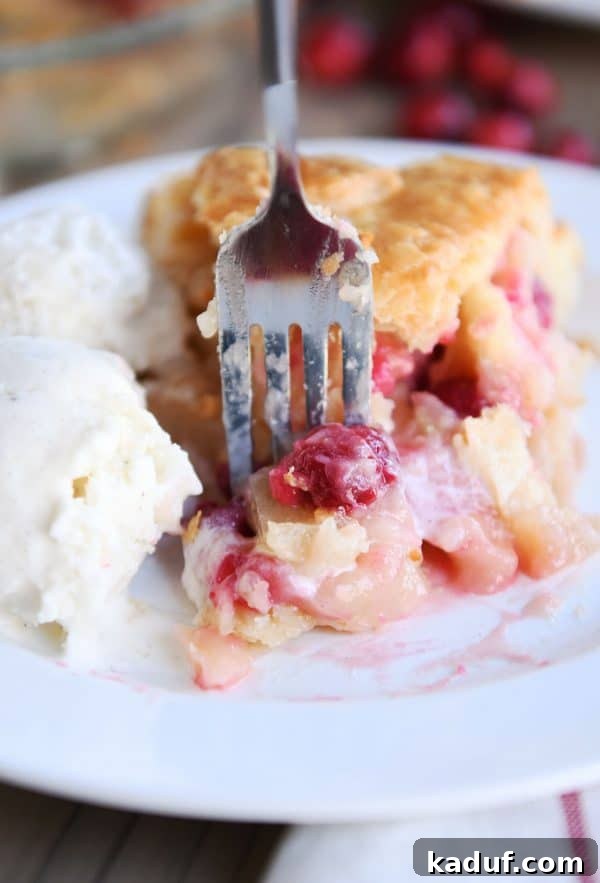
Choosing the Perfect Apples for Your Pie
The type of apples you choose can significantly impact the final texture and flavor of your pie. For this recipe, I almost exclusively use Honeycrisp apples. Their firm texture holds up beautifully during baking, preventing the apples from turning into a mushy consistency, and their balanced sweet-tart flavor complements the cranberries wonderfully. However, feel free to experiment with other varieties or even a combination to find your personal favorite.
When selecting apples, the golden rule is to opt for crisp, firm varieties that maintain their structure in the oven. Excellent choices include Braeburn, Fuji, Gala, or even a mix of several. If you prefer a tarter pie, Granny Smith apples are a classic choice, but I recommend pairing them with a sweeter apple to balance the acidity, and you might want to halve the amount of lemon juice called for in the recipe. Avoid softer apples like Red Delicious or Macintosh, as they tend to break down too much, leading to a watery filling.
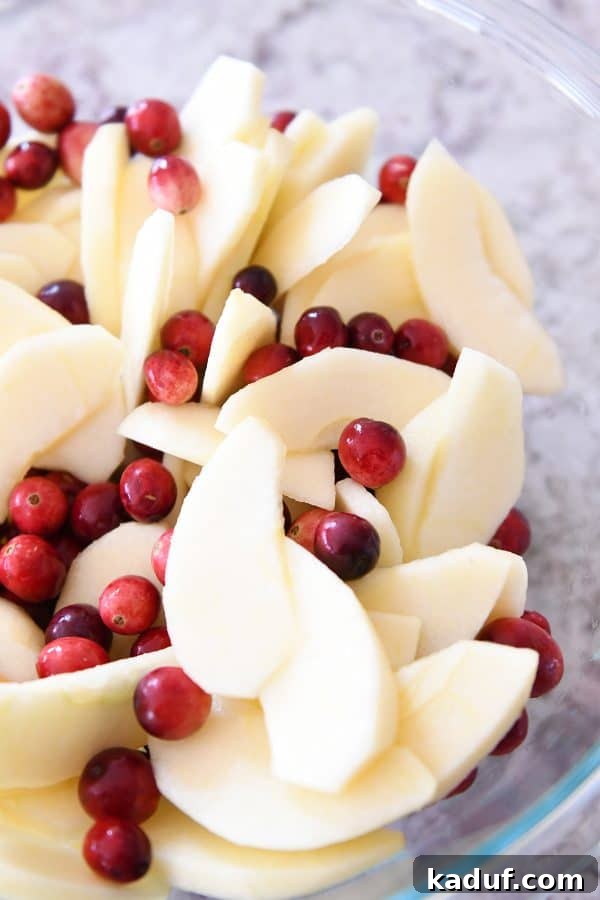
Once peeled and cored, I slice the apples to approximately 1/8-inch thick. This uniform thickness ensures even cooking. After slicing, they are tossed with lemon juice, almond extract, and a pinch of salt. The lemon juice helps prevent oxidation and brightens the flavors, while the almond extract, as mentioned, adds that subtle complexity. The cranberries are then added and gently mixed in. It’s crucial to have your apples and cranberries prepped and ready in the bowl, as the caramel sauce needs to be poured over them immediately after it’s finished simmering to achieve the best results.
Crafting the Perfect Caramel Sauce Filling
What sets this apple cranberry pie apart from many traditional apple pies is its unique filling. Instead of merely tossing the fruit with flour, tapioca, or cornstarch as a thickener, this recipe features a rich, buttery caramel sauce. Yes, it’s an extra step, but I assure you, it’s an effort that pays dividends in unparalleled flavor and texture. The sauce not only thickens the filling but also infuses it with a deep, caramelly sweetness that complements the tart fruit beautifully.
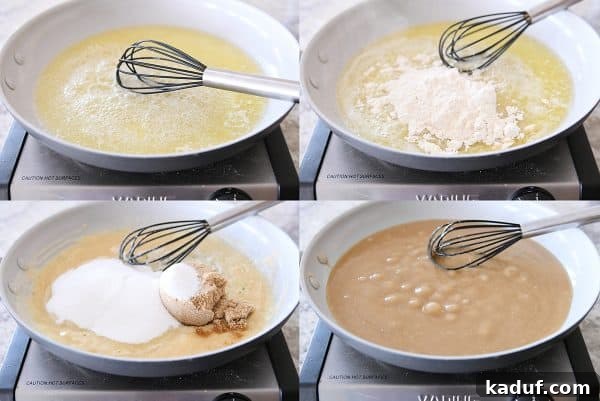
The process for making this sauce is surprisingly straightforward. You begin by melting butter in a saucepan or skillet over medium heat. Once melted, flour is stirred in, creating a roux. This mixture is whisked constantly until it’s smooth and thick, forming the base of our luscious sauce. Then, granulated and brown sugars are added, along with a touch of water. The mixture is brought to a gentle simmer and cooked for just a minute or two, whisking continuously, until it becomes bubbly and reaches a thick, glossy consistency. The brown sugar contributes to the rich caramel notes, adding an extra layer of flavor complexity.
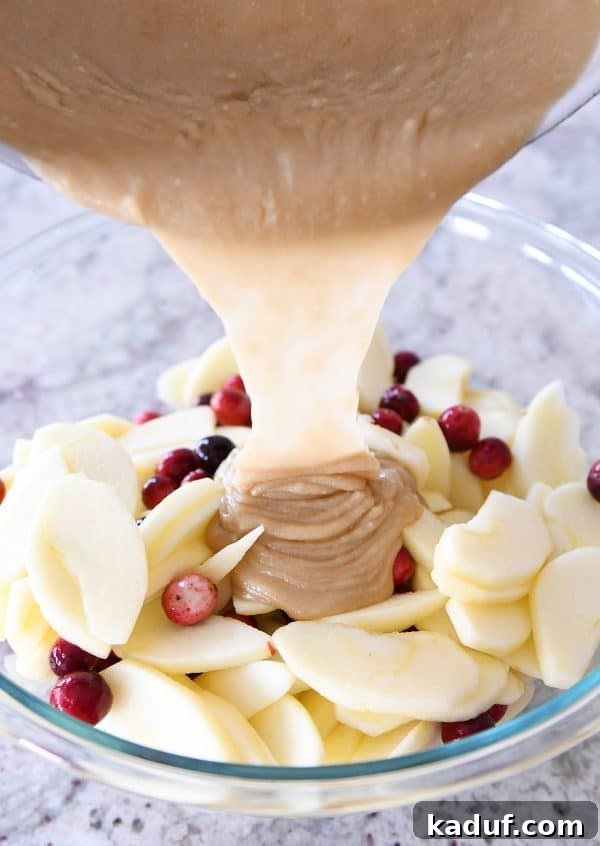
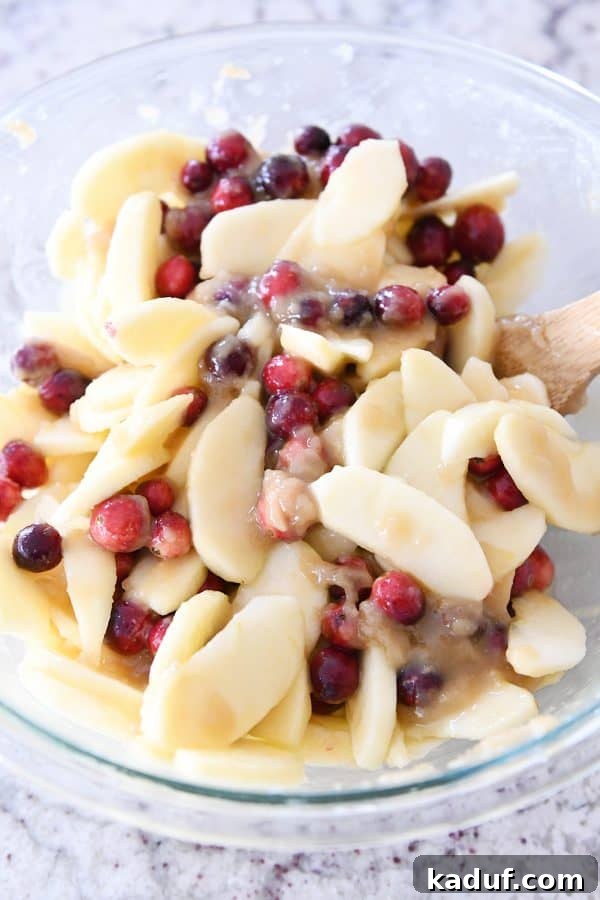
The key to success with this sauce, as highlighted earlier, is its immediate application. Once the sauce is ready, it must be poured directly over the prepped apples and cranberries. It’s important to work quickly because the sauce will begin to thicken and crystallize as it cools. When the warm, syrupy sauce hits the cold fruit, you might notice it clumping slightly – don’t panic! This is completely normal and expected. Just toss everything together as thoroughly as you can. As the mixture sits while you prepare your pie crust, the natural juices released from the apples will gradually thin out the sugary sauce, ensuring every piece of fruit is evenly coated in that delicious caramel goodness.
The Foundation: Perfecting Your Pie Crust
A truly exceptional pie requires an equally exceptional crust. For my homemade pies, I consistently turn to this tried-and-true recipe, known for its incredible flakiness and rich buttery flavor. Whether you opt for a homemade masterpiece or a quality store-bought crust, the most important thing is to ensure you have enough dough for a double-crust pie, as this recipe calls for both a bottom and a top crust.
While a traditional top crust is wonderful, a crumble or streusel topping would also be absolutely delicious on this pie! Imagine the textural contrast of a buttery, crunchy topping against the soft, caramelly fruit filling. Perhaps a crumble topping from an apple crumb pie or the rich streusel from a strawberry rhubarb pie. If you try this, please let me know how it turns out!
For a traditional double-crust pie, begin by rolling out the bottom crust. Gently lift it and carefully tuck it into your pie plate, taking care not to stretch or pull the dough. Stretching can cause the crust to shrink during baking. Leave about an inch or so of overhang around the entire rim of the pie plate. If you need a little extra guidance on making and rolling out pie crust, check out this helpful pie-making tutorial.
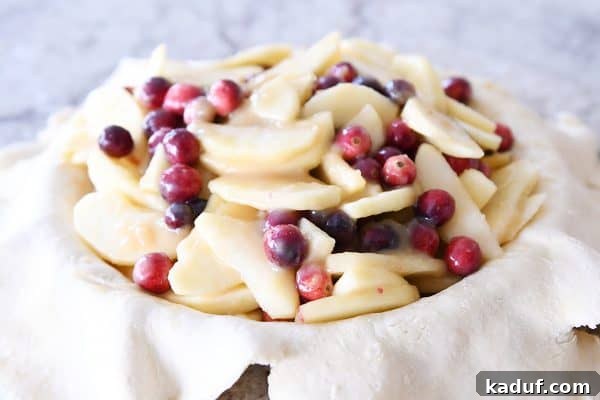
Once the bottom crust is in place, carefully scrape the apple and cranberry filling, making sure to get every last drop of that amazing caramel sauce, into the pie plate. It will likely be piled quite high, but don’t worry; the fruit will cook down and settle as it bakes. Next, roll out your top crust and carefully place it over the filling. Trim the top crust so it’s even with the bottom crust, leaving about a 1/2-inch overhang. Then, fold the bottom crust up and over the edge of the pie plate, pressing or pinching the two crusts together to create a secure seal. For a visual reference on this sealing technique, you can look at photos from my cherry pie recipe.
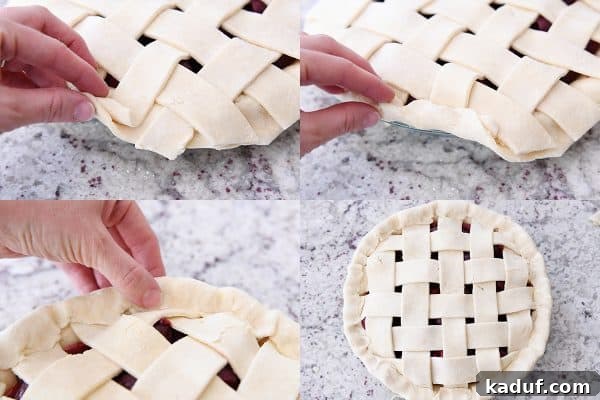
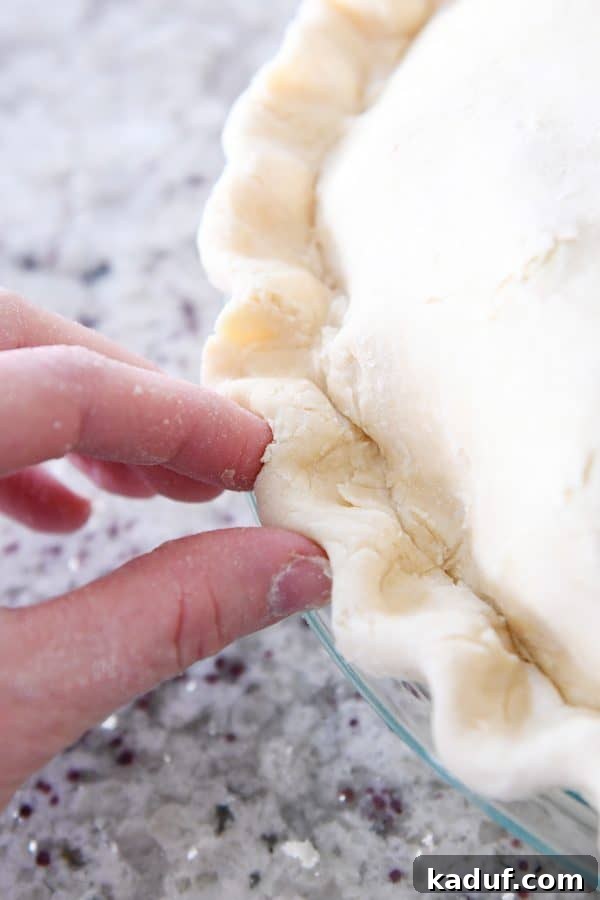
Finally, flute the edges of your pie crust for a classic, decorative finish. While a picture-perfect flute is lovely, remember that homemade charm often lies in its slight imperfections. As I’ve grown older, I’ve embraced the beauty of “imperfect pies” – they’re made with love, and that’s what truly counts!
The Importance of Slits: Ensuring a Perfectly Baked Pie
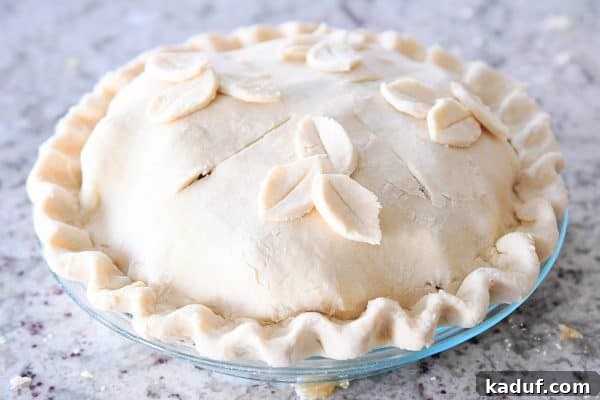
Before baking, take a sharp paring knife and cut four slits into the top crust of your pie. This isn’t just for aesthetics; it serves a crucial purpose. These slits act as vents, allowing steam to escape from the hot filling as the pie bakes. Without these escape routes, the steam would build up, potentially causing the crust to puff up or even crack unevenly. Proper venting ensures that your filling cooks evenly and that your crust remains beautifully crisp and flaky.
The slits also provide a convenient way to monitor the baking progress. You can carefully peek into them to check on the bubbling filling and assess the tenderness of the fruit without having to cut into the pie. Sometimes, I like to get a little creative and cut small decorative shapes from any leftover pie dough, like leaves or stars. These can be placed on the top crust for an extra touch of flair. To help them adhere during baking, simply brush the back of the shapes with a little egg wash before placing them on the pie.
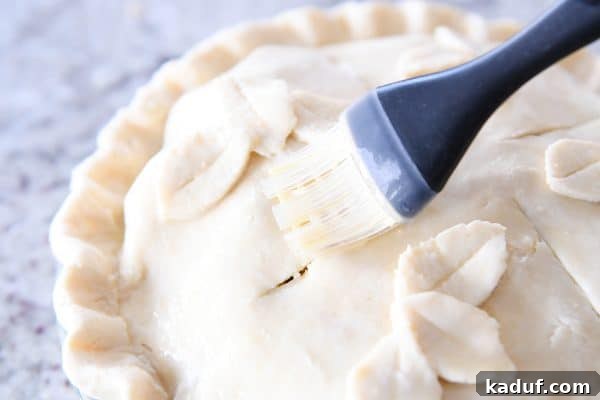
Speaking of egg wash, it’s highly recommended to brush the entire top surface and edges of your pie crust with a simple egg wash (a whisked egg mixed with a tablespoon of water). This step is purely cosmetic but makes a significant difference in the final appearance. The egg wash contributes to a gorgeous golden-brown hue and a subtle sheen, making your pie look professionally baked and utterly irresistible.
Baking Tips for a Stress-Free Pie Experience
Here’s a small but mighty tip that will save you a lot of hassle and cleanup: **always place your unbaked pie on a foil-lined baking sheet.** This step is non-negotiable for homemade pies, especially those with a juicy fruit filling like this apple cranberry delight. As the pie bakes and the filling cooks, it will inevitably bubble and often spill over the edges, even if only slightly. Cleaning sticky, caramelized fruit filling off the bottom of your oven or a bare baking sheet is a task no one enjoys. A simple sheet of foil underneath will catch any drips, making cleanup an absolute breeze, allowing you to focus on the joy of baking rather than the dread of scrubbing.
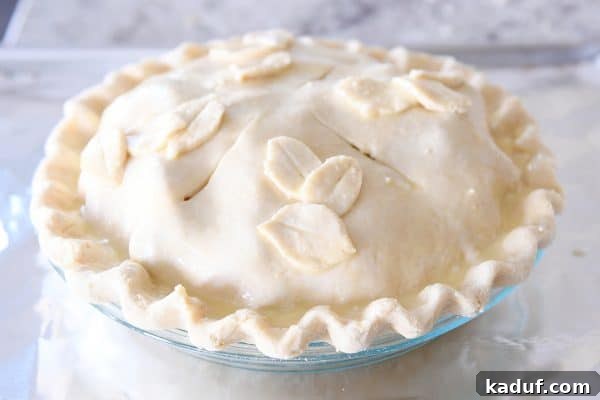
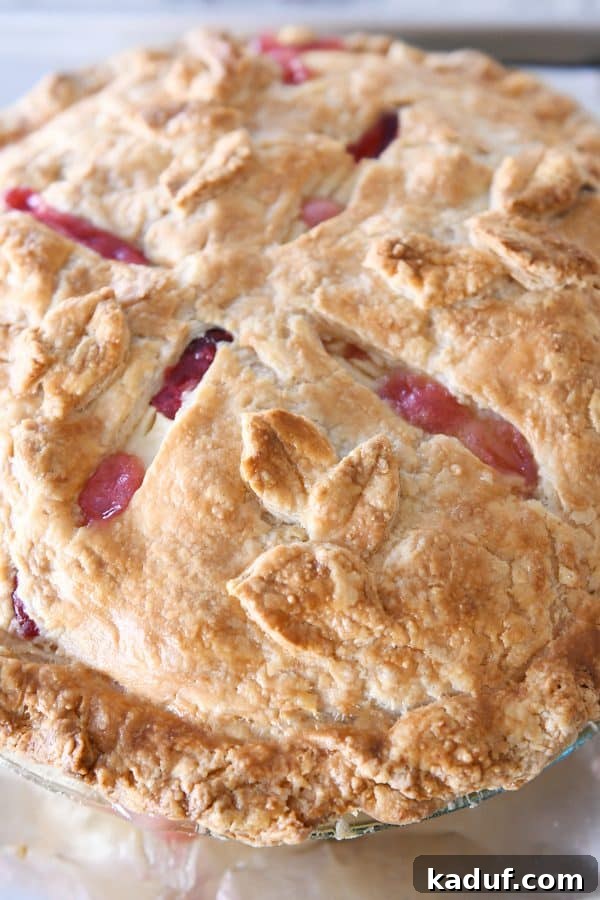
This pie typically bakes for approximately 65-75 minutes in my oven at 375 degrees F. However, baking times can vary significantly depending on your specific oven, the thickness of your pie crust, and even the type of pie plate you use. It’s crucial to keep a watchful eye on your pie as it bakes. If the crust begins to brown too quickly but the filling still requires more time, simply create a loose tent with aluminum foil and place it over the top of the pie. This will prevent the crust from burning while allowing the filling to continue cooking through. If you are using a glass pie plate, you should be able to see a lovely golden-brown hue forming on the bottom crust, which is another excellent indicator of doneness.
Knowing When Your Pie is Perfectly Baked
Determining when a pie is truly done can sometimes feel like an art rather than a science. Beyond the visually appealing golden crust and the audibly bubbling filling, ensuring the fruit is tender is paramount, especially with apples. This is where those strategically placed slits in the top crust become invaluable. Carefully pulling the pie out of the oven for a moment and peering into these vents can give you a good indication of whether the fruit appears cooked enough. You’re looking for a rich, thick, bubbly sauce and fruit that looks soft.
If you’re still uncertain, a paring knife or a thin skewer can be your best friend. Gently insert it into one of the slits and carefully pierce a few apple slices. If the knife slides in easily with minimal resistance, your fruit is likely tender and the pie is done. If you feel a firm crunch, the pie needs more time. A slight overbake is often preferable to an underbaked pie, especially with fruit fillings. As long as the crust isn’t charred, an extra few minutes in the oven can ensure a fully cooked, delicious result. A slightly overbaked pie will have a more set filling and tender fruit, preventing a runny or crunchy disappointment.
The Ultimate Holiday Dessert Awaits!
There you have it – a comprehensive guide to what I confidently declare as the best apple pie I’ve ever tasted. The anticipation of Thanksgiving, for me, is now intrinsically linked to this incredible apple cranberry pie. Its complex blend of sweet, tart, and caramelly notes brings an unmatched joy to our holiday table. While my children might argue that dark chocolate and naps are more essential for my mothering prowess, I truly believe this pie contributes to the overall festive spirit that makes every moment brighter!
If you’re seeking to introduce a delightful, yet familiar, twist to your traditional Thanksgiving dessert spread, look no further. This Apple Cranberry Pie is your golden ticket to becoming the culinary rockstar of the season. The apple and cranberry combination isn’t merely a pairing; it’s a taste sensation that will captivate palates and create new cherished holiday traditions. It’s comforting, vibrant, and utterly unforgettable.
Make-Ahead and Freezing: Your Holiday Pie Strategy
A frequently asked question, especially during busy holiday seasons, is whether pies can be made in advance. The answer is a resounding yes! Preparing pies ahead of time is a fantastic way to alleviate stress and manage your holiday baking schedule more efficiently. I routinely bake our holiday pies a day or two before they are needed. Once baked and completely cooled, I cover them loosely with foil to protect the crust and prevent it from becoming soggy. They can then be stored in the refrigerator, or if space is tight, in a cool garage during colder months. For fruit pies (avoiding cream or dairy-based pies), leaving them at room temperature for up to 24 hours after cooling typically yields excellent results without any adverse effects on quality or safety.
When it’s time to serve, warming the pie brings out its incredible aromas and flavors. About 20-30 minutes before serving, I place the whole pie in a 250-degree F oven to gently warm through. Alternatively, if you’re serving individual slices, each can be warmed briefly in the microwave for a few seconds. The gentle warmth enhances the gooey texture of the filling and slightly crisps the crust, making for a truly delightful experience.
While I haven’t had consistent success freezing *unbaked* fruit pies (often resulting in a soggy bottom crust), I have found great success with freezing completely baked and cooled fruit or pecan pies. To freeze, wrap the cooled pie tightly in a double layer of plastic wrap, followed by a layer of aluminum foil, ensuring it’s airtight. This robust wrapping protects it from freezer burn. When you’re ready to enjoy it, simply transfer the frozen pie to the refrigerator to thaw completely overnight, or let it thaw at room temperature for several hours. Once thawed, you can reheat it using the same method described above for warming a fresh pie.
One Year Ago: Instant Pot White Chicken Black Bean Chili {Slow Cooker Directions Included!}
Two Years Ago: Buttery, Flaky Make-Ahead Overnight Crescent Dinner Rolls {No Kneading/No Stand Mixer}
Three Years Ago: Chocolate Chip Cookie Pie
Four Years Ago: Stuffed Apple and Bacon Sweet Potato Casserole
Five Years Ago: Buttermilk Potato Rolls {Fluffiest Most Delicious Rolls I’ve Ever Met}
Six Years Ago: Healthy Applesauce Carrot Muffins {a.k.a. Carrot Cake Muffins}
Seven Years Ago: Chocolate Mousse Cheesecake Pie
Eight Years Ago: Sesame Chicken Stir-Fry
Apple Cranberry Pie Recipe
Pin
Ingredients
Pie:
- 9-inch double crust pie dough
- 4-5 medium apples, about 1.75 pounds; I use Honeycrisp, peeled, cored and sliced 1/8-inch thick (about 5-6 cups total)
- 2 tablespoons lemon juice
- 1 teaspoon almond extract
- Pinch salt
- 1 ½ to 2 cups (170 to 227 g) fresh cranberries
Sauce:
- ½ cup (113 g) salted butter
- ½ cup (71 g) all-purpose flour
- 2 tablespoons water
- ¾ cup (159 g) granulated sugar
- ½ cup (106 g) light brown sugar
Egg wash:
- 1 large egg
- 1 tablespoon water
Instructions
-
Preheat oven to 375 degrees F (190°C). Place an oven rack in the middle or lower middle position of the oven. Line a large baking sheet with foil and set aside.
-
In a large bowl, toss the sliced apples with the lemon juice, almond extract and salt. Add the cranberries and toss to combine.
-
In a 10- or 12-inch skillet or small saucepan, melt the butter over medium heat. Stir in the flour and whisk constantly until smooth and well-combined. Add the water, granulated sugar and brown sugar and cook at a simmer, whisking or stirring constantly, for 1-2 minutes.
-
Immediately pour the mixture over the apples and cranberries. Toss to combine. The sauce mixture may clump up a bit but it will thin out the more it is stirred together (or the longer it sits). It doesn’t have to be perfect.
-
Roll out bottom crust and place evenly in pie plate (don’t stretch or pull it, just lift and tuck into the pie plate). Leave a 1- to 2-inch border all the way around.
-
Scrape the apple/cranberry filling evenly into the pie plate (get all of the caramel mixture!) – try to get the apples in even layers instead of piled in at wonky angles. It will be piled pretty high; that’s ok as it will cook down in the oven.
-
Roll out the top crust and place it over the filling. Trim the top crust evenly with the bottom crust (leaving about 1/2-inch overhang all the way around). Fold the bottom crust up and over evenly with edge of pie plate and press/pinch to seal. Flute the edges of the pie crust.
-
Cut four slits with a sharp paring knife in the top crust.
-
For the egg wash, whisk together the egg and water and brush a thin layer over the top and edges of the crust.
-
Place the pie on the foil-lined baking sheet (important! the filling may bubble over a bit) and bake for 65-75 minutes until the crust is golden and filling is bubbling (tent the top of the pie with foil if it is browning too much partway through baking). If you are using a glass pie plate, the bottom crust should be lightly browned.
-
Remove the pie from the oven and let cool completely, 4-5 hours (even longer is better). This is important so the pie isn’t soupy. If you like warm pie, individual pieces can be warmed in the microwave or the pie can be served warm, the filling just might be a little less set.
Notes
Apples: I almost always use Honeycrisp apples in this pie, but you could use a different variety or a combination. Make sure to choose crisp apples that don’t turn to mush when baking.
Cranberries: If you want more cranberry in every bite, you could pulse the cranberries in a food processor until coarsely chopped.
Recipe Source: from Mel’s Kitchen Cafe (inspired by this crazy popular recipe on allrecipes)