
The Ultimate Homemade Cinnamon Rolls: A Recipe for Pure Comfort and Joy
There’s an undeniable magic that happens when you bake. The warmth that fills your home, the enticing aromas that waft through every room, and the promise of a delightful treat at the end of it all. For me, especially during a period of recovery and reflection, the simple act of creating something delicious can be profoundly therapeutic. After a recent surgery and navigating the unique journey of pregnancy, I found myself indulging in a much-needed period of rest. While I’ve embraced the comfort of my bed, the call of the kitchen, particularly the scent of freshly baked goods, eventually became irresistible.
I must admit, it felt like quite an accomplishment to simply “roll out of bed” and engage with my passion for food again. To all the diligent individuals out there who tackle their days with unwavering energy, I tip my hat! My recent weeks have been defined by a well-deserved, albeit rather lazy, recuperation. However, the urge to share something truly special with you, something that brought immense joy to my own household and to those around us, was simply too strong to resist. And what better way to re-enter the culinary world than with a batch of the most heavenly, fluffy, and utterly irresistible homemade cinnamon rolls?
Why These Homemade Cinnamon Rolls Will Become Your New Favorite
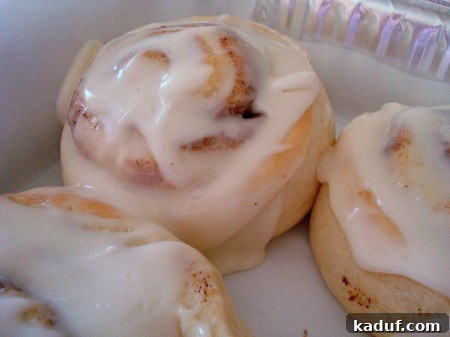
A few weeks ago, I ventured into the kitchen to create these extraordinary cinnamon rolls, and the results were nothing short of spectacular. They quickly disappeared, not just within our family, but also when shared with some wonderful neighbors who had generously helped us with concrete work in our backyard. The appreciative smiles and murmurs of delight were all the confirmation I needed – this recipe for homemade cinnamon rolls is a definite keeper.
For years, I’ve relied on a beloved cinnamon roll recipe that ingeniously incorporates vanilla pudding into the dough, resulting in an incredibly moist and tender crumb. It’s been my go-to, my tried-and-true. However, I’m thrilled to report that this particular recipe stands shoulder-to-shoulder with my long-standing favorite. The texture, the flavor, the perfect balance of sweet and spicy cinnamon – it’s all here. I can confidently say these delicious cinnamon rolls will be gracing my kitchen counter again and again, becoming a new staple in our home and likely in yours too, once you give them a try.
My heartfelt thanks go to Melanie from The Sister’s Cafe for sharing this incredible recipe. The moment I laid eyes on her blog post, captivated by her stunning photographs, I knew I had to make them. While my pictures capture a glimpse of their deliciousness, I highly recommend visiting her site through the link provided. Her visuals are truly inspiring and will undoubtedly seal the deal, convincing you to embark on your own cinnamon roll baking adventure!
Mastering the Art of Homemade Cinnamon Rolls: The Recipe
Understanding Yeast Dough: A Baker’s Best Friend for Fluffy Cinnamon Rolls
Before we dive into the ingredients and steps, let’s talk about yeast dough – the heart and soul of these incredible homemade cinnamon rolls. One crucial piece of advice I always share: *never* treat the flour measurement in a yeast dough recipe as an absolute, unyielding rule. Unless a precise weight is provided (and in that case, reach for your kitchen scale!), the amount of flour you’ll actually need can vary significantly. Factors like humidity in your kitchen, the ambient temperature, your altitude, and even the specific brand of flour you’re using can all play a role in how your yeast dough behaves.
Instead of rigidly sticking to a number, learn to trust your senses. You want the dough to be firm enough to handle without being overly sticky, yet still soft, pliable, and slightly tacky to the touch. It should feel elastic and bounce back when gently pressed. Over-flouring can lead to dry, tough rolls, while too little flour will result in a sticky, unmanageable mess. For those who are new to working with yeast or want to refine their technique, this tutorial on yeast offers invaluable guidance on achieving that perfect dough consistency for the best cinnamon rolls.
Ingredients for Irresistible Fluffy Cinnamon Rolls
Gathering your ingredients is the first step towards baking success. For these rolls, you’ll need a combination of pantry staples and fresh components that come together to create a rich, flavorful dough and a decadent filling. Quality ingredients are key to truly outstanding homemade cinnamon rolls.
- For the Dough:
- 2 cups whole milk (essential for richness and a tender crumb)
- 2 cubes (1 cup) unsalted butter, divided (adds incredible flavor and moisture to the dough)
- 2 packages active dry yeast (4 ½ tsp total, ensures a good rise)
- 1/3 cup warm water (to gently activate the yeast)
- 1 1/3 cups granulated sugar (sweetens the dough and provides food for the yeast)
- 1 teaspoon salt (balances the sweetness and enhances overall flavor)
- 4 large eggs, beaten (contribute to richness, color, and structure of the fluffy cinnamon rolls)
- 8 cups all-purpose flour (approximately; always adjust based on dough texture)
- For the Classic Cinnamon Filling:
- 1 cube (1/2 cup) unsalted butter, softened (the secret to that gooey, melt-in-your-mouth center)
- Plenty of ground cinnamon (be generous for maximum flavor!)
- Granulated sugar (to mix with cinnamon for that iconic sweet and spicy swirl)
Step-by-Step Directions to Heavenly Homemade Cinnamon Rolls
- Prepare the Liquid Base: In a medium saucepan, gently heat the milk and 1 cube of butter (1/2 cup) together until the butter is completely melted. Be careful not to boil the milk. Once melted, remove from heat and set aside to cool until it’s lukewarm (around 105-115°F or 40-46°C). This crucial step ensures the liquid is warm enough to activate the yeast but not so hot that it kills it.
- Activate the Yeast: In a large mixing bowl (or the bowl of a stand mixer fitted with a dough hook), combine the yeast with 1/3 cup warm water. Let it stand undisturbed for about 5-10 minutes, until it becomes visibly foamy and fragrant. This indicates your yeast is active and ready to work its magic.
- Combine Wet Ingredients: To the activated yeast mixture, add the cooled milk and butter mixture, 1 1/3 cups of granulated sugar, 1 teaspoon of salt, and the 4 beaten eggs. Whisk everything together thoroughly until all components are well combined.
- Gradually Add Flour: Begin by adding 4 cups of the all-purpose flour to the wet ingredients. Mix well, either with a sturdy spoon or on low speed with a stand mixer, until a shaggy dough starts to form. Gradually add the remaining 4 cups of flour, approximately a cup at a time, mixing thoroughly after each addition. Remember our earlier note about flour: judge by texture, not just quantity. The ideal yeast dough should be firm enough to handle but still soft, pliable, and slightly sticky to the touch.
- First Rise (Bulk Fermentation): Once the dough is mixed to the correct consistency, cover the bowl with a clean cloth or plastic wrap (lightly greased to prevent sticking as it rises). Place it in a warm, draft-free spot. Let the dough rise for 1 ½ to 2 hours, or until it has nearly doubled in size. This first rise is vital for developing the dough’s flavor and achieving that signature light, airy texture in your homemade cinnamon rolls.
- Prepare for Shaping: Once the dough has successfully risen, gently punch it down to release the trapped air. Turn the dough out onto a lightly floured surface. Divide the dough in half. Lightly knead each half for a minute or two to ensure an even, smooth consistency, making it easier to roll.
- Roll Out the Dough: Take one half of the dough and, using a rolling pin, roll it into a large rectangle. Aim for a thickness of approximately ½ inch. Strive for an even thickness across the entire surface to ensure uniform rolls that bake consistently.
- Apply the Generous Filling: Spread ½ cube (1/4 cup) of the softened butter evenly over the entire surface of the rolled-out dough, extending almost to the edges. Don’t be shy with the butter; it helps create the gooey layers. Next, sprinkle a generous layer of granulated sugar over the butter. Finally, add a liberal coating of ground cinnamon. The cinnamon is what truly defines these rolls, so be ample with it for the best flavor!
- Roll and Slice: Starting from one long edge, carefully roll the dough tightly into a log. Pinch the seam gently to seal it securely. For perfectly clean, squish-free cuts, use unflavored dental floss. Slide a piece of floss under the log, cross the ends over the top, and pull to slice through the dough. This method preserves the beautiful layers better than a knife. Slice into rolls about 1 to 1 ½ inches thick.
- Second Rise (Proofing): Arrange the sliced rolls on a large baking sheet lined with a silicone baking mat (like a Silpat) or parchment paper, leaving some space between them as they will expand significantly. Repeat steps 7-9 with the second half of the dough. Cover the baking sheets loosely with a clean dishtowel or plastic wrap lightly sprayed with cooking spray. Place in a warm, draft-free place for the second rise, which can take anywhere from 2 to 5 hours. This rise is often longer and slower, contributing to an incredibly light and fluffy texture. The rolls should visibly double in size.
- Bake to Golden Perfection: Preheat your oven to 350°F (175°C). Bake the cinnamon rolls for 10 to 15 minutes, or until they are barely golden brown around the edges. Be extremely careful not to overbake, as this can make them dry and tough. They should still be soft and slightly yielding in the center.
- Cool and Glaze: Remove the baked cinnamon rolls from the oven and let them cool on the baking sheet for about 5 minutes. This allows them to set slightly without losing too much warmth. While still warm, generously drizzle with the prepared Butter Cream Glaze. The warmth helps the glaze melt slightly and seep into all the wonderful nooks and crannies, creating an irresistibly gooey finish.
This recipe yields a substantial batch of 3-4 dozen delicious homemade cinnamon rolls, perfect for sharing with a crowd, freezing for later enjoyment, or simply indulging in throughout the week!
The Essential Butter Cream Glaze for Your Cinnamon Rolls
No cinnamon roll is truly complete without a luscious, creamy glaze. This butter cream glaze strikes the perfect balance of sweetness and richness, complementing the warm, spicy rolls beautifully and adding that iconic finishing touch.
Glaze Ingredients:
- 1 cube (1/2 cup) unsalted butter, softened
- 1 teaspoon pure vanilla extract
- A dash of salt (crucial for balancing and enhancing sweetness)
- A dash of cream of tartar (adds a slight tang and helps stabilize the glaze)
- 1 ½ pounds powdered sugar (confectioners’ sugar), sifted if clumpy
- Scalded milk or cream (adjust quantity to achieve desired consistency)
Glaze Directions:
In a medium mixing bowl, combine the softened butter, pure vanilla extract, a dash of salt, and a dash of cream of tartar. Using an electric mixer, beat these ingredients together until the mixture is smooth and creamy. Gradually begin adding the powdered sugar, incorporating about half of it first. Then, add a small splash of scalded milk or cream (start with 1-2 tablespoons). Continue to alternate between adding powdered sugar and small amounts of milk/cream, beating until all the powdered sugar is incorporated and you reach your desired consistency. For cinnamon rolls, you typically want a glaze that is pourable and slightly thinner than typical cake icing. This allows it to elegantly cascade over the warm rolls and melt into their tender layers, creating that signature gooey top. If the glaze is too thick, add more milk a teaspoon at a time; if it becomes too thin, whisk in a bit more powdered sugar until perfect.
Recipe Source: From The Sister’s Cafe
Expert Tips for Cinnamon Roll Perfection
Achieving bakery-quality cinnamon rolls at home is entirely possible with a few key considerations:
- Temperature Matters Immensely: Always ensure your milk and butter mixture is lukewarm, not hot, when adding to the yeast. Too hot will kill the delicate yeast organisms, preventing your dough from rising. Too cold will hinder its activation.
- Flour Wisely for Optimal Texture: As emphasized, avoid dumping all the flour in at once. Add it gradually, observing the dough’s texture. The goal is a dough that’s slightly tacky but not overly sticky, elastic, and delightfully soft.
- Provide a Warm Rising Environment: Yeast thrives in warmth. A slightly warm oven (turned off, with just the pilot light or after being preheated and then turned off), a sunny spot on your counter, or even near a warm appliance can provide the ideal environment for your dough to rise beautifully.
- Do Not Overbake: The secret to incredibly soft and gooey cinnamon rolls is to bake them just until they are barely set and lightly golden brown around the edges. Overbaking will result in dry, tough rolls, so pull them out when they still look slightly underdone in the very center.
- Be Generous with the Filling: Do not skimp on the softened butter, granulated sugar, and especially the ground cinnamon for the filling. This abundant filling is where a significant portion of the iconic cinnamon roll flavor and gooeyness comes from!
- The Dental Floss Trick is a Game-Changer: Seriously, give this method a try for slicing your dough log! It creates beautifully clean, perfectly round slices without squishing your delicate layers, ensuring each roll looks as good as it tastes.
- Glaze While Warm for Maximum Gooeyness: Apply the prepared glaze while the cinnamon rolls are still warm from the oven. The residual heat helps the glaze melt slightly and gently seep into all the nooks and crannies, creating that irresistible gooey, melt-in-your-mouth top layer that everyone loves.
Beyond the Classic: Delicious Variations to Try
Once you’ve mastered this classic homemade cinnamon roll recipe, don’t hesitate to experiment and customize! Here are a few ideas to add your personal touch:
- Nutty Delight: For an added layer of texture and flavor, sprinkle finely chopped pecans or walnuts over your cinnamon filling before rolling the dough.
- Fruity Twist: A handful of dried cranberries, raisins, or finely diced apples can add a pleasant tartness and chewiness to your rolls.
- Spice It Up: Enhance the classic cinnamon flavor by adding a pinch of other warm spices like nutmeg, cardamom, or allspice to your filling for a more complex aroma and taste.
- Cream Cheese Glaze: For an even richer and tangier topping, consider making a classic cream cheese frosting instead of the butter cream glaze. Combine softened cream cheese, butter, powdered sugar, and a splash of milk or vanilla.
- Maple Glaze: For a delightful autumnal twist, replace some of the milk in the glaze with pure maple syrup. This adds a wonderful depth of flavor that pairs beautifully with cinnamon.
Share the Joy: Perfect Serving Suggestions
These homemade cinnamon rolls are incredibly versatile and perfect for a variety of occasions, bringing warmth and happiness wherever they go:
- Breakfast or Brunch Staple: They are the quintessential treat to start your day, especially on leisurely weekends or festive holidays. Pair them with a freshly brewed cup of coffee, tea, or a tall glass of cold milk.
- Comforting Dessert: Warm them slightly and serve as a comforting, satisfying dessert after a family meal. They’re especially delightful with a scoop of vanilla ice cream.
- Impressive for Special Occasions: These rolls are guaranteed to impress guests at potlucks, parties, office events, or any family gathering. They’re always a crowd-pleaser and a sign of thoughtfulness.
- Thoughtful Gift: Beautifully package a few rolls in a decorative box or tin and share them with friends, neighbors, or anyone who could use a little warmth and sweetness in their day. They make for a truly appreciated homemade gift.
- Afternoon Treat: Enjoy one with your favorite beverage for a delightful pick-me-up during the afternoon.
Your Baking Adventure Awaits!
Baking, at its core, is an act of love. Whether you’re making these homemade cinnamon rolls for yourself, your family, or your community, the effort and care you put into them will shine through in every soft, gooey, and utterly delicious bite. I genuinely encourage you to set aside some time, gather your ingredients, and immerse yourself in the rewarding process of creating these truly special treats. Don’t be intimidated by working with yeast; it’s a forgiving process that yields incredible rewards and builds confidence in the kitchen.
I can’t wait to hear about your baking experiences and how these fluffy cinnamon rolls turn out for you! If you make this recipe, please share your thoughts, any clever tips you discovered, or even pictures of your creations in the comments section below. Your feedback and stories inspire me and other bakers. Happy baking, and enjoy every sweet moment!