
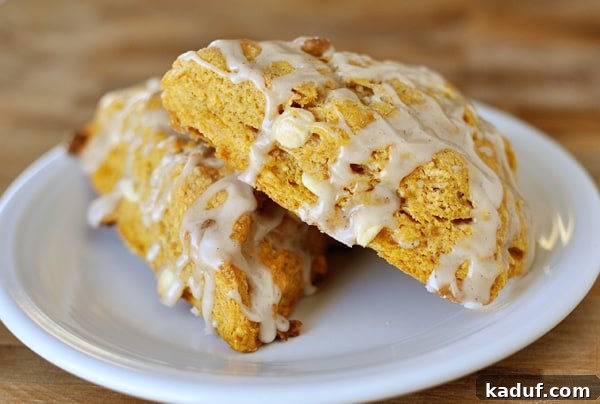
Indulge in the irresistible allure of our pumpkin-flavored scones, where every bite promises a tender, melt-in-your-mouth experience. These delightful pastries are generously studded with creamy white chocolate chips and elegantly finished with a sweet, subtly spicy ginger glaze. Prepare to elevate your breakfast or brunch with a treat that transcends seasons.
Who says pumpkin is only for fall? While autumn certainly has its charm with all things pumpkin spice, we believe these extraordinary pumpkin scones deserve a spotlight all year round. Forget the conventional rules of seasonal baking; some flavors are simply too good to be confined to a few months. This recipe isn’t just about making scones; it’s about creating an experience that brings warmth and joy, no matter the calendar date.
Imagine waking up to the inviting aroma of freshly baked goods, a perfect blend of sweet pumpkin, warm spices, and decadent white chocolate. These scones are more than just a recipe; they are a celebration of comfort and simple indulgence. They were almost the star of our Christmas morning spread, nearly outshining the beloved Giant Cinnamon Rolls – a testament to their exceptional appeal.
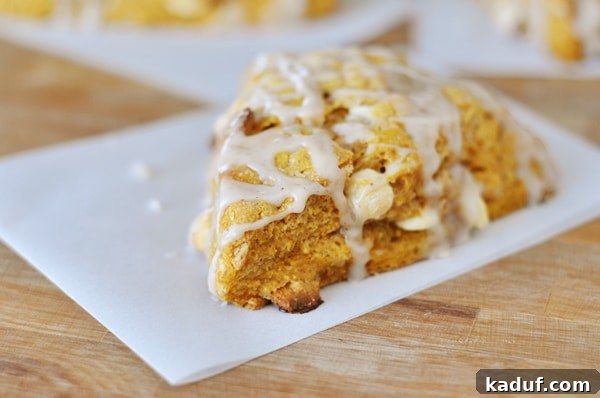
Unlock the Secret to Unforgettable Homemade Scones
If you’ve ever felt intimidated by scone making, fearing a dry, tough outcome, you’re not alone. For a long time, the idea of “cutting butter into flour” filled me with trepidation, imagining dense, unappetizing baked goods. However, this particular pumpkin scone recipe has completely transformed my perspective. It’s not just a good recipe; it’s a revelation that has turned me into a passionate scone enthusiast. If you’re new to traditional scone baking, or even if you’re a seasoned baker looking for perfection, this is the recipe to start with. It’s truly a game-changer, yielding scones that are consistently tender, moist, and utterly delicious.
Why These Pumpkin Scones Stand Out
What makes these pumpkin scones so extraordinary? It’s a harmonious blend of simple ingredients and gentle technique. They boast a beyond-tender, almost melt-in-your-mouth texture, infused with the subtle, earthy sweetness of pumpkin. Each scone is generously studded with creamy white chocolate chips, adding pockets of delightful sweetness. But the true masterpiece lies in the finish: a delightfully sweet and spicy ginger glaze that ties all the flavors together, creating an unforgettable treat. The best part? They’re surprisingly quick to pull together, making them perfect for busy mornings or an impromptu baking session.
The key to achieving such soft, perfectly flaky scones lies in one crucial principle: be gentle with the dough. Overworking the dough is the nemesis of tender scones, leading to a tough, dry result. By handling it with care and mixing just until combined, you unlock the secret to bakery-quality scones right in your own kitchen. This isn’t just a recipe; it’s a lesson in gentle baking that promises rewarding results every time.
A Tried-and-True Family Favorite
The origins of this recipe add to its charm and credibility. My dear cousin Tami received this recipe from a friend who baked them for her after she welcomed her seventh child into the world. Tami was so utterly enchanted by these scones that, despite the demanding schedule of a new mother, she found the superhuman strength to bake them herself mere weeks after her baby’s arrival. This isn’t just a testimonial; it’s a legend! A recipe that inspires such dedication from an ambitious new mom certainly earns its “tried-and-true” badge.
I can personally attest to their worthiness. While my post-baby baking ambitions might not reach Tami’s impressive level – I’ll likely be shamelessly begging friends and neighbors to make these for me when my own little one arrives – I promise you, these scones are worth every moment you put into them. They’re a labor of love that delivers immense satisfaction, making them a perfect gift for loved ones or a special treat for yourself.
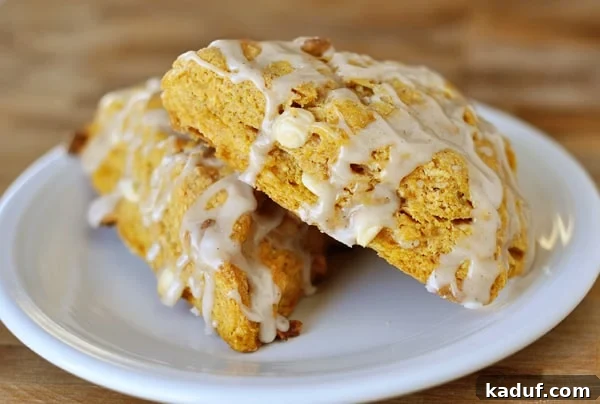
Tips for Baking the Best Pumpkin Scones
Achieving the perfect scone doesn’t have to be complicated. With a few simple tips, you can master this recipe and impress everyone with your baking prowess. The cornerstone of a great scone is cold butter. Using butter that is very cold and cut into small pieces prevents it from fully incorporating into the flour, creating pockets of butter that melt during baking, resulting in those desirable flaky layers. You can even cube your butter and then pop it back into the freezer for 10-15 minutes before using it.
Another critical element is minimal handling. As mentioned, overworking the dough develops the gluten, leading to a tough texture. Mix the wet and dry ingredients just until they come together, and knead only a few times on a lightly floured surface. The dough might seem a bit crumbly, but it will hold together as you pat it into a circle. Trust the process, and resist the urge to keep mixing or kneading.
Finally, don’t overbake! Scones should be lightly golden brown and a toothpick inserted into the center should come out clean. Baking them for too long will dry them out, sacrificing their tender crumb. Keep a close eye on them during the last few minutes of baking. The magic of these scones truly lies in their delicate balance of flavor and texture, a balance easily maintained by following these simple guidelines.
Beyond the Recipe: Ingredient Spotlight
Let’s take a moment to appreciate the stars of this show. The **pumpkin puree** provides not just flavor but also essential moisture, contributing to the scone’s incredible tenderness. Ensure you’re using plain canned pumpkin puree, not pumpkin pie filling, which contains added spices and sugar that would alter the recipe’s balance. The blend of **ground ginger, nutmeg, allspice, and cinnamon** creates that quintessential warm spice profile that perfectly complements the pumpkin.
The **white chocolate chips** are a delightful addition, melting slightly within the scone and offering a sweet contrast to the spices. For the glaze, the fresh kick of **ginger** (or a blend of pumpkin pie spices for a milder touch) mixed with powdered sugar and milk creates a glaze that’s both vibrant and comforting, enhancing every bite without overwhelming the scone’s delicate flavor.
Serving Suggestions & Storage
These pumpkin scones are incredibly versatile. Serve them warm with your morning coffee or tea for a cozy start to your day. They make an exquisite addition to any brunch spread, impressing guests with their gourmet appeal. For an afternoon treat, pair them with a dollop of whipped cream or a side of fruit compote. They’re also perfect for holiday gatherings or simply as a comforting snack anytime you crave something sweet and satisfying.
To store leftover scones, keep them in an airtight container at room temperature for up to 2-3 days. For longer storage, you can freeze baked, unglazed scones for up to 3 months. Thaw them at room temperature and warm gently in the oven before glazing and serving. You can also prepare the dough ahead of time, cut the wedges, and freeze them on a baking sheet. Once solid, transfer to a freezer bag. Bake directly from frozen, adding a few extra minutes to the baking time.
Frequently Asked Questions About Pumpkin Scones
Can I use fresh pumpkin puree?
Yes, absolutely! If you have fresh pumpkin, you can roast and puree it. Just make sure it’s thick and not too watery. If it seems thin, you can gently simmer it on the stove to reduce some of the moisture before using.
What if I don’t have buttermilk?
No problem! You can easily make a homemade buttermilk substitute. For ⅓ cup of buttermilk, simply measure ⅓ cup of regular milk (dairy or non-dairy) and stir in 1 teaspoon of lemon juice or white vinegar. Let it sit for 5-10 minutes until it slightly curdles. Then use it as directed.
Can I add nuts or other mix-ins?
Certainly! While the white chocolate chips are fantastic, feel free to get creative. Chopped pecans, walnuts, or even dried cranberries would be delicious additions. You could also swap out the white chocolate for dark chocolate chips for a richer flavor profile. Just keep the total amount of mix-ins to about ½ to ¾ cup to maintain the scone’s structure.
How can I make these scones ahead of time?
You have a couple of options. You can prepare the dough, cut the wedges, and refrigerate them overnight on a parchment-lined baking sheet. In the morning, bake them directly from the fridge. Alternatively, you can freeze the cut dough wedges (as mentioned in the storage tips) and bake them from frozen, adding a few minutes to the baking time.
Is the ginger glaze necessary?
While the ginger glaze adds an incredible sweet and spicy punch that really elevates these scones, they are still delicious without it. If you prefer a simpler scone, you can omit the glaze or opt for a simple vanilla glaze instead. However, we highly recommend trying the ginger glaze at least once!

Pumpkin Scones with Ginger Glaze
Yield: 8 Scones
Prep Time: 25 mins
Cook Time: 20 mins
Total Time: 45 mins
Pin Recipe
Ingredients
Scones:
- 2 cups (284 g) all-purpose flour
- ½ cup (106 g) packed light brown sugar
- ¼ teaspoon ground ginger
- ½ teaspoon nutmeg
- ¼ teaspoon allspice
- ½ teaspoon cinnamon
- 1 teaspoon baking powder
- ¼ teaspoon baking soda
- ¼ teaspoon salt
- ½ cup (113 g) cold butter, cut into pieces
- ⅓ cup buttermilk
- ½ cup canned pumpkin puree, no added spices or sugar
- 1 teaspoon vanilla extract
- ½ cup (85 g) white chocolate chips
Glaze:
- 2 cups (228 g) powdered sugar
- ¼ teaspoon ginger or pumpkin pie spice
- 3 tablespoons milk
- 1 teaspoon vanilla
Instructions
- Preheat the oven to 350 degrees F (175 C).
- For the scones, in a large bowl, mix together the flour, sugar, spices, baking powder, baking soda, and salt. Toss the cold butter pieces in with the flour mixture and cut in the butter with a pastry blender, two knives, or your fingers (careful not to melt the butter with the heat from your fingers) until the mixture looks like coarse crumbs.
- In a separate bowl, mix together the buttermilk, pumpkin, and vanilla.
- Add the wet mixture to the dry flour mixture and mix until the dough just barely comes together. If the mixture is too crumbly to come together, add 1-2 tablespoons more buttermilk, one tablespoon at a time. Don’t overwork the dough, or the scones will be tough and dry.
- Gently mix in the white chocolate chips. The mixture may be on the crumbly side, but when you turn it out, it should come together.
- Transfer the dough to a very lightly floured surface and knead gently 3-4 times. Pat the dough into a thick circle, about 1 1/2-inches thick. Cut into six or eight pie-shaped wedges. Transfer the scones to a parchment- or Silpat-lined baking sheet, placing them about 2 inches apart.
- Bake for 18-20 minutes, just until a toothpick inserted comes out clean and the edges are lightly golden. Don’t overbake.
- While the scones are baking, whisk together the ingredients for the glaze until smooth. When the scones come out of the oven, transfer them to a cooling rack set over a baking sheet or waxed/parchment paper. Drizzle the hot scones generously with the glaze. Serve warm or at room temperature for the best flavor and texture.
Author: Mel
Course: Bread
Cuisine: American
Method: Bake
Nutrition Information (per serving):
- Serving: 1 Scone
- Calories: 463 kcal
- Carbohydrates: 76g
- Protein: 5g
- Fat: 16g
- Saturated Fat: 10g
- Cholesterol: 34mg
- Sodium: 290mg
- Fiber: 1g
- Sugar: 51g
Recommended Products
Recipe Source: Adapted from my beloved cousin Tami, who received it from a dear friend.