
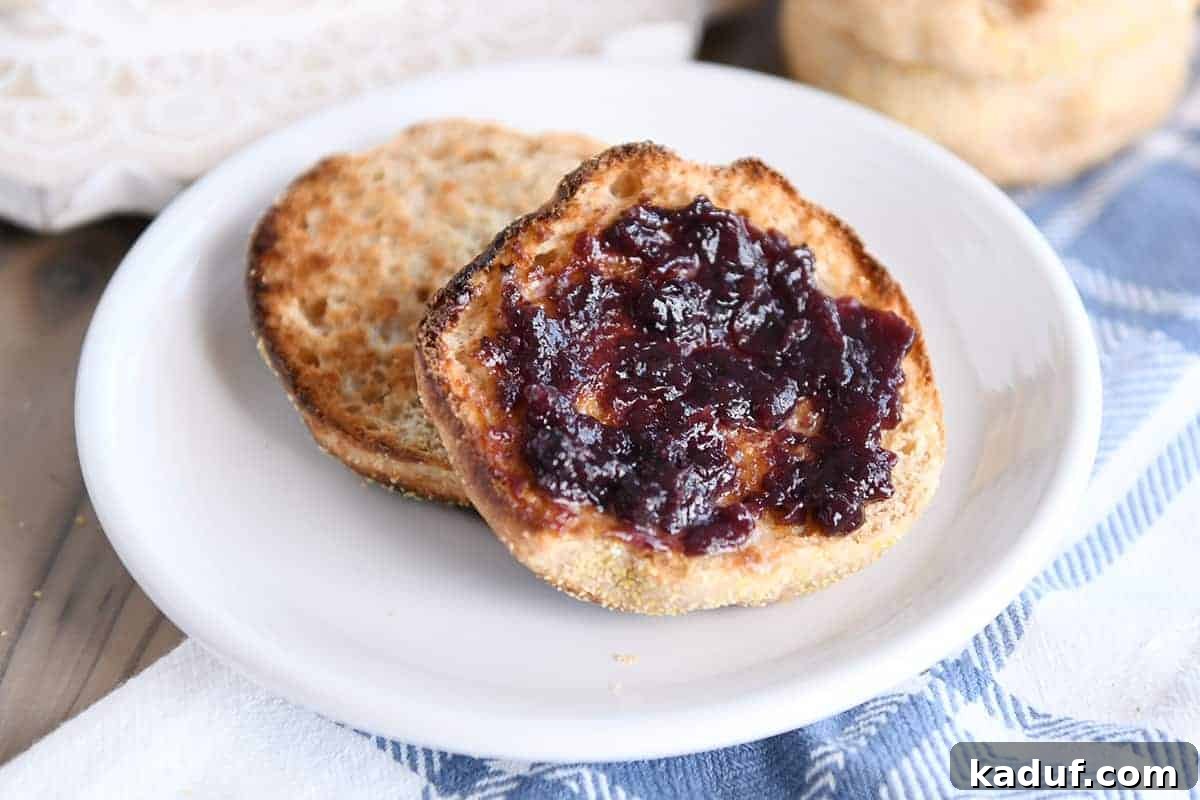
Mastering the Art of Homemade English Muffins: A No-Mixer Guide
Experience the unparalleled delight of homemade English muffins. This incredibly simple recipe requires no stand mixer, is deliciously easy to follow, and perfectly adaptable for whole grains!
There’s something truly special about sinking your teeth into a warm, freshly baked English muffin. While store-bought versions certainly have their place, crafting them at home elevates the experience to an entirely new level. If you’ve ever pondered why you should invest the time in making these delightful rounds yourself, allow me to present compelling reasons:
1. **Superior Flavor & Texture:** Homemade English muffins boast a taste that far surpasses anything you’ll find on a grocery shelf. The delicate balance of flavors, combined with a tender, airy texture and those iconic nooks and crannies, is simply unmatched.
2. **Unleash Your Inner Baker:** There’s immense satisfaction in creating something so beloved from scratch. You’ll feel like a culinary rock star, and rightly so, after effortlessly whipping up these incredibly easy homemade English muffins.
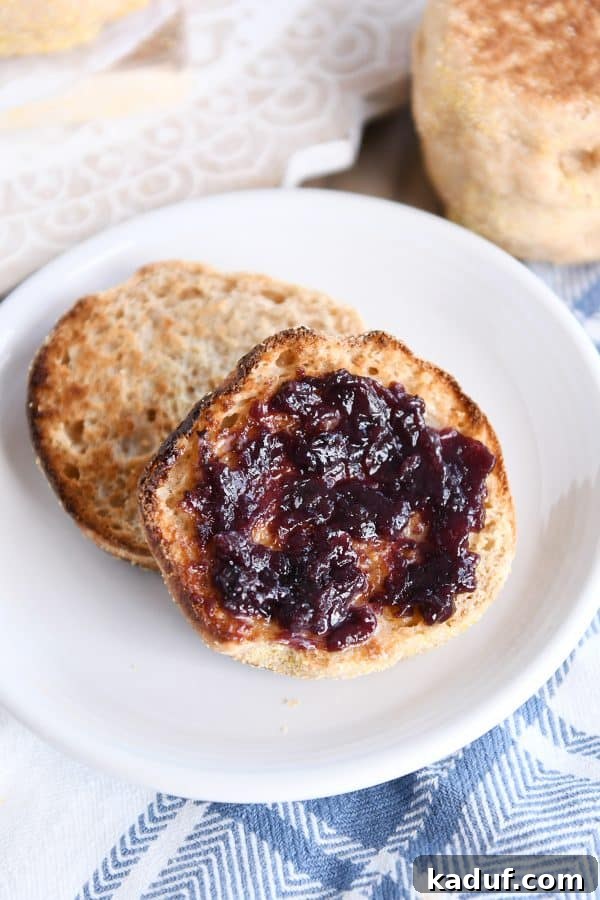
The Magic of Minimal Effort: No Stand Mixer Required
Perhaps the most enticing aspect of this recipe is its sheer simplicity. You won’t need any fancy equipment; a stand mixer is completely unnecessary. The dough comes together by hand, in a single bowl, in under 15 minutes. This makes homemade English muffins accessible to even the most novice bakers. And as if that weren’t enough, stick around, and I’ll even reveal how we transform these into one of our absolute favorite, easy weeknight dinners.
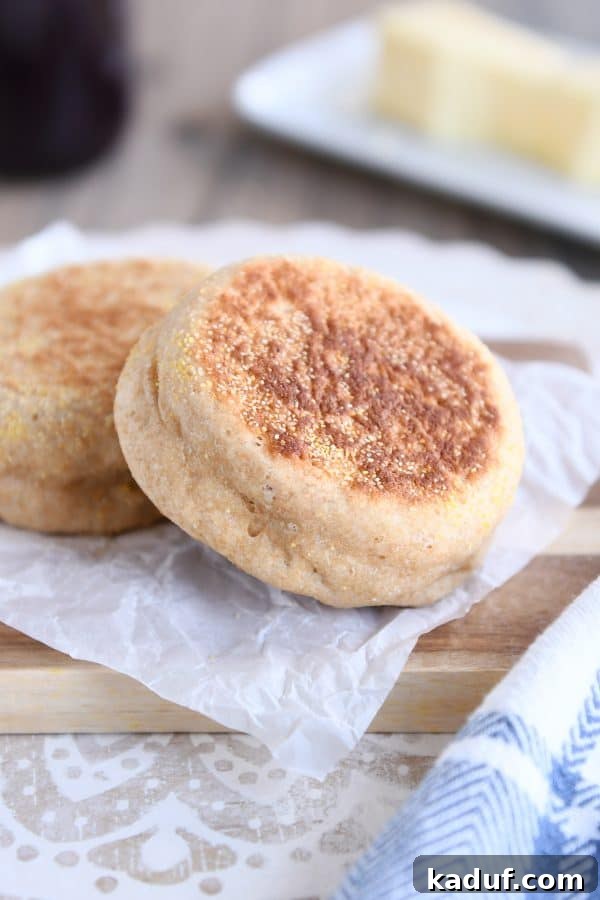
Embracing Wholesome Goodness: Whole Grain English Muffins
For those seeking a healthier twist without compromising on taste or texture, this English muffin recipe is exceptionally versatile. It performs beautifully with whole wheat flour, allowing you to incorporate more fiber and nutrients into your diet. I particularly recommend using white wheat varieties (either soft or hard), kamut, or einkhorn flour. These specific whole grains tend to yield the best results in terms of texture and flavor when used in breads and other baked goods, preventing the muffins from becoming overly dense or crumbly.
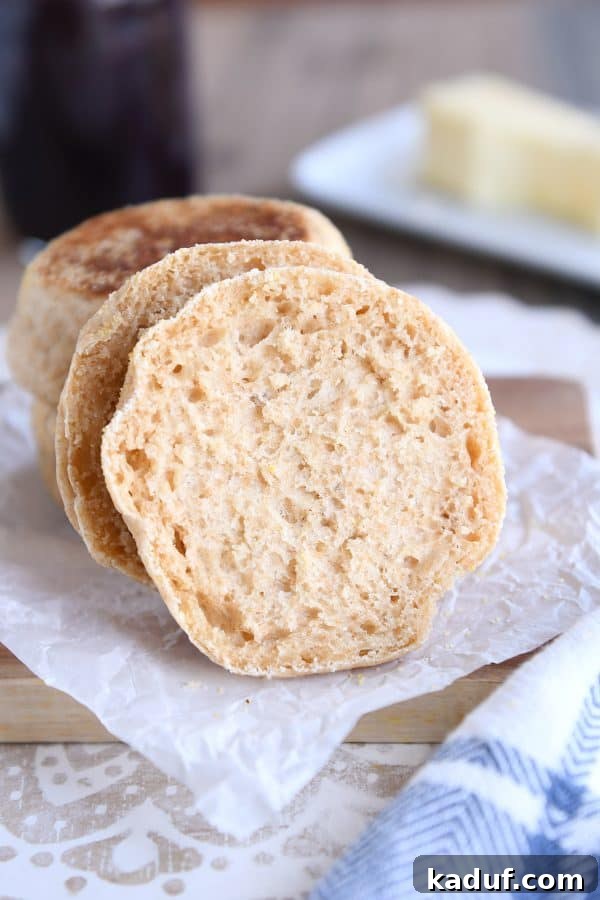
The beauty of these homemade English muffins lies in their perfect texture: soft, light, and tender. What truly sets them apart are those signature airy holes, or “nooks and crannies,” on the inside. This coveted texture is achieved thanks to the relatively wet consistency of the dough, which allows for ample gas production during proofing and cooking, creating those delightful pockets ready to absorb butter, jam, or any other topping you desire.
The Ultimate Purpose of the English Muffin: The Sandwich
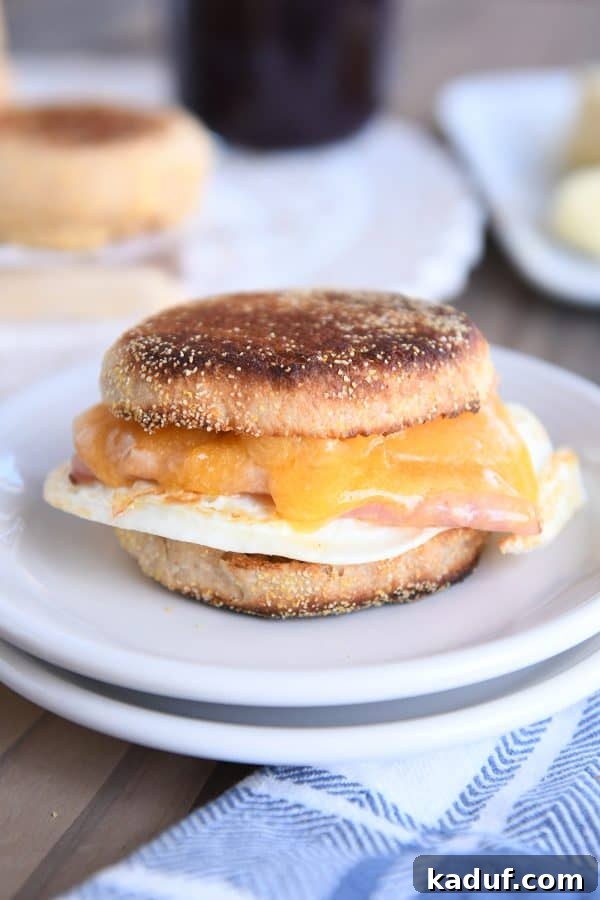
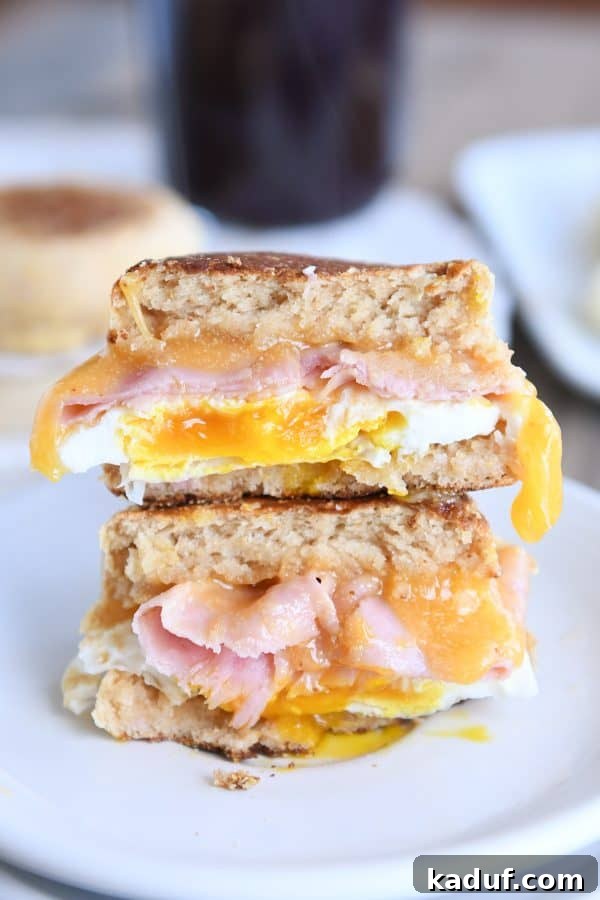
In my humble opinion, the very existence of English muffins is inextricably linked to one glorious creation: the egg, ham, and cheese sandwich. This timeless combination is, without a doubt, the best way to enjoy an English muffin since its invention. Our family relies on these sandwiches multiple times a month for quick and satisfying dinners, especially when we’re constantly on the move. (Though, to be clear, we don’t always have the luxury of homemade English muffins for every single one!)
The convenience is unparalleled. I often assemble these sandwiches ahead of time, wrapping them snugly in foil. They stay warm until we’re ready to go, making them perfect for handing out to the kids in the car on the way to practices, lessons, or games. It’s a simple yet effective strategy for feeding a busy family wholesome food on the fly, proving just how versatile and essential English muffins can be in a modern household.
A Step-by-Step Guide to Homemade English Muffin Perfection
Let’s embark on this baking journey together! I understand that the idea of making English muffins from scratch might seem daunting at first, but I assure you, it’s far easier than you might imagine. My promise to you is a straightforward, enjoyable process with delicious results. Sometimes, a visual walkthrough makes all the difference, so let’s dive in.
1. Mixing the Wet Ingredients
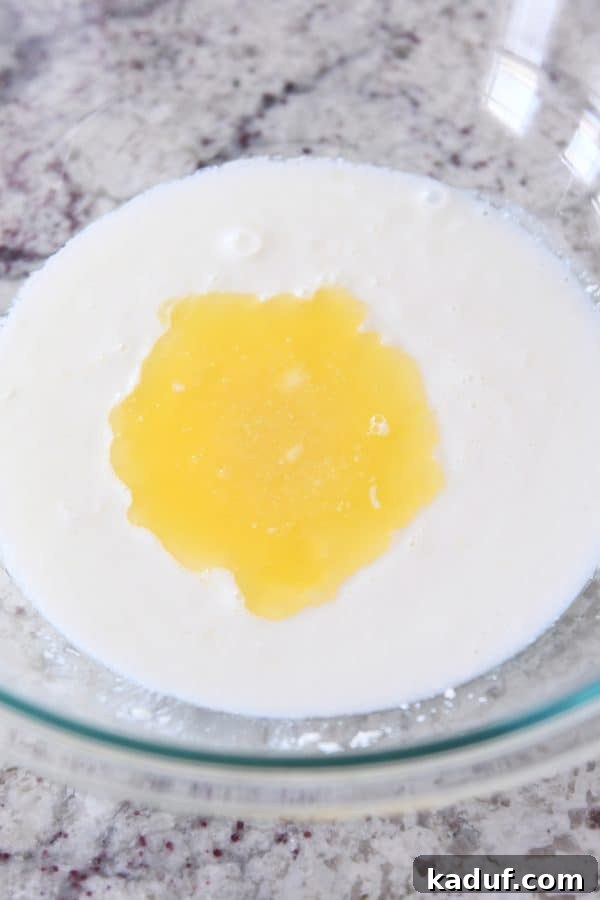
Begin by combining the warm buttermilk (or regular milk) and melted butter in a large bowl. Buttermilk is a fantastic ingredient here; it imparts a subtle, pleasant tanginess to the English muffins, reminiscent of the classic store-bought variety, without being overpowering. This also contributes to a wonderfully tender crumb.
2. Incorporating the Dry Essentials
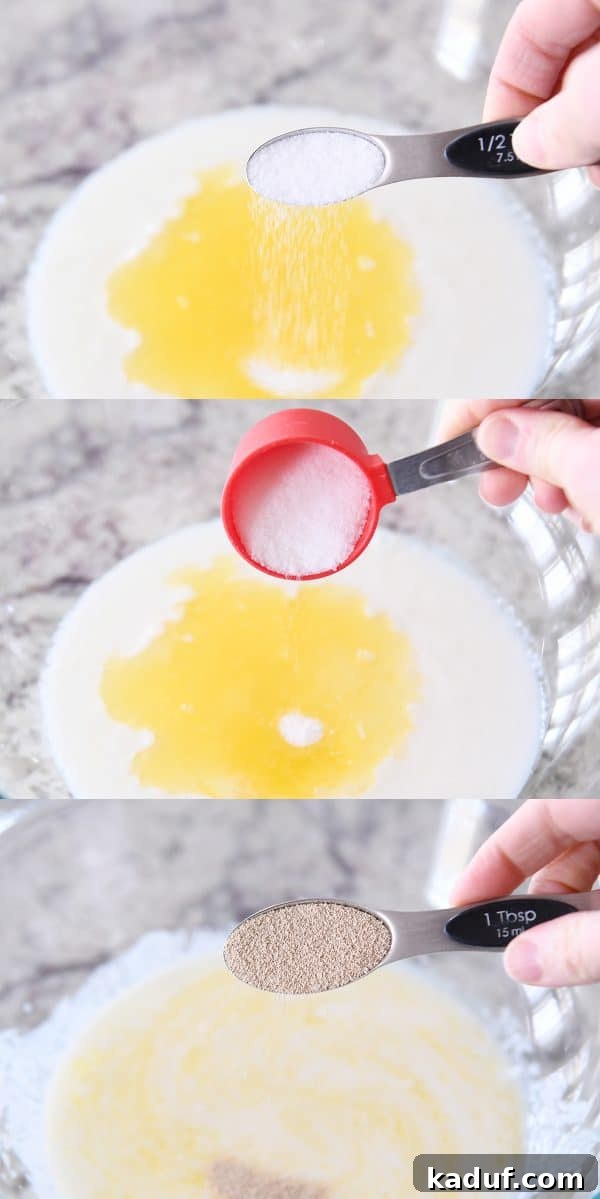
Next, add the salt, granulated sugar, and yeast to the wet mixture. This recipe specifically calls for **instant yeast**, which is incredibly convenient as it doesn’t require prior proofing. You can simply add it directly to the mixture. However, if active dry yeast is what you have on hand, don’t fret! Just check the recipe notes below for a simple adjustment to ensure your muffins rise beautifully.
3. Adding the Flour
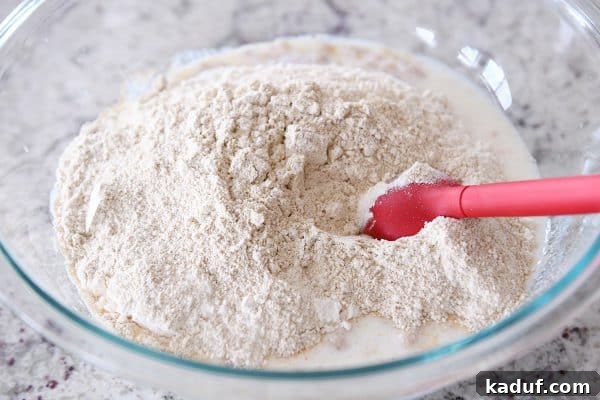
Now it’s time to incorporate the flour. I often use a balanced blend of half whole wheat flour and half all-purpose flour to achieve both robust flavor and a light texture. Bread flour is also an excellent option if you’re looking for extra chewiness. Feel free to use 100% all-purpose flour for a classic, tender muffin, or bravely go for 100% whole wheat flour, especially if using the recommended white wheat, kamut, or einkhorn varieties. The key to success is to measure your flour with a light hand to avoid a dense dough. My preferred method for accurate flour measurement is to fluff the flour in its container, then gently scoop it into your measuring cup, and finally, level it off with a straight edge.
Understanding the Dough Consistency: Batter or Dough?
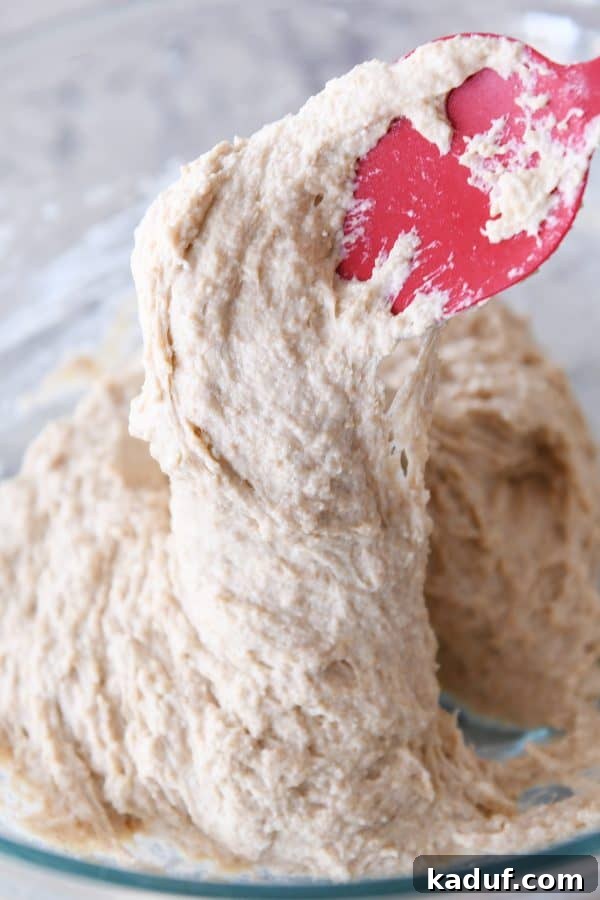
One crucial aspect of this recipe that often surprises first-time bakers is the consistency of the English muffin “dough.” It’s incredibly soft – much wetter and looser than a typical bread dough. It might even seem more like a very thick batter than a traditional dough. There’s no need to panic when you see this! This wet consistency is precisely what contributes to the characteristic airy interior and tender crumb of authentic English muffins. Trust the process, and I’ll guide you through handling this unique texture with ease.
4. The First Rise
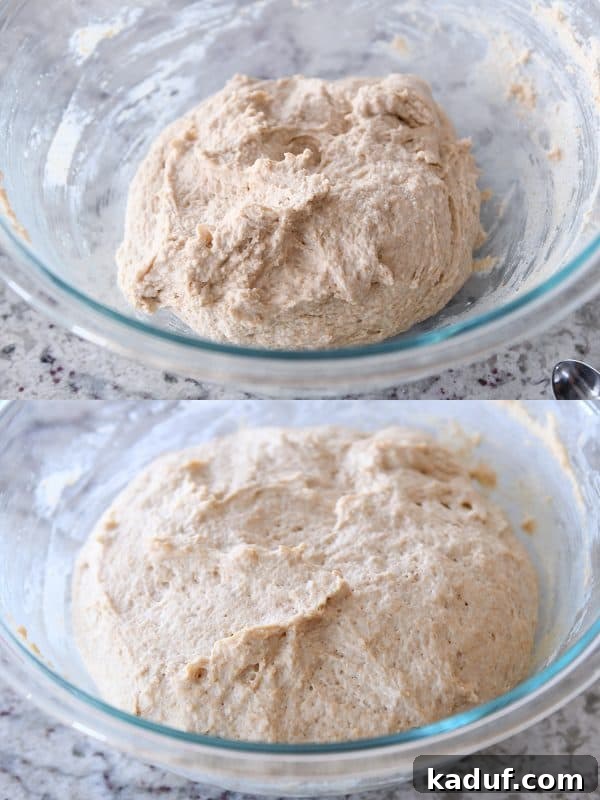
Once your soft dough is thoroughly mixed with no dry streaks remaining, simply leave it in the same bowl. Cover the bowl loosely with plastic wrap or a clean kitchen towel and place it in a warm spot. Allow the dough to rise until it’s noticeably puffy and has approximately doubled in size. This process typically takes 1 to 2 hours, depending on the warmth of your environment. This initial rise develops the flavors and creates the airy structure you’re aiming for.
Shaping the Muffins: A Little Messy, A Lot of Fun
Now for the truly hands-on part, which is surprisingly enjoyable! We’re going to transform that soft, risen dough into individual muffin shapes. First, prepare two half-sheet baking pans by lining them with parchment paper. Liberally dust the parchment with cornmeal; this is crucial for preventing the sticky dough from adhering and for providing that classic English muffin texture on the exterior.
5. Scooping the Dough
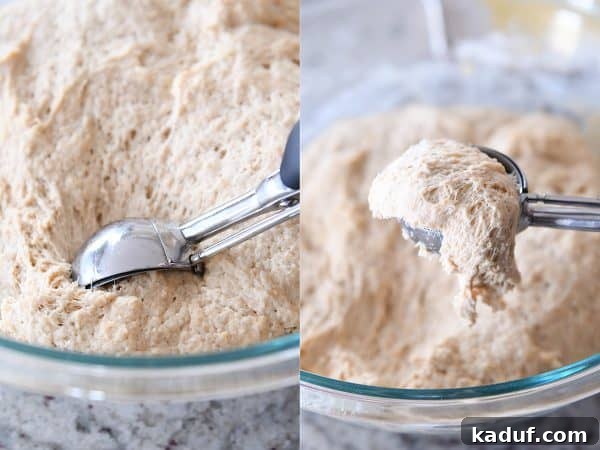
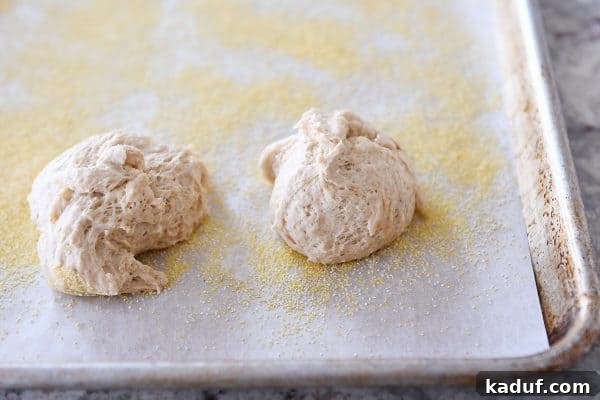
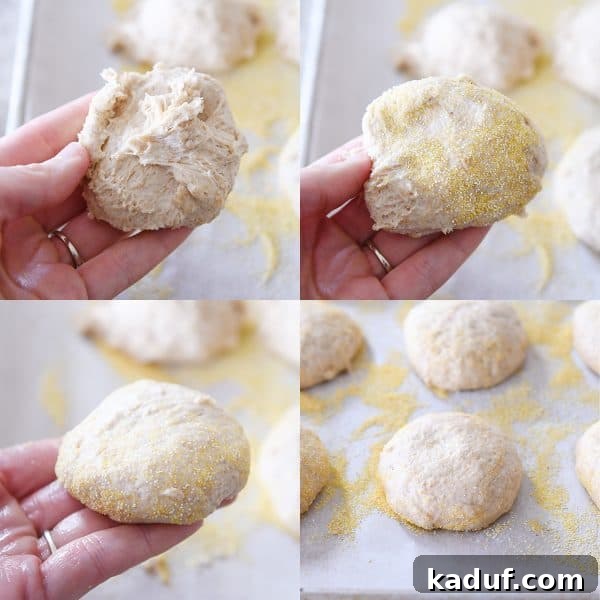
Using a large #20 cookie scoop (which holds about 6 tablespoons or 2.5 ounces of dough) or two lightly greased spoons, scoop mounds of the soft dough onto your prepared baking sheets. Don’t worry about precision here; perfectly round scoops aren’t necessary. Just aim for heaping scoops and space them several inches apart. At this stage, the scooped dough will look quite ragged and messy – a little scary even! You might question if these unformed blobs could ever become a proper English muffin. But trust me, they will. I’ve never steered you wrong, and today won’t be the day to start!
6. Gently Shaping into Discs
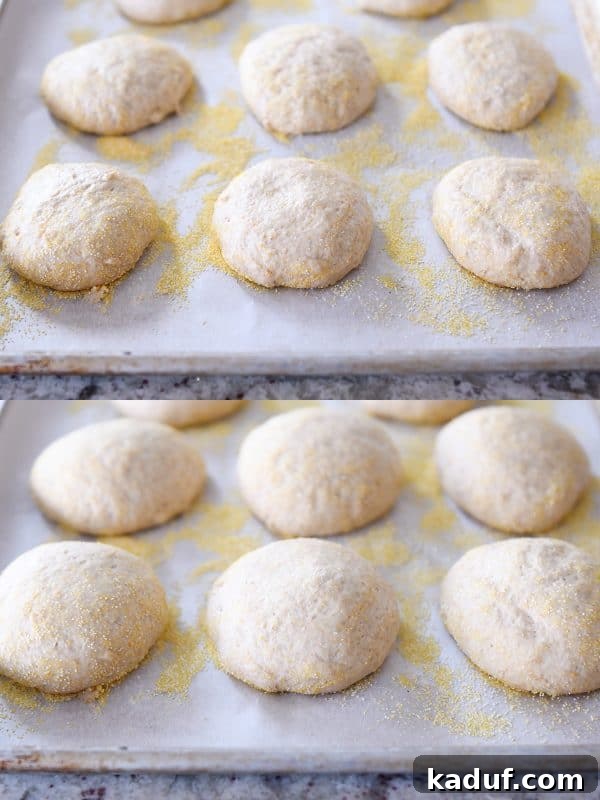
Now for the transforming touch: lightly grease your hands. Gently pick up one of the scraggly dough blobs. Flip it over in your hands so the cornmeal-dusted side is facing up. Carefully press in and around the rough edges, tucking any jagged bits towards the bottom until you’ve formed a somewhat smooth, puffy disc shape. Don’t worry if there are still some minor seams on the bottom; that’s perfectly fine. Return the shaped disc to the baking tray, adding a little more cornmeal to the parchment if needed to prevent sticking during the second rise.
7. The Second Rise
Once all your dough mounds have been shaped into neat discs, cover the baking sheets again. Let these cute, slightly reformed dough blobs undergo their second rise until they are noticeably puffy. They might not necessarily double in size this time, but you’ll certainly observe a significant increase in their plumpness. This usually takes about an hour.
The Dual Cooking Method: Griddle and Oven Bake
Achieving that perfect golden exterior and fully cooked interior requires a two-step cooking process, ensuring your English muffins are never dry. Preheat your oven to 375 degrees F; it will come into play very shortly. Simultaneously, preheat a griddle to a medium-low heat, around 325-350 degrees F, or use a large skillet on your stovetop over medium-low to medium heat.
8. Griddle First
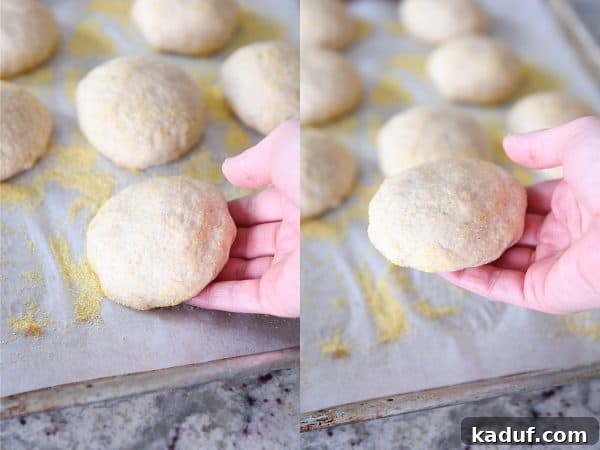
Carefully pick up each puffy English muffin, handling them gently to avoid deflating their precious rise, and place them onto the hot griddle. Cook them for approximately 4-5 minutes per side. Keep a close eye on them; if they begin to burn or brown too quickly, simply adjust the heat downwards. The goal here is to achieve a lovely light brown crust on both sides, while the interior may still be slightly doughy.
This partial cooking on the griddle is my preferred method. It creates that signature crispy, cornmeal-dusted exterior while preventing the muffins from drying out. While it’s possible to cook them entirely on the griddle from start to finish, you risk overcooking and drying them if the heat isn’t managed perfectly. The oven finish ensures they are cooked through without losing their tender moisture.
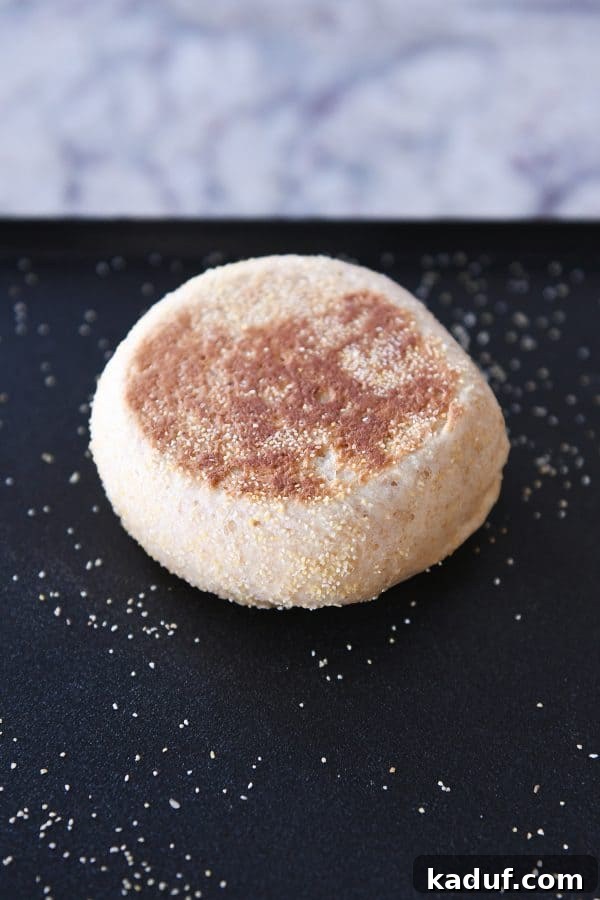
9. Oven Finish and Enjoy!
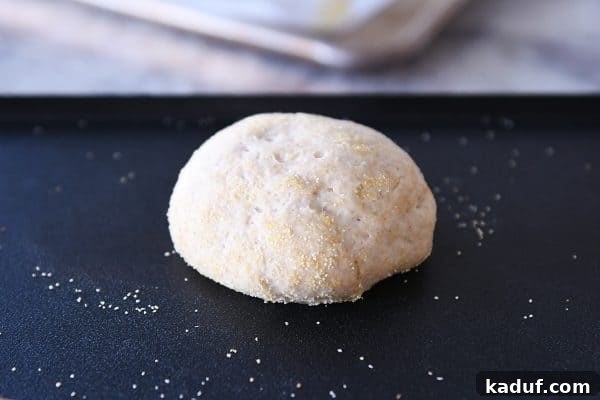
Once lightly browned on the griddle, transfer your precious (and now rather pretty) English muffins to a clean, parchment-lined baking sheet (without additional cornmeal). Bake them in the preheated 375-degree F oven for another 5-7 minutes, or until they are no longer doughy in the center. This final bake ensures they are cooked through perfectly. The aroma filling your kitchen will be irresistible!
While it’s highly recommended to let them cool completely before slicing and toasting to preserve their delicate structure and allow the interior to set, I would be a total hypocrite if I insisted this was mandatory. In our house, as soon as these warm beauties emerge from the oven, they typically disappear in a frantic “hot potato” game, with kids eagerly slicing them open and tossing them into the toaster, or even back onto the griddle for a quick toast. Patience is a virtue rarely found when homemade English muffins are involved!
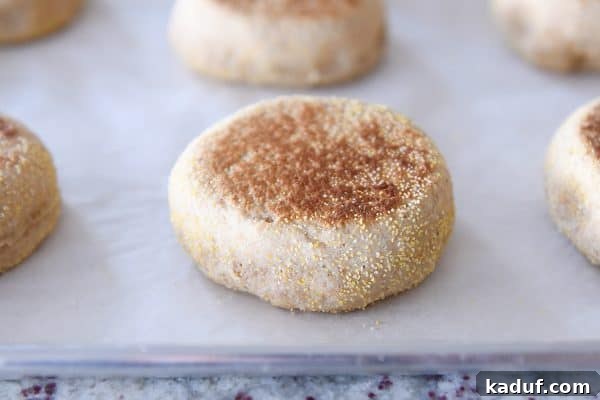
Customizing Your Muffins: Size and Texture
Adjust the Size to Your Liking
This recipe yields English muffins that are just slightly smaller than most store-bought varieties, making them perfect for individual servings. However, don’t let that limit your creativity! You can easily adjust the size to suit your preference. If you’re a fan of ginormous, “big-as-your-face” English muffins, I say go for it! Simply scoop more dough per muffin and adjust the cooking times slightly longer on the griddle and in the oven to ensure they cook through evenly.
Pro Tip for Perfect Nooks and Crannies
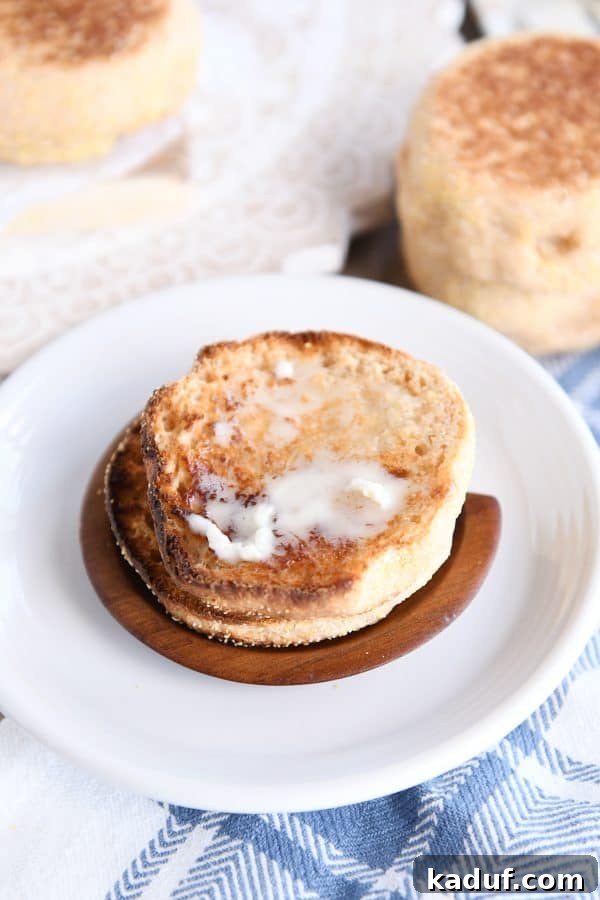
For those striving for the ultimate English muffin experience – characterized by an abundance of those coveted “nooks and crannies” – there’s a widely shared trick: use a fork to split them in half rather than a knife. The fork tines gently separate the internal structure, creating more irregular pockets, while a knife tends to cut through cleanly, resulting in fewer crevices. Additionally, allowing the muffins to cool completely before splitting also significantly aids in achieving this desirable texture. Full disclosure: my family is often far too impatient for either of these steps! But if you decide to experiment with the fork-splitting method and a cooling period, please let me know your results; I’d love to hear about your perfectly craggy creations!
The Ultimate Versatility: Breakfast (or Dinner) Sandwich
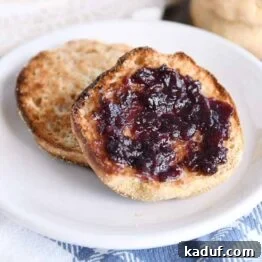
While it’s undeniably challenging to resist a freshly toasted English muffin, generously slathered with butter and jam, our family absolutely lives for the breakfast sandwich option. The delightful irony is that we frequently enjoy it for dinner! This versatile meal can be adapted to any preference or what you have on hand.
Sometimes we scramble the eggs, other times we opt for fried eggs with their perfectly runny yolks. There are nights when the sandwiches remain meatless, a gentle nudge that mom needs a grocery run. But on other, more fortunate evenings, the options are bountiful, with ham, crispy bacon, or savory sausage available. Lucky kids indeed!
Crafting these sandwiches isn’t rocket science, but the combination of a perfectly toasted English muffin with savory fillings is pure culinary genius. If you’ve ever even contemplated making English muffins at home, this is unequivocally the recipe to begin with. I eagerly await all your homemade English muffin success stories and reports. Get ready to feel like a true rock star in your kitchen!
One Year Ago: Super Easy S’Mores Chocolate Pie {or Tart}
Two Years Ago: Incredible Fluffy Overnight Buttermilk Pancakes
Three Years Ago: Chinese Cashew Chicken {30-Minute Meal}
Four Years Ago: Double Chocolate Quick Bread
Five Years Ago: Healthier Banana Bread Chocolate Chip Oat Snack Bars
Six Years Ago: Family Style Shrimp Scampi {20-Minute Meal}
Seven Years Ago: Chocolate Tres Leches Cake
Eight Years Ago: Split Pea Soup with Barley and Ham {Slow Cooker}
Easy Homemade English Muffins
Yield: 14 Muffins
Prep Time: 2 hrs 30 mins | Cook Time: 15 mins | Total Time: 2 hrs 45 mins
Pin Recipe
Ingredients
- 1 ¾ cups warm milk or buttermilk (see note)
- 3 tablespoons salted butter, melted
- 1 ½ teaspoons salt
- 2 tablespoons granulated sugar
- 1 tablespoon instant yeast
- 1 ¾ cups (249 g) all-purpose flour
- 1 ¾ cups (249 g) whole wheat flour (see note)
- ½ cup (85 g) cornmeal
Instructions
- In a large bowl, mix together the buttermilk, butter, salt, sugar, and yeast.
- Stir in the flour and mix until well-combined and no dry streaks remain. The batter will be very soft – you can kind of lift it up in a doughy ribbon with a spatula.
- Cover and let the batter rise in a warm place until puffy and doubled, 1-2 hours.
- Line two half sheet pans with parchment paper and liberally sprinkle cornmeal over the parchment paper. This will prevent the English muffin dough from sticking.
- Using a large cookie scoop or two greased spoons, scoop out about 6 tablespoons/2.5 ounces of batter and place in mounds on the prepared baking sheets. *You can make the English muffins larger or smaller depending on preference.* They’ll look a little messy at this point; that’s ok.
- Lightly grease your hands and take each mound of batter and flip it over in your hands so it is cornmeal-side up. Gently shape the dough into a mostly smooth round disc and set it back on the baking sheet (sprinkle more cornmeal on the parchment paper, if needed). Space the muffins several inches apart to leave room for rising.
- Cover the baking sheets and let the muffins rise until noticeably puffy, about an hour.
- Preheat the oven to 375 degrees F.
- Preheat a griddle to about 325-350 degrees (can also us a skillet on the stove over medium-low or medium heat). Gently pick up the puffy English muffins so they don’t totally deflate, and place them on the hot griddle.
- Cook for about 4-5 minutes per side. Adjust the heat if the English muffins are burning or overly browning. They’ll finish cooking all the way through in the oven.
- Transfer the English muffins to a clean (no cornmeal) parchment lined baking sheet and bake for 5-7 minutes until no longer doughy in the center.
- Let cool completely (if you can!) before splitting, toasting, and eating.
Notes
Buttermilk: Using buttermilk gives the English muffins a slight tanginess (similar to store-bought English muffins); it’s not overpowering. I also think it lends a lighter texture to the muffins. Regular milk can be used instead (I recommend using 1% or higher). The buttermilk or milk should be warm but not hot (about 90-100 degrees on an instant-read thermometer).
Yeast: I’ve only ever used instant yeast in this recipe, but you can try subbing in active dry yeast. Decrease the buttermilk/milk to 1 1/2 cups, proof 1 tablespoon active dry yeast in 1/4 cup warm water until bubbly and foaming and add to the recipe in step 1.
Flour: If you don’t have whole wheat flour, 100% all-purpose flour (and probably even bread flour) will work. If using whole wheat flour, I highly recommend using a white wheat variety (soft or hard) or kamut or einkhorn. I have the best results with any of those when using them in breads and baked goods.
Cooking: I like to “prebake” the English muffins on the griddle and then finish baking in the oven – if they cook too long on the griddle, they can dry out. However, you definitely can cook them start to finish on the griddle. Keep the heat low and dry cook them until they are no longer doughy in the center.
Author: Mel
Course: Bread | Cuisine: American | Method: Bake
Serving: 1 Muffin, Calories: 174kcal, Carbohydrates: 30g, Protein: 5g, Fat: 4g, Saturated Fat: 2g, Cholesterol: 9mg, Sodium: 285mg, Fiber: 3g, Sugar: 3g
Recommended Products
Recipe Source: Adapted and combined from cherished recipes including Joy of Cooking, King Arthur Flour, and my much-loved English Muffin Bread recipe.