
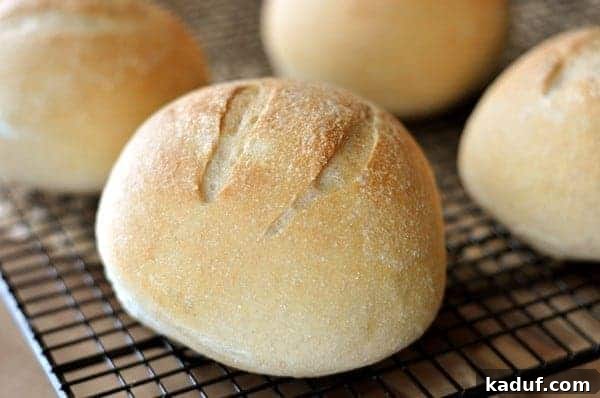
These homemade Artisan bread bowls are hearty and dense and perfect for scooping out, and filling up with a delicious, comforting soup.
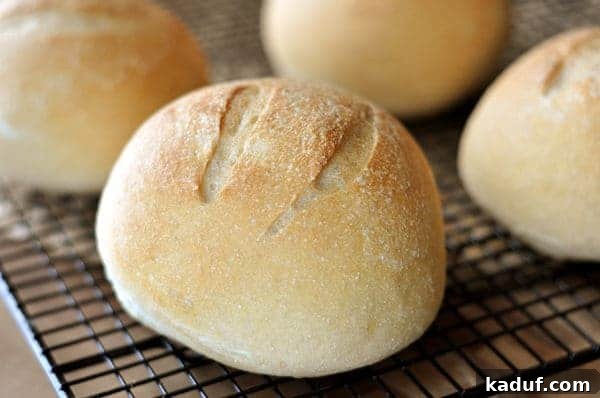
Homemade Artisan Bread Bowls: Crafting the Perfect Edible Bowl for Your Favorite Soups
Imagine a chilly evening, a steaming bowl of your favorite hearty soup, and the delightful experience of tearing off pieces of the vessel it’s served in. That’s the magic of a homemade artisan bread bowl! These rustic, dense, and perfectly crusty edible bowls are more than just a charming novelty; they’re a deeply satisfying way to enjoy everything from creamy chowders to robust chilis. Forget soggy bottoms or bland flavors – this recipe ensures a bread bowl that stands up to your most comforting creations while offering a delicious, chewy interior and a delightfully crisp exterior.
This particular Artisan Bread Bowl recipe is a cherished staple, known for its incredible depth of flavor and ideal texture. Unlike some simpler versions, the artisan method employed here results in a bread that is robust enough to hold generous portions of soup without quickly succumbing to moisture, yet tender enough to complement every spoonful. It’s a truly rewarding baking project that transforms a simple meal into an unforgettable culinary event.
Why Embark on the Journey of Homemade Bread Bowls?
While the convenience of store-bought options exists, the unparalleled joy and superior quality of homemade bread bowls are well worth the effort. Here are compelling reasons to roll up your sleeves and bake your own:
- Superior Freshness and Flavor: There’s simply no comparison to the taste of bread baked fresh in your own kitchen. The ingredients are at their peak, and the aroma alone is enough to transform your home into a cozy haven. Homemade means you control the quality and can savor every nuanced flavor.
- Optimal Texture and Durability: This artisan recipe is meticulously designed to yield a bread bowl with the perfect balance: a dense, chewy crumb on the inside and a gloriously crisp crust on the outside. This isn’t just for sensory pleasure; it provides the structural integrity needed to cradle even the thickest soups and stews without becoming soggy prematurely, ensuring a delightful eating experience from start to finish.
- Impressive Presentation for Any Occasion: Serving soup in an edible vessel is a guaranteed showstopper. Whether you’re hosting a dinner party, planning a special family meal, or simply want to elevate a weeknight dinner, homemade bread bowls add a touch of elegance and rustic charm that guests will adore and remember.
- Complete Customization: Baking from scratch gives you full control over the ingredients. You can experiment with different flours, add herbs like rosemary or thyme to the dough, incorporate a sprinkle of cheese, or adjust the size and shape to perfectly match the soup you intend to serve. Your kitchen, your rules!
- The Therapeutic Joy of Baking: Beyond the delicious outcome, the process of making bread is incredibly therapeutic. The tactile experience of kneading dough, the anticipation of watching it rise, and the satisfaction of pulling perfectly golden-brown loaves from the oven can be a deeply calming and rewarding activity. It’s a journey of creation that culminates in a truly heartwarming meal.
Unlocking the Artisan Secret: Key Steps for Perfect Bread Bowls
The journey to crafting these exceptional bread bowls involves several critical steps that contribute to their signature artisan quality. Understanding the ‘why’ behind each stage will empower you to achieve consistent and delicious results every time.
1. Activating the Yeast: The Spark of Life
The foundation of any great yeast bread is active yeast. Begin by dissolving your active dry yeast in lukewarm water. This crucial step, often called “proofing,” awakens the yeast and ensures it’s ready to work its magic. Within about 5 minutes, you should observe a creamy, slightly foamy layer on the surface of the water, indicating that your yeast is vibrant and active. If your mixture remains flat and doesn’t foam, your yeast may be old or the water temperature was incorrect (too hot will kill it, too cold won’t activate it), and it’s best to start again with fresh yeast.
2. The Art of Kneading: Developing Gluten for Structure
Kneading is where the dough truly comes to life. Whether you choose to knead by hand, with a powerful stand mixer fitted with a dough hook, or utilize a bread machine, the objective is the same: to develop the gluten in the flour. Gluten is the protein network that gives bread its elasticity, chewiness, and ability to hold its shape. A properly kneaded dough will transition from a shaggy mass to a smooth, supple, and elastic ball. It should feel soft and slightly tacky to the touch but should not stick excessively to your hands or the bowl. Don’t skimp on this step; sufficient kneading is paramount for achieving that desirable artisan texture.
3. The First Rise (Bulk Fermentation): Flavor and Volume Development
Following the kneading process, the dough undergoes its initial, or “bulk,” fermentation. During this period, the activated yeast diligently converts sugars into carbon dioxide and alcohol, causing the dough to gradually expand and become delightfully puffy. More importantly, this extended rise allows for the development of complex flavors, transforming simple flour and water into something truly profound. Always cover your dough loosely with plastic wrap or a damp kitchen towel to prevent it from drying out, and place it in a warm, draft-free environment. A slow, steady rise is often indicative of better flavor development.
4. Cold Fermentation: The Artisan Baker’s Secret to Depth
One of the distinctive characteristics of this artisan bread bowl recipe is the innovative cold fermentation step. After its initial rise, the dough is refrigerated for a significant period – typically between 4 and 24 hours. This chilling process dramatically slows down yeast activity, but it allows enzymes within the dough more time to break down complex starches into simpler sugars. This enzymatic action results in a richer, more nuanced flavor profile and contributes significantly to the bread’s superior crisp-chewy crust. This patience is rewarded with bread bowls that possess an incredible depth of taste and texture that’s hard to achieve with a quick rise.
5. Shaping and the Final Proof (Second Rise): Preparing for the Oven
Once the cold fermentation is complete, the chilled dough is gently divided and shaped into individual, tight, smooth balls – your future bread bowls. Consistency in size here will ensure even baking. These shaped dough balls then undergo a final, shorter proofing period at room temperature. This allows the gluten to relax and the dough to puff up slightly one last time before it hits the heat. While the dough is proofing, this is also the perfect moment to preheat your oven to a high temperature, ensuring it’s ready to impart that coveted, deep brown crust.
6. Scoring and Baking: The Signature Finish
Just before baking, use a very sharp razor blade or a sharp knife to make several shallow slashes (about ¼ to ½ inch deep) across the top surface of each shaped bread bowl. This practice, known as scoring, isn’t merely for aesthetics. It controls where the bread expands during the initial burst of heat in the oven, preventing uncontrolled tearing and contributing to the beautiful, rustic appearance of artisan bread. Baking at a high initial temperature is key for developing that beautiful, crisp, golden-brown crust, while the interior bakes through to a tender, airy finish. The thumping test on the bottom of the baked loaf confirms its readiness.
Artisan Bread Bowls Recipe
5-6 bread bowls
6 hours
28 minutes
6 hours 28 minutes
Pin Recipe
Ingredients
- 3 ¾ cups (533 g) all-purpose flour (see important note below for flour amount)
- ½ cup (71 g) whole wheat flour
- ¼ cup nonfat dry milk
- 2 teaspoons active dry yeast
- 2 teaspoons salt
- 2 tablespoons oil (e.g., olive oil or vegetable oil)
- 1 ½ cups lukewarm water, or enough to form a smooth, soft dough
Instructions
- **Activate Yeast:** In a large mixing bowl (or the bowl of a stand mixer), combine the active dry yeast with the lukewarm water. Stir gently and allow the mixture to sit undisturbed for about 5 minutes, until it becomes creamy and slightly foamy. This confirms your yeast is active and ready.
- **Mix and Knead the Dough:** Add the all-purpose flour, whole wheat flour, nonfat dry milk, salt, and oil to the yeast mixture. Mix thoroughly using a wooden spoon, a stand mixer with a dough hook, or a bread machine until the ingredients are just combined and a shaggy dough forms. Continue to knead for 8 to 10 minutes (or follow your bread machine’s dough cycle) until the dough is smooth, elastic, and soft. It should be pliable and slightly tacky to the touch but not sticky.
- **First Rise (Bulk Fermentation):** Lightly grease a clean bowl with a little oil. Transfer the kneaded dough to the bowl, turning it once to coat all sides. Cover the bowl securely with plastic wrap or a clean kitchen towel. Place the bowl in a warm, draft-free spot and let the dough rise for approximately 45 minutes, or until it has visibly puffed up and nearly doubled in size.
- **Shape the Bread Bowls:** Gently “punch down” the risen dough to release the accumulated air. Turn the dough out onto a lightly floured work surface. Divide the dough into 5 or 6 equal pieces, depending on the desired size of your bread bowls. Shape each piece into a tight, uniform ball. Arrange the dough balls on a lightly greased baking sheet or a baking sheet lined with parchment paper, ensuring there is adequate space between each one.
- **Cold Fermentation for Flavor and Texture:** Cover the shaped bread bowls loosely but completely with greased plastic wrap. Transfer the baking sheet to the refrigerator and allow the dough to cold ferment for a minimum of 4 hours, and up to 24 hours. This extended cold rest is crucial for developing the deep flavor and achieving the characteristic crisp-chewy texture of artisan bread.
- **Second Rise (Proofing) & Oven Preheat:** Two to three hours before you plan to serve the bread bowls, remove them from the refrigerator. Uncover them and let them sit at room temperature for approximately one hour. During this final proofing time, preheat your oven to a high temperature of 425°F (220°C).
- **Score and Bake:** Just before placing the bread bowls into the preheated oven, take a very sharp razor blade or a sharp knife and make several shallow slashes (about ¼ to ½ inch deep) across the top surface of each dough ball. These scores allow the bread to expand beautifully and prevent uncontrolled cracking during baking.
- **Bake Until Golden:** Bake the bread bowls for 22 to 28 minutes, or until they are a deep golden brown and produce a hollow sound when gently tapped on the bottom. This indicates they are fully baked.
- **Cool Completely:** Once baked, remove the bread bowls from the oven and transfer them immediately to a wire rack to cool completely. Cooling is essential before hollowing them out and filling them with your delicious soup.
Chef’s Notes & Expert Tips for Artisan Bread Bowls
Precision with Flour Amount (Consider a Kitchen Scale!): As is often the case with yeast doughs, the exact quantity of flour can fluctuate based on environmental factors such as humidity, ambient temperature, and even altitude. While cup measurements are provided for convenience, using a kitchen scale for flour (approximately 533g for all-purpose and 71g for whole wheat) offers the highest level of accuracy and consistency. If you’re measuring by volume, always rely on the dough’s texture rather than strictly adhering to the recipe’s flour quantity. Aim for a dough that feels smooth, soft, and slightly tacky, effortlessly pulling away from the sides of your mixing bowl during kneading.
Mastering Yeast Baking: For those who are new to baking with yeast or simply wish to hone their skills, exploring a dedicated tutorial on working with yeast can be incredibly beneficial. Understanding how yeast interacts with your ingredients and recognizing the visual and tactile cues of a perfectly proofed dough are fundamental to consistent baking success.
Incorporating Whole Wheat Flour for Flavor and Nutrition: To introduce an extra layer of nutty flavor and a nutritional boost, you can successfully substitute half to three-quarters of the all-purpose flour with finely ground white whole wheat flour. The results are typically excellent! For the more adventurous baker, using 100% finely ground white whole wheat flour is an option, though it will yield a slightly denser bread bowl. When incorporating a significant amount of whole wheat flour, it’s advisable to increase the kneading time by a few minutes. The bran in whole wheat flour can impede gluten development, so extra kneading helps ensure a strong, well-structured dough.
Troubleshooting Your Dough: Common Issues and Solutions:
- Dough not rising as expected? The most common culprits are inactive yeast (check the expiration date!) or water that was either too hot (killing the yeast) or too cold (inhibiting activation).
- Dough too sticky to handle? Gradually incorporate additional flour, a tablespoon at a time, until the dough achieves that ideal smooth, slightly tacky consistency that pulls cleanly away from surfaces.
- Dough feeling too dry or stiff? Add lukewarm water sparingly, a teaspoon at a time, and knead it in until the dough softens and becomes more pliable.
Mel
Bread
American
Bake
Nutrition Information (per serving)
- Serving: 1 Bowl
- Calories: 470 kcal
- Carbohydrates: 85 g
- Protein: 16 g
- Fat: 7 g
- Saturated Fat: 1 g
- Cholesterol: 1 mg
- Sodium: 969 mg
- Fiber: 5 g
- Sugar: 4 g
Recommended Kitchen Tools
Recipe Source: Adapted from King Arthur Flour
Serving Your Masterpiece: What to Fill Your Artisan Bread Bowls With
Once your beautifully baked artisan bread bowls have cooled and are ready for their starring role, the creative fun truly begins! Their sturdy structure and delightful flavor profile make them incredibly versatile vessels for a wide array of delicious fillings. Here are some popular and inventive ideas to inspire your next meal:
- Classic Creamy Soups: These bowls are a match made in heaven for rich and creamy concoctions. Think hearty New England Clam Chowder, comforting Broccoli Cheddar Soup, an earthy Cream of Mushroom, or a luscious Potato Soup. The bread perfectly soaks up the creamy goodness, making every bite sublime.
- Robust Stews and Chilis: For a more substantial meal, fill your bread bowls with savory stews or chilis. Beef Stew, a hearty Chicken Pot Pie filling, a zesty White Bean Chili, or a classic Texas Chili are all fantastic choices. The bread provides an excellent counterpoint to the rich, slow-cooked flavors.
- Lighter, Flavorful Fare: Don’t feel limited to only heavy fillings. A vibrant Tomato Basil Soup, a rich French Onion Soup (with extra melted Gruyère bubbling over the top!), or a chunky Garden Vegetable Soup can be equally satisfying and elegant when served in a bread bowl.
- Creative Breakfast or Brunch Options: Break away from tradition! Smaller bread bowls can be transformed into unique breakfast experiences by filling them with scrambled eggs, crispy bacon bits, and melted cheese, creating a delightful morning treat.
- Dips and Appetizers for Entertaining: For your next gathering, hollow out a larger bread bowl and use it as a striking serving dish for crowd-pleasing dips like warm Spinach Dip, creamy Artichoke Dip, or even a savory Cheese Fondue. The scooped-out bread pieces can be toasted and served alongside for dipping!
To prepare your bread bowls for serving, carefully use a serrated knife to slice off the top “lid” of each cooled bowl. Then, gently hollow out some of the soft interior bread using your fingers or a small spoon, being careful to leave a sturdy wall (about ½ to ¾ inch thick) and bottom. You can tear the removed bread into bite-sized pieces and serve them alongside your chosen filling for extra dipping pleasure.
Frequently Asked Questions About Baking Artisan Bread Bowls
Baking, especially when aiming for artisan quality, can sometimes spark a few questions. To ensure your bread bowl journey is smooth and successful, here are some common queries and their helpful answers:
- Q: Can I prepare these bread bowls in advance?
- A: Absolutely! The cold fermentation step is specifically designed with make-ahead convenience in mind. You can prepare the dough up to the refrigeration stage (Step 5) a full day before you plan to bake and serve them. On the day of your meal, simply remove them from the refrigerator, allow them to come to room temperature, and then proceed with baking. Baked, unfilled bread bowls can also be stored at room temperature for up to 2-3 days, or frozen for longer preservation (see next point).
- Q: What’s the best way to store leftover or pre-baked bread bowls?
- A: For short-term storage, once your bread bowls are completely baked and cooled, place them in an airtight container or a large plastic bag at room temperature. They will stay fresh for 2-3 days. For longer storage, wrap each cooled bread bowl tightly in plastic wrap, then an additional layer of aluminum foil, and freeze for up to 1 month. To use, thaw them overnight in the refrigerator or at room temperature, then refresh them in a warm oven (around 350°F / 175°C) for 5-10 minutes until warmed through and the crust is crisp again.
- Q: My bread bowls aren’t as crusty as I hoped. What might have gone wrong?
- A: Achieving a perfectly crisp crust depends on a few factors. Firstly, ensure your oven is fully preheated to the specified high temperature before you put the bread in. Baking on a preheated baking stone or a heavy-duty baking steel can significantly aid in crust development. Another tip is to create steam in your oven during the initial baking phase. You can do this by placing a shallow tray of hot water on the bottom rack of your oven just before inserting the bread. This steam helps gelatinize the starches on the surface, leading to a crisper crust. Finally, make sure they are baked long enough to achieve a deep golden-brown color and sound hollow when thumped.
- Q: Can I experiment with different types of flour in this recipe?
- A: Yes, with some thoughtful adjustments! As detailed in the expert tips, finely ground white whole wheat flour is an excellent substitute for a portion of the all-purpose flour, adding nutrition and flavor. Bread flour, with its higher protein content, can yield an even chewier texture. If you decide to use other specialty flours, be aware that different flours absorb liquids at varying rates. You might need to slightly adjust the amount of water (adding a little more or less) to achieve the desired dough consistency. Don’t be afraid to experiment to discover your preferred flour blend!
- Q: What’s the easiest way to hollow out the bread bowls without tearing them?
- A: The key is to wait until the bread bowls are completely cooled, as warm bread is more prone to tearing. Use a sharp serrated knife to carefully cut a circular lid around the top of each bowl, about an inch or so from the edge, ensuring you don’t cut all the way through to the bottom. Once the lid is removed, use your fingers or a small spoon to gently pull out the soft interior bread, leaving a sturdy and even wall of about ½ to ¾ inch thick and a solid bottom. The removed bread can be torn into pieces and served alongside your soup.
More Delicious Bread Recipes to Explore: