
Decadent Red Velvet Cheesecake Cake: The Ultimate Holiday Dessert
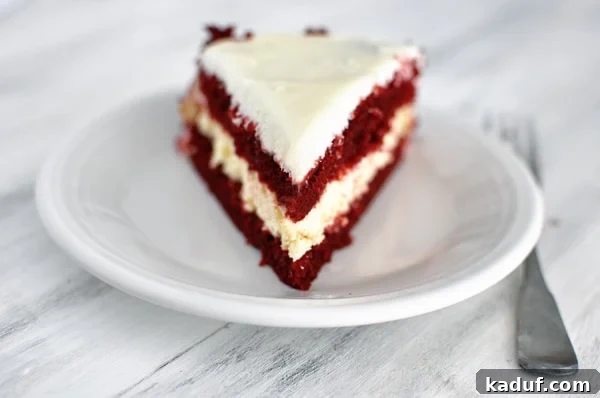
Prepare to have your expectations redefined with this show-stopping, utterly decadent Red Velvet Cheesecake Cake. This isn’t just a dessert; it’s an experience, a masterpiece of flavors and textures that promises to be the highlight of any holiday gathering or special celebration. With its vibrant red layers, creamy cheesecake core, and luxurious cream cheese frosting, it’s a treat that looks as impressive as it tastes.
The Inspiration Behind This Iconic Dessert
My journey to perfecting this Red Velvet Cheesecake Cake began with an image – a captivating photo of Junior’s legendary red velvet cheesecake that had been repinned thousands of times on Pinterest. It was an instant obsession. The visual appeal was undeniable: perfectly layered, rich, and inviting. As a passionate lover of cheesecakes – having previously explored chocolate chip cookie dough cheesecake, brownie mosaic cheesecake, classic chocolate cheesecake, and even exotic pomegranate cheesecake – I knew I had to recreate this red velvet marvel in my own kitchen. The challenge was to capture that iconic blend of classic red velvet cake with the signature creamy cheesecake, creating a dessert that truly stood out.
What Makes This Red Velvet Cheesecake Cake Unique?
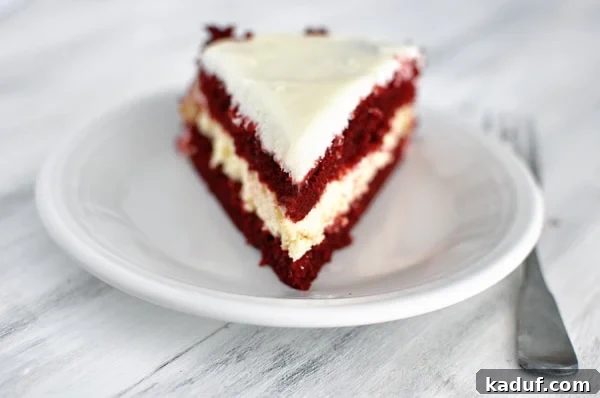
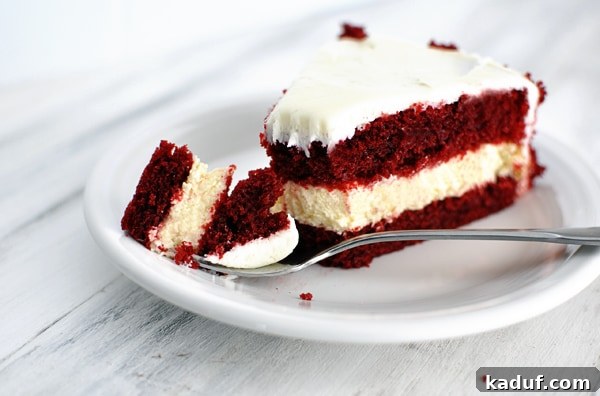
This dessert is a delightful deception, a harmonious blend that offers the best of both worlds. It’s not *entirely* cheesecake, nor is it merely a red velvet cake. Instead, it’s an ingeniously constructed confection: two tender layers of moist red velvet cake embrace a thick, luxurious baked cheesecake. To the casual observer, the cheesecake might even appear to be an incredibly rich frosting, adding to its mystique. The entire creation is then lavishly coated in swirls of tangy cream cheese frosting and generously adorned with delicate red velvet cake crumbs, adding both texture and visual appeal. Every bite is an exquisite balance of the rich, slightly chocolatey red velvet, the smooth and creamy cheesecake, and the sweet, tangy frosting. It’s a symphony of flavors that truly celebrates the red velvet and cream cheese pairing.
Is It Difficult to Make? Your Guide to a Flawless Creation
Despite its elaborate appearance, don’t let this cake intimidate you. The beauty of this recipe lies in its modularity. Each component – the cheesecake layer, the red velvet cake, and the cream cheese frosting – can be prepared independently, making the overall process much more manageable than it might seem. I often tackle it on a leisurely Saturday morning, moving in and out of the kitchen as each part chills or bakes. This phased approach allows you to spread out the work, preventing any overwhelming kitchen chaos. On a particularly cold day, I even leveraged my back porch as a natural freezer to quickly chill the baked cheesecake to perfection – a little baker’s ingenuity goes a long way!
The result is a cake that is undeniably appealing in both its stunning presentation and its unforgettable taste. I struggled to pick just a few photos for this post, a testament to how utterly enamored I am with this dessert. While my homemade version may not be an *exact* replica of the famous original, the moment you take that first bite, all comparisons fade away. Because, ultimately, it’s the taste that truly matters, isn’t it?
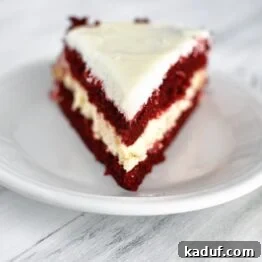
Red Velvet Cheesecake Cake
12 Servings
25 mins
1 hr
1 hr 25 mins
Pin Recipe
Ingredients
Cheesecake Layer:
- 2 packages (8-ounces each) (454 g) cream cheese, at room temperature
- ⅔ cup (141 g) granulated sugar
- Pinch of salt
- 2 large eggs
- ⅓ cup (75 g) sour cream
- ⅓ cup heavy whipping cream
- 1 teaspoon vanilla extract
Red Velvet Cake Layer:
- 2 ½ cups (355 g) all purpose flour
- 1 ½ cups (318 g) granulated sugar
- 3 tablespoons natural unsweetened cocoa powder (not Dutch-process)
- 1 ½ teaspoons baking soda
- 1 teaspoon salt
- 2 large eggs, at room temperature
- 1 ½ cups vegetable or canola oil
- 1 cup buttermilk
- ¼ cup two 1-ounce bottles red food coloring
- 2 teaspoons vanilla extract
- 2 teaspoons white vinegar
Cream Cheese Frosting:
- 2 packages (8-ounces each) (454 g) cream cheese, at room temperature
- ½ cup (113 g) butter, at room temperature
- 1 teaspoon vanilla extract
- 2 ½ cups (285 g) powdered sugar
Instructions
-
Prepare the Cheesecake Layer: Begin by making the cheesecake layer to allow ample chilling time. Preheat oven to 325°F (160°C). Lightly coat a 9-inch springform pan with nonstick spray. In a large bowl, using an electric mixer, whip the cream cheese until completely smooth and creamy. Mix in the granulated sugar and a pinch of salt, blending for 2 minutes and scraping down the bowl as needed. Add the eggs one at a time, mixing well after each addition. Finally, mix in the sour cream, heavy whipping cream, and vanilla extract until just combined and smooth; avoid overbeating. Pour the cheesecake batter into the prepared springform pan. Bake for 40-45 minutes, or until the edges are set and the center has a slight jiggle. Remove from oven and cool completely on a wire rack. Once cooled, wrap the pan tightly with foil and place the cheesecake in the freezer until firm, which will help with assembly.
-
Bake the Red Velvet Cake Layers: Preheat oven to 350°F (175°C). Grease and flour two 9-inch round metal baking pans. In a large bowl, whisk together the all-purpose flour, granulated sugar, natural unsweetened cocoa powder, baking soda, and salt. Create a well in the center of the dry ingredients. Add the eggs, vegetable or canola oil, buttermilk, red food coloring, vanilla extract, and white vinegar into the well. Whisk until all ingredients are fully combined and the batter is thick and smooth, continuing to whisk for another 1-2 minutes, scraping down the sides as necessary. Divide the batter evenly between the two prepared pans. Bake for 28-30 minutes, or until a toothpick inserted into the center comes out with a few moist crumbs attached (be careful not to overbake, as this can result in dry cake layers). Let the cakes cool in their pans for 5-10 minutes. Run a knife around the edges of the pans, then invert the cakes onto a piece of parchment or wax paper set on a cooling rack to cool completely.
-
Make the Cream Cheese Frosting: In a large bowl, using an electric handheld mixer or a stand mixer, whip the room temperature cream cheese until smooth and creamy. Add the room temperature butter and vanilla extract, mixing until incorporated. Gradually add the powdered sugar, mixing on low speed until combined, then increase to high speed and beat until the frosting is light, fluffy, and creamy.
-
Assemble the Cake: To begin assembly, carefully cut each cooled red velvet cake layer in half horizontally, creating two thinner cake layers from each, for a total of four thin cake layers. Select one of the flatter bottom halves of cake and place it in the center of your serving platter or cake plate. Remove the cheesecake from the freezer. Use a thin, flat knife or spatula that has been run under hot water to gently loosen the cheesecake from the sides and bottom of the springform pan. Carefully transfer the cheesecake layer onto the first red velvet cake layer on the serving plate. Place another red velvet cake layer on top of the cheesecake. For best results, choose the flattest cake layers for the top and bottom to ensure an even, stable cake structure. Crumble the remaining two cake layers into fine crumbs and set aside for decoration.
-
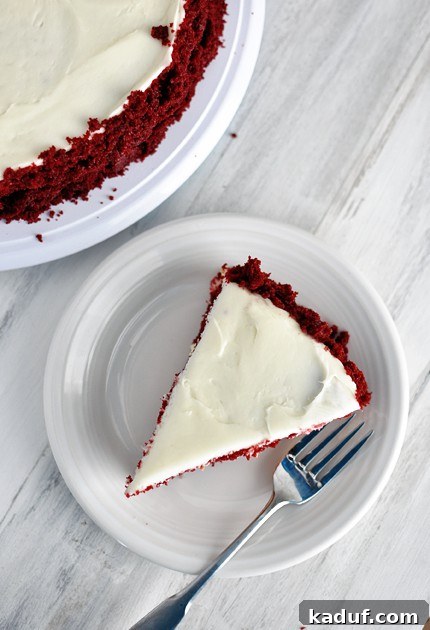
Frost and Decorate: Scoop generous dollops of the cream cheese frosting onto the top of the assembled cake. Using an offset spatula, spread the frosting evenly over the top and sides of the cake. The sides don’t need to be perfectly smooth, as they will be covered with cake crumbs, but ensure an even layer so the crumbs can adhere. Create decorative swirls on the top of the cake with your spatula. Carefully gather handfuls of the reserved red velvet cake crumbs and gently press them into the sides of the cake, working your way around the entire perimeter until fully covered. Don’t worry about any fallen crumbs; they can be easily swept away once the cake is complete.
-
Chill and Serve: Lightly cover the finished cake (to prevent the cake crumbs from drying out) and refrigerate until ready to serve. For best flavor and texture, allow the cake to come to room temperature for about 30 minutes before slicing and serving. This cake can be made up to two days in advance and stored chilled.
Notes
Mel
Dessert
American
Bake
Calories: 984kcal,
Carbohydrates: 86g,
Protein: 11g,
Fat: 68g,
Saturated Fat: 25g,
Cholesterol: 180mg,
Sodium: 695mg,
Fiber: 1g,
Sugar: 64g
Essential Tools for Your Baking Success
Having the right equipment can make all the difference when tackling a multi-layered cake like this. Here are some recommended products that will help you achieve baking perfection:
Recommended Products
Recipe Source: The cheesecake, cake, and frosting recipes have been adapted from a delightful recipe found on Recipe Girl. My method for assembly and presentation is my own, carefully crafted to mimic the exquisite visual appeal of Junior’s Red Velvet Cheesecake Cake, as seen in countless online images.
Other Delicious Red Velvet Recipes You Might Love: