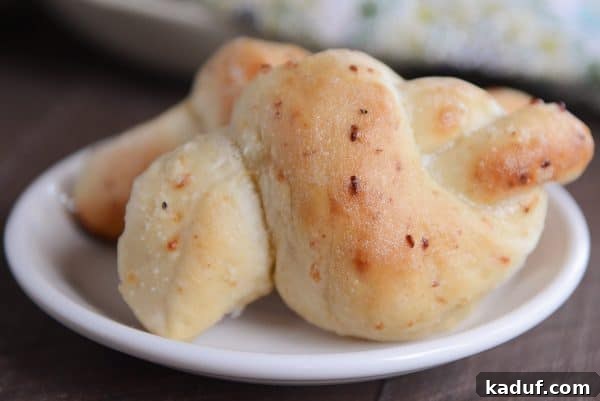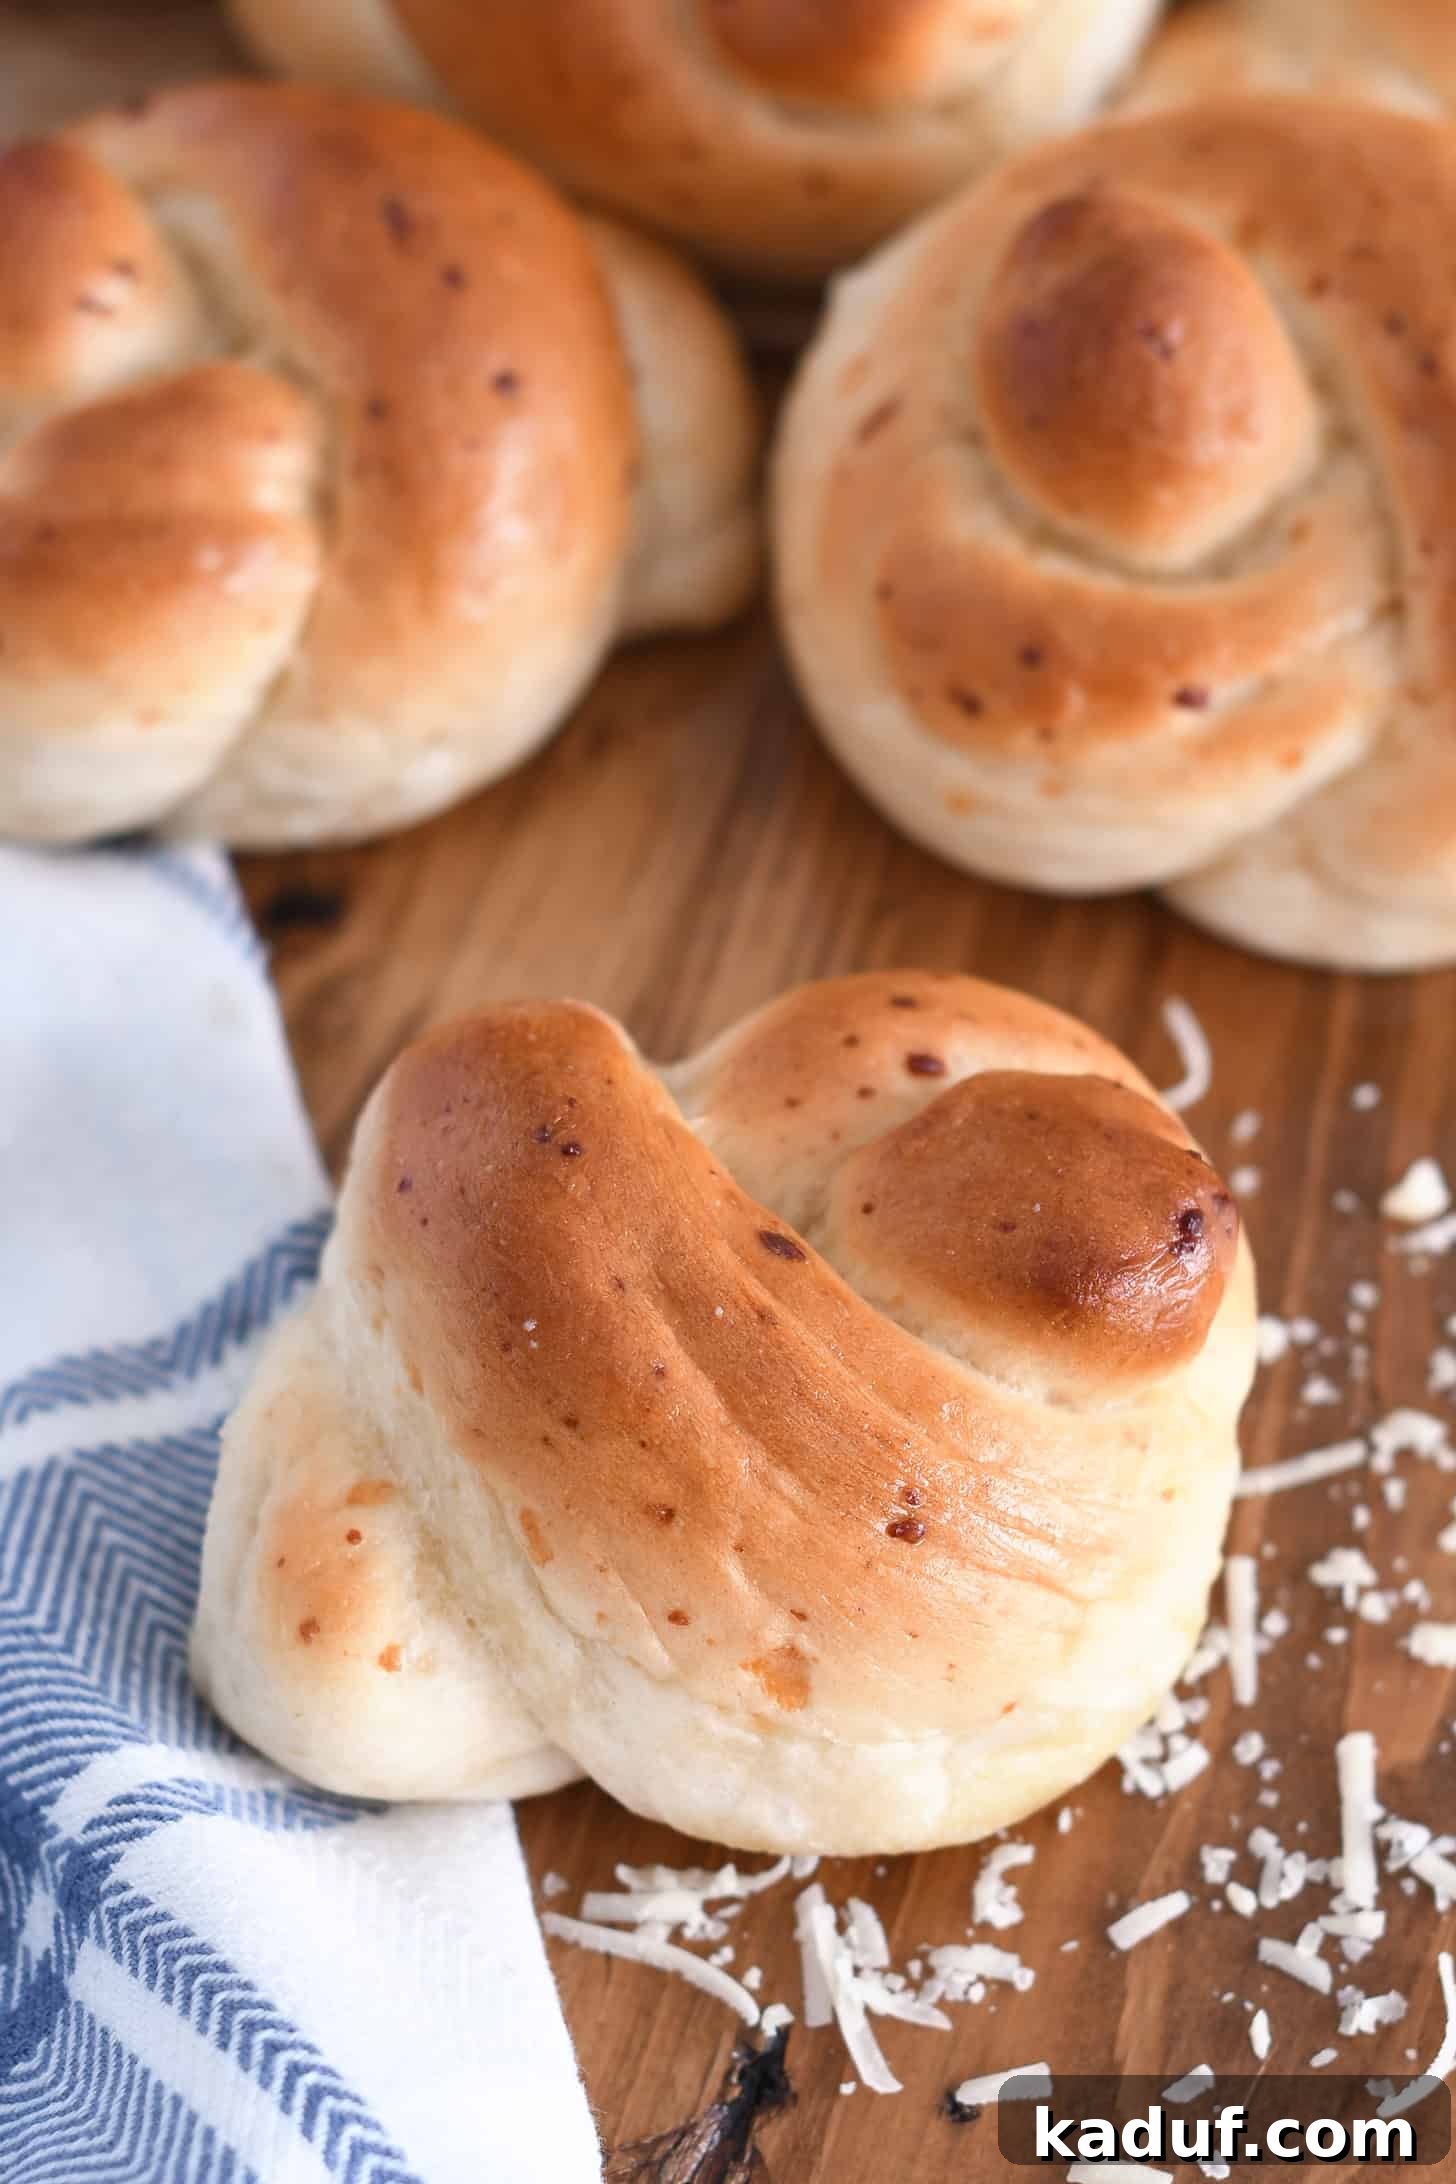
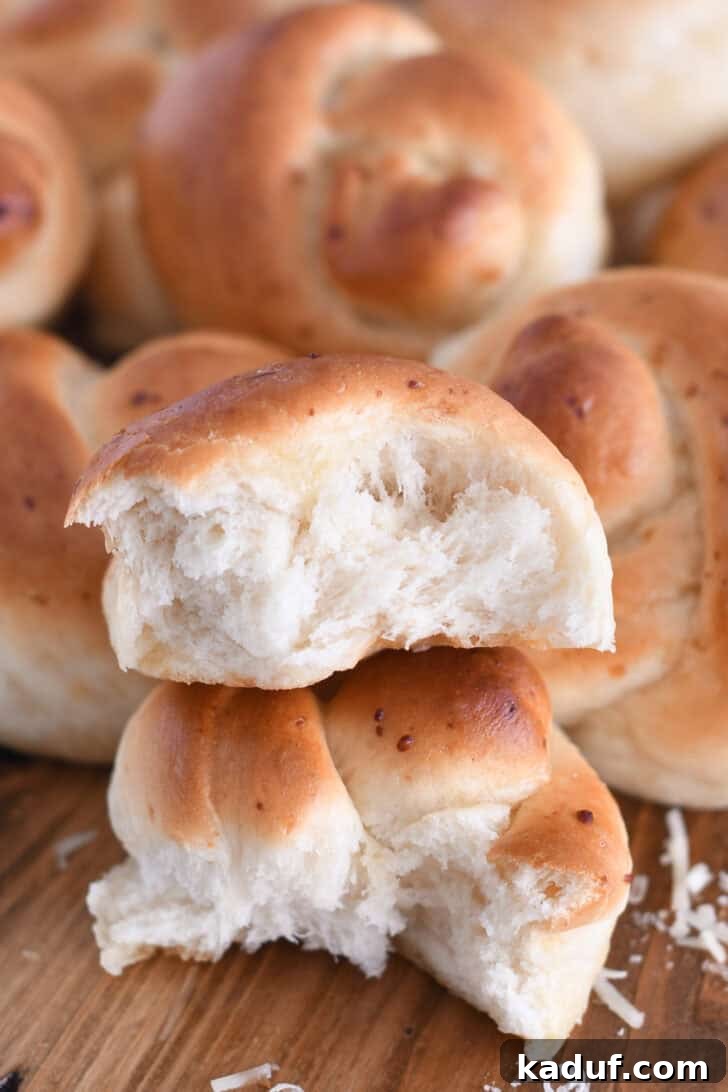
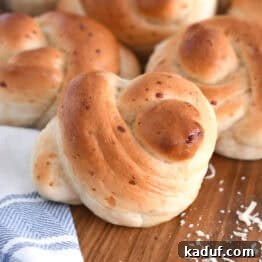
These easy Parmesan breadstick knots are undeniably buttery, incredibly fluffy, and bursting with savory flavor. They are, without a doubt, some of the most satisfying bread you’ll ever bake, destined to become a staple in your kitchen. Imagine warm, golden-brown knots, fresh from the oven, generously brushed with melted butter and infused with the irresistible aroma of authentic Parmesan cheese. Pure comfort, pure delight, and remarkably simple to achieve!
What makes these homemade breadstick knots truly extraordinary isn’t just a secret ingredient, but rather a combination of four simple yet powerful tips. Today, I’m thrilled to share these insights with you, ensuring your bread-making experience is nothing short of incredible, delivering results that will impress everyone who tries them.
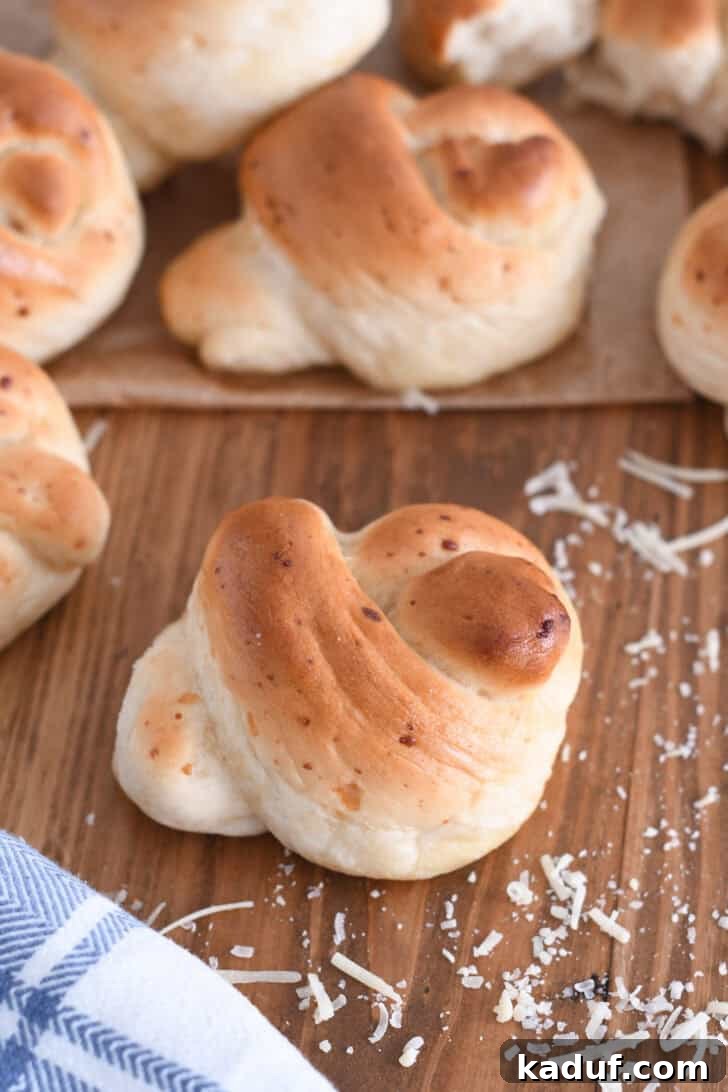
Four Masterful Tips for Unforgettable Parmesan Breadstick Knots
The foundation of these delightful Parmesan breadstick knots comes from a remarkably easy and straightforward dough recipe, adapted from my beloved 1-hour divine breadsticks. While the base is simple, it’s these four key techniques that elevate them from good to absolutely phenomenal, guaranteeing a bread experience like no other and making them truly stand out.
-
The Flour Factor: Bread Flour for Superior Texture
Swapping out standard all-purpose flour for bread flour is a game-changer for these knots. Bread flour boasts a higher protein content, which translates to superior gluten development during kneading. This extra gluten forms a strong, elastic network within the dough, allowing it to trap more gas produced by the yeast as it ferments and rises. The beautiful result? Insanely fluffy, wonderfully airy breadsticks with a satisfyingly chewy bite that you just can’t achieve with all-purpose flour alone. It’s the secret to that coveted light-yet-substantial texture that makes these breadsticks so addictive. -
Infused Flavor: Freshly Grated Parmesan in the Dough
Instead of merely sprinkling Parmesan on top as an afterthought, we incorporate freshly grated Parmesan cheese directly into the dough itself. This isn’t just any cheese; freshly grated Parmesan delivers a sharp, nutty, and distinctly savory “punchy” flavor that permeates every single crumb, infusing the bread from the inside out. As the breadsticks bake, the cheese melts subtly into the dough, creating delicate pockets of intense umami and an aromatic depth that transforms a simple breadstick into a gourmet delight. Always opt for freshly grated Parmesan over pre-grated varieties, as the latter often contains anti-caking agents that can affect both the flavor profile and the texture of your finished bread. -
The Aesthetic and Textural Advantage: Shaping into Knots
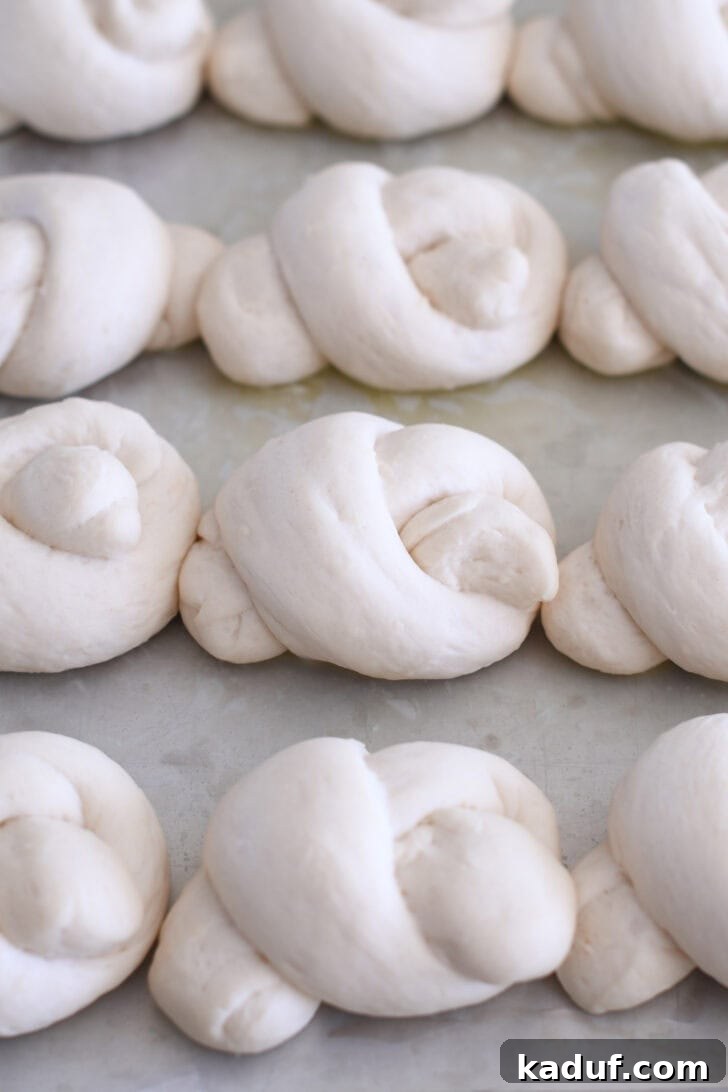
While simple straight breadsticks are undoubtedly delicious, forming the dough into elegant knots offers distinct advantages that enhance both their visual appeal and eating experience. The knot shape creates more surface area for that desirable golden-brown crust, adding a delightful textural contrast. Moreover, these plump knots result in a thicker, puffier breadstick with a more substantial feel in hand. They boast a wonderfully varied texture – soft and tender within, with slightly crispy, buttery edges. Visually, they’re incredibly appealing, adding a touch of rustic elegance and homemade charm to any meal. -
The Ultimate Finish: Liberally Brushing with Hot Butter
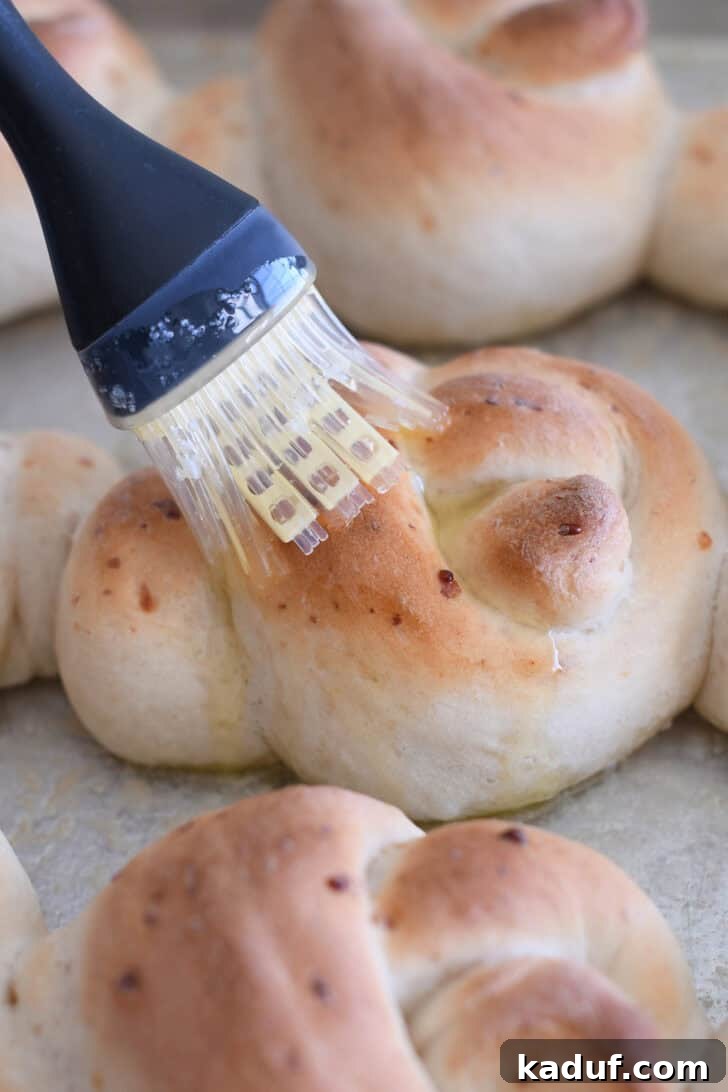
This final step is absolutely non-negotiable for achieving peak breadstick perfection and maximum flavor. As soon as these golden-brown breadsticks emerge from the scorching hot oven, they are generously brushed with melted, salted butter. The hot bread eagerly absorbs the butter, infusing it with an incredible richness, essential moisture, and a glorious, glistening sheen. The butter not only adds an unparalleled, luxurious flavor but also contributes significantly to that tender, melt-in-your-mouth quality, ensuring each bite is utterly irresistible. This is truly where the magic happens, transforming good bread into an extraordinary culinary experience. Need I say more? It’s pure butter bliss!
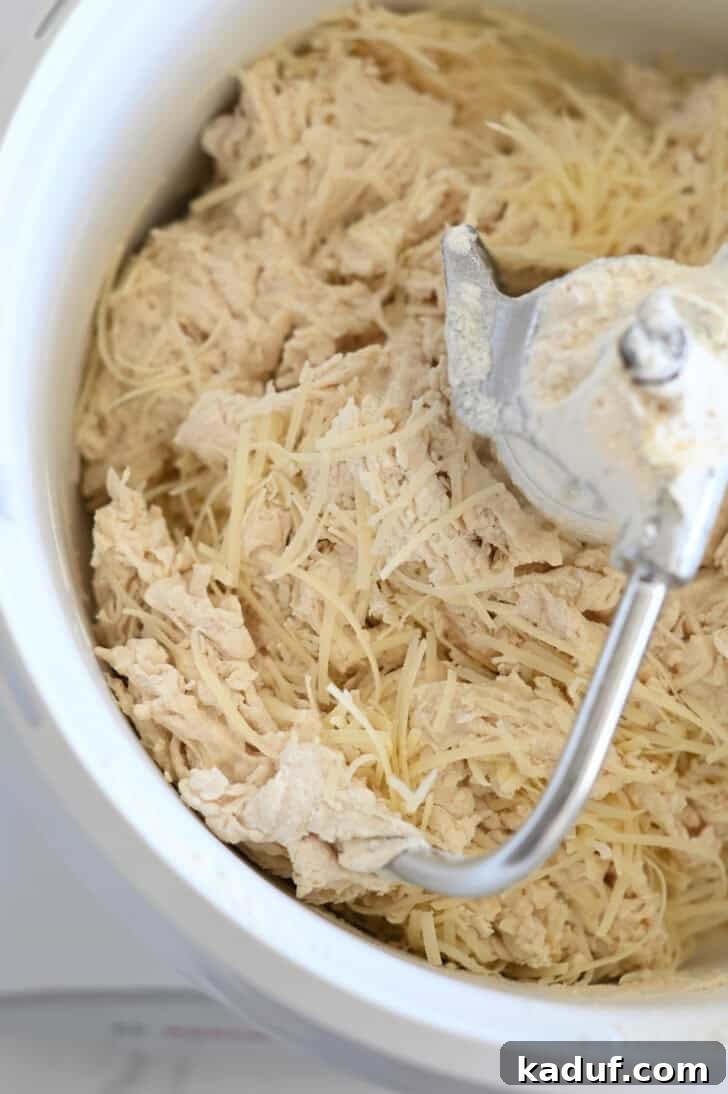
How to Shape Perfect Parmesan Breadstick Knots
While the idea of shaping dough into knots might sound intimidating for a novice baker, it’s actually an incredibly simple and intuitive process that adds a charming, artisanal touch to your homemade breadsticks. Don’t worry about perfection; rustic charm is part of their appeal! Follow these straightforward steps to create beautiful, puffy knots every time.
- Portion the Dough: Begin by turning your wonderfully risen dough out onto a lightly greased countertop. Using a bench knife or a sharp knife, divide the dough into 12 equal pieces. For optimal consistency and uniform baking, each piece should ideally weigh approximately 2.75 to 3 ounces. This ensures that all your breadsticks cook evenly.
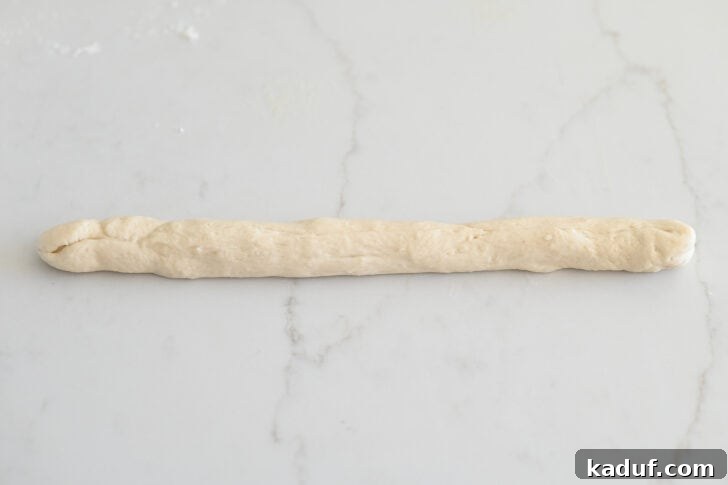
- Roll into Strips: Take each individual dough piece and, using the palms of your hands and a gentle rolling motion, shape it into a thick, elongated strip or rope. Aim for a length of about 6 inches. The key here is to maintain an even thickness throughout the strip to prevent any thin spots from over-baking and becoming too crisp, or thick spots from under-baking and remaining doughy.
- Form a Loop: Next, carefully take one end of the dough strip and gently lift it over the other end, allowing it to cross over and create a graceful, open loop. This simple action forms the initial foundation and structure of your knot, setting the stage for the final twist.
- Complete the Knot: Finally, bring the free end of the dough strip up and through the center of the loop you just created. Gently pull and tighten the knot, ensuring it’s snug enough to hold its shape but not overly compressed. You want to leave enough room for the dough to expand and rise beautifully during its second proofing and baking, without losing its distinct knot definition. Place the finished knot on your prepared baking sheet.
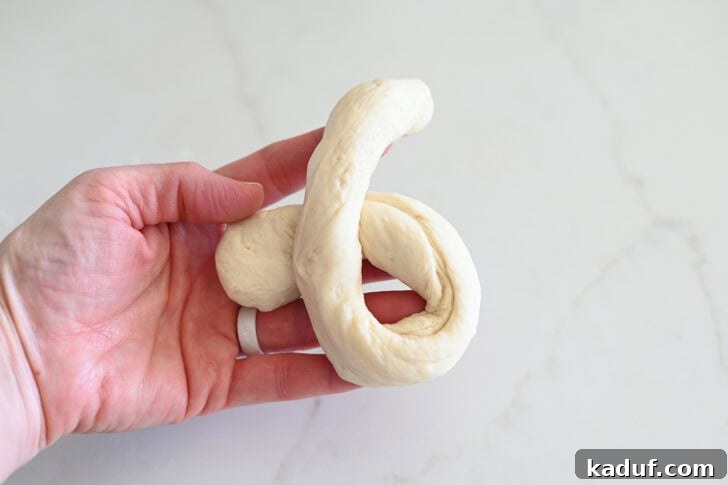
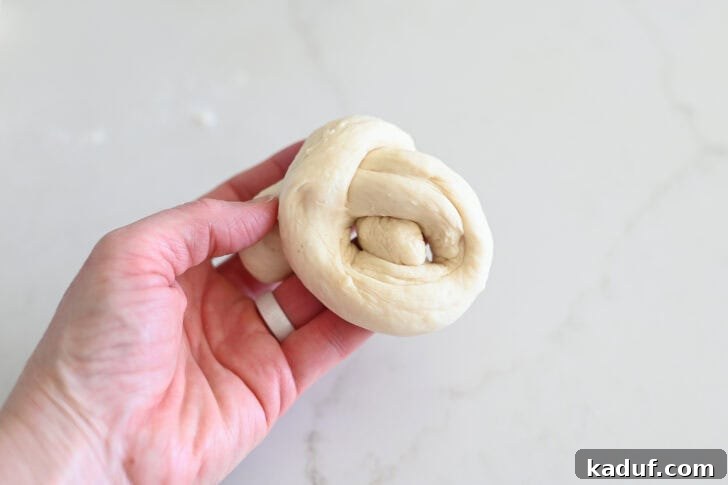
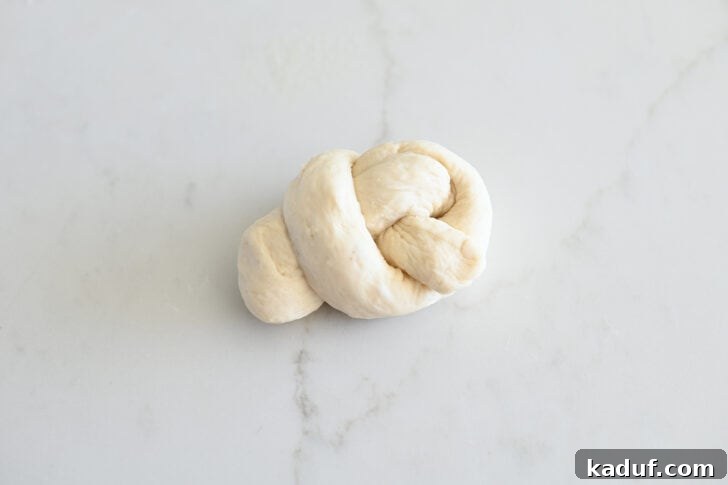
Please don’t stress if your knots don’t look absolutely perfect! This is home baking, and minor variations or a slightly rustic appearance only add to their charm and authenticity. Rest assured, most minor imperfections will gracefully disappear as the breadsticks rise during proofing and puff up beautifully and evenly in the hot oven. What truly matters most is the phenomenal taste, and I promise, these Parmesan breadstick knots will be incredibly delicious no matter their exact appearance.
For those who prefer a visual guide, here’s a quick 30-second video tutorial to help you master the knot-shaping technique with confidence. A brief glance at this visual instruction, and you’ll be knotting like a seasoned pro in no time! ⬇️⬇️
The World’s Best Bread: A Versatile Delight
These easy Parmesan breadstick knots are far more than just a simple side dish; they are a true culinary revelation. They hold a cherished spot as one of our most frequently prepared bread recipes, and for exceptionally good reason. They seamlessly combine speed in preparation, effortless simplicity, and stunning deliciousness into one irresistible and unforgettable package that everyone adores.
What truly sets these breadsticks apart is their incredible versatility, making them a perfect pairing for virtually any meal. Imagine serving these golden, savory knots alongside a rich and comforting pasta dish, perfect for soaking up delectable sauces. They are an absolute dream companion with hearty soups, adding a wonderful textural contrast and comforting warmth. Pair them with a slow-cooked, tender pot roast, a fresh, crisp salad, or even a spicy chili for an added dimension of flavor. From casual weeknight family dinners to elegant holiday gatherings, these breadsticks fit seamlessly and beautifully into any menu, elevating the entire dining experience.
Their universal appeal spans all ages, from the youngest eaters to the most discerning adults! My daughter, for instance, adores them so profoundly that she’ll often bake a dedicated batch just for herself. She then ingeniously hides them from her ever-hungry brothers, ensuring she has a delightful treat or two to pack in her school lunches throughout the entire week. That’s truly a testament to how utterly irresistible and deeply loved these Parmesan breadstick knots are!

Rave Reviews: What Our Bakers Are Saying
Don’t just take our word for it! The incredible flavor, impressive texture, and remarkable ease of these Parmesan breadstick knots have garnered a loyal and enthusiastic following among home bakers. Here’s what delighted cooks and satisfied eaters have shared about their personal experience with this recipe:
⭐️⭐️⭐️⭐️⭐️ Divine. Perfection. So easy. SO yummy. Making these makes me look like a domestic goddess, all thanks to Mel. -Katie S.
⭐️⭐️⭐️⭐️⭐️ What?!?!? Absolutely incredible bread in under an hour?!?! Perfection! So fluffy and flavorful. My husband (who is not a bread-guy) ate 4 of them….and would have continued, but he ruefully excised himself from the table so that he wouldn’t have to face the temptation of more. Sooo good! Make these!!!! -Maichael
⭐️⭐️⭐️⭐️⭐️ Just had these with lasagna! Sooooo good!!! -Alisha O.
If you’re yet to experience the pure magic and sheer delight of these buttery, fluffy, and savory Parmesan breadstick knots, there’s truly no better time than now to bake a batch. Make them ASAP! I promise, it’s a culinary decision you absolutely won’t regret. Prepare yourself for an onslaught of rave reviews and inevitably empty plates!
Parmesan Breadstick Knots Recipe
Quick Overview
- Yield: 12 breadstick knots
- Prep Time: 45 minutes
- Cook Time: 15 minutes
- Total Time: 1 hour
- Average Rating: 4.77 stars (based on 73 ratings)
Ingredients
- 1 ½ cups warm water (approximately 105-115°F or 40-46°C)
- 2 tablespoons granulated sugar or honey
- 1 tablespoon instant yeast (refer to the notes section if using active dry yeast)
- ¾ teaspoon salt
- 1 teaspoon garlic powder
- 3 to 3 ½ cups (426 to 497 g) bread flour or high-quality all-purpose flour
- ½ cup (57 g) finely grated Parmesan cheese (freshly grated from a block yields the best flavor and texture)
- 3 tablespoons salted butter, melted (for brushing)
Instructions
- In the capacious bowl of a stand mixer, fitted with the dough hook attachment, meticulously combine the warm water, granulated sugar or honey, instant yeast, salt, and garlic powder. Add an initial 1 cup of the bread flour. Mix these ingredients gently on low speed until they are just combined and form a shaggy mixture.
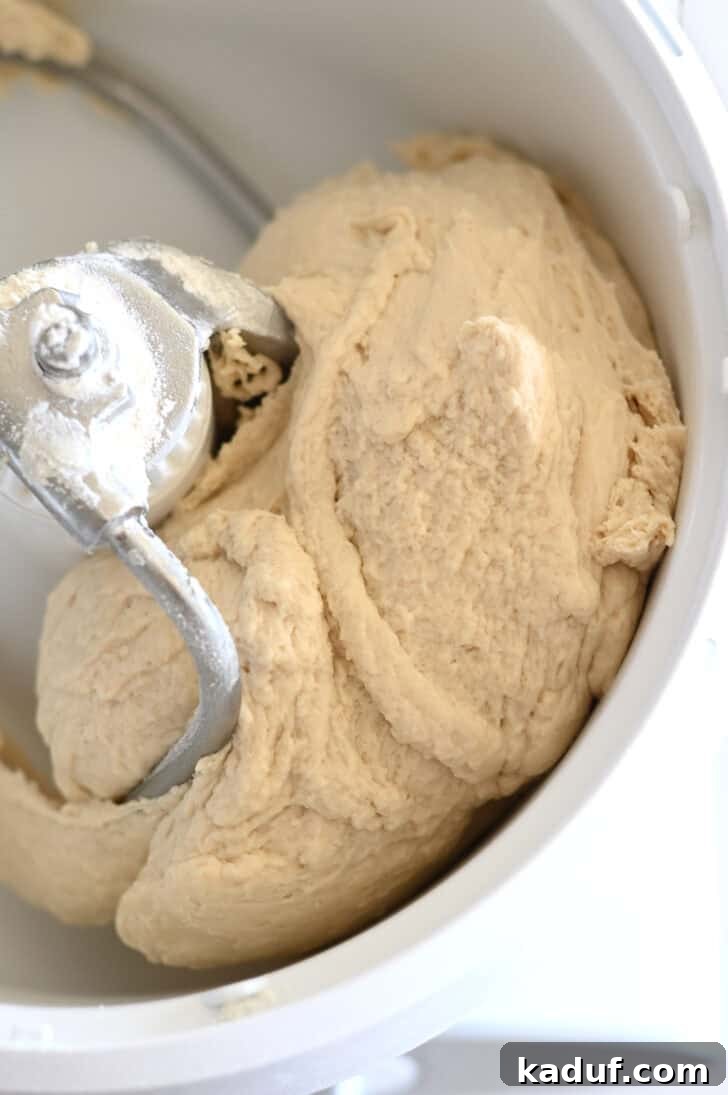
- With the mixer still operating on low speed, gradually incorporate the finely grated Parmesan cheese. Then, begin adding the remaining flour, approximately half a cup at a time, allowing each addition to be absorbed. Continue adding flour until the dough comes together to form a soft ball and cleanly pulls away from the sides of the bowl.
- The dough should exhibit a soft texture and feel slightly tacky to the touch – this consistency is paramount for achieving tender breadsticks. Increase the mixer speed to medium-low and knead the dough for a full 4 to 5 minutes to develop the gluten. Should the dough cling persistently to the sides of the bowl (or the center column of a Bosch mixer), add a very small amount of additional flour, sparingly, until it clears. Exercise caution not to over-flour the dough, as this can result in tough, dense breadsticks.
- Once thoroughly kneaded, remove the dough hook, cover the bowl with a clean kitchen towel or plastic wrap, and allow the dough to rest in a warm, draft-free place for 10 to 15 minutes. It is perfectly acceptable if the dough doubles in size during this resting period, which can be extended up to an hour if your schedule permits.
- While the dough rests, meticulously prepare your baking sheet. Liberally spread the 3 tablespoons of melted salted butter evenly over the entire surface of a half-sheet pan (a standard 11×17-inch rimmed baking sheet). This buttery coating will ensure the bottom of the knots develops a rich, golden, and incredibly flavorful crust.
- Turn the beautifully rested dough out onto a lightly greased countertop. Using a bench knife or a sharp, floured knife, accurately divide the dough into 12 equal pieces. For the most consistent results in baking and appearance, each piece should weigh approximately 2.75 to 3 ounces.
- Take each individual dough portion and, using a gentle yet firm rolling motion with your hands, shape it into a thick strip or rope. Aim for a consistent length of about 6 inches. Maintaining an even thickness throughout the strip is crucial to prevent uneven baking, where some parts might become overly crisp while others remain undercooked.
- To form the distinctive knot, carefully lift one end of the dough strip and bring it over the other end, allowing it to cross and elegantly create an open loop. Subsequently, bring the free end of the dough strip up and thread it through the center of the loop you just created. Gently pull and tighten the knot, ensuring it is snug enough to maintain its shape but not overly compressed. Remember to leave adequate room for the dough to expand and rise beautifully during its second proofing and baking. Refer to the instructional pictures provided earlier in the post for a clear visual guide.
- Arrange the newly shaped breadstick knots on the prepared, buttered baking sheet, ensuring approximately an inch of space is left between each one. This spacing is vital to allow them ample room to expand without fusing together during the rising and baking processes.
- Loosely cover the baking sheet with plastic wrap or a clean kitchen towel and allow the knots to undergo a second proofing. Let them rest in a warm place until they appear noticeably puffy and almost doubled in size. This process typically takes anywhere from 15 to 30 minutes, depending on the ambient temperature and humidity of your kitchen environment.
- Towards the end of the proofing period (around 10-15 minutes before baking), preheat your oven to 400 degrees Fahrenheit (200 degrees Celsius). This ensures the oven is at the optimal temperature for a quick rise and golden crust.
- Bake the breadsticks in the preheated oven for 15-16 minutes, or until they achieve a beautiful, deep golden-brown color and are cooked through.
- Immediately upon removing the hot breadsticks from the oven, for an extra layer of decadence and an unbeatable buttery finish, you can generously brush them with an additional amount of melted butter. While this step is not strictly necessary for deliciousness, it truly enhances their flavor, adds a lustrous sheen, and contributes to an incredibly moist and tender crumb, making them utterly irresistible.
Notes
Yeast: If your recipe calls for active dry yeast instead of instant yeast, you will need to activate or “proof” it prior to combining it with the main ingredients. To do so, gently stir the active dry yeast together with a few tablespoons of warm water (taken directly from the recipe’s total water measurement) and a small pinch of granulated sugar in a small bowl. Allow this mixture to rest for 5-10 minutes until it becomes visibly foamy and bubbling, indicating the yeast is active and alive. When you subsequently mix the dough, be prepared to adjust the flour amount slightly, as the pre-proofed yeast can subtly alter the overall hydration of the dough.
Recipe Information
- Author: Mel
- Course: Bread
- Cuisine: American, Italian
- Method: Bake
Nutrition Information (Approximate per 1 breadstick knot)
- Serving: 1 Roll
- Calories: 185 kcal
- Carbohydrates: 30 g
- Protein: 6 g
- Fat: 4 g
- Saturated Fat: 3 g
- Cholesterol: 11 mg
- Sodium: 237 mg
- Fiber: 1 g
- Sugar: 2 g
Recommended Products
These are some of the essential tools that can make your bread-making experience even smoother and more enjoyable:
- Bosch Universal Stand Mixer
- Bench Knife/Scraper
- Cookie Sheet (Half Sheet Pan)
Recipe Source: This incredible recipe for Parmesan Breadstick Knots originates from the renowned Mel’s Kitchen Cafe, and was originally featured in her popular 2016 eCookbook (which is no longer available for public sale).