
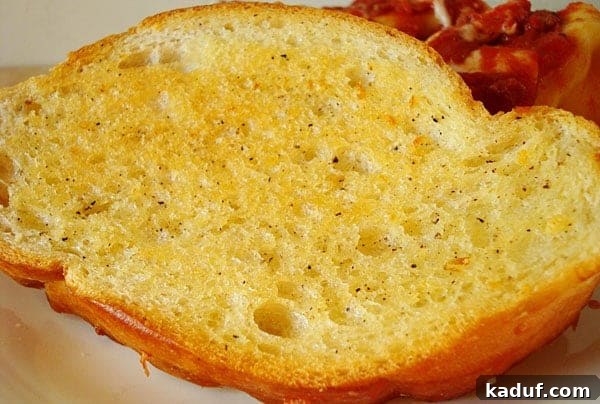
Make-Ahead Crispy, Buttery Garlic Bread: Your Secret Weapon for Effortless Deliciousness
Elevate your next pasta night or family dinner with this incredible make-ahead crispy, buttery garlic bread. Boasting a rich garlic flavor, a perfect golden crust, and a wonderfully soft interior, it’s the ultimate easy side dish that tastes anything but simple. Prepare it in advance, freeze, and bake whenever the craving strikes for fresh, homemade goodness!
Picture this: It’s spaghetti night, or perhaps you’re serving a comforting Manicotti, and you need that perfect companion to sop up all the delicious sauce. The aroma of garlic bread fills your kitchen, but you haven’t had to scramble for fresh bread or last-minute ingredients. Sounds like a dream, right? Well, it’s not! With this ingenious make-ahead garlic bread recipe, you can enjoy restaurant-quality bread with minimal effort on the day of your meal.
For too long, I, like many others, struggled with the spontaneity of garlic bread. Rarely did I keep a fresh loaf of French or Italian bread on hand, and even when I did plan it into my menu, it often wasn’t until days after grocery shopping. By then, the bread would be stale, rendering my garlic bread ambitions futile. That all changed when I discovered this fantastic recipe in Cook’s Country magazine. It was a revelation! I tried it the very next day after picking up a fresh baguette, froze the pre-buttered slices, and pulled them out weeks later for a quick bake. The results? Absolutely transformative. This method yields a thousand times better garlic bread than any last-minute attempt or store-bought variety I’ve ever made.
The Ultimate Make-Ahead Solution for Busy Households
In our fast-paced lives, finding shortcuts that don’t compromise on quality is invaluable. This make-ahead garlic bread is precisely that: a culinary cheat code for busy weeknights and entertaining. Imagine having a freezer stocked with perfectly prepped, ready-to-bake garlic bread slices, waiting to be transformed into a golden, aromatic masterpiece in less than 20 minutes. No more rushing to the grocery store for fresh bread, no more worrying about it going stale, and certainly no more settling for mediocre alternatives. This recipe not only saves you time and reduces stress but also ensures you always have a delightful, homemade side dish ready to complement any meal. It’s truly a game-changer for anyone who loves the comfort of freshly baked bread but dreads the preparation.
Why This Homemade Garlic Bread Stands Out from the Rest
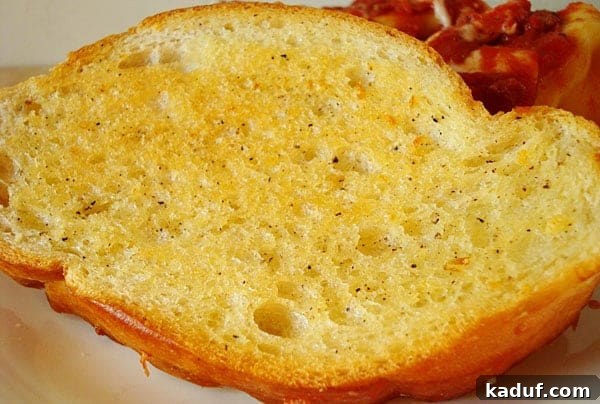
What makes this particular crispy, buttery garlic bread so exceptional? It’s a symphony of textures and flavors that are hard to replicate. First, there’s the incredible crispiness of the exterior, achieved through precise baking instructions that create a beautiful, golden-brown crust. This crunch gives way to a wonderfully soft and tender interior, a hallmark of well-made garlic bread. Then, there’s the rich, savory garlic butter. It’s not just “buttery and garlicky”; it’s a perfectly balanced blend where the aromatic punch of fresh garlic meets the creamy indulgence of butter, enhanced by subtle seasonings. Each bite delivers a burst of flavor that will leave you reaching for more. This isn’t just a side dish; it’s a star in its own right, capable of stealing the show from the main course!
Choosing Your Canvas: French vs. Italian Bread
The foundation of great garlic bread is, of course, the bread itself. For this recipe, both Italian and French bread work beautifully, but understanding their slight differences can help you pick your perfect loaf. French baguettes typically have a thinner, crispier crust and a lighter, airier crumb. This results in a very delicate and extra-crispy garlic bread. Italian bread, on the other hand, often has a slightly thicker crust and a denser, chewier interior. This can lead to a more substantial garlic bread with a satisfying chewiness. Whichever you choose, look for a fresh loaf with a good crust that’s not too soft or too hard. Slicing the bread into 1-inch thick pieces is crucial, as this thickness allows for maximum absorption of the garlic butter while ensuring the bread bakes evenly to that perfect golden crispness without drying out.
Crafting the Perfect Garlic Butter Spread
The heart and soul of this garlic bread lie in its simple yet profoundly flavorful garlic butter spread. The key ingredients are straightforward, but their quality and preparation make all the difference. Start with 12 tablespoons of softened butter – softened is critical for easy mixing and spreading. Next, we incorporate 4 very finely minced garlic cloves. Emphasize “very finely minced” because you want the intense flavor of fresh garlic distributed throughout, not large chunks. While garlic powder can be used in a pinch, fresh garlic delivers an unparalleled aroma and taste that truly elevates the dish. A surprising addition is ¼ teaspoon of sugar. This tiny amount doesn’t make the bread sweet; instead, it helps balance the sharp notes of garlic, promotes browning, and enhances the overall flavor profile. Finally, ¼ teaspoon each of salt and pepper rounds out the seasoning, bringing all the flavors into harmony. Beat these ingredients together with a fork until they are thoroughly combined into a smooth, fragrant paste. This ensures every slice gets an even coating of deliciousness.
The Magic of Freezing: A Step-by-Step Guide for Make-Ahead Success
The beauty of this recipe truly shines in its make-ahead nature. Once your delectable garlic butter is ready, generously spread it evenly over both sides of each 1-inch slice of bread. Don’t be shy – every inch deserves that buttery, garlicky goodness! The next step is crucial for preventing the slices from sticking together in the freezer: arrange them in a single layer on a large baking sheet or plate. Pop them into the freezer until they are firm, which usually takes about 15 minutes. This quick freeze solidifies the butter, creating individual, ready-to-store slices. Once firm, transfer the slices to a heavy-duty freezer-safe Ziploc bag or an airtight container. This step prevents freezer burn, which can lead to dry, flavorless bread. Properly stored, these garlic bread slices can be kept in the freezer for up to one month, making them an ideal staple for effortless meal planning.
Baking to Golden Perfection: From Frozen to Fabulous
When you’re ready to enjoy your delicious make-ahead garlic bread, the baking process is remarkably simple. No need to thaw! Just preheat your oven to a crisp 425 degrees Fahrenheit (220 degrees Celsius). Arrange the frozen buttered bread slices on a rimmed baking sheet. A rimmed sheet is preferred as it helps contain any melted butter. Bake for approximately 10 minutes on the first side, or until you see a beautiful golden-brown color forming. This initial bake helps crisp up the underside and toast the garlic butter. Carefully flip each slice and continue baking for another 6-7 minutes until the second side is also golden brown and perfectly crispy. The timing might vary slightly depending on your oven, so keep an eye on them. Once golden and fragrant, remove them from the oven and serve immediately. The reward is a warm, crusty, deeply flavorful garlic bread that tastes like you spent hours on it, but you barely lifted a finger!
Serving Suggestions and Creative Variations
While this crispy, buttery garlic bread is a perfect match for classic Italian dishes like spaghetti, lasagna, or the Manicotti mentioned earlier, its versatility extends far beyond. Consider pairing it with a hearty bowl of tomato soup, a fresh garden salad, or even as a base for open-faced sandwiches. For a delightful appetizer, cut the baked slices into smaller pieces and serve with marinara sauce. Don’t be afraid to get creative with variations! Before freezing, you could sprinkle a little freshly grated Parmesan cheese on top of the buttered bread for an extra savory kick. A pinch of dried oregano or Italian seasoning mixed into the butter spread adds another layer of herbaceous flavor. For those who enjoy a bit of heat, a tiny sprinkle of red pepper flakes can provide a subtle warmth. You can also experiment with different types of bread; a sourdough baguette would lend a lovely tangy note to the garlic bread. The possibilities are endless!
Tips for Success & Troubleshooting Common Mistakes
Achieving perfectly crispy, buttery garlic bread is easy with a few key tips. Firstly, ensure your butter is truly softened before mixing; this prevents clumping and allows for a smooth, even spread. Secondly, don’t skimp on mincing the garlic; very fine pieces integrate better and release more flavor without being overwhelming. Regarding the bread, a fresh loaf (French or Italian) with a good crust is ideal. Avoid overly soft or stale bread, as it won’t achieve the desired texture. When freezing, the initial flash-freeze on a baking sheet is critical; it prevents the slices from sticking together and ensures they retain their shape. Finally, when baking, keep an eye on the oven. Ovens can vary, and a minute or two can be the difference between golden perfection and slightly burnt edges. If the garlic seems to be browning too quickly, you can loosely tent the bread with foil for the last few minutes of baking. Remember, homemade garlic bread should be an enjoyable experience, so don’t be afraid to adjust to your personal preferences!
Frequently Asked Questions About Make-Ahead Garlic Bread
- Can I use pre-minced garlic from a jar?
- While fresh garlic is highly recommended for the best flavor, pre-minced garlic can be used in a pinch. However, be aware that the flavor might be slightly less vibrant and could have a subtle difference compared to freshly minced cloves. Adjust the quantity to your taste.
- How long does this garlic bread last in the freezer?
- When stored in an airtight freezer bag or container, this make-ahead garlic bread will maintain its quality for up to one month. Beyond that, it’s still safe to eat, but the texture and flavor might start to degrade slightly due to potential freezer burn.
- What if I don’t want to freeze it? Can I bake it immediately?
- Absolutely! If you want to enjoy this garlic bread right away, simply skip the freezing step. Preheat your oven to 425 degrees Fahrenheit (220 degrees Celsius). Bake the buttered bread on a rimmed baking sheet for about 8 minutes on the first side, then flip and bake for an additional 5 minutes on the second side, or until it’s golden brown and crispy.
- Can I use unsalted butter?
- Yes, you can use unsalted butter. If you do, you might want to slightly increase the amount of salt in the garlic butter mixture to compensate for the lack of salt in the butter itself. Taste the mixture before spreading to ensure it’s seasoned to your liking.
- My garlic bread came out soggy, what went wrong?
- Soggy garlic bread often happens if the butter mixture is too thick, or if the bread wasn’t baked long enough to crisp up. Ensure you’re spreading the butter evenly and not excessively. Also, make sure your oven is at the correct temperature and bake until both sides are truly golden brown and firm.
Make-Ahead Crispy, Buttery Garlic Bread
Yield: 6 Servings
Prep Time: 45 mins
Cook Time: 15 mins
Total Time: 1 hr
Rating: 4.46 stars (24 ratings)
Pin Recipe
Ingredients
- 12 tablespoons butter, softened
- 4 garlic cloves, very finely minced
- ¼ teaspoon sugar
- ¼ teaspoon salt
- ¼ teaspoon pepper
- 12 (1-inch slices) Italian or French bread
Instructions
- Using a fork, beat butter, garlic, sugar, salt, and pepper in a small bowl until combined. Spread the butter mixture evenly over both sides of the bread.
- Freeze the slices on a large baking sheet or plate until firm, about 15 minutes. After they are firm, transfer the slices to a freezer-safe ziploc bag and freeze for up to one month.
- To serve, preheat oven to 425 degrees F (220 C). Arrange the frozen bread on a rimmed baking sheet and bake until golden brown on the first side, about 10 minutes. Flip and bake until golden brown on the second side, 6-7 minutes more. Serve warm.
Notes
Baking the Bread Immediately: To serve the bread immediately instead of freezing, bake buttered bread on a rimmed baking sheet at 425 degrees F (220 C) for 8 minutes, then flip and bake 5 more minutes on the second side, until golden brown and crispy.
Author: Mel
Course: Bread
Cuisine: American
Method: Bake
Nutrition Information (per serving)
- Serving: 1 Serving
- Calories: 575kcal
- Carbohydrates: 73g
- Protein: 15g
- Fat: 25g
- Saturated Fat: 15g
- Cholesterol: 60mg
- Sodium: 954mg
- Fiber: 3g
- Sugar: 3g
Recipe Source: Slightly adapted from Cook’s Country