
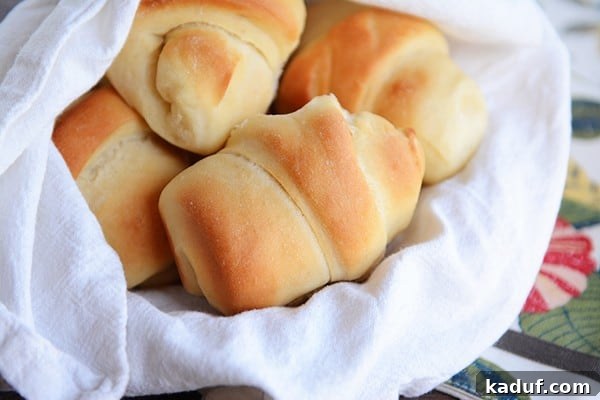
Experience the magic of homemade bread without the last-minute rush! These Make-Ahead Buttermilk Dinner Rolls are incredibly light, fluffy, and bursting with rich flavor, making them a perfect addition to any meal. Their secret? The exceptional tenderizing power of buttermilk and a dough that can be prepared days in advance, simplifying your baking schedule significantly.
Make-Ahead Buttermilk Dinner Rolls: Your Secret to Effortless Baking
There’s nothing quite like a warm, freshly baked dinner roll to complement a meal. From holiday feasts to simple weeknight dinners, homemade rolls elevate the dining experience, offering a comforting aroma and a pillowy texture that store-bought options simply can’t match. For years, this particular recipe for buttermilk dinner rolls has been a cherished gem in our archives, and for good reason. It consistently delivers results that make everyone at the table exclaim, “Gosh, these rolls are good!”
Now, after six years, this beloved recipe is getting a well-deserved refresh, complete with updated insights and a clearer guide to help you achieve baking perfection. Forget the days of frantic, last-minute bread making. With this recipe, you can enjoy the satisfaction of homemade rolls with the unparalleled convenience of preparing the dough ahead of time.

Why These Buttermilk Dinner Rolls Are a Game Changer
If you’ve been on a quest for the ultimate dinner roll recipe, look no further. These buttermilk rolls are nothing short of magnificent. What truly sets them apart, beyond their incredible taste and texture, is their remarkable make-ahead capability. The dough, a resilient and forgiving creation, can be safely refrigerated for up to seven days. This flexibility is a lifesaver, especially during busy times like holiday meal planning or when you simply want to enjoy fresh rolls without the commitment of a full day in the kitchen.
Unlike many yeast doughs that struggle with extended refrigeration, this recipe thrives on it. Once pulled from the fridge, shaped, and baked, these rolls emerge from the oven as tender and flavorful as if they were made from scratch that very morning. In fact, many bakers find that the extended cold fermentation actually enhances the dough’s flavor, resulting in an even more complex and delicious roll. This means you can wake up, shape your rolls, let them rise, and have warm, irresistible bread on the table with minimal effort.
The Secret Ingredient: The Power of Buttermilk
The magic behind the light, tender texture and distinctive flavor of these rolls lies in one crucial ingredient: buttermilk. We strongly recommend using genuine buttermilk for this recipe. Its natural acidity reacts with the baking soda, creating a wonderfully tender crumb and adding a subtle tang that elevates the overall taste profile. This isn’t just a flavor enhancer; it’s a structural necessity for achieving that desired pillowy softness.
While we encourage using real buttermilk, we understand that it’s not always readily available. For those moments, homemade buttermilk substitutes (like adding lemon juice or vinegar to regular milk) can be acceptable. However, for the absolute best results, we suggest going the extra mile for the real deal. The slight effort is truly worth the superior texture and depth of flavor it brings to these already amazing dinner rolls.
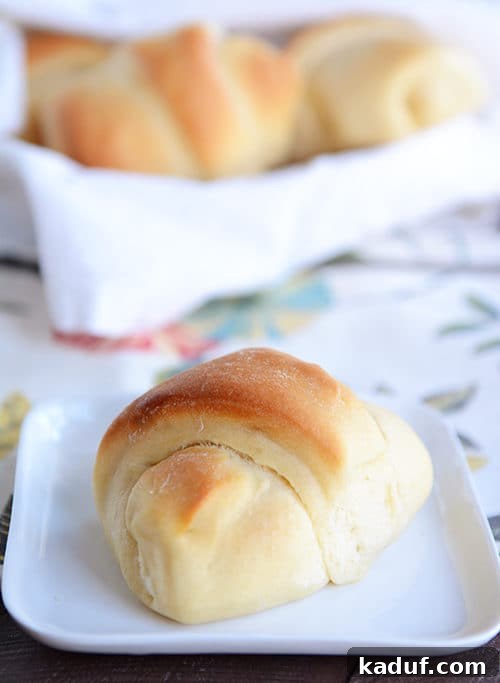
Make-Ahead Buttermilk Dinner Rolls
Pin
Rate
Save
Ingredients
- 3 cups buttermilk at room temperature
- 3 cups (426 g) all-purpose flour
- 1 tablespoon instant yeast
- ½ cup (106 g) granulated sugar
- 3 large eggs
- 2 teaspoons salt
- ½ cup neutral-flavored oil (like vegetable or canola)
- 1 teaspoon baking soda
- 6-7 cups (about 852 to 994 g) all-purpose flour, more or less, depending on consistency
Instructions
-
In a large mixing bowl or the bowl of a stand mixer (a Bosch is highly recommended for its powerful kneading capabilities, though a Kitchenaid can also work with careful monitoring), combine the room temperature buttermilk, the initial 3 cups of flour, and the instant yeast. Stir these ingredients until just combined. Cover the bowl loosely with plastic wrap or a clean kitchen towel and let it rest at room temperature for 2-3 hours, or until the mixture becomes noticeably puffy and bubbly. This initial fermentation step allows the yeast to activate and develop flavor.
-
Once the mixture is activated, add the granulated sugar, large eggs, salt, neutral oil, and baking soda to the bowl. Mix these ingredients thoroughly until well incorporated. Gradually begin adding the remaining 6-7 cups of flour, a cup at a time, allowing the dough to come together. Continue adding flour until a soft, pliable dough forms that pulls away cleanly from the sides of the bowl. The dough should be smooth and elastic, but not overly sticky. Knead the dough in the mixer for approximately 7 minutes on medium speed, or by hand on a lightly floured surface until it is smooth and resilient.
-
At this crucial point, you have two options: either proceed to shape and bake the rolls immediately, or prepare the dough for refrigeration. To refrigerate, transfer the kneaded dough into a generously greased large container or bowl, ensuring there’s ample space for it to expand slightly. Cover the container tightly with plastic wrap or an airtight lid and place it in the refrigerator. The dough can be stored in the fridge for up to seven days, offering incredible flexibility for your baking schedule.
-
If you choose to use the dough immediately, begin shaping your rolls. There are several popular methods:
- Cloverleaf Rolls: Divide the dough into small, approximately ¾-inch diameter balls (aim for about 3 balls per roll). Place three of these small balls into each greased muffin tin cup.
- Crescent Rolls: Divide the dough into three equal portions. Roll each portion into a 10- or 11-inch diameter circle. Brush the surface of each circle generously with melted butter, then cut into 8 or 12 wedge-shaped sections. Starting from the wide end, roll each wedge tightly towards the point to form a crescent shape.
- Classic Dinner Rolls: Portion the dough into pieces weighing about 2-3 ounces each. Roll each piece into a smooth, taut ball. Arrange these balls in a greased 9×13-inch baking dish or on a large baking sheet, leaving a small space between each.
Once shaped, cover the rolls loosely with greased plastic wrap to prevent them from drying out. Let them rise in a warm, draft-free place until they have doubled in size, which typically takes about an hour, depending on your room temperature.
-
Preheat your oven to 375°F (190°C). Bake the risen rolls until they are beautifully golden brown on top and thoroughly baked through. The exact baking time will vary based on the shape and size of your rolls:
- Cloverleaf rolls typically bake in about 11 minutes.
- Crescent rolls usually take around 15-16 minutes.
- Classic dinner rolls in a baking dish will need approximately 16 minutes or slightly more.
Keep a close eye on them during the last few minutes to prevent over-browning.
-
If you are using refrigerated dough, remove the desired amount from the container. The dough will be cold and firm. If it is too stiff to work with easily, allow it to rest, covered, at room temperature for 30-45 minutes to relax slightly before shaping.
-
Shape the refrigerated dough into your preferred roll style, as described in step 3. Once shaped, cover the rolls with greased plastic wrap and let them rise until they have doubled in size. Since the dough has been chilled, this second rise (proof) will take considerably longer than with fresh dough, typically 2-3 hours. Ensure they are fully risen before baking. Bake following the instructions in step 4, adjusting for your chosen roll shape.
-
Once baked to perfection, remove the rolls from the oven. For an extra touch of richness and shine, you may brush the tops with melted butter immediately after they come out of the oven. Serve warm and enjoy!
Notes
Measuring the Flour Accurately: When working with yeast doughs, the amount of flour specified in a recipe is often a guideline rather than a strict rule, especially when not given by weight. Factors such as humidity, ambient temperature, altitude, and even the type of flour can significantly impact how much flour your dough will absorb. Rather than strictly adhering to a cup measurement, focus on the dough’s texture: it should be soft, smooth, and elastic, pulling cleanly away from the sides of your mixing bowl without being excessively sticky. If a weight measure is provided, using a kitchen scale is the most accurate approach. Trust your instincts and the feel of the dough over rigid measurements.
Yeast Dough Tutorial: For a deeper understanding of yeast and how to achieve the perfect dough consistency, this comprehensive tutorial on working with yeast offers invaluable insights. It can help you identify what a perfectly floured and kneaded dough should look and feel like, ensuring consistent success with your baking endeavors.
Recommended Products
Recipe Source: This treasured recipe was generously shared by my sister-in-law Erin and her sister, Melanie (yes, the names can get a little confusing, but the deliciousness is clear!).
Beyond the Recipe: Tips for Perfect Buttermilk Dinner Rolls Every Time
While the recipe itself is straightforward, mastering a few key techniques can elevate your buttermilk dinner rolls from good to unforgettable. Yeast baking can sometimes feel intimidating, but with a little understanding, you’ll be producing bakery-quality rolls with confidence.
Mastering Buttermilk Temperature
As mentioned in the notes, the temperature of your buttermilk is critical for activating the yeast properly. Yeast thrives in a warm, but not hot, environment. If your buttermilk is too cold, the yeast will be sluggish or won’t activate at all, resulting in dense, unrisen rolls. Too hot, and you risk killing the yeast, which also leads to a failure to rise. Aim for a temperature between 100-110°F (38-43°C). A quick microwave zap, followed by a stir and a temperature check with a kitchen thermometer, is your best friend here. This ensures your dough gets off to the best possible start.
The Art of Flour Measurement and Kneading
Precision is important in baking, but with yeast dough, flexibility in flour measurement is often more valuable than strict adherence to numbers. The environment (humidity, altitude) truly dictates how much flour your dough needs to achieve the right consistency. Start with the recipe’s recommended amount, then add more gradually, focusing on the dough’s feel. It should be soft, slightly tacky but not sticky, and should form a smooth ball that clears the sides of your mixing bowl. Over-flouring can lead to dry, tough rolls, while too little flour will result in a sticky, unmanageable dough.
Kneading is equally crucial. It develops the gluten in the flour, which gives the rolls their structure and chewiness. Knead for the recommended time (around 7 minutes in a stand mixer, or 10-15 minutes by hand) until the dough is smooth, elastic, and passes the “windowpane test” (where a small piece of dough can be stretched thin enough to see light through without tearing). Proper kneading ensures those coveted light and fluffy rolls.
Maximizing the Make-Ahead Advantage
The make-ahead feature of these buttermilk dinner rolls is truly a superpower for any home baker. Imagine hosting a holiday dinner where the rolls are already prepped and waiting patiently in your fridge, ready to be shaped and baked with minimal fuss on the big day. This not only frees up oven space but also significantly reduces stress. The cold fermentation also allows the dough to develop deeper, more nuanced flavors, making the rolls taste even better than if baked immediately. For best results with refrigerated dough, always allow ample time for the shaped rolls to come to room temperature and double in size before baking, as the cold will slow down the final rise considerably.
Serving Suggestions: The Perfect Companion for Any Meal
These versatile buttermilk dinner rolls are more than just a side dish; they’re an experience. Their fluffy texture and slightly tangy flavor make them a perfect accompaniment to a wide array of meals:
- Holiday Feasts: They are an absolute must for Thanksgiving, Christmas, or Easter, soaking up gravy beautifully.
- Soups and Stews: Their soft interior is ideal for dipping into hearty soups and rich stews.
- Barbecues and Potlucks: Bring a basket of these rolls to your next gathering, and watch them disappear!
- Breakfast or Brunch: Split warm rolls, slather them with butter and your favorite jam or honey for a delightful morning treat.
- Sandwiches: Their soft texture makes them perfect for slider sandwiches or small, delicious dinner roll sandwiches.
Whether you’re serving them plain, with a pat of butter, or alongside a decadent meal, these rolls are guaranteed to be a hit. Don’t be surprised if they become your new go-to recipe for homemade bread!