
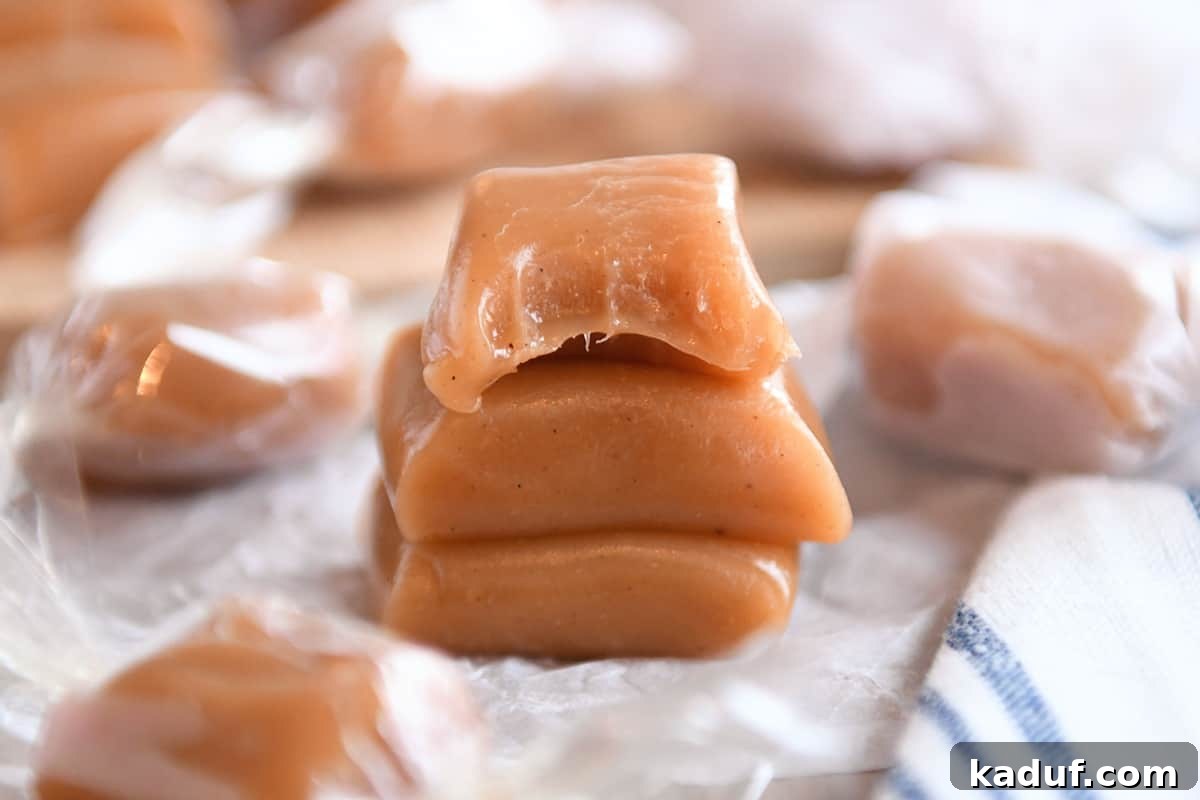
Soft, chewy, and bursting with the iconic flavors of autumn, these homemade apple cider caramels are a true seasonal delight. The secret lies in reducing fresh apple cider until it transforms into a rich, syrupy essence, infusing every bite with an unparalleled caramel apple taste.
Embarking on the journey of homemade caramels might seem daunting, but it’s far easier and more rewarding than you imagine. And trust us, you absolutely don’t want to miss out on the incredible experience of crafting these apple cider caramels! This comprehensive guide is packed with expert tips and proven tricks, ensuring your caramels turn out perfectly soft, perfectly chewy, and perfectly delicious every single time.

Mastering Apple Cider Caramels: Adapting Any Beloved Caramel Recipe
While many caramel recipes exist, the foundational recipe used here is truly exceptional. Its reliability and exquisite results have made it my absolute favorite, serving as the canvas for countless flavor variations, including these show-stopping apple cider caramels. I wholeheartedly recommend it for crafting what might just be the best caramels you’ve ever tasted.
However, I understand that many home bakers cherish their own tried-and-true caramel recipes, fostering a deep loyalty to their family favorites. The good news is, you don’t necessarily have to abandon your go-to recipe to enjoy the distinct flavor of apple cider caramels.
Expert Tip for Caramel Enthusiasts: Through extensive testing, I discovered that most classic caramel recipes can be transformed into delicious apple cider caramels. The key is to simply boil down apple cider until it reaches a thick, syrupy consistency, then incorporate it into your chosen recipe.
- Integrate the reduced apple cider with the cream and/or corn syrup early in your recipe, ideally before the main caramel mixture undergoes prolonged cooking.
- As a general guideline, aim for approximately 1/2 cup of boiled and reduced apple cider for recipes designed to fill an 8×8-inch or 9×9-inch pan of caramels. If you’re preparing a larger 9×13-inch pan, increase the reduced apple cider to 3/4 to 1 cup.
While some minor experimentation might be required when adapting a new recipe, these guidelines provide an excellent starting point for your culinary adventure into apple cider caramel making!
The Essential First Step: Boiling Down Apple Cider for Intense Flavor
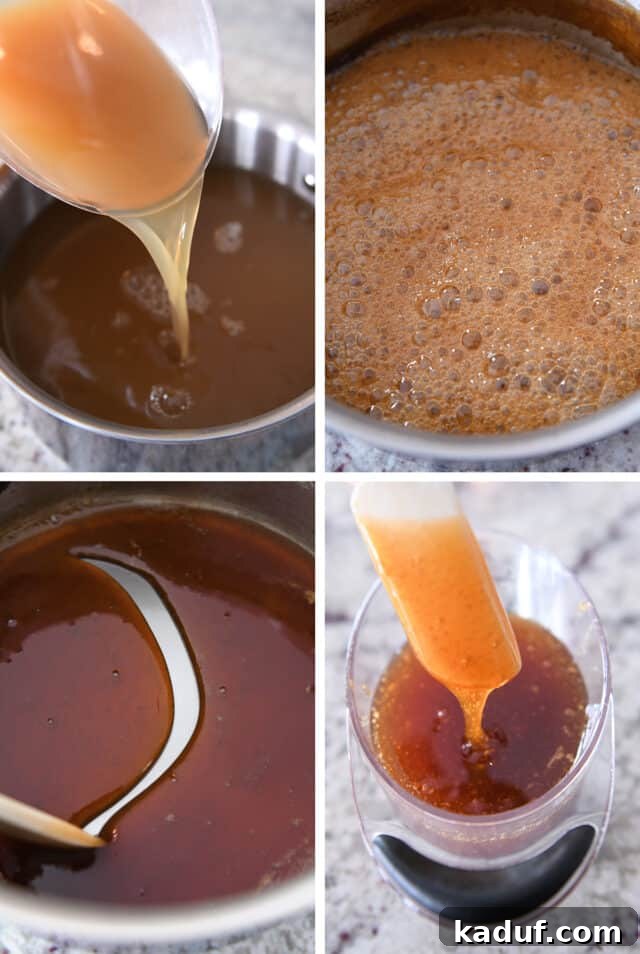
The initial and arguably most critical step in creating these magnificent apple cider caramels is properly reducing the apple cider. This process concentrates the natural sugars and tangy apple flavor, transforming a watery liquid into a potent, syrupy essence that will define your caramels.
How to Reduce Apple Cider: Begin by pouring four cups of unfiltered apple cider into a medium saucepan. Gently simmer the cider over moderate heat, stirring occasionally, until its volume reduces significantly, reaching approximately 1/2 cup. At this stage, it should possess a noticeably thick, syrupy consistency. Do not rush this process; patience is key to developing that deep, concentrated apple flavor.
It’s imperative not to skip or shortchange this reduction step. If the apple cider remains too thin, its flavor will be diluted, and its liquid content could disrupt the delicate balance of your caramel mixture, leading to an inferior texture. The goal is a rich, almost molasses-like syrup that deeply infuses the caramels with vibrant apple notes.
Selecting the Best Apple Cider: For optimal results, seek out “fresh” apple cider, which is typically abundant during the crisp fall months. The ideal choice is unfiltered cider—it will appear cloudy rather than clear like apple juice—and should contain no added sugars. This natural, robust cider provides the purest apple essence for your caramels.
Advance Preparation for Convenience: This crucial step can be completed several days ahead of time. Once reduced, store the concentrated apple cider in the refrigerator until you’re ready to proceed with caramel making. Before incorporating it into your caramel, gently warm the reduced cider until it is slightly warm and easily pourable. Introducing cold, straight-from-the-refrigerator cider into a hot caramel mixture can shock the sugar, potentially leading to crystallization or an unwanted burst of boiling splatters, which nobody wants!
Crafting Perfect Homemade Apple Cider Caramels: Step-by-Step
With your fragrant apple cider syrup ready, it’s time to assemble the luscious caramel. This process involves precise temperature control and careful technique, but with our guidance, you’ll be a caramel-making pro in no time.
First, combine the granulated sugar, light corn syrup, and water in a sturdy, heavy-bottomed saucepan. Bring this mixture to a gentle simmer over medium heat. As the sugar dissolves and begins to boil, occasionally brush down the sides of the pan with a pastry brush dipped in water. This essential step dislodges any sugar crystals clinging to the sides, preventing them from causing the entire batch to crystallize later. Continue cooking this sugar syrup until it achieves a beautiful golden amber color and registers a temperature of 345 degrees F on a reliable candy thermometer.
A quick note on equipment: a trustworthy candy thermometer is your best friend in caramel making. For in-depth insights into essential caramel-making tools and my top thermometer recommendations, be sure to check out this comprehensive guide on crafting the best homemade caramels of your life.
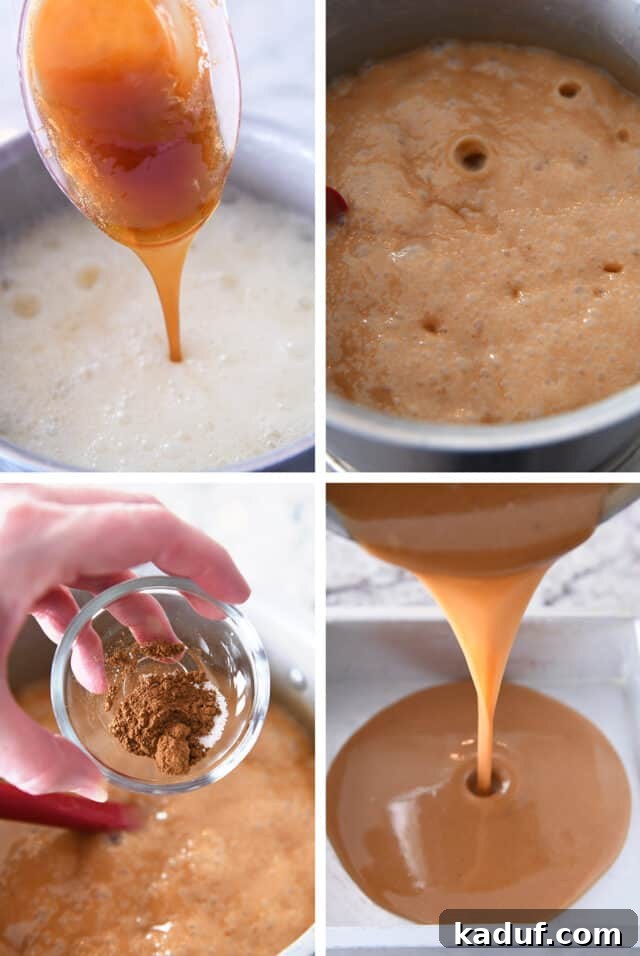
Once your sugar reaches the desired temperature and color, slowly and carefully pour in the warm heavy cream, softened butter, and a pinch of salt. Be prepared for a vigorous bubbling reaction as the cooler ingredients meet the hot sugar. This is completely normal! Stir gently until the mixture calms down.
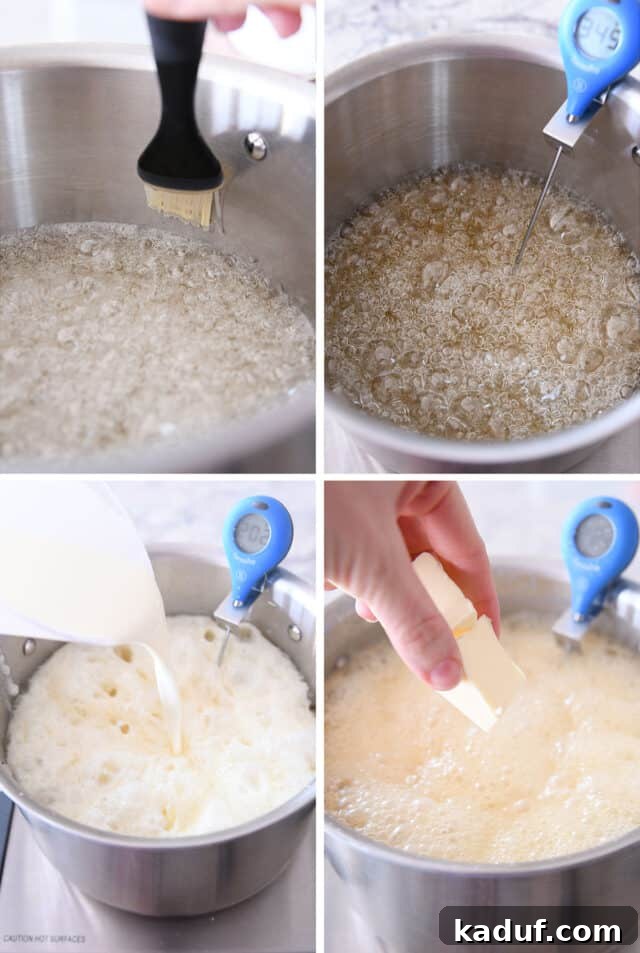
Now, it’s time for the star ingredient: add that glorious, reduced, syrupy apple cider to the mixture. Continue to cook the caramel over medium heat, stirring constantly with a heatproof silicone spatula. The stirring ensures even cooking and prevents scorching. Keep a close eye on your candy thermometer and cook until the caramel registers between 245 to 248 degrees F. This temperature range is crucial for achieving that perfect soft and chewy texture characteristic of apple cider caramels.
Essential Precision: How to Calibrate a Candy Thermometer
Accurate temperature readings are paramount for successful candy making. To ensure your candy thermometer is precise, it’s vital to calibrate it before each use.
Calibration Process: Bring a pot of water to a rolling boil and insert the tip of your thermometer into the boiling water for at least a full minute. Note down the temperature your thermometer displays. This is your personal boiling point reading.
Here are some essential guidelines for temperature adjustments:
- Most candy recipes, including this one, are typically developed and tested at sea level. At sea level, water boils at 212 degrees F.
- If your thermometer registers below 212 degrees F in boiling water, you’ll need to subtract the difference from the target cooking temperature stated in the recipe.
- Conversely, if your thermometer registers above 212 degrees F, you’ll need to add that difference to the recipe’s target cooking temperature. Remember: whatever temperature your thermometer registers in boiling water becomes your “new” 212 degrees F reference point.
Example 1: Thermometer Reads Low
If your thermometer reads 205 degrees F in boiling water, there’s a 7-degree difference (212 – 205 = 7). Therefore, for this apple cider caramel recipe, which calls for cooking to 245 degrees F, you would subtract 7 degrees and cook your caramels to 238 degrees F.
Example 2: Thermometer Reads High
If your thermometer reads 215 degrees F in boiling water, there’s a 3-degree difference (215 – 212 = 3). In this case, you would add 3 degrees to the recipe’s target temperature, cooking your caramels to 248 degrees F.
Adjustments for Elevation:
If a recipe was developed at an elevation different from yours (information usually provided by the recipe author), further adjustments may be necessary. A simple rule of thumb is to adjust the final cooking temperature by 2 degrees F for every 1,000 feet difference in elevation:
- Add 2 degrees F for every decrease of 1,000 feet in elevation (e.g., if the recipe was tested at 3,000 feet and you are at sea level).
- Subtract 2 degrees F for every increase of 1,000 feet in elevation (e.g., if the recipe was tested at sea level and you are at 5,000 feet).
Combining Adjustments: These elevation adjustments are in addition to any adjustments made for your thermometer’s boiling water test.
For instance, if a caramel recipe was tested at 3,000 feet elevation and suggests cooking to 238 degrees F, but you live at sea level (a 3,000-foot decrease), you would add an additional 6 degrees F (2 degrees per 1,000 feet) to the target temperature, bringing it to 244 degrees F (assuming your thermometer is already calibrated for sea level). If your thermometer itself also reads low, you’d apply that correction too.
Another example: if a recipe tested at sea level calls for 245 degrees F, and you live at 5,000 feet elevation (a 5,000-foot increase), you would subtract 10 degrees F (2 degrees per 1,000 feet), aiming for 235 degrees F (again, after initial thermometer calibration).
Embrace Experimentation: Remember that candy-making often involves a bit of trial and error. Even with meticulous adjustments, you might find that you need to slightly alter the final cooking temperature by a few degrees to achieve your preferred firmness. A difference of 2 to 3 degrees usually won’t ruin a batch, so do your best with these guidelines, observe your results, and enjoy the process!
Once your apple cider caramel reaches its precise target temperature, immediately remove the pan from the heat. Swiftly stir in the vanilla extract and ground cinnamon. These additions provide a beautiful aromatic finish that complements the apple and caramel flavors perfectly.
Pour the hot caramel mixture into your prepared, buttered pan. Resist the urge to poke or disturb the caramel while it sets. Allow the pan of caramel to cool completely to room temperature. This slow cooling process is vital for achieving the ideal firm yet chewy texture.
Perfect Presentation: Cutting and Wrapping Your Caramels
Once your caramels have completely cooled and set, it’s time for the satisfying task of cutting and wrapping them into individual treats.
- Remove the Caramel Slab: Gently lift the entire slab of caramel out of the pan. A flat metal spatula can be incredibly helpful for carefully peeling it up in one smooth piece and transferring it to a clean cutting board.
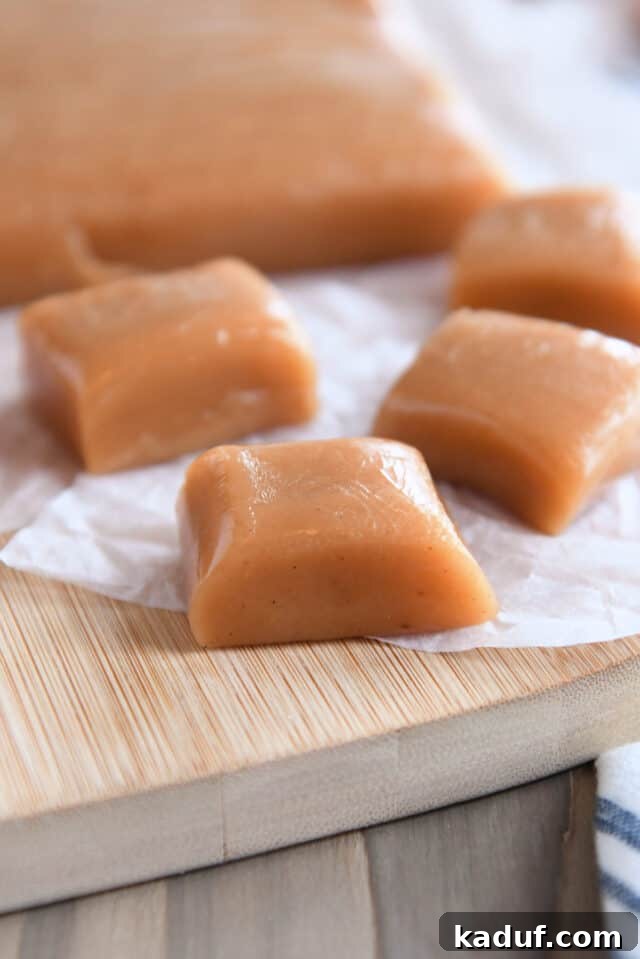
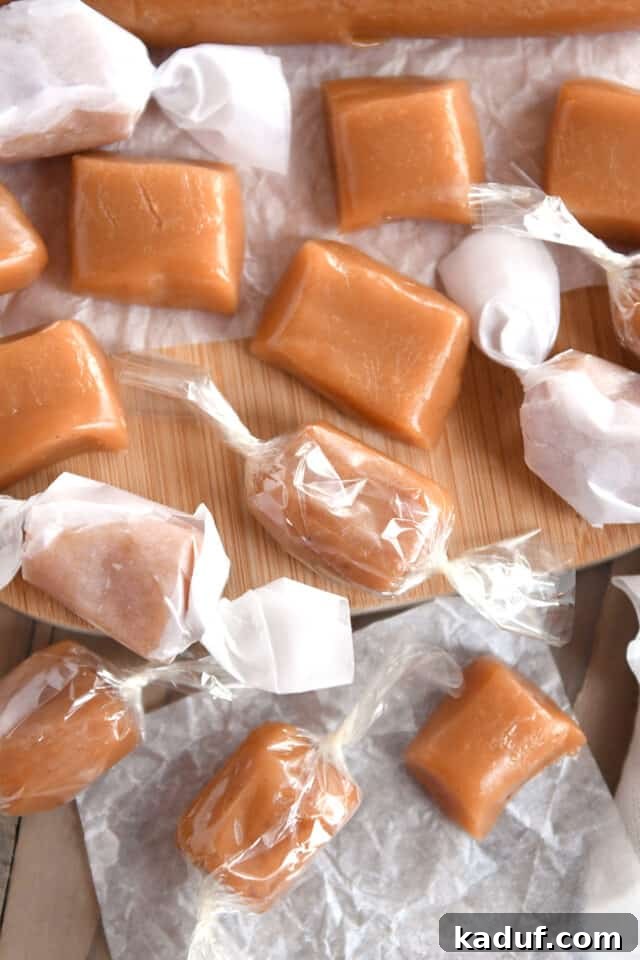
- Cut into Squares: Using a sharp, ungreased knife or a bench knife, cut the caramel slab into desired squares. For a traditional look, aim for about 1-inch squares. Clean your knife frequently to prevent sticking.
- Wrap Individually: For optimal freshness and to prevent sticking, wrap each caramel square individually. You can use squares of wax paper, parchment paper, or cellophane. Many find that cellophane wrappers twist shut most effectively and keep the caramels freshest.
Once meticulously wrapped, your apple cider caramels will maintain their delightful texture and flavor for several weeks. Store them in an airtight container at a cool room temperature, away from direct sunlight or excessive heat.
While we recommend storing them for several weeks, if your household is anything like ours, these rich, creamy, and wonderfully chewy apple cider caramels won’t last that long! The classic caramel flavor is beautifully enhanced by the sweet-tartness of the reduced apple cider and the comforting warmth of cinnamon. They are truly incredible and stand out as one of my all-time favorite caramel variations.
Feeling Intimidated by Homemade Caramels? Let’s Conquer It Together!
If the idea of making homemade caramels still feels a bit overwhelming, please know that you’re not alone. Many bakers start out feeling daunted by candy making. Remember, this dedicated post is full of helpful tips designed to make foolproof caramels, guiding you every step of the way.
If you still have lingering questions or encounter any challenges, please don’t hesitate to leave a comment below, and I will personally assist you! I vividly recall my own early struggles with homemade caramels – they never turned out right. I disliked the mess, the elaborate process, and the constant disappointment. However, once I invested in the right tools and honed in on the most foolproof recipe (the very one shared here!), the experience transformed from stressful to genuinely enjoyable.
Now, homemade caramels are one of my absolute favorite treats to make year-round. There’s an undeniable satisfaction in the process, a feeling of culinary accomplishment. Plus, at the end of it all, you get to savor an entire pan of truly delectable caramel!
I sincerely hope you adore this delightful apple cider variation on classic caramels!
Explore More Delicious Recipes:
- One Year Ago: Creamy Tortellini Sausage Soup
- Two Years Ago: The Best Classic Apple Pie
- Three Years Ago: The Best BBQ Pulled Pork Sandwiches {Instant Pot or Slow Cooker}
- Four Years Ago: The Best Red Sauce Chicken Enchiladas
- Five Years Ago: Chicken BLT Burritos with Creamy Southwest Dipping Sauce {Quick and Easy!}
- Six Years Ago: Homemade Chicken and Broccoli Alfredo Stuffed Shells
- Seven Years Ago: Overnight Buckwheat Oat Gluten-Free Waffles or Pancakes
- Eight Years Ago: Slow Cooker Lasagna {Perfected}
- Nine Years Ago: Crusty Artisan No-Knead Bread {Made Even Easier + Step-by-Step Tutorial}
- Ten Years Ago: Pumpkin Cream Sandwiches
Apple Cider Caramels
60
caramels
15 minutes
1 hour
45 minutes
2 hours
Pin
Rate
Save
Saved!
Ingredients
- 4 cups apple cider (see note)
- 2 cups heavy cream
- 2 ½ cups (530 g) granulated sugar
- ½ cup light corn syrup
- ½ cup water
- 6 tablespoons (85 g) salted butter
- ¼ teaspoon coarse, kosher salt
- 1 teaspoon vanilla extract
- ½ teaspoon ground cinnamon
Instructions
-
Pour the apple cider into a medium saucepan and simmer over moderate heat, stirring occasionally, until reduced to 1/2 to 2/3 cup. This reduction process typically takes about 1 hour and concentrates the apple flavor intensely.
-
Generously butter the bottom and sides of a 9×9-inch square baking pan, ensuring you get into all the corners. For easier removal, you can also line the pan with parchment paper, then butter the parchment. Set the prepared pan aside.
-
Gently heat the heavy cream in a separate small saucepan or in the microwave until it is steaming but not boiling. Keep it warm until ready to use.
-
In a large, heavy-bottomed pot (preferably 5- to 6-quarts to accommodate bubbling), combine the granulated sugar, light corn syrup, and water. Stir gently to combine, being careful not to splash the mixture up the sides of the pot. Attach a reliable candy thermometer to the side of the pan, ensuring the tip does not touch the bottom.
-
Bring the sugar mixture to a boil over medium heat WITHOUT STIRRING or moving the pan. As it begins to boil, dip a pastry brush in water and carefully wash down the sugar crystals that may stick to the sides of the pan. This crucial step prevents crystallization in later stages of caramel making. You typically won’t need to repeat this after the initial cleaning.
-
Continue cooking the boiling sugar syrup until it develops a beautiful light-to-medium amber color and registers between 325 to 345 degrees F on your thermometer. This stage usually takes about 15-20 minutes.
-
Very slowly and carefully pour the warm cream into the hot caramel. Immediately add the reduced apple cider, softened butter, and kosher salt. Be cautious as the mixture will bubble up significantly during this addition, but it will settle down after a few minutes of gentle stirring.
-
Begin stirring the caramel continuously with a heatproof silicone spatula that has a flat top (a flat edge helps prevent caramel from sticking and scorching more effectively than a rounded one). Avoid aggressively scraping the edges of the pan, and continue cooking over medium heat, stirring slowly and constantly, until the mixture reaches a temperature of 245 to 248 degrees F. This final cooking stage typically takes 10-15 minutes. Note that apple cider caramels tend to be a bit softer than traditional caramels due to the cider; if you prefer a firmer caramel, consider cooking it to an extra 2 to 3 degrees higher.
-
Immediately remove the pot from the heat. Stir in the vanilla extract and ground cinnamon until fully incorporated, distributing their wonderful aromas throughout the caramel.
-
Without delay, pour the hot caramel mixture evenly into your prepared baking pan. Do not scrape the bottom of the pot, as residual bits might cause crystallization.
-
Allow the caramels to cool completely and undisturbed at room temperature for several hours, or even overnight. Once firm, use a large metal spatula or the parchment paper lining to gently lift the entire slab of cooled caramel from the pan and transfer it to a cutting board.
-
Using a sharp, ungreased knife or a bench scraper, cut the caramel slab into individual squares. Wrap each caramel tightly in wax paper, parchment paper, or cellophane. Store the wrapped caramels in an airtight container at a cool room temperature for up to two weeks.
Notes
Double Batch: This recipe can be successfully doubled to fill a 9×13-inch pan. When doubling, ensure you use a larger pot to prevent boil-overs. Be aware that a double batch will naturally take longer to reach the desired temperature at each cooking stage.
Cooking Time: The precise cooking times for each step will vary depending on the intensity of your heat setting (low to moderate) and whether you are using a gas or electric stove. Always rely on your candy thermometer for accuracy, not just visual cues or estimated times.
Elevation: This recipe was developed and tested at 2,400 feet elevation. If you reside at a significantly higher or lower elevation, you might need to adjust the final cooking temperature. As a general guide, subtract approximately 2 degrees F for every 1,000 feet increase in elevation, and add 2 degrees F for every 1,000 feet decrease in elevation (e.g., at sea level, you might add 4 degrees; at 5,000 feet, you might subtract 4-5 degrees). The exact adjustment can also depend on your desired caramel firmness. Don’t stress too much over minor differences (2-4 degrees won’t typically ruin a batch). Keep notes on your results and adjust subsequent batches as needed.
Several bakers have noted that these apple cider caramels tend to be softer than typical caramels, likely due to the apple cider’s composition. If you prefer a firmer caramel, I recommend increasing the final cooking temperature by a few degrees (e.g., cook to 248-250 degrees F).
Mel Gunnell
Dessert
American
Stovetop
Serving:
1
caramel
,
Calories:
27
kcal
,
Carbohydrates:
0.2
g
,
Protein:
0.2
g
,
Fat:
3
g
,
Saturated Fat:
2
g
,
Cholesterol:
9
mg
,
Sodium:
2
mg
,
Sugar:
0.2
g