

If you love cinnamon rolls, you’ll love this spinoff from the classic. Sweet orange rolls drizzled with a lightly sweet orange glaze. Yum.
Irresistible Homemade Orange Sweet Rolls with Zesty Glaze
Prepare to elevate your breakfast or brunch experience with these truly exceptional Orange Sweet Rolls. Forget everything you thought you knew about sweet rolls because this citrus-infused masterpiece is about to become your new obsession. This recipe takes a beloved classic and infuses it with the bright, vibrant essence of fresh oranges, resulting in a treat that is both comforting and exhilaratingly fresh. Imagine sinking your teeth into a roll so tender, so soft, with a dreamy, light, and perfectly sweet orange filling, all crowned with a glistening, tangy orange glaze. It’s a culinary journey you won’t want to miss.
Our journey to the perfect orange sweet roll begins with a tried-and-true sweet roll dough base, renowned for its incredible tenderness and rich flavor, enhanced by the subtle tang of buttermilk. We then transform it with a deliciously orange-forward, sweet, and buttery filling adapted from a cherished past recipe. The result is a harmonious blend of textures and tastes that will leave you craving more. These aren’t just rolls; they’re little bundles of sunshine, bursting with citrus joy.
The Secret to Unforgettable Sweet Rolls: A Touch of Orange Magic
What sets these orange rolls apart? It’s the fresh, bold flavor of orange permeating every layer. From the zesty filling generously spread across the fluffy dough to the light, refreshing orange glaze that drizzles over each warm roll, every element sings with citrus delight. The delicate balance of sweetness and tanginess from the orange cuts through the richness of the butter and sugar, creating a refreshing contrast that makes these rolls incredibly addictive. They offer a brightness that traditional cinnamon rolls simply can’t match, making them a perfect pick-me-up any time of day.
I know, it’s a bold statement, but if forced to choose between a classic cinnamon roll and one of these magnificent orange creations, my heart (and taste buds) would unequivocally pick the orange rolls every single time. While I certainly wouldn’t turn down one of each, there’s something uniquely captivating about the tender dough meeting that dreamy, citrus-infused filling. These rolls are seriously delectable, promising a taste experience that is utterly divine.
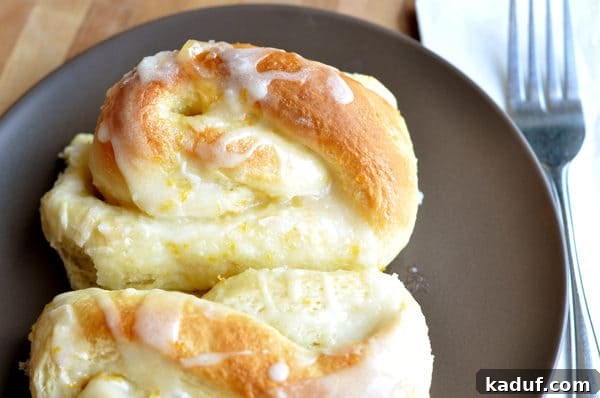
The Art of the Twist: Enhancing Flavor and Texture
While you can absolutely prepare these orange sweet rolls in the traditional spiral shape, I’m a firm believer that the simple act of twisting them makes all the difference. This unique shaping method isn’t just for aesthetics; it truly enhances the taste and texture of the final product. By gently stretching and twisting the dough, you create more nooks and crannies, allowing the luscious orange filling to be distributed more evenly and caramelize beautifully during baking. This also means more surface area for that incredible orange glaze to cling to, ensuring every bite is bursting with flavor. I’ve included detailed instructions on how to achieve this delightful twist below the recipe, complete with step-by-step photos to guide you. Give it a try – you might just find yourself agreeing that they taste better twisted!

Crafting Your Perfect Orange Sweet Rolls: A Visual Guide
Creating these heavenly orange sweet rolls is a rewarding experience, and we’ve broken down the process into easy-to-follow steps, complete with visual cues to ensure your baking success. From preparing the rich, buttermilk dough to spreading the vibrant orange filling and shaping the rolls, each stage is designed to be straightforward and enjoyable. Let’s walk through the key moments of bringing these delightful pastries to life.
Preparing the Zesty Orange Filling
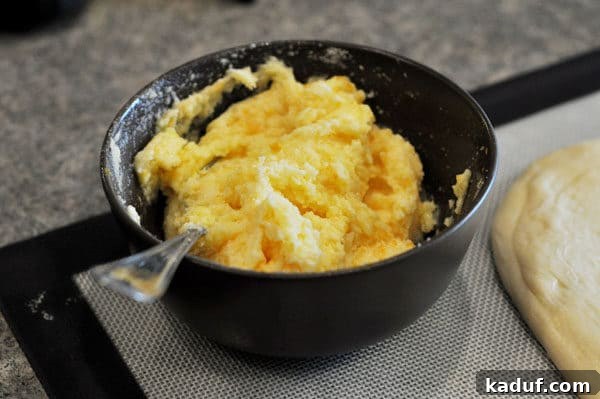
Before you even begin rolling out your dough, you’ll want to have your exquisite orange filling ready. This simple yet crucial mixture combines softened butter, granulated sugar, freshly squeezed orange juice, and plenty of grated orange rind (zest). The zest is where much of the orange’s aromatic oils and intense flavor reside, so don’t skimp on it! This mixture, waiting patiently in a bowl, is the heart of the roll’s flavor.
Rolling Out the Dough
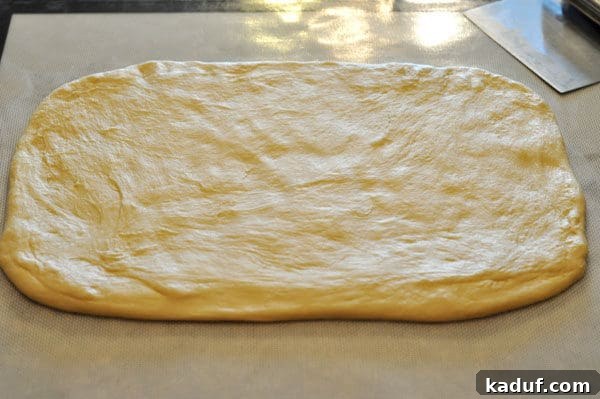
Once your buttermilk dough has beautifully risen, it’s time to transform it. Gently turn the dough out onto a lightly floured surface. The goal is to roll it into a large, even rectangle, typically about 16 by 12 inches. This provides the perfect canvas for your orange filling, ensuring a uniform spread and consistent rolls. The dough should be smooth and elastic, making it easy to work with.
Spreading the Orange Filling
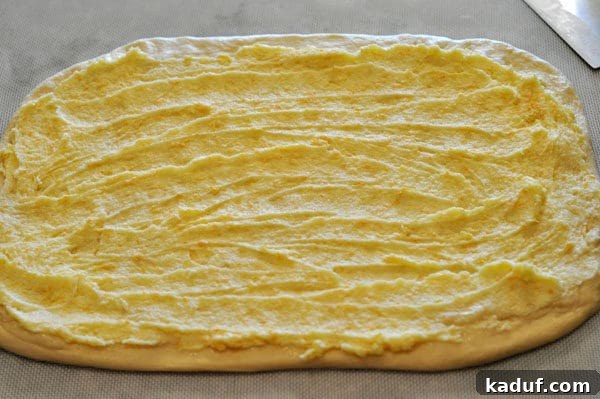
With your dough rolled out, generously spread the prepared orange, butter, and sugar mixture evenly over the entire surface. An offset spatula or a rubber spatula works wonderfully for this, ensuring every inch is coated with that bright, citrusy goodness. This layer is crucial for the flavor profile, so make sure it’s consistent.
Rolling and Sealing the Dough
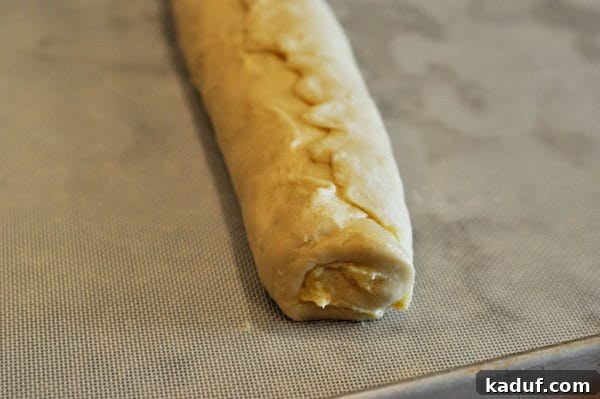
Now for the fun part: rolling! Starting from the longest edge closest to you, carefully and tightly roll the dough into a log. The tighter you roll, the more distinct the layers of filling will be. Once rolled, pinch the seam firmly to seal it, preventing any filling from escaping during baking. Then, gently roll the log seam-side down to secure it further.
Slicing into Individual Rolls
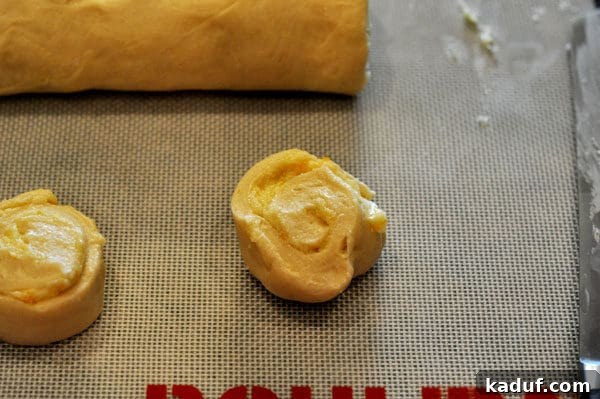
Using a serrated knife (or even a piece of dental floss for extra clean cuts), slice the log into about 12-14 evenly sized rolls. You have the flexibility to make them thinner or thicker depending on your preference. For a traditional look, you can place these spirals directly onto your baking sheet. But if you’re embracing the twist, proceed to the next step!
The Twisting Technique
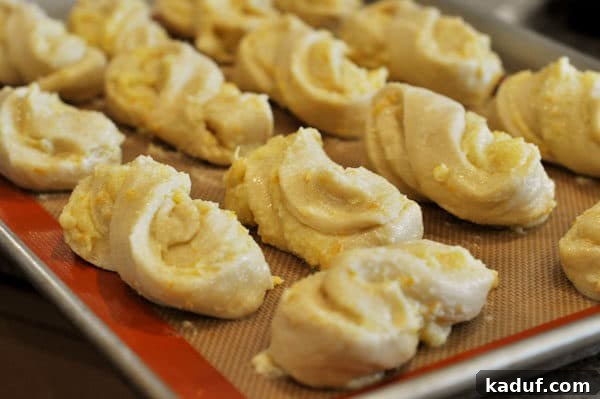
To create the signature twisted shape, gently grasp each side of a sliced roll. Simultaneously pull and twist the roll, forming a figure-eight or a similar elegant, elongated shape. This not only looks beautiful but, as mentioned, creates extra surface area for that delicious glaze and delightful chew. Place your twisted rolls about an inch or two apart on your prepared baking sheet to give them space to rise and expand. Cover them loosely with greased plastic wrap and let them rise until doubled in size.
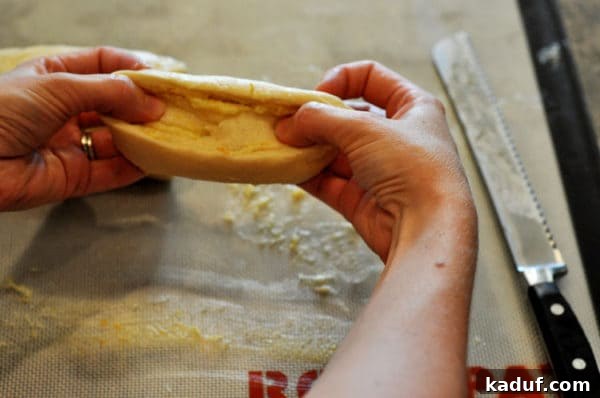
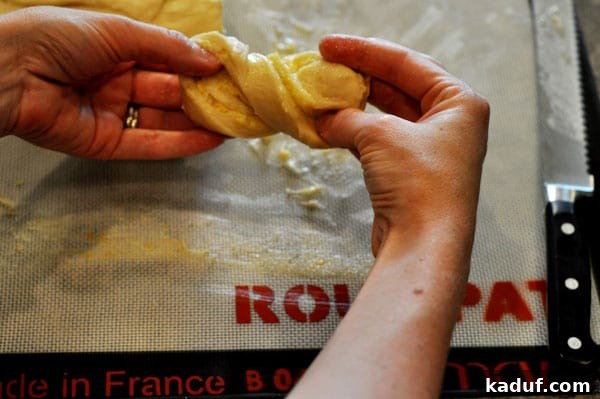
Finally, arrange your carefully twisted rolls on the baking sheet, ensuring they have enough room to expand without touching too much. Once baked to a beautiful golden perfection, and while still warm, generously drizzle them with the vibrant orange glaze. Then, prepare to devour these magnificent creations!
Expert Tips for Sweet Roll Success
Baking with yeast can sometimes feel intimidating, but with a few simple tips, you’ll be making bakery-quality orange sweet rolls in no time. Precision and patience are your best friends in the kitchen.
Understanding Flour Amounts
As with all yeast doughs, the amount of flour specified in a recipe is a guideline, not a strict rule, especially if a weight measure isn’t provided. Factors like humidity, temperature, and altitude significantly impact how much flour your dough will actually need. Rather than sticking rigidly to the measurement, learn to judge the dough by its texture. You want a dough that is smooth and elastic, clearing the sides of your mixing bowl, but still possessing a slight tackiness when lightly pressed with your fingertips. Adding flour slowly, one tablespoon at a time after the initial amount, until this consistency is reached, is key to preventing a dry, tough roll. This tactile approach ensures a tender, fluffy final product every time.
Mastering Yeast and Rising
Yeast is a living organism, and understanding how it works is fundamental to successful baking. Ensure your buttermilk is warm (around 105-115°F or 40-46°C) but not hot, as too much heat will kill the yeast. A warm kitchen environment is ideal for rising. If your kitchen is cool, consider placing the covered dough in a slightly warmed oven (turned off!) or near a sunny window. Properly risen dough will be visibly doubled in size and feel light and airy. Patience during the rising stages will reward you with incredibly soft and flavorful rolls. Don’t rush it!
The Perfect Golden Bake and Glaze
Bake your rolls until they are lightly golden on top and cooked through, typically 22-25 minutes. Overbaking can lead to dry rolls, so keep a close eye on them. The interior should be soft and fully set. As soon as they come out of the oven, while still warm, generously drizzle them with your homemade orange glaze. The warmth of the rolls will allow the glaze to melt slightly and seep into all those wonderful nooks and crannies, adding another layer of irresistible orange flavor and moisture. This is where the magic truly happens, transforming simple rolls into a masterpiece.

Orange Sweet Rolls
Pin
Rate
SaveSaved!
Ingredients
Dough:
- ¾ cup warm buttermilk, (I pour the buttermilk in a glass liquid measuring cup and microwave for 1 minute on 50% power).
- 6 tablespoons (85 g) butter, melted and cooled
- 3 large eggs
- 4 ¼ cups (604 g) flour
- ¼ cup (53 g) sugar
- 2 ¼ teaspoons instant yeast
- 1 ¼ teaspoons salt
Orange Filling:
- ½ cup (113 g) softened butter
- 1 cup (212 g) sugar
- 2 tablespoons freshly squeezed orange juice
- Grated orange rind/zest from two large oranges, reserving 1/2 teaspoon grated rind for the glaze below
Orange Glaze:
- 1 ½ cups (171 g) powdered sugar
- 3 tablespoons freshly squeezed orange juice from about 1 orange
- ½ teaspoon grated orange rind/zest reserved from the filling above
Instructions
-
For the dough, whisk the warmed buttermilk and butter together in a large liquid measuring cup. Combine 4 cups of flour, sugar, yeast and salt together in a standing mixer fitted with dough hook (or you can use a large bowl and mix with a wooden spoon or electric handheld mixer). With the mixer on low speed, add the buttermilk mixture and eggs and mix until the dough comes together, about 2 minutes. Increase the mixer to medium speed and knead the dough until it is smooth and elastic, about 10 minutes (knead for 15-18 minutes by hand). If after 5 minutes of kneading, the dough is still overly sticky, add 1/4 cup flour 1 tablespoon at a time until the dough clears the sides of the bowl but has a slight tacky feel when pressed between your fingertips. (See this tutorial for a visual.)
-
Place the dough in a large, lightly greased bowl and cover the top tightly with plastic wrap. Let the dough rise in a warm place until doubled, around 2 to 2 ½ hours, depending on the warmth of your kitchen.
-
For the filling, combine all the filling ingredients (reserving 1/2 teaspoon orange zest for the glaze) in a small bowl and mix well. Set aside.
-
When the dough is ready, turn it out onto a lightly floured counter (I use my trusty roul’pat for this step) and press it into about a 16 by 12-inch rectangle (if you have doubled the recipe, split the dough in half and roll out one half at a time). Gently brush the filling mixture over the rectangle, using an offset spatula or rubber spatula.
-
Lift the longest edge closest to you and begin rolling the dough into a tight log. Pinch the seam closed and roll the log so it is seam side down. Using a serrated knife, slice the log into 12 evenly sized rolls,more or less. You can slice them thinner or thicker as you like. For a traditional cinnamon-roll-look, arrange the rolls cut side down on a lined or lightly greased baking pan. If you want to try the twist method (see the pictures below), one at a time grab each sliced roll and holding on to either end simultaneously pull and twist the roll into a figure eight and place it on the prepared pan. Cover the rolls with lightly greased plastic wrap. Let the rolls rise in a warm place until doubled, 1 to 1 ½ hours.
-
Bake the rolls at 350 degrees for 22-25 minutes, until the rolls are lightly golden on top and cooked through. While the rolls are baking, mix together the glaze ingredients. Drizzle the glaze over the warm rolls.
Notes
Yeast: this tutorial on yeast may help identify how a perfectly floured dough should be.
Recommended Products
Other Delicious Recipes You Might Enjoy
More Sweet Rolls and Pastries:
A Look Back:
One Year Ago: Steak Hoagies with Mushrooms, Onions and Peppers
Two Years Ago: Meatballs with Cream Sauce
We hope you feel inspired to bake these incredible Orange Sweet Rolls. They are more than just a recipe; they are an experience, a delightful treat that brings joy with every bite. The tender dough, the zesty orange filling, and the sweet, tangy glaze come together in perfect harmony. Don’t hesitate to dive into this recipe, embrace the twist, and share the homemade goodness with your loved ones. Happy baking!