

Embark on a culinary journey to create the most exquisite homemade glazed donuts you’ve ever tasted. This comprehensive guide, born from countless trials, offers foolproof techniques and invaluable tips for achieving irresistibly light, fluffy, and melt-in-your-mouth donuts right in your own kitchen. Prepare to impress your family and friends with a treat that redefines homemade indulgence!
For weeks, anticipation has built since I shared a sneak peek of these incredible donuts on my Instagram stories. The response was overwhelming, with many of you eagerly awaiting this recipe. And now, the moment has arrived! I am thrilled to finally present what I confidently declare to be the best homemade glazed donut recipe on the planet. This isn’t just an exaggeration; it’s a testament to the dozens of times my family and I have perfected this recipe, consistently agreeing that it surpasses all others. The wait, I promise, will be entirely worth it.

You might wonder, with countless donut recipes available, what makes this one truly stand out? The secret lies in a delicate balance that results in donuts that are wonderfully light, unbelievably fluffy, and literally melt in your mouth with every bite. Many homemade donut recipes deliver a thick, chewy texture, often resembling a dense bagel more than a delicate donut. Others fall short, resulting in bland or mediocre creations. We’ve all been there: investing time and effort into homemade treats only to be met with disappointment. This recipe ensures that your hard work culminates in nothing less than perfection.
Our donuts boast a buttery softness paired with an “ethereal squishy factor” (yes, it’s a real and highly desirable quality!) that elevates them to an extraordinary level. While crafting homemade donuts may not be an everyday endeavor, having this tried-and-true recipe at your fingertips brings a unique sense of comfort and capability. It’s there, ready for those special mornings or whenever a craving for truly exceptional donuts strikes. My discerning taste-testers, including my family, unanimously agree: these homemade glazed donuts are simply unparalleled.

To guarantee your absolute success, I’ve packed this guide with an abundance of detailed tips and tricks. My goal is for you to feel like a culinary rock star as you effortlessly create these perfect homemade donuts. Let’s dive in and transform your kitchen into a delicious donut factory!

Crafting the Perfect Homemade Donut Dough
For this exceptional donut dough, an electric stand mixer is highly recommended. Achieving the desired texture and consistency through hand mixing alone can be challenging, if not impossible. I personally use a Bosch mixer {affiliate link}, which features a center drive shaft and is my go-to for all dough-related tasks. However, this recipe should adapt well to other types of stand mixers, such as a KitchenAid.
Begin by adding the flour, sugar, instant yeast, eggs, and cold milk to your mixer bowl. A couple of crucial points to note here:
- **Milk Temperature is Key:** Using cold or room temperature milk (never warm) is essential. When the butter is incorporated later, the cooler dough facilitates a subtle “laminating” effect, contributing significantly to the donut’s incredible texture.
- **Yeast Type:** This recipe calls for instant yeast. If you prefer active dry yeast, please refer to the notes section below the main recipe for conversion instructions.
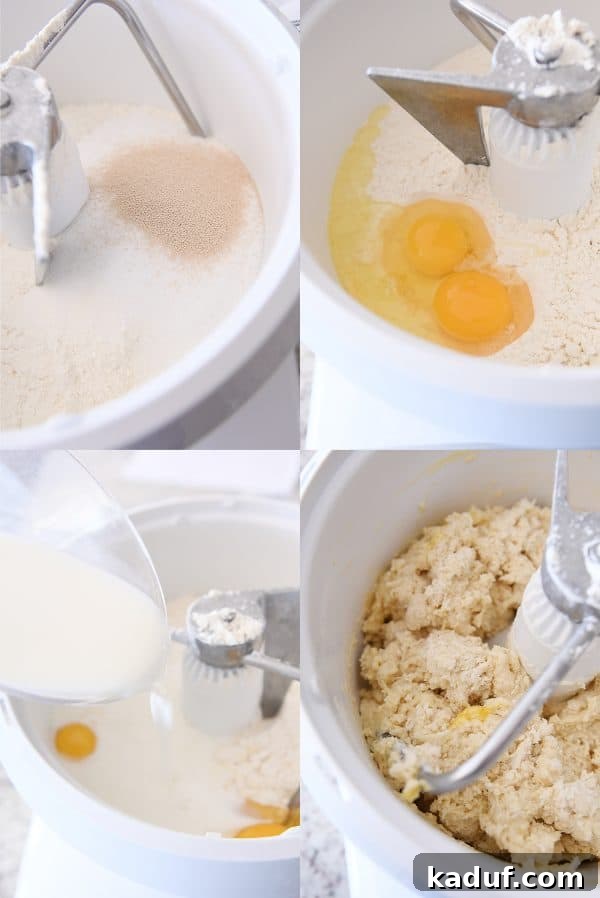
Initially, the ingredients will come together into a somewhat shaggy mixture. Don’t worry; this is perfectly normal. Once the dough starts to form, add the salt. Continue mixing until the dough gradually smooths out and achieves a thicker, somewhat stodgy consistency. This texture is precisely what we’re aiming for at this stage.
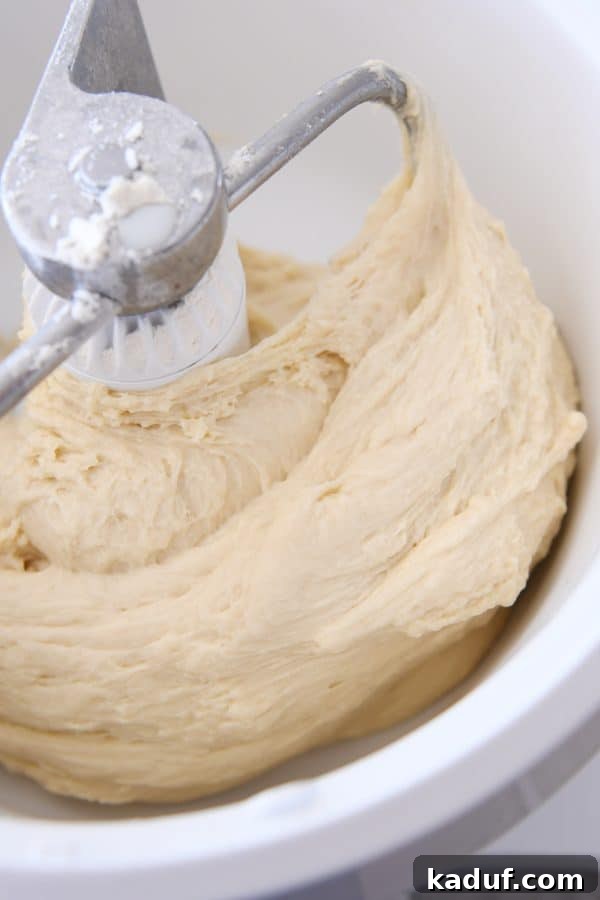
Incorporating Butter for Supreme Softness
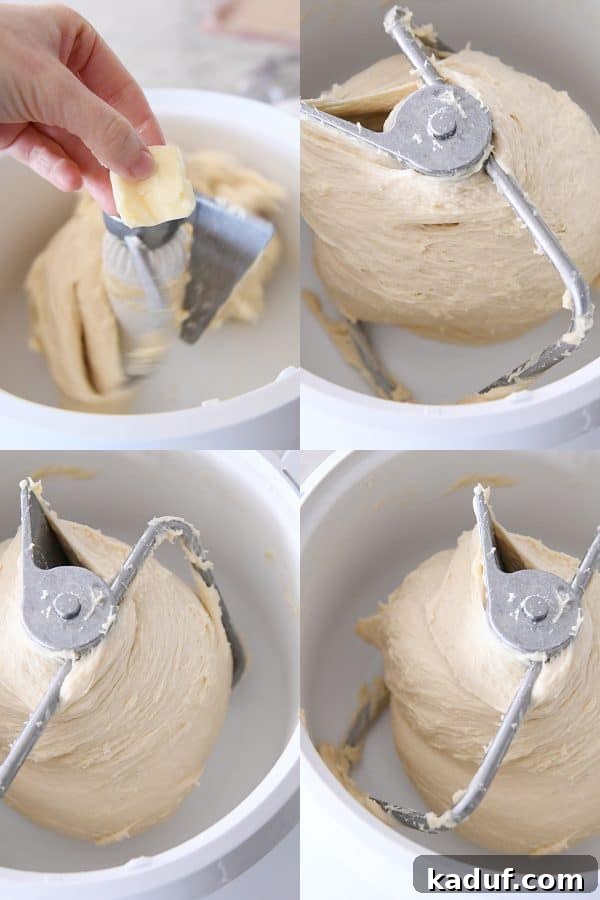
With the mixer running, gradually add the softened butter, one tablespoon-sized piece at a time. You’ll quickly observe a remarkable transformation as the dough softens and develops a more elastic, stretchy quality. This is where the magic begins!
Once all the butter has been fully incorporated, the dough will be exceptionally soft—almost to the point where you might question its consistency. Rest assured, this ultra-soft dough is precisely what contributes to the light and airy texture of the finished donuts. Continue mixing and kneading on medium-low to medium speed for 10-12 minutes. Be sure to scrape down the sides of the bowl as needed to ensure all ingredients are evenly integrated. As the dough kneads, it will become more cohesive, forming a soft yet manageable mass.
It’s important to note that if you’re using a Bosch mixer, the dough might cling slightly to the center drive. In a KitchenAid, it may stick to the bottom and sides of the bowl. This is entirely normal. You’ll know the dough is perfectly kneaded when, upon stopping the mixer, you can gently pull a handful upwards, and it stretches into a silky, elastic ribbon. When released, it should leave minimal residue on your fingers. Even if it hasn’t completely cleared the sides or middle of the bowl, a smooth, very soft (but not excessively sticky) texture indicates readiness.
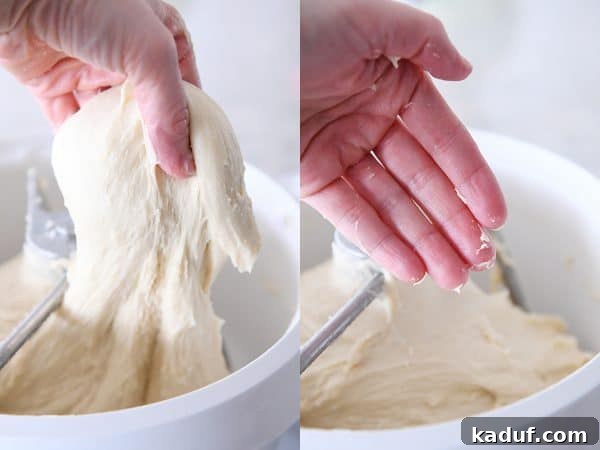
Resist the Urge: The Flour Dilemma
I cannot stress this enough: **resist the temptation to add more flour to the dough if at all possible.** I understand it might seem counterintuitive, especially if the dough is still adhering to the bowl. However, if it has been kneaded for the full 10-12 minutes and passes the “silky, stretchy ribbon” test with minimal finger residue, it truly is ready. Its consistency will firm up significantly during the crucial refrigeration period.
Only consider adding more flour (a mere 1/4 cup at most) if the dough is exceptionally wet and coats your hands in a persistently sticky mess. Otherwise, trust the process; the softness is a feature, not a flaw.
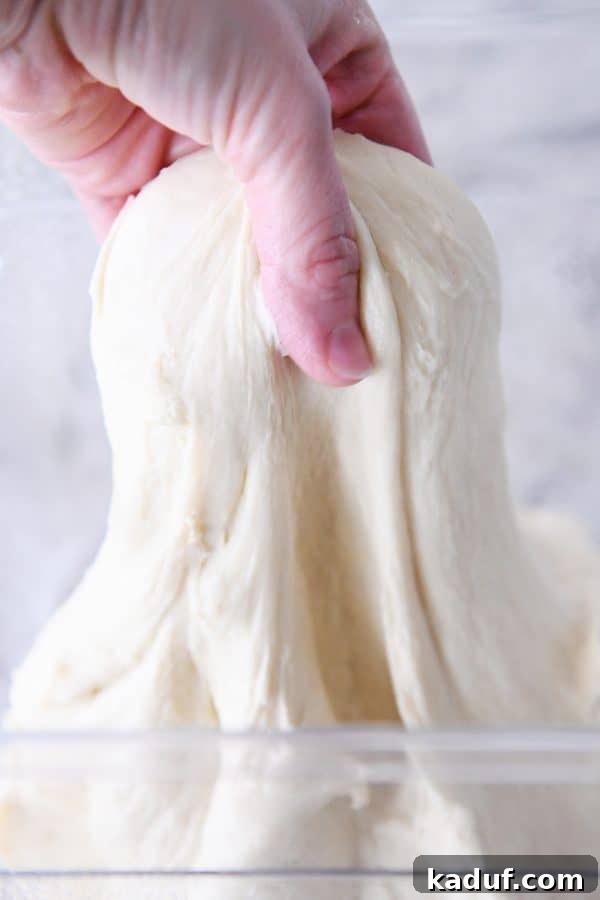
The Marvel of Our Donut Dough: The Cold Rise
The texture of this dough is nothing short of amazing. It’s luscious, incredibly soft, and a complete dream to work with. Once kneaded, transfer the dough to a lightly greased container, cover it, and place it in the refrigerator for a minimum of 8-12 hours, and up to 24 hours. **This cold rise is a critical step for superior donuts.**
I’ve experimented with same-day rising and frying, and the results simply do not compare. Allowing the dough to rest overnight in the refrigerator transforms its texture, making the final donuts immeasurably better. Let’s embrace patience here; the world’s best donuts are a reward for those who wait.
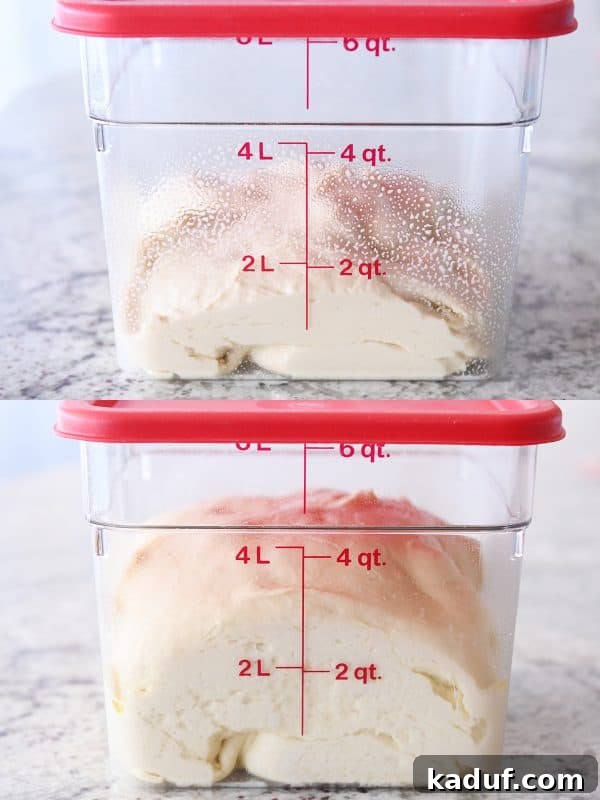
You’ll notice the dough will rise significantly even in the cold environment of the refrigerator. The best part? This chilled dough rolls out beautifully straight from the fridge, making the next step incredibly easy. Aim to roll the dough to approximately 1/4-inch thick, or perhaps just a touch thicker. There’s no need for extreme precision here; a good estimate is perfectly fine.
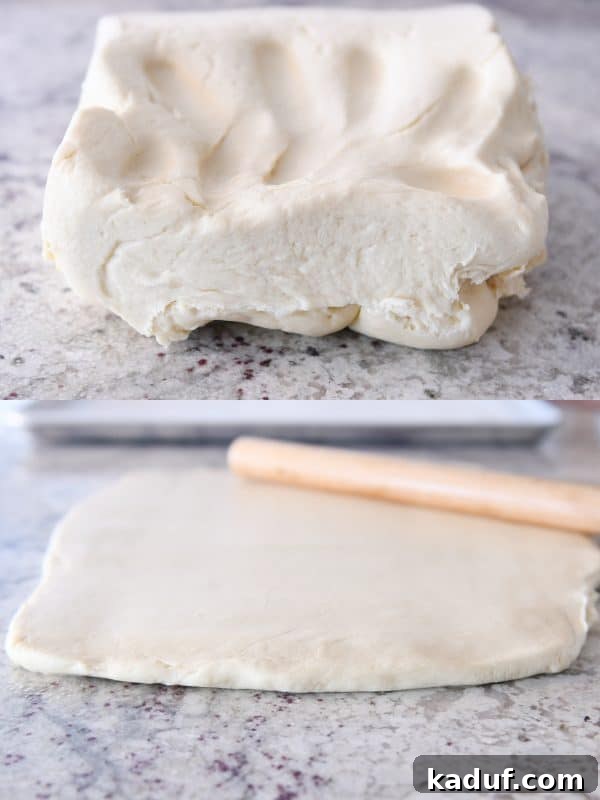
Essential Tools for Cutting Perfect Donuts
When it comes to cutting your donuts, you have several options. My personal preference is to use a set of varying-sized round cutters {affiliate link}. This method allows you to cut the donut holes from the excess dough, ensuring minimal waste and more delicious treats.
While dedicated donut cutters (like the one shown on the far left in the image below) with an attached donut hole center {affiliate link} are convenient, they often produce donuts larger than I prefer. Furthermore, the non-detachable center can make cutting additional donut holes from scraps a bit cumbersome. **My top recommendation is a 3-inch round donut cutter paired with a separate 3/4-inch or 1-inch cutter for the donut holes.**
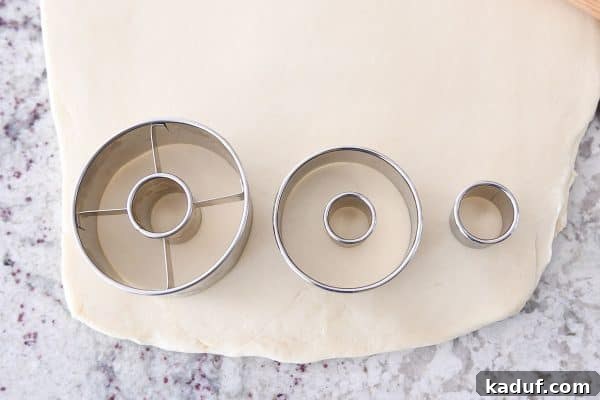
Strategically cut your donuts as close together as possible to maximize the use of your dough. This is important because rerolled donut dough, while usable, won’t yield the same perfectly tender results (I’ll elaborate on this shortly). After cutting all the full-sized donuts, go back and cut as many donut holes as you can from the remaining dough.
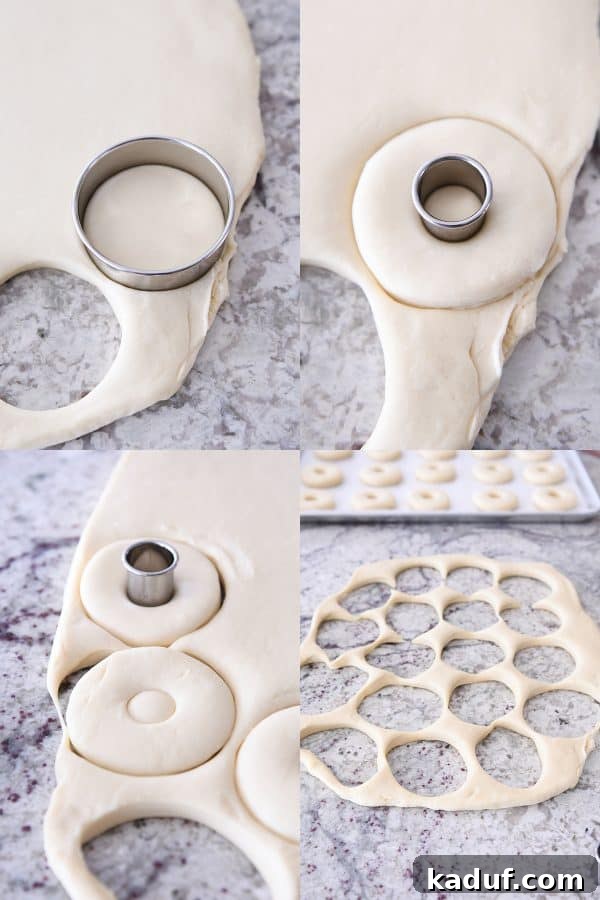
In my household, there’s a clear division: some prefer the substantial main donuts, while others gravitate towards the irresistible charm of donut holes. Regardless, I can never have enough donut holes (teenagers, am I right?). So, I always aim to get every last one out of the dough. They’re undeniably cute and utterly addictive!
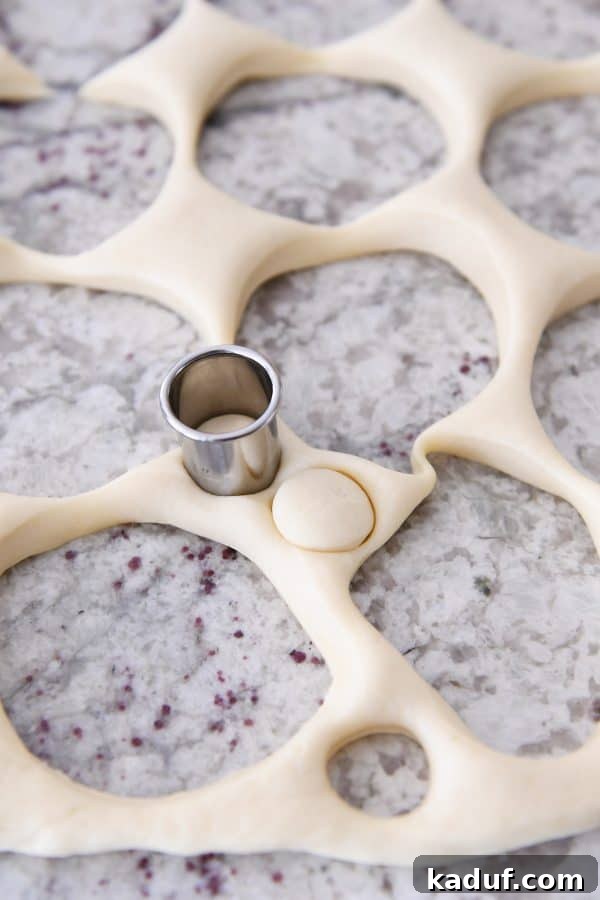
Handling Donut Dough Scraps: Rerolling or Reinventing?
Once you’ve exhausted all possibilities for cutting perfect donuts and donut holes from your initial roll, you’re faced with a few choices for the remaining dough scraps:
- Discard the remaining dough (a solution that frankly makes me a little sad).
- Cut the scraps into small, rustic strips and fry them up as delightful “donut fries.”
- Gather the dough into a mass and reroll it for additional donuts or holes.
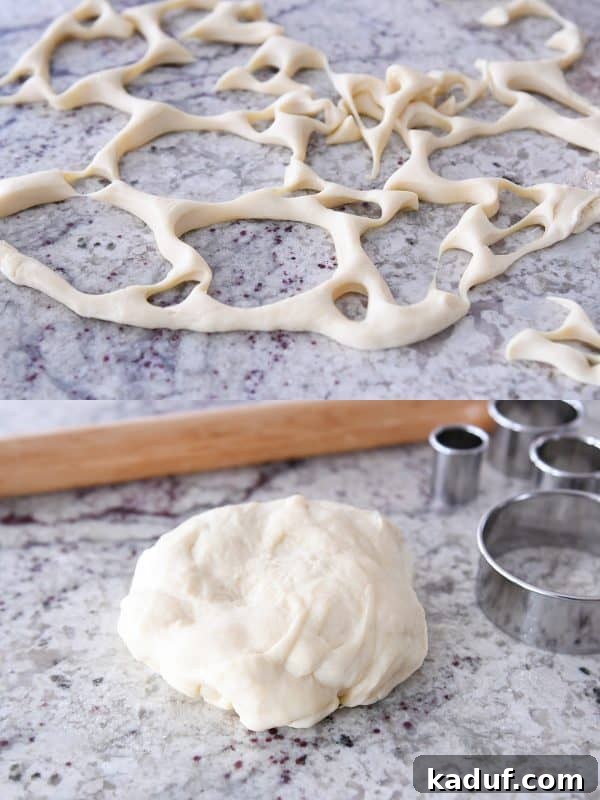
If you choose to reroll the dough, I have two important recommendations for you. **First,** after gathering the scraps, allow the dough to rest for 15-20 minutes before attempting to reroll it. This resting period is crucial for relaxing the gluten, which prevents the dough from springing back excessively as you roll—a common and frustrating issue for many bakers.
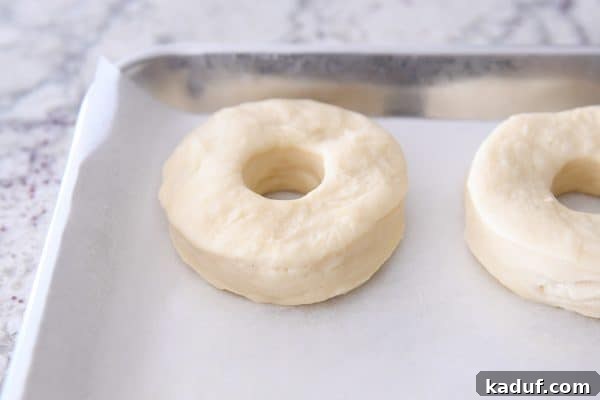
**Second,** manage your expectations for donuts made from rerolled dough. While still delicious, they will generally not achieve the same flawless appearance or tender consistency as those from the first roll. As you can see in the image below, even with careful handling, rerolled donuts tend to be a bit bumpier, lumpier, and not quite as aesthetically perfect.
A Delicious Alternative: Apple Fritters from Donut Scraps
UPDATE: Many of you, both here and on social media, enthusiastically suggested that the ultimate use for donut scraps (rather than rerolling!) is to transform them into apple fritters.
I simply had to try this! Especially after receiving detailed instructions from my cousin-in-law, Tami. The results were absolutely phenomenal! Several of my children even declared them superior to the glazed donuts themselves, a high compliment indeed.
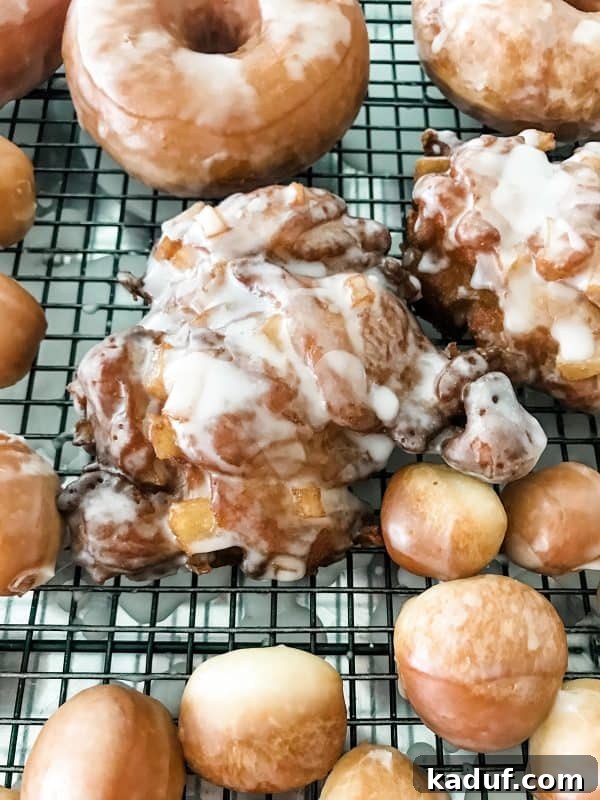
Here’s my perfected apple fritter process:
- First, cut out all your regular donuts as usual.
- Do not bother cutting any additional donut holes from the leftover dough.
- Using a bench scraper, chop all the remaining dough scraps into small “nubbins,” roughly 1/2-inch pieces or slightly smaller.
- Finely chop about 2 large apples (yielding approximately 2 cups of chopped apples). Toss these with a squeeze of lemon juice, 1/3 cup of brown sugar, and 1 1/2 teaspoons of cinnamon.
- Combine all the chopped dough pieces and seasoned apples in a bowl.
- Scoop out small handfuls of the mixture (it might feel a bit strange and like it won’t hold together, but trust the process). Gently form these into balls, then place them on a greased baking sheet and press gently to flatten them into thick disc shapes.
- Allow these fritters to rest and puff up slightly, similar to the donuts.
- Fry the fritters last, as small bits of apple will inevitably fall into the oil (spoiler alert: these little fried apple bits are incredibly delicious!).
- Once cooled to just warm, glaze one side of the fritters with powdered sugar.
Returning to Our Regular, Delicious Glazed Donuts!
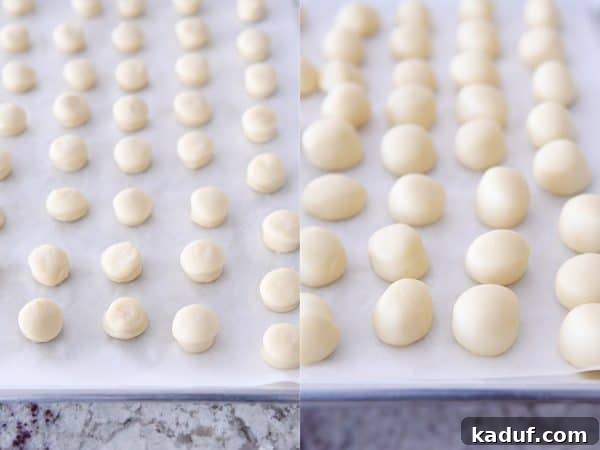
Now, let’s get back to our main event: the classic homemade glazed donuts. Arrange all the cut-out donuts and donut holes on greased parchment-lined baking sheets. Allow them to rest and rise until they are noticeably puffy. While a full doubling in size isn’t strictly necessary, they should certainly appear delightfully plump and happy.
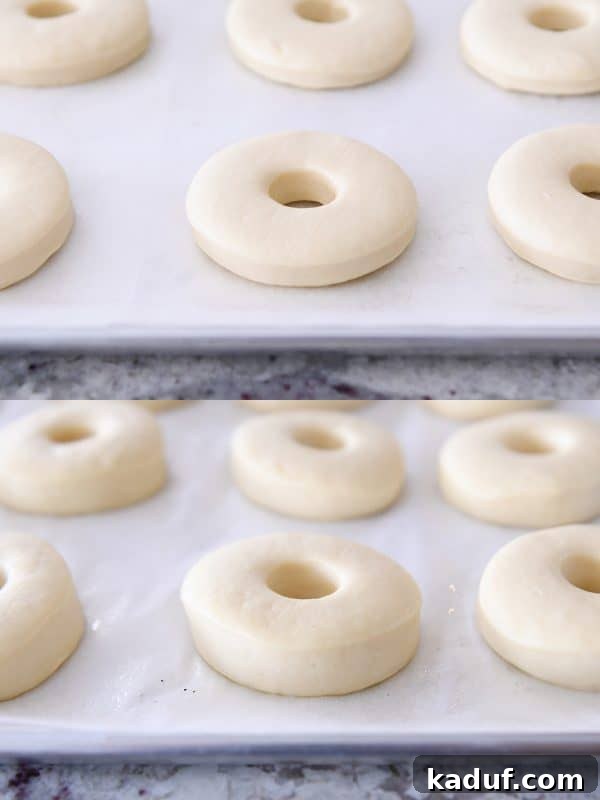
The Art of Frying Homemade Glazed Donuts
Pour about 2-3 inches of vegetable oil into a heavy-bottomed pot on your stove, or follow the manufacturer’s instructions for your electric deep fryer. Heat the oil slowly and steadily until it reaches a temperature between 350 and 360 degrees F. A gradual heating process ensures the oil cooks evenly without burning the exterior of the donuts before the interior is done.
*My electric deep fryer is an older Hamilton Beach model no longer available, but I’ve linked a similar, highly-rated model in the recipe card below.
After rising, your donuts will be incredibly soft. Handle them with extreme care as you gently lift them from the baking sheets to prevent stretching. Carefully but quickly lower them into the hot oil. Fry each side for approximately 60-90 seconds, until a beautiful golden brown color is achieved. I find kitchen tongs to be indispensable for both flipping and removing the donuts from the oil.
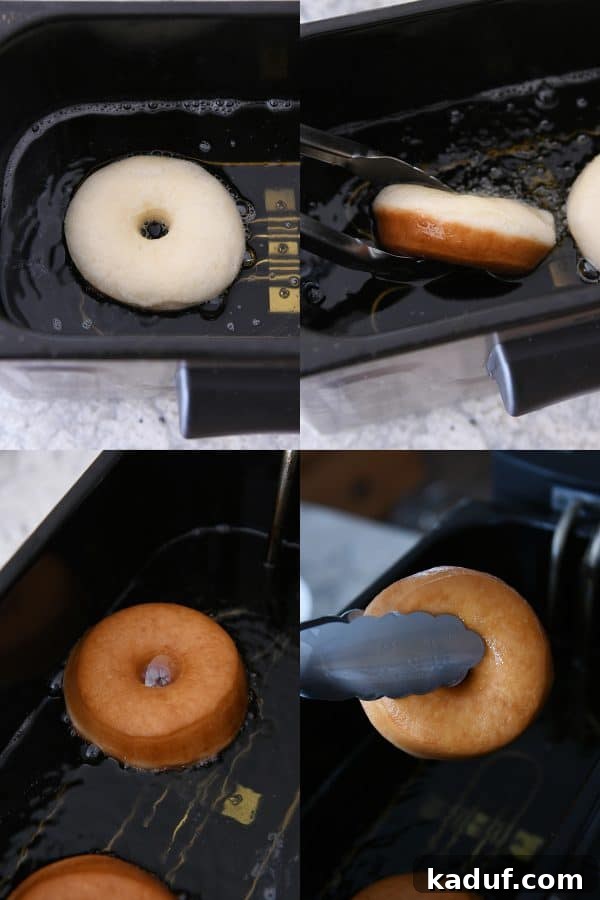
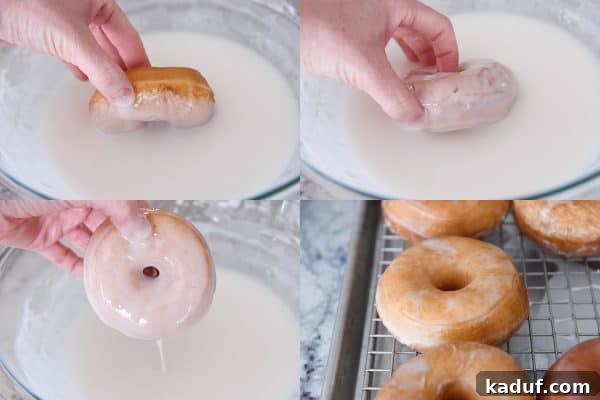
Once fried, transfer the donuts to a paper towel-lined baking sheet to drain excess oil. Allow them to cool until they are just warm to the touch before proceeding with the glaze. **This cooling period is vital!** If the donuts are too hot, the delicious glaze will simply slide right off, leaving you with less of that sugary coating we all adore.
Sidenote: You might notice a subtle ridge line at the top of my donuts. This happens consistently, and I suspect it’s related to the cooking spray used on the pans during the rising process. Similarly, the undersides of my donuts often appear slightly bumpier and more rustic than the tops. Again, I attribute this to the cooking spray and how they rise. Honestly, I don’t let these minor aesthetic details bother me. As long as the donuts are puffy, fluffy, soft, and utterly luscious, their perfect appearance is secondary to their taste!
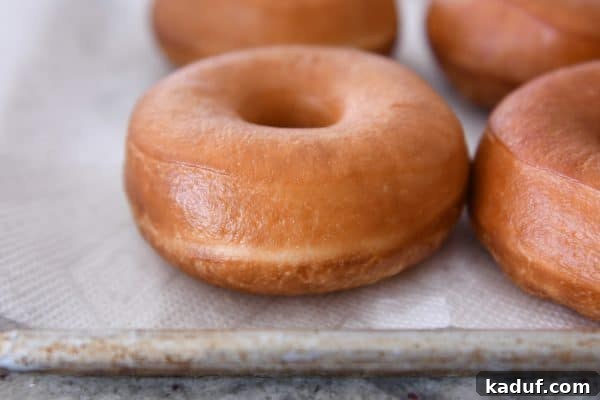
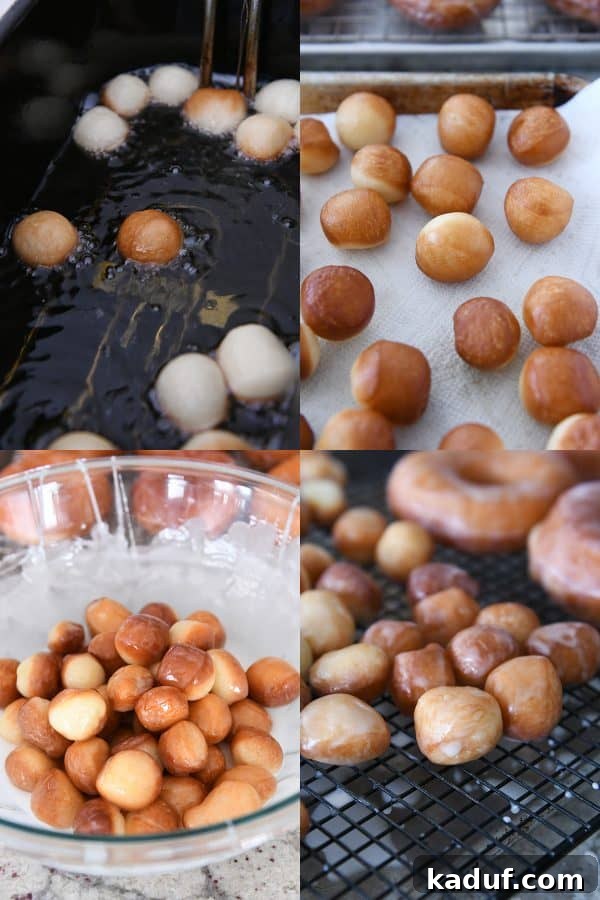
The same principles apply to the donut holes. Allow them to rise until they are puffy and roughly doubled in size. Then, carefully drop them into the hot oil for frying.
A Moment of Honesty: The Peculiarities of Frying Donut Holes
Let me be entirely transparent here: frying donut holes is often the bane of my donut-making existence. Yes, they are undeniably cute, highly coveted, and talking ill of them might even earn you glares from angsty teenagers (the donut holes, not the teenagers!).
However, they can be a real pain to fry evenly. Some will obediently flip and cook to a perfect golden hue on all sides, while others stubbornly bob in the hot oil, refusing to allow their pale undersides to bathe in the blistering bubbles. I’ve attempted every trick in the book to achieve perfectly uniform donut holes, and I’ve ultimately surrendered to their independent spirit. The truth is, no one in my family cares if some have slightly lighter bottoms; they’re still devoured with equal enthusiasm.
So, here’s my advice: don’t stress over them. I’ve learned that donut holes truly have a mind of their own, and we simply won’t let their stubborn tendencies dampen our delicious day. Embrace their charming imperfections!
Efficiently Glazing Donut Holes
When it comes to glazing donut holes, abandon the tedious one-by-one approach. My preferred method is to toss a generous batch of them into the bowl of glaze simultaneously. With clean hands, gently roll them around until each donut hole is thoroughly and evenly coated. Then, transfer them to a wire rack, allowing any excess glaze to drip off cleanly.
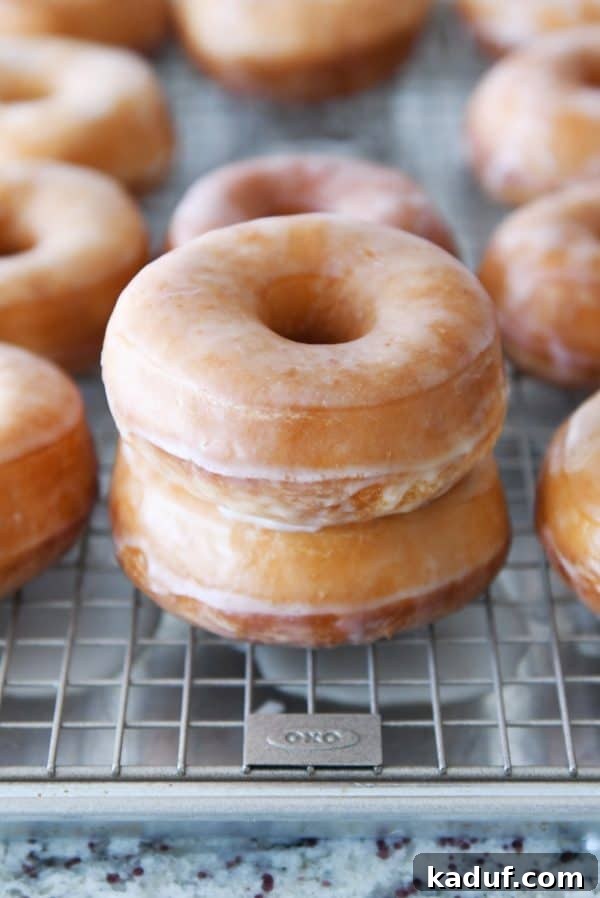
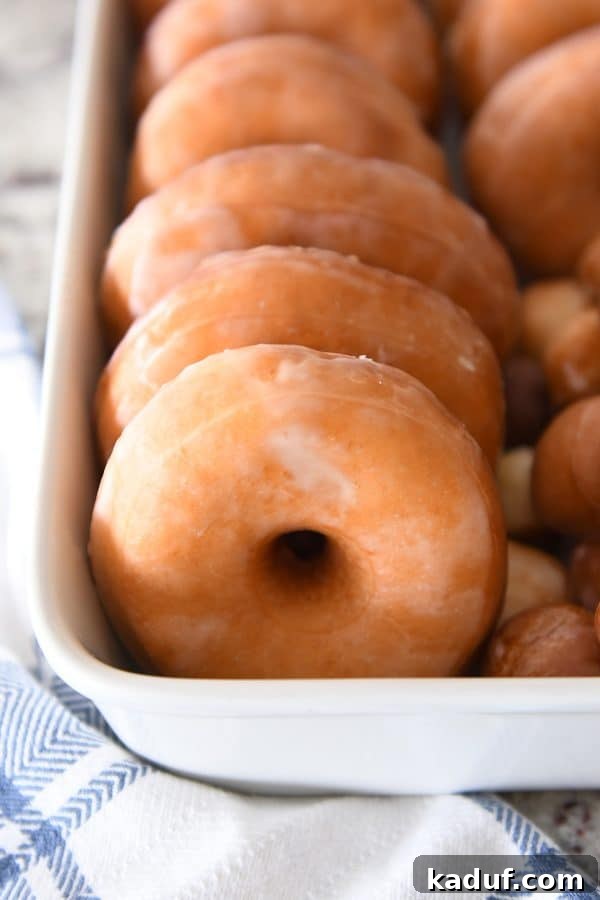
And there you have it! The definitive guide to making not just any homemade donuts, but truly the BEST homemade glazed donuts on the planet. Unless I someday share a beloved spudnut (potato donut) recipe from my childhood, I can’t imagine relying on any other homemade donut recipe. These are a consistent family favorite.
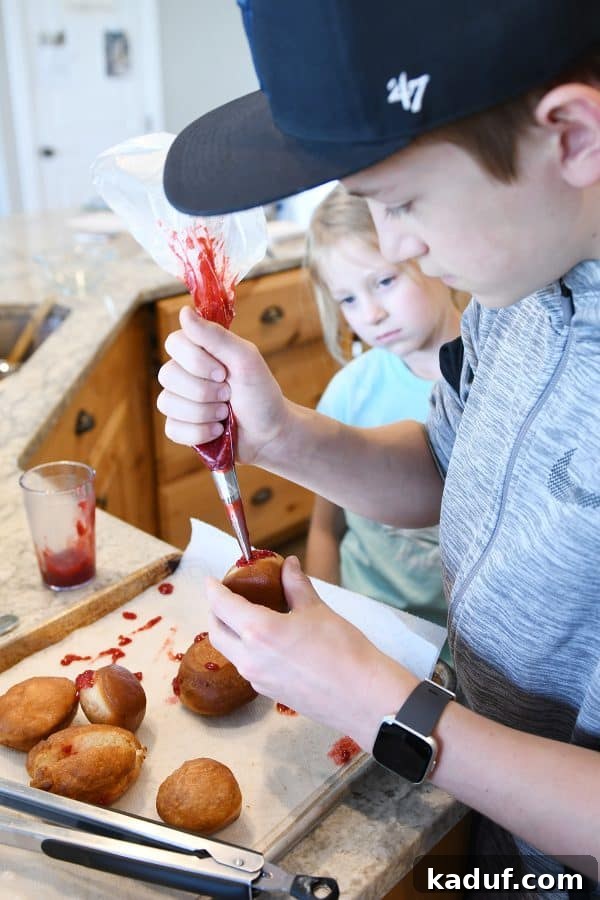
My children frequently beg for them; my daughter even opted for a “cake” made of stacked homemade donuts for her recent birthday! My 14-year-old has taken on the challenge of perfecting the jelly donut, often requesting a portion of the dough for his experiments (which usually result in a very sticky kitchen floor, but undeniably delicious progress).
Your Donut-Making Journey: Questions and Creative Freedom
Please don’t hesitate to reach out with any questions, troubleshooting needs, comments, or concerns you might have (except for comments about donuts not being healthy—duly noted!). I’m here to help ensure your success and enjoyment.
Feel empowered to experiment with different glazes and frostings. A classic chocolate frosted donut with sprinkles, for instance, is always a welcome variation! Most importantly, embrace the joy of the homemade donut-making process. If your donuts don’t emerge looking absolutely picture-perfect, take heart—that simply means you’re doing just fine! Perfection is often overrated and, frankly, a little annoying. And besides, it just gives you a delightful excuse to make them again… and again… and again!
One Year Ago: Amazing Instant Pot Creamy “Baked” Ziti
Two Years Ago: Double Chocolate Salted Caramel Muffins
Three Years Ago: Instant Pot Indian Vegetable Rice
Four Years Ago: Amazing Cinnamon Chip Scones {Best Basic Scone Recipe}
Five Years Ago: Amazing Key Lime Cheesecake
Six Years Ago: Oatmeal Peanut Butter Chocolate Chip Bars
Seven Years Ago: Creamy Tuscan Pasta Sauce {Quick 20-Minute Dinner}
Eight Years Ago: Crab and Goat Cheese Ravioli

The Best Homemade Glazed Donuts
Pin
Rate
Ingredients
Donuts:
- 7 cups (994 g) all-purpose flour (see updated note!)
- ¾ cup (159 g) granulated sugar
- 1 ½ teaspoons instant yeast (see note for active dry yeast)
- 2 cups cold milk, I use 2%
- 2 large eggs
- 1 ½ teaspoons salt
- ¾ cup (170 g) salted butter, cut into tablespoon-size pieces and softened to room temp
- 2 to 3 quarts vegetable oil, for frying
Glaze:
- 6 cups (684 g) powdered sugar
- ¾ cup hot water (see note)
- ¼ teaspoon vanilla extract
- Pinch salt
Instructions
-
In the bowl of an electric stand mixer fitted with the dough hook, add the flour (see note!), sugar, yeast, milk, and eggs. Mix until just combined and the dough appears shaggy. Add the salt and continue mixing for 2-3 minutes until well combined and the texture looks fairly smooth. Let the dough rest for 5 minutes.
-
With the mixer running on medium-low speed, add the softened butter, one piece at a time. Continue mixing until all the butter is fully incorporated into the dough. The dough will visibly soften and may begin to stick to the middle or sides of the bowl. Scrape down the bowl as necessary to ensure even mixing.
-
Increase the mixer speed to medium and knead the dough for 10-12 minutes, starting the timer after the last of the butter has been added. The dough will be very soft, but as it kneads, it should come together into a more cohesive mass. Scrape down the sides of the bowl if needed.
-
To check if the dough is done, pull up a handful; it should stretch easily into a silky ribbon. It will be very soft and may still slightly stick to the bowl depending on your mixer, but it should not leave significant sticky residue on your fingers. If the dough is excessively wet and sticky, add 1/4 cup more flour and mix for a few more minutes (only add flour if absolutely necessary).
-
Transfer the dough to a lightly greased container. Cover and refrigerate for at least 8 hours, and up to 24 hours. The dough should approximately double in size in the refrigerator. UPDATE: Some users have reported minimal rising in the fridge, but still achieved excellent donuts. If your dough doesn’t visibly rise much, don’t worry, and consider placing the container on a middle shelf where it might be slightly warmer.
-
Immediately after removing it from the refrigerator, roll the chilled dough on a lightly greased countertop to about 1/4-inch thick (or slightly thicker), forming roughly a 12×16-inch rectangle. Line half-sheet pans with parchment paper and lightly grease the parchment.
-
Cut out the donuts using a 3-inch donut cutter (with a 1-inch center for the hole) and carefully place them on the prepared pans. Cut any remaining excess dough into additional donut holes. If desired, you may reroll scraps (note that these donuts might be bumpier and slightly less tender; resting the combined scraps for 15-20 minutes before rerolling helps relax the gluten).
-
Allow the cut donuts and donut holes to rise, uncovered, until noticeably puffy. For a quicker rise, you can warm your oven to 140 degrees F, turn it off, and place the sheet pans inside for about 20 minutes. On the countertop, this rise may take 1-2 hours.
-
Prepare a separate half-sheet pan by lining it with a double layer of paper towels. This will be for draining the fried donuts.
-
Heat vegetable oil in a heavy pot (at least 2 inches deep) or an electric deep fryer to 350 degrees F (or up to 365 degrees F for darker donuts). Follow your fryer’s manufacturer directions if using one.
-
Gently pick up the puffy donuts, taking care not to stretch them, and quickly place them into the hot oil. For best results with fewer air bubbles, place the soft underside of the risen donut (which rested on the greased parchment) facing up. Do not overcrowd the pot, as this will cause the oil temperature to drop too rapidly.
-
Cook the donuts until the bottom is golden brown, about 1 to 1 1/2 minutes. Flip them with tongs and continue cooking for another minute or so until both sides are golden. Lift the fried donuts out of the oil with tongs, allow any excess oil to drain, and transfer them to the paper towel-lined baking sheet. (Donut holes typically cook in about half the time).
-
Always allow the oil to return to the correct temperature before adding subsequent batches of donuts or donut holes.
-
Prepare the glaze by whisking all the glaze ingredients together until smooth. Refer to the note below the recipe for thinning out the glaze if desired. Place a wire cooling rack over a clean half-sheet pan to catch drips.
-
Allow the fried donuts to cool until they are just warm to the touch before fully dipping them in the glaze. If the donuts are too hot, the glaze will run off almost completely. Place the glazed donuts on the wire rack so excess glaze can drip onto the pan below.
-
For donut holes, simply toss a couple dozen at a time in the glaze. Use your hands to roll them around until evenly coated, then transfer them to the wire rack.
-
Once the glaze has set on the donuts, they are ready to be transferred to a plate or serving dish. These donuts are best enjoyed fresh, but leftovers can be gently reheated the next day with a quick 12-15 second zap in the microwave for an almost-fresh taste.
Notes
Small Batch Donuts: This recipe can easily be halved for a smaller yield. All rising and cooking times will remain the same.
Whole Wheat/Bread Flour: I have not tested this recipe with whole wheat flour or bread flour. For the lightest and fluffiest results, all-purpose flour is recommended.
Yeast: This recipe was developed using instant yeast. While it should convert well to active dry yeast, I suggest proofing 2 to 2 1/4 teaspoons of active dry yeast in 1/4 cup warm water with a pinch of sugar until it becomes foamy (3-5 minutes). Then, add this mixture to the recipe along with the milk (reducing the total milk amount by 1/4 cup).
Glaze: For a thicker glaze, you can easily add more powdered sugar until your desired consistency is reached. Conversely, a few drops of hot water can thin it out.
Rising: The slow, cold rise in the refrigerator is crucial for the optimal texture of these donuts. When I attempted room-temperature rising and immediate frying, the donuts were noticeably denser and chewier.
Yield: The stated yield is approximate and can vary. The actual number of donuts and donut holes you get will depend on the size of your cutters, whether you reroll scraps, and other factors.
Recommended Products
Recipe Source: Adapted from Mel’s Kitchen Cafe, with inspiration drawn from various sources including The Bread Ahead Cookbook – affiliate link – America’s Test Kitchen, and numerous online recipes.
Disclaimer: I am a participant in the Amazon Services LLC Associates Program, an affiliate advertising program designed to provide a means for me to earn fees by linking to Amazon.com and affiliated sites. As an Amazon Associate I earn from qualifying purchases.