
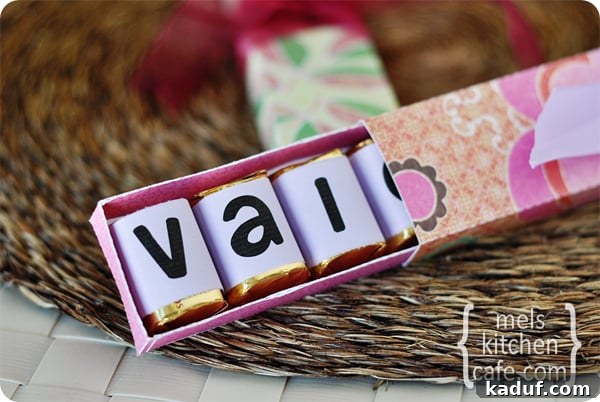
Discover the joy of handmade gifts with these incredibly easy and unique DIY Valentine chocolate boxes – perfect for spreading love and cheer!
DIY Valentine Chocolate Boxes: Crafting Personalized Gifts with a Sweet Touch
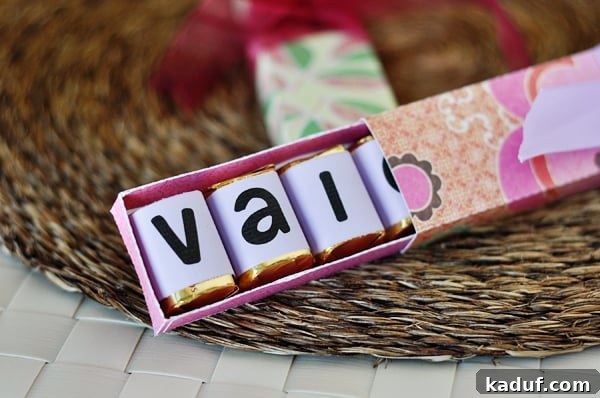
In a world saturated with generic gifts, there’s something truly special about a present made with love and a personal touch. This Valentine’s Day, go beyond the ordinary and create memorable gifts that speak volumes without saying a word – or rather, by spelling a word! We’re not talking about complex baking or elaborate confectionery; instead, we’re diving into the delightful world of DIY chocolate boxes. These simple yet ingenious creations are not only easy to assemble but also offer a unique way to convey your heartfelt messages to teachers, friends, and loved ones.
Forget the myth that homemade gifts require advanced crafting skills or hours of painstaking effort. This project proves that thoughtful gestures can be surprisingly simple. The best part? You don’t need to be a chocolatier to make these gifts shine. While the idea of homemade chocolates sounds delightful, we’re taking a much simpler, yet equally effective, route. Hershey’s Nuggets, with their perfect size and delightful variety, are the stars of this show, fitting flawlessly into our custom-designed boxes.
The Sweet Concept: Personalized Messages in Every Bite
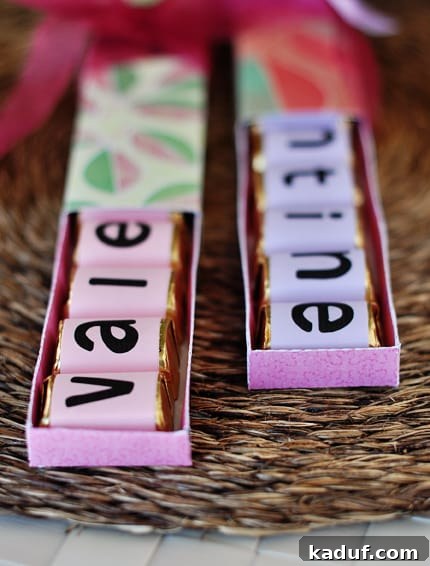
The ingenuity of these chocolate boxes lies in their clever design: they’re perfectly sized to hold nine chocolates. And what word, often associated with February 14th, has exactly nine letters? VALENTINE! Imagine the delight of your recipient as they slide out the chocolates, revealing a sweet, hidden message. It’s a playful and incredibly personal way to celebrate the holiday.
But the magic doesn’t stop at Valentine’s Day. This versatile gift idea has been a personal favorite for countless occasions. Need a token of gratitude? Nine chocolates are just enough to perfectly spell “THANK YOU.” Celebrating a friend’s birthday? “HAPPY BDAY” or simply their name can be arranged. The possibilities are truly endless, making these boxes a go-to for any time you want to show appreciation or spread joy.
Why Choose Hershey’s Nuggets for Your DIY Boxes?
The choice of Hershey’s Nuggets for this project is no coincidence. Their uniform size, delightful variety of flavors (milk chocolate, special dark, milk chocolate with almonds, cookies ‘n’ creme), and widespread availability make them the ideal candy for these personalized boxes. They fit snugly within the compartments, ensuring your message remains intact, and their individual wrappers add a touch of elegance and hygiene. Plus, who doesn’t love a classic Hershey’s chocolate?
Crafting Your Unique Chocolate Boxes: A Step-by-Step Tutorial
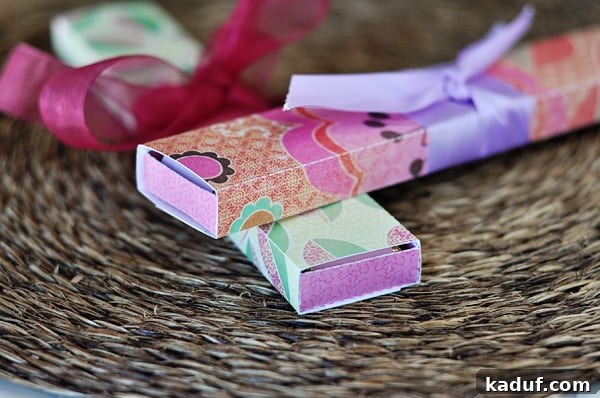
Ready to get crafty? This tutorial will guide you through creating these charming chocolate boxes, from printing the templates to adding those final, personal flourishes. You’ll be amazed at how quickly these come together!
Materials You’ll Need:
- Cardstock (preferably medium to heavy weight for durability)
- Printer
- Scissors or a craft knife
- Ruler (for scoring clean folds)
- Scoring tool (optional, but highly recommended for crisp folds)
- Adhesive (craft glue, double-sided tape, or a hot glue gun for quick drying)
- Ribbon, stickers, markers, glitter, or other embellishments for decoration
- Nine Hershey’s Nuggets chocolates per box
1. Downloading and Printing Your Templates:
The foundation of your chocolate box lies in precise templates. We’ve provided downloadable files for the letter strips, the box bottom, and the box top wrap-around. Ensure you download the correct version (PDF for non-editable, Word for editable letter strips).
- Important Printing Tip: When printing the box bottom and top wrap-around from PDF files, always check your printer settings. Make sure the “Page Scaling” option is set to “None” or “Actual Size.” If your printer scales the page down, the box dimensions will be off, and your nine chocolates won’t fit perfectly. This critical step ensures your boxes turn out exactly as intended!
2. Cutting and Folding the Box Components:
Once printed, carefully cut out all the pieces. Precision here makes a big difference in the final look of your box. Use a ruler and craft knife for the straightest lines, or sharp scissors if preferred. For the box bottom and top, you’ll notice dashed or faint lines indicating where to fold. Using a scoring tool along these lines before folding will create beautifully crisp edges, giving your box a professional finish. Gently fold along all marked lines.
3. Assembling the Box:
Begin with the box bottom. Apply adhesive to the tabs and carefully press them into place to form the rectangular box shape. Ensure all edges are neatly aligned and secured. Repeat this process for the box top wrap-around, forming the outer sleeve that will slide over the base.
4. Personalizing Your Message:
Now for the fun part – arranging your sweet message! Print out the letter strips. If you used the editable Word version, you can customize the font or even the message itself before printing. Cut out each individual letter. Carefully unwrap your Hershey’s Nuggets and gently attach one letter to the top of each chocolate. You can use a tiny dab of glue or double-sided tape, making sure it’s secure but also easy for the recipient to remove. Arrange the chocolates inside the box bottom to spell out “VALENTINE” or your chosen message.
5. The Final Touches: Decorating and Gifting:
Slide the box bottom, now filled with your personalized chocolates, into the box top wrap-around sleeve. This sleeve acts as the pull-out mechanism. Now, it’s time to unleash your creativity! You can keep it simple with a beautiful ribbon tied elegantly around the middle, as shown in the examples. Or, go wild with stickers, markers, glitter, stamps, or even small handwritten notes. For a delightful surprise, consider adding a tag to the top that reads “Be My…” – then, as the recipient slides out the chocolates, they reveal the full message: “VALENTINE!” For teacher gifts, have your children decorate plain white boxes with their own drawings and stickers for an extra personal touch.
Unleash Your Creativity: Customization Ideas
The beauty of these DIY chocolate boxes is their adaptability. While the “VALENTINE” message is charming, consider these ideas to truly make each box unique:
- Thematic Colors: Use cardstock and ribbons in colors appropriate for the occasion – reds and pinks for Valentine’s, pastels for Easter, blues and silvers for winter holidays.
- Photo Personalization: Print small photos of the recipient or shared memories and attach them to the chocolates instead of letters, creating a mini-photo album!
- Handwritten Notes: Instead of typed letters, handwrite individual messages or compliments on small paper squares for each chocolate.
- Embellishments Galore: Beyond ribbons, think about small charms, die-cut shapes, glitter pens, or even fabric accents to adorn the outside of the box.
- Interactive Elements: Create a small flap on the top of the box that reveals a hidden question or clue before the chocolates are pulled out.
- Different Messages: “I LOVE YOU,” “GRACIAS,” “GET WELL,” “BEST MOM” – adapt the message for any recipient and any sentiment.
Why This DIY Gift Stands Out
In a marketplace filled with mass-produced items, a handmade gift carries an unparalleled level of thoughtfulness and sincerity. These DIY Valentine chocolate boxes aren’t just containers for candy; they are vessels of your affection and creativity. They offer:
- A Personal Touch: Each box is a unique reflection of the giver’s effort and care.
- Memorability: Recipients are more likely to remember a unique, personalized gift than a generic one.
- Versatility: Perfect for multiple occasions beyond just Valentine’s Day.
- Cost-Effectiveness: A budget-friendly way to create luxurious-looking gifts.
- Fun for All Ages: A great project for adults, and simple enough for kids to help decorate.
So, whether you’re crafting for a special teacher, a dear friend, or the love of your life, these DIY chocolate boxes are a surefire way to make them feel cherished. Get your craft on and embark on this delightful project!
Files You’ll Need to Get Started:
Download Your Templates Here:
LETTER STRIPS:
Personalize your message with these easy-to-use letter strips.
- PDF Version (not editable)
- Word Version (editable – allows you to change fonts or messages!)
- *The font used in the Word version is “Howser.” A free download for this charming font is available HERE.*
BOX BOTTOM:
This template forms the base of your chocolate box.
- PDF Version
- **Important Printing Note: When printing this PDF, please ensure your printer’s “Page Scaling” option is set to “None” or “Actual Size.” Failing to do so may result in the box printing too short to fit the nine chocolates properly. A huge thank you to Kenzie, a reader, for discovering this crucial tip!**
BOX TOP WRAP-A-ROUND:
This template creates the sliding sleeve for your box.
- PDF Version
- **Important Printing Note: Similar to the box bottom, when printing this PDF, make sure your printer’s “Page Scaling” option is set to “None” or “Actual Size.” This ensures the wrap-around fits perfectly over the box bottom. We’re grateful to Kenzie for her invaluable insight!**
SILHOUETTE SD FILES:
For those with a Silhouette SD cutting machine, these files make cutting a breeze!
- Click HERE to download the Silhouette SD cut files for the chocolate boxes.
*Don’t forget the star of the show! Nine Hershey’s Nuggets fit perfectly in each box, ready to spell out your heartfelt message.*
Visual Guide: Step-by-Step Assembly at a Glance
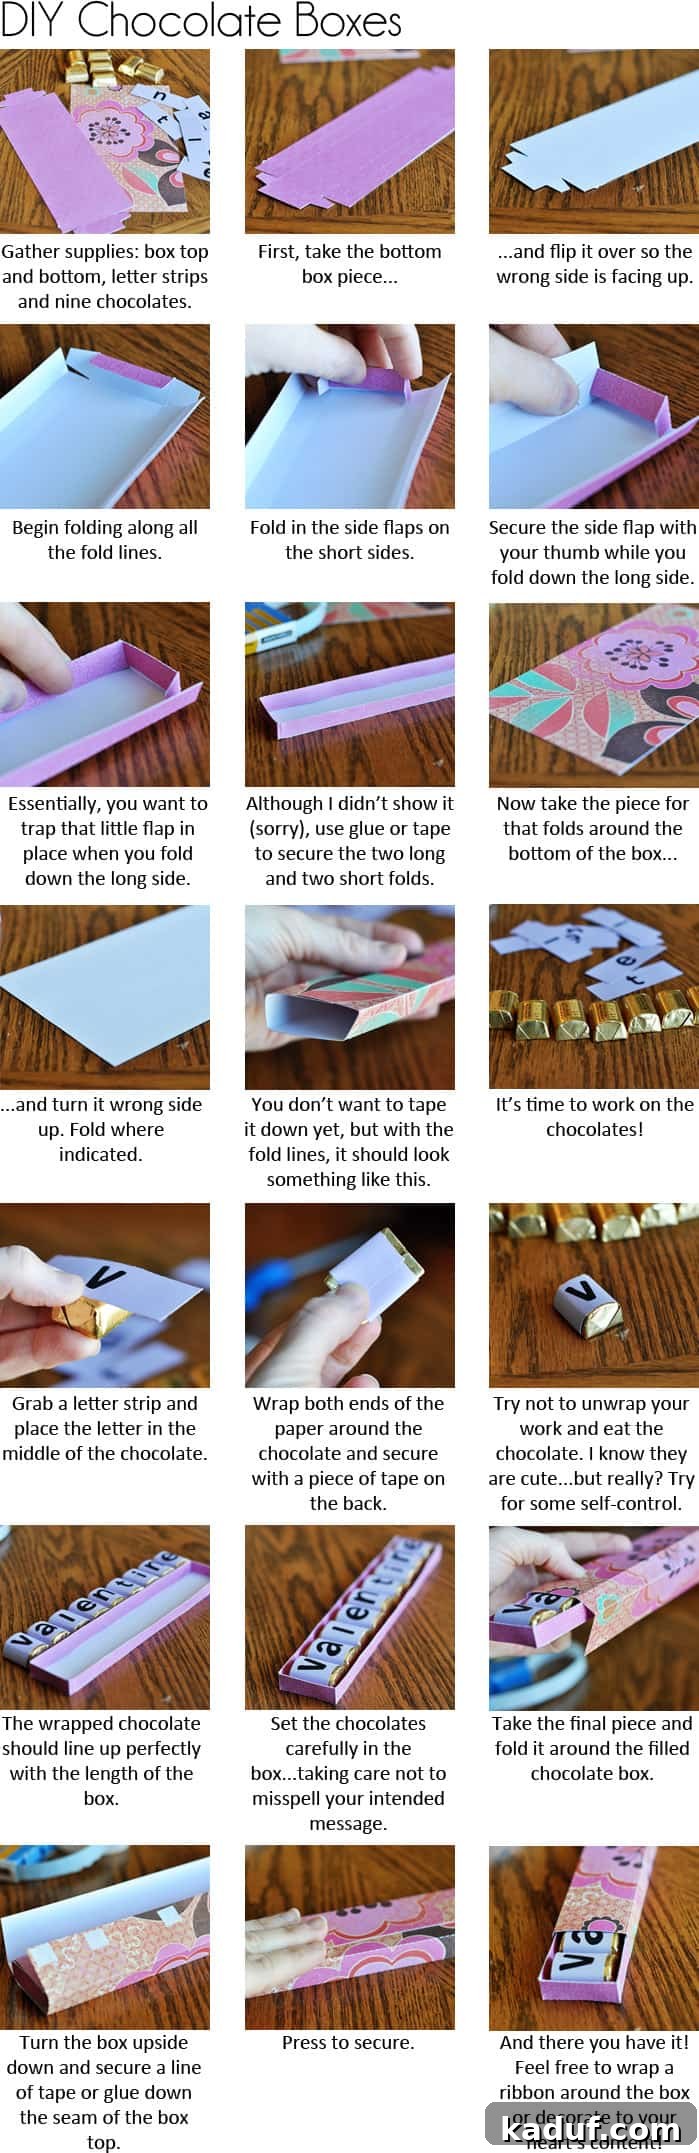
The accompanying image collage provides a quick visual reference for each stage of the crafting process. From printing and cutting to folding and assembling, these visual cues will complement the written instructions, ensuring a smooth and enjoyable DIY experience. Follow these steps, let your creativity flow, and prepare to spread some sweetness!