
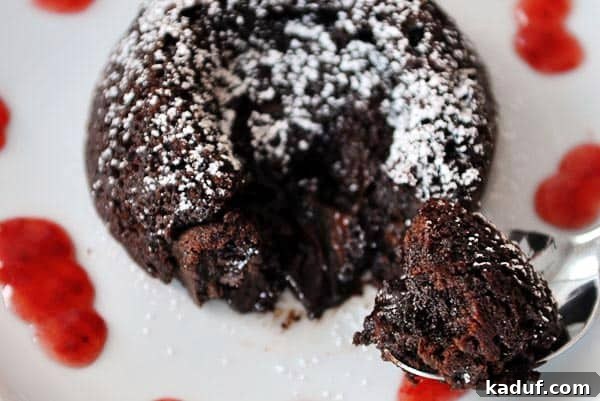
Welcome to a truly irresistible dessert experience: a lightened-up rendition of classic chocolate molten fudge cakes. This recipe offers the ultimate sweet ending to any meal, particularly perfect for a romantic Valentine’s Day dinner or any occasion that calls for a touch of chocolate bliss.
It’s hard to believe it took me so long to bring this extraordinary recipe to you. My friend, Lesli, shared it with me over six months ago, and honestly, I’ve been savoring these delightful cakes time and time again ever since. I almost feel a twinge of guilt, knowing that while I was indulging in their insane chocolate deliciousness, many of you were living in blissful ignorance of their divine attributes. Please, can you forgive my delay?
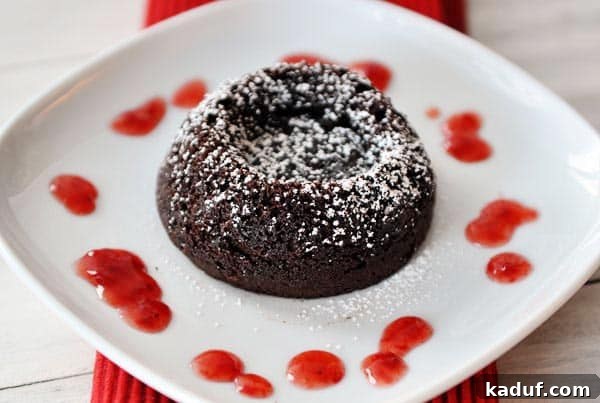
Crafting Perfection: My Journey with Molten Fudge Cakes
Over the numerous times I’ve prepared these cakes, I’ve gently refined the original recipe. My goal was to enhance their inherent richness while keeping them more approachable than some butter-laden alternatives. For instance, I opted for real eggs instead of egg substitutes, adding a touch of natural decadence. To elevate the chocolate experience even further, I introduced a delightful cocoa-butter-sugar mash that’s spread into the baking dishes before filling. This simple step creates an extra layer of flavor and prevents sticking, resulting in perfectly caramelized edges.
Another practical adjustment I made was adapting the baking process to accommodate muffin tins. This is a game-changer if you don’t have a collection of ramekins readily available. It ensures everyone can enjoy these fantastic cakes, no special equipment needed. It’s all about making gourmet desserts accessible and enjoyable for every home baker.
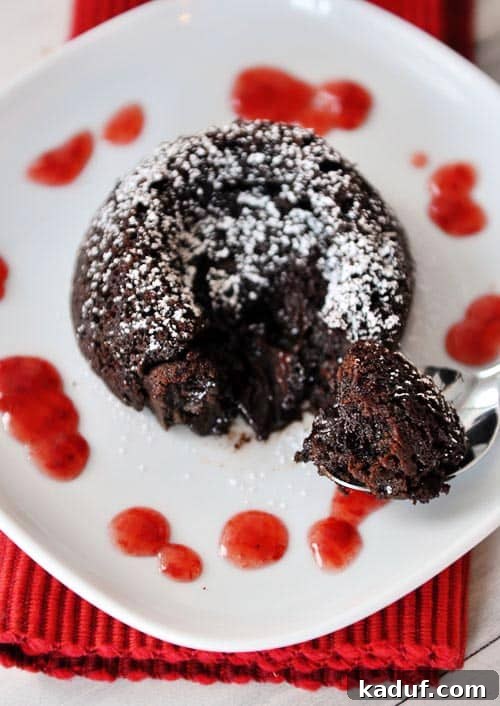
What Makes These Fudge Cakes Stand Out?
These aren’t your typical molten lava cakes that have been popular for ages. While lava cakes are renowned for their flowing, gooey center, these “fudge” cakes offer something uniquely exquisite. Instead of a runny lava, you’ll discover a luscious, soft, and warm fudge-like middle. This dense, creamy heart is perfectly encased by a tender, airy chocolate cake, creating a harmonious contrast in textures and an explosion of rich chocolate flavor with every bite. The name truly says it all: it’s all about that incredible fudge core.
And if you really want to elevate the experience, serving these warm chocolate fudge cakes with a scoop of vanilla bean ice cream is an absolute must. The cold, creamy ice cream melting into the warm, fudgy center creates a symphony of indulgence that is simply “holy moly” good! The combination is truly unforgettable and guaranteed to impress.
A Guilt-Free Indulgence?
Let’s be clear: these aren’t health food. They are, after all, a dessert. However, knowing that a recipe yielding 10 servings (which can easily be halved for a smaller batch) uses only four tablespoons of butter in the batter offers a small comfort. This is a significant reduction compared to some popular recipes that call for upwards of 16 tablespoons of butter for fewer servings. So, you can enjoy this decadent treat with a little less guilt, knowing it’s a slightly lighter option without compromising on flavor or texture.
But truthfully, my affection for these cakes isn’t solely rooted in their lower fat content. My deep love for them stems from the sheer, intense decadence of their chocolate bliss. It’s a perfect fit for my chocolate-loving soul, delivering an unparalleled experience that truly satisfies any cocoa craving. The rich, profound chocolate flavor is what keeps me coming back for more.
The Magic of Make-Ahead Dessert
One of the most appealing aspects of this recipe is its incredible simplicity and speed in preparation. The batter comes together quickly, and while the cakes do require refrigeration before baking, this actually works to your advantage. You can prep them up to two days in advance, allowing you to bake them fresh whenever the craving strikes or when guests arrive. This make-ahead capability makes them an ideal dessert for entertaining or for busy weeknights when you want a quick but impressive treat. Awesome, right?
This flexibility means less stress on event day and more time to enjoy your company (or simply relax). Just imagine: the dessert is ready to go, waiting patiently in the fridge, and then it’s just 15 minutes to warm, fudgy perfection. It’s convenience without compromise, a truly awesome feature for any dessert.
Here’s a quick snapshot of the cakes baked in muffin tins and elegantly overturned. This method offers a fantastic alternative for those who don’t possess ramekins, or perhaps don’t have enough to serve a crowd. The muffin tin method makes these cakes even more accessible and equally delicious.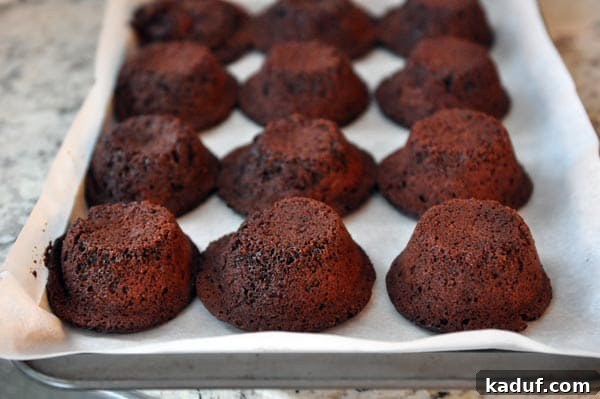
One Year Ago: Delicious Ground Beef {or Turkey} Stroganoff
Two Years Ago: Lemon Crinkles
Three Years Ago: Baked Penne with Chicken, Broccoli and Smoked Mozzarella
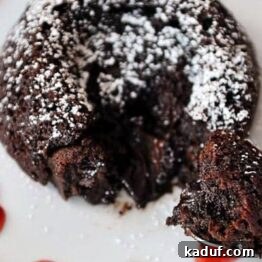
Chocolate Molten Fudge Cakes
Yield: 10 servings
Prep Time: 4 hrs 20 mins
Cook Time: 15 mins
Total Time: 4 hrs 35 mins
Average Rating: 4.70 stars (13 ratings)
Pin
Ingredients
Butter/Sugar Coating:
- 2 tablespoons salted butter, softened
- 2 tablespoons granulated sugar
- 1 tablespoon cocoa powder
Cakes:
- ½ cup plus 2 tablespoons all-purpose flour
- ⅔ cup (57 g) natural unsweetened cocoa powder
- 1 ½ teaspoons baking powder
- ¼ teaspoon salt
- ¼ cup (57 g) salted butter, softened
- ⅔ cup (141 g) granulated sugar
- ⅔ cup (141 g) lightly packed brown sugar
- 4 large eggs
- 1 ½ teaspoons vanilla extract
- ⅓ cup (57 g) finely chopped semisweet or bittersweet chocolate
Garnish:
- Powdered sugar for sprinkling
- Warm strawberry or raspberry jam for drizzling
- Ice cream for serving
Instructions
- In a small bowl, mash together the butter, granulated sugar and cocoa (for the butter/sugar coating) until well-combined. Using a pastry brush or your fingers, rub the mixture evenly into the bottom and up the sides of 10 (4-ounce) ramekins (see note for other dish options). Set aside.
- For the cakes, in a medium bowl, whisk together the flour, cocoa powder, baking powder and salt.
- In a medium bowl, beat the softened butter until light and creamy, 1-2 minutes, using a handheld electric mixer or stand mixer. Add the granulated and brown sugars and beat on medium-high speed for 4-5 minutes, ensuring the mixture is light and fluffy.
- Add the eggs one at a time, incorporating each fully before adding the next, then stir in the vanilla extract. Continue mixing until the batter is pale and thick, about 4 minutes. It’s important not to rush this step; sufficient mixing helps the cakes achieve their airy and moist texture. Gently fold the flour mixture into the wet ingredients until no dry streaks remain. Finally, stir in the finely chopped chocolate.
- Divide the batter evenly among the prepared ramekins (or muffin tin if using – see note below for details). Lightly cover the ramekins with plastic wrap. This is easily done by placing them all on a sheet pan and covering them with a single sheet of plastic wrap, rather than wrapping each individually. Refrigerate for at least 4 hours or up to 2 days. This crucial chilling period ensures the fudge center remains molten during baking.
- Preheat your oven to 350 degrees F (175°C). Remove the cakes from the refrigerator and let them sit at room temperature for about 10 minutes while the oven preheats. This allows them to temper slightly before baking.
- Carefully remove the plastic wrap from the cakes. Bake them for 14-15 minutes (slightly less, around 12-13 minutes, if you are using muffin tins). The cakes are ready when the edges are puffy and the tops are slightly crusty, but the center still feels soft and yields slightly when gently pressed.
- Serve immediately! These molten fudge cakes are best enjoyed straight out of the oven for the optimal warm, gooey experience. Garnish them with a light dusting of powdered sugar, a scoop of your favorite ice cream, or a drizzle of warm strawberry or raspberry jam.
- If you’re using ramekins, they are often served directly in the dish for a rustic, elegant presentation. However, for a more refined look, you can carefully invert them onto a plate. If baking in a muffin tin, you’ll definitely want to turn them out. To do this, place a piece of greased parchment paper onto a baking sheet or cooling rack (greased-side up). Position this on top of the muffin tin, then, holding both the baking sheet and muffin tin firmly, flip them over so the cakes fall onto the parchment. Ensure the parchment is well-greased, or the cakes may stick. Once inverted, the individual cakes can be easily transferred with a spatula to small bowls or serving plates. This makes for a delightful family-style presentation.
Notes
Ramekins: You can use any size of ramekin you have on hand. This recipe typically yields about 10 cakes when using 4-ounce ramekins. If you opt for 6-ounce ramekins, you’ll likely get around 8 cakes. Don’t have ramekins? No worries at all! A standard muffin tin works beautifully. The key is to avoid overfilling the muffin tin. This recipe makes approximately 14 standard muffin-sized cakes.
Plan Ahead: Remember that the unbaked cakes absolutely need to be refrigerated for at least 4 hours. This chilling period is essential as it helps the fudge center maintain its molten texture during baking. The fantastic news is that these can be prepared and refrigerated for up to 2 days in advance, making them an excellent make-ahead dessert option for entertaining or for a spontaneous indulgence.
Serving: For the best experience, these beautiful little cakes should be served immediately after they come out of the oven. If left to sit for too long, the molten center will begin to solidify, and the edges of the cake won’t be quite as soft and tender. The fresh-baked warmth is crucial for that perfect fudgy core.
Author: Mel
Course: Dessert
Cuisine: American
Method: Bake
Recommended Products
- Mixing Bowl
- Ramekins
- Electric Hand Mixer
Recipe Source: This recipe is a thoughtful adaptation of a wonderful recipe found in Cooking Light, generously shared by my friend Lesli many years ago. I’ve added a few personal touches to enhance the experience, such as the innovative cocoa/sugar coating for the ramekins (an idea inspired by a recipe featured in Cuisine at Home), along with some ingredient and method tweaks to perfect the final outcome.