
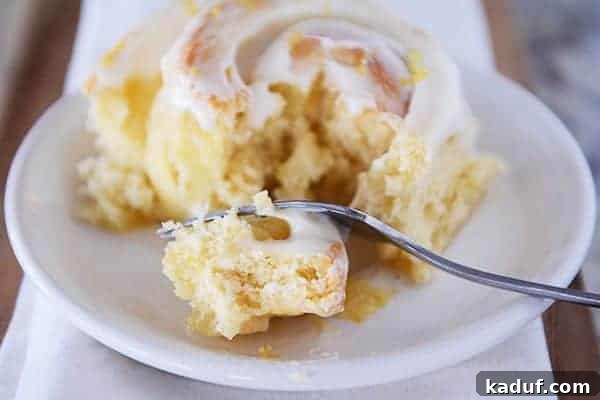
Indulge in the irresistible allure of Ooey, gooey lemon sticky buns – a delightful pastry that’s light, refreshing, and utterly delicious. Crowned with a zesty lemon cream cheese glaze, these buns are an absolute showstopper, promising a burst of sunshine in every bite.
When the idea of creating lemon sticky buns first crossed my mind, I’ll be honest, my expectations were set quite low. The thought of venturing beyond the comforting embrace of a classic cinnamon roll for an upcoming brunch gathering felt like a bold step. Could lemon truly compete with the beloved, sticky-sweet goodness of traditional cinnamon rolls? Or even stand alongside my much-cherished orange sweet rolls, which have long been a household favorite?
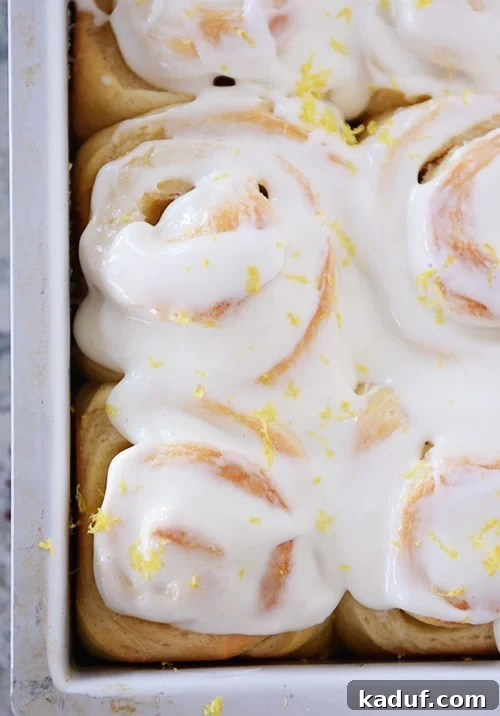
Allow me to dispel any doubt: these lemon sticky buns are not just good; they are outrageously delicious, exceeding every hesitant expectation I harbored. They represent a harmonious blend of bright citrus and tender, sweet pastry that will captivate your senses from the first aroma to the last crumb. The secret to their incredible appeal lies in a meticulous combination of ingredients, each playing a vital role in crafting this exceptional treat.
The Anatomy of Perfection: What Makes These Lemon Sticky Buns Irresistible
If I had to pinpoint why these buns soared beyond my wildest hopes, I would undoubtedly start with the dough. It’s a beautifully crafted buttermilk dough, enriched with fresh lemon zest, inspired by a fantastic buttermilk cinnamon roll recipe. This foundation creates a remarkably soft, fluffy, and tender texture, providing the perfect canvas for the vibrant lemon flavors. The buttermilk imparts a subtle tang and moisture, ensuring the buns remain tender for days, while the lemon zest is gently incorporated, releasing its aromatic oils throughout the dough.
But the dough is just the beginning. Next, we turn to the lemon filling—a buttery, sugary concoction infused with an intense burst of fresh lemon. This isn’t just sugar and butter; it’s a meticulously balanced blend where the granulated sugar is lovingly rubbed with lemon zest, creating a deeply fragrant, almost crystalline texture that melts into the dough as it bakes. A hint of nutmeg adds a warm, subtle spice that beautifully complements the lemon’s brightness, preventing it from being overly tart while enhancing its natural sweetness. This rich, aromatic filling caramelizes slightly, creating that signature “sticky” quality that makes these buns so addictive.
And finally, the crowning glory: an ethereal, luxurious lemon-spiked thick cream cheese glaze. This isn’t your average thin icing. It’s rich, creamy, and generously flavored with fresh lemon juice and zest, making it a star in its own right. This decadent glaze cascades over every twist and turn of the baked rolls, seeping into the tender crevices and creating pockets of pure, citrusy bliss. It provides the perfect sweet and tangy counterpoint to the buttery rolls, elevating the entire experience to something truly extraordinary. Each component, from the tender dough to the zesty filling and luscious glaze, works in concert to deliver a sweet roll experience that is unparalleled.
In essence, these lemon sticky buns are more than just a recipe; they are an invitation to experience pure culinary joy. So, clear your schedule, gather your ingredients, and prepare to embark on a baking adventure that will undoubtedly become a new favorite in your kitchen.

Presentation vs. Perfection: A Matter of Shape
One small thought lingered in my mind after tasting these incredible buns: a brief moment of wishing I had shaped them using the clever twist-method I employ for my orange sweet rolls. That particular technique creates an extra-special visual appeal and a unique texture, and I imagined it would push this lemon version even further over the top in terms of gourmet presentation. It’s a method that yields beautifully intricate swirls, making each bun a work of art.
However, my insightful husband quickly brought me back to reality. As he happily devoured his third lemon sticky bun, he wisely remarked, “I can’t honestly see how the shape has anything to do with the taste; don’t change a thing.” And there you have it – a clear verdict from a discerning palate. While a fancy shape might add an aesthetic touch, the inherent deliciousness of these buns shines through regardless. The tender crumb, the bursting lemon flavor, and the rich glaze are more than enough to satisfy any craving.
Ultimately, whether you decide to experiment with a twisted shape or stick to the classic roll, the core experience of these lemon sticky buns remains consistent: exceptional taste. I’ll leave it to you to be the judge if you decide to venture out and try an alternative shaping method. Rest assured, the flavor profile is robust enough to carry any form you choose.

Tips for Baking the Best Lemon Sticky Buns
Achieving bakery-quality sticky buns at home is easier than you might think, especially with a few helpful tips:
- Perfecting the Dough: The buttermilk is key here. Ensure it’s warm but not hot (around 105-115°F or 40-46°C) to properly activate the yeast without killing it. Don’t over-flour the dough; a slightly tacky dough yields the softest, most tender rolls. The elasticity developed during kneading is crucial for a light and airy texture. If kneading by hand, pay attention to the dough’s feel – it should be smooth and resilient.
- Optimal Rising: A warm, draft-free environment is essential for the dough to double in size. If your kitchen is cool, you can place the bowl in a slightly warm (but turned off) oven or near a sunny window. Patience during the rising process will be rewarded with incredibly fluffy buns.
- Zest and Juice Maximization: When zesting lemons, be sure to only get the yellow part of the rind, avoiding the bitter white pith. For juicing, rolling the lemons firmly on a countertop before cutting can help extract more juice. The combination of zest and juice provides a multi-layered lemon flavor.
- Even Spreading: When applying the butter and lemon filling, aim for as even a spread as possible across the rectangular dough. This ensures every bite of the baked bun has a consistent burst of flavor. Don’t stress too much about perfection, but a relatively even layer makes a difference.
- Don’t Overbake: These buns are best when they are just barely golden. Overbaking can lead to dry rolls. Keep a close eye on them during the last few minutes of baking. They should be soft to the touch and just starting to color around the edges.
- Frosting Temperature: Frosting the buns while they are still slightly warm allows the glaze to melt slightly and seep into the crevices, creating an even gooier and more decadent experience.
These lemon sticky buns are perfect for a special breakfast, a delightful brunch, or even as an elegant dessert. Their bright, cheerful flavor makes them particularly fitting for spring and summer gatherings, but they can bring a touch of sunshine to any day of the year. Paired with a cup of coffee or tea, they offer a moment of pure culinary bliss that’s hard to beat.

Lemon Sticky Buns with Lemony Cream Cheese Glaze
12 buns
1 hr 25 mins
25 mins
1 hr 50 mins
Pin
Rate
Ingredients
Dough:
- ¾ cup buttermilk, warm (I microwave buttermilk for 1 minute on 50% power)
- 6 tablespoons salted butter, melted and cooled
- 3 large eggs
- 3 ½ to 4 ½ cups (497 to 639 g) all-purpose flour
- Zest of 1 lemon, about a tablespoon
- ¼ cup (53 g) granulated sugar
- 2 ¼ teaspoons instant yeast
- 1 ¼ teaspoons salt
Lemon Filling:
- 1 cup (212 g) granulated sugar
- Zest of 1 lemon, about a tablespoon
- ⅛ teaspoon ground nutmeg
- 1 tablespoon fresh lemon juice
- 6 tablespoons (85 g) salted butter, softened
Lemony Cream Cheese Glaze:
- 4 ounces (113 g) cream cheese, light or regular, softened
- 2 tablespoons lemon juice, from 1 lemon
- 1 cup (114 g) powdered sugar
- Zest of 1 lemon, about 1 tablespoon
Instructions
- For the dough, whisk the warmed buttermilk and melted butter together in a large liquid measuring cup. In a standing mixer fitted with a dough hook (or a large bowl with a wooden spoon), combine 3 1/2 cups of flour, lemon zest, sugar, instant yeast, and salt. With the mixer on low speed, gradually add the buttermilk mixture and eggs. Mix until the dough comes together, which usually takes about 2 minutes. Increase the mixer speed to medium. If the dough remains very sticky and hasn’t pulled away from the sides of the bowl, add flour a little at a time until it cleans the sides but is still slightly sticky. Knead the dough until it is smooth and elastic, about 5-6 minutes in a mixer (or about 10 minutes by hand). Remember not to over-flour the dough, as this can result in dry rolls; you’re aiming for a soft, slightly tacky dough that yields when pressed but doesn’t leave excessive residue on your hands.
- Place the dough in a large, lightly greased bowl. Cover the bowl tightly with greased plastic wrap. Allow the dough to rise in a warm place until it has doubled in size, which typically takes between 1-2 hours, depending on the temperature of your kitchen.
- While the dough is rising, lightly grease a 9×13-inch baking dish and set it aside.
- Prepare the lemon filling: Combine the granulated sugar and lemon zest. Use your fingertips to rub the mixture together until it is well combined and highly fragrant – the intense lemon aroma will be delightful! Stir in the ground nutmeg and fresh lemon juice until everything is well incorporated.
- Once the dough has risen, gently turn it out onto a lightly greased countertop. Press or roll the dough into a rectangle approximately 16 by 12 inches (precision isn’t critical here).
- Spread the softened butter evenly across the entire surface of the dough rectangle. Then, sprinkle the prepared lemon filling mixture over the butter, spreading it out as evenly as possible. Again, a perfectly uniform layer isn’t necessary.
- Starting from one of the long ends, tightly roll up the dough, cinnamon-roll style. Pinch the seam firmly to seal it shut. Using a sharp knife or dental floss, cut the rolled dough into 12 equal pieces. Arrange the buns in the prepared baking pan, typically three across and four down. Cover the pan loosely with greased plastic wrap and let the buns rise again until they are very puffy and their sides are touching each other.
- Preheat your oven to 350°F (175°C). Uncover the risen buns and bake them for approximately 20-25 minutes, or until they are very lightly golden brown. Be careful not to overbake, as this can make the rolls dry.
- Allow the buns to cool slightly before frosting. They are particularly wonderful when glazed while still just a bit warm.
- For the frosting, use an electric mixer (or a blender) to whip the softened cream cheese and lemon juice together until the mixture is completely smooth and creamy. Gradually add the powdered sugar and continue mixing until the glaze is well-combined and lump-free.
- Generously spread the lemon cream cheese glaze evenly over the warm lemon buns. For an extra touch of freshness and visual appeal, sprinkle with additional fresh lemon zest just before serving.
Notes
Lemons: You will need a total of three lemons for this recipe. The zest of all three lemons will be used, and you’ll typically need the juice from about two of them, depending on their size.
Nutrition Facts (Per Bun)
- Serving: 1 Bun
- Calories: 439 kcal
- Carbohydrates: 65g
- Protein: 8g
- Fat: 17g
- Saturated Fat: 10g
- Cholesterol: 89mg
- Sodium: 408mg
- Fiber: 2g
- Sugar: 32g
Recommended Products
Recipe Source: This recipe was inspired by a delightful base recipe at The Kitchn. We’ve enhanced it by substituting our favorite delicious buttermilk sweet roll dough and making slight adjustments to the lemon filling to achieve maximum flavor.