
Cinnamon Sugar Twisted Croissant Bread: Your Easy Path to Buttery, Flaky Perfection
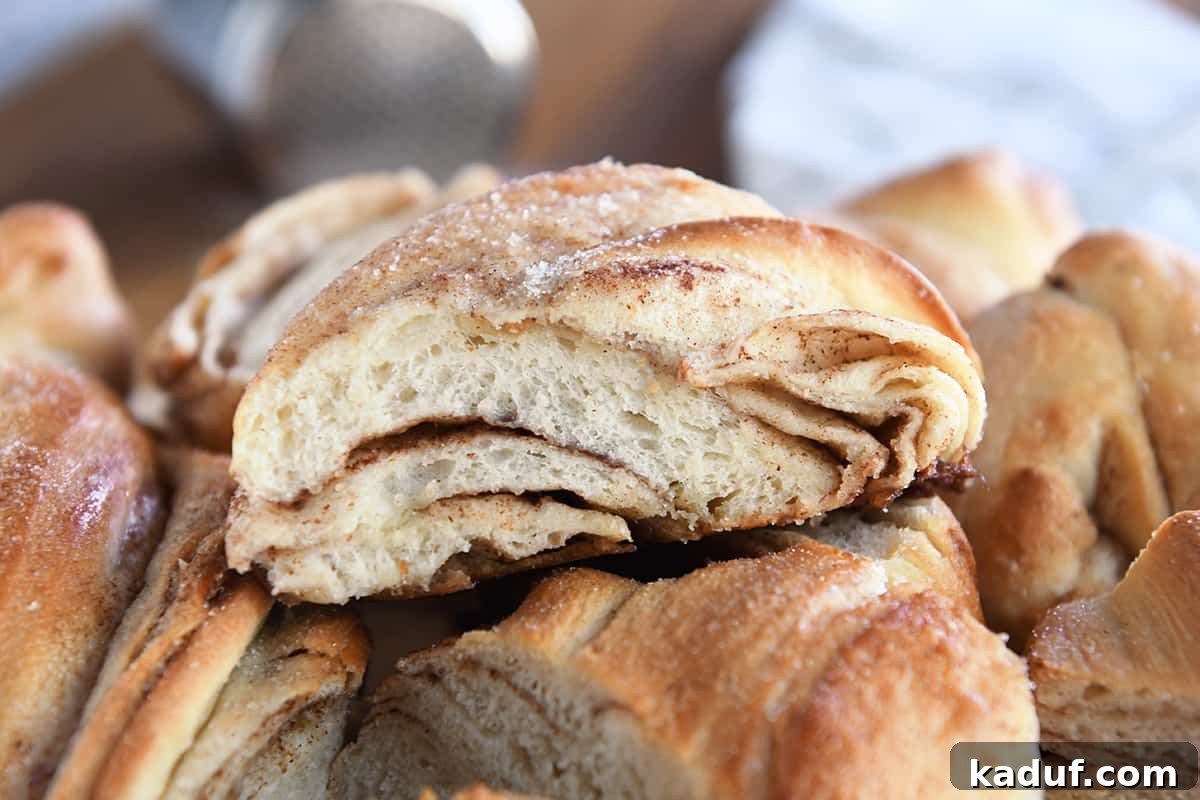
Imagine the irresistible aroma of warm cinnamon and sugar dancing through your kitchen. Now picture a beautiful, twisted loaf of bread, boasting golden-brown crust and delicate, buttery layers reminiscent of a classic croissant, but without the daunting effort. Welcome to the world of Cinnamon Sugar Twisted Croissant Bread! This delightful recipe captures the essence of a traditional croissant’s flaky texture and buttery richness, infused with the comforting sweetness of cinnamon sugar, all achieved with a surprisingly straightforward process.
Forget the intricate folds and multiple chilling steps of conventional croissants. This simplified “croissant bread” method delivers incredible results, making it accessible for even novice bakers. Each twist in the dough encapsulates pockets of sweet, spiced butter, melting into a tender interior during baking that will leave you craving more. Whether for a special breakfast, a delightful brunch centerpiece, or an indulgent afternoon treat, this bread is sure to impress with its elegant appearance and utterly delicious flavor profile. Get ready to embark on a baking adventure that promises both ease and extraordinary taste!
The Secret Weapon: A Special Cinnamon Sugar Butter Packet
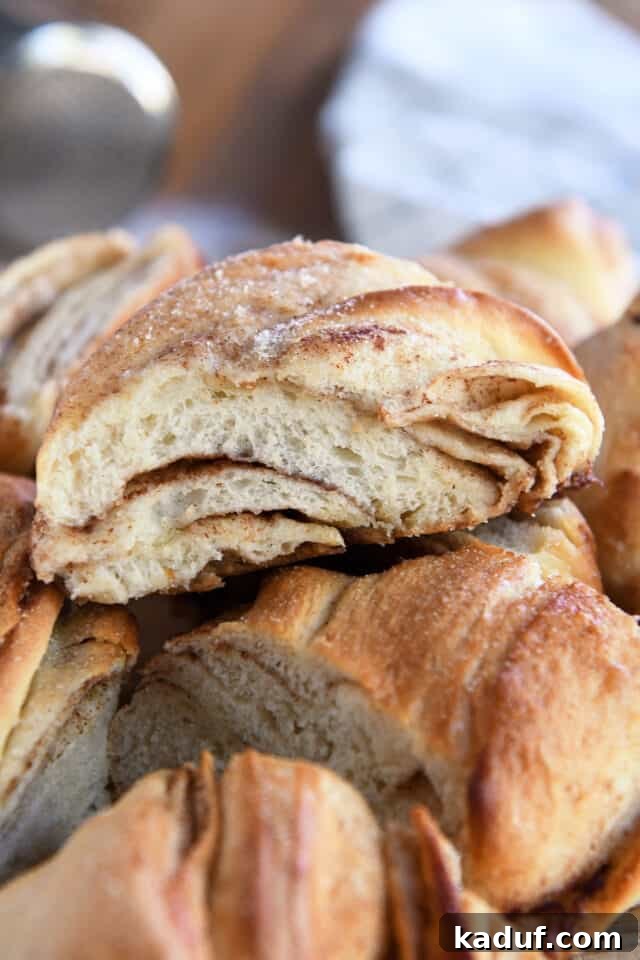
The magic behind our Cinnamon Sugar Twisted Croissant Bread lies in its innovative butter packet. Unlike traditional croissant recipes that incorporate plain butter, we elevate the flavor profile right from the start. For this cinnamon sugar rendition, we’re not just using butter; we’re crafting a luxurious, spiced butter slab that becomes the heart of every flaky layer.
The process begins by taking softened, high-quality salted butter and whipping it together with a generous amount of granulated sugar and aromatic ground cinnamon. This step isn’t merely about mixing; it’s about infusing every ounce of butter with that warm, sweet spice that defines this bread. The butter becomes light, airy, and evenly flavored, ready to impart its incredible taste throughout the dough.
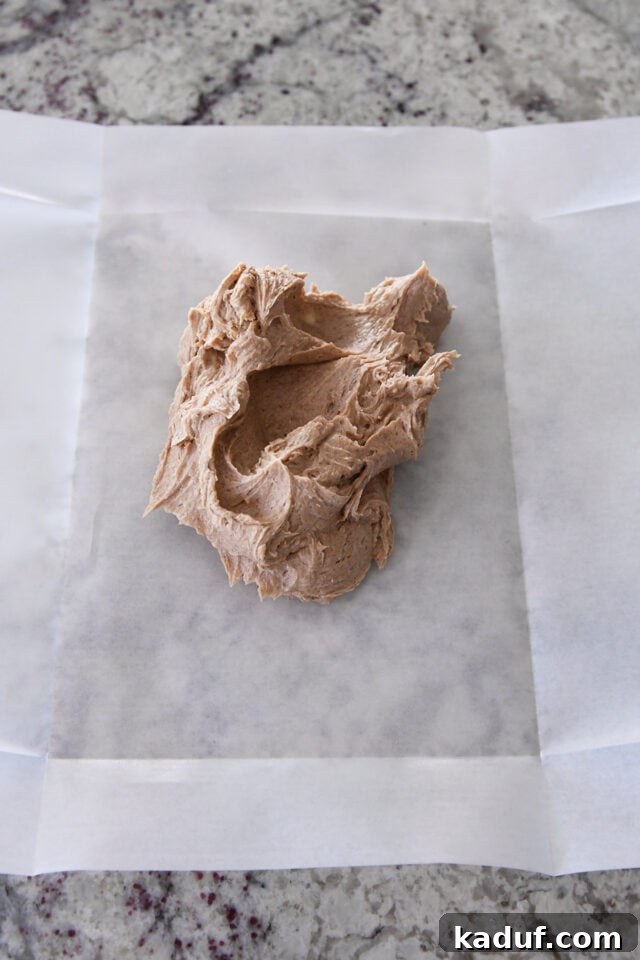
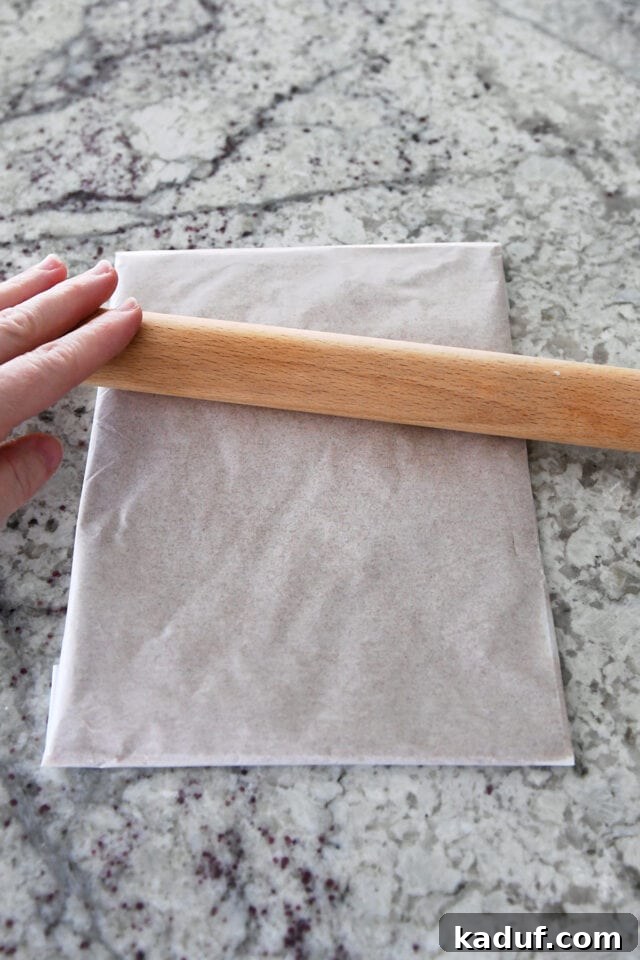
Once whipped to perfection, this cinnamon-sugar-infused butter is carefully folded into parchment paper and rolled out into a thin, even sheet. The softened state of the butter after mixing actually makes this step quite user-friendly. You can even use your hands to gently press and spread the butter within the parchment, ensuring an even thickness without the need for a rolling pin. This technique simplifies the process significantly.
Pro Tip: After mixing, the butter will be soft. Instead of a rolling pin, you can easily use your hands to press it into an even, thin layer inside the parchment, guiding it to fill the packet’s borders. This ensures uniformity and helps prevent tearing later.
However, once shaped, this special butter packet absolutely *must* be chilled until firm. This step is non-negotiable! Attempting to work with soft butter and dough will quickly lead to a sticky, unmanageable mess, making it impossible to achieve those coveted flaky layers. A firm butter packet ensures clean folds and distinct separation between the dough layers, which is crucial for the croissant-like texture. So, resist the urge to rush this step; patience here pays off in spectacular flakiness!
Mastering the Folds for Unforgettable Flaky Layers
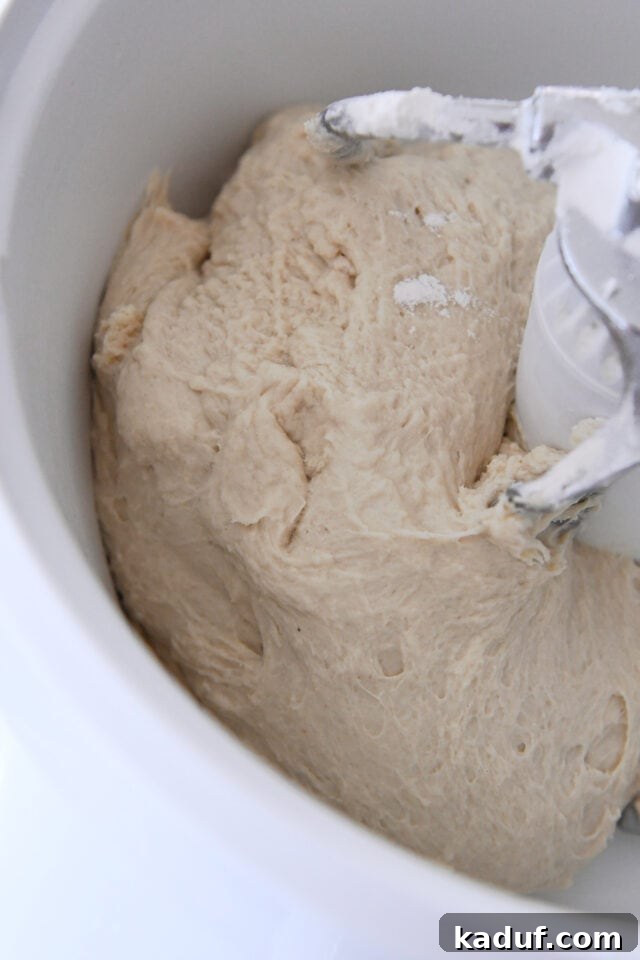
While your enriched butter packet is chilling to the perfect consistency, it’s time to prepare the foundational dough. This recipe utilizes a simple French bread dough, designed for ease and excellent rise. In the bowl of your stand mixer, combine warm water, yeast, and a touch of sugar to activate the yeast. Once foamy, demonstrating its vitality, incorporate the salt and all-purpose flour. Mix until a soft, pliable dough forms, one that effortlessly pulls away from the sides of the bowl. Aim for a dough that feels soft to the touch but isn’t overly sticky, adding a tiny bit more flour if needed.
Knead the dough for a brief 3-4 minutes, allowing the gluten to develop just enough to create a smooth, elastic texture. Cover the bowl and let the dough rise in a warm, draft-free spot until it has gloriously doubled in size and appears wonderfully puffy. This initial rise is essential for a light and airy final product.
Once risen, gently deflate the dough and turn it out onto a lightly floured counter. Roll it into a rectangular shape, approximately 18-inches by 11- or 12-inches. This serves as the canvas for incorporating our special butter packet. Carefully remove the chilled butter packet from the refrigerator, unfolding the parchment but leaving the firm butter sheet on one half of the paper. Place the butter face down in the center of your rolled-out dough, then peel back the parchment to transfer the butter sheet cleanly onto the dough.
Now, the critical “lamination” process begins – working swiftly to ensure the butter remains cold and firm. Follow these steps meticulously to create the characteristic flaky layers:
- Position the Butter: Place the chilled sheet of cinnamon sugar butter squarely in the center of your rolled dough rectangle.
- First Fold (Right): Take the right side of the dough and fold it over, covering roughly two-thirds of the butter.
- Second Fold (Left): Now, fold the left side of the dough over, overlapping the first fold by about an inch. This creates a neat “envelope” enclosing the butter.
- Seal the Edges: Fold the top and bottom edges of the dough over by approximately 1/2 to 1 inch. Pinch these edges firmly together to create a secure seal, ensuring no butter escapes during subsequent rolling.
- Final Fold: Fold the entire dough packet in half once more, bringing the left side to meet the right side (or vice versa). This completes your first series of folds, creating multiple butter and dough layers.
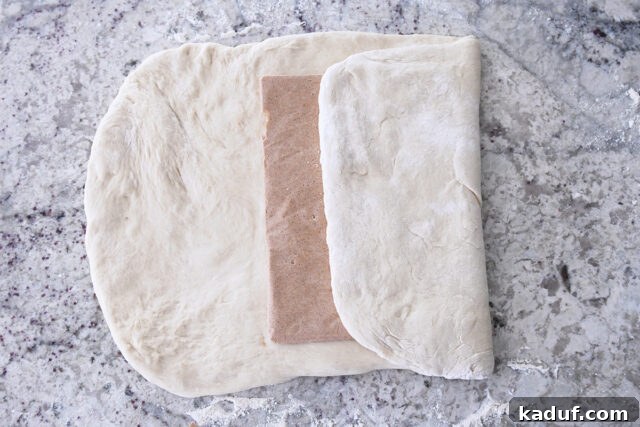
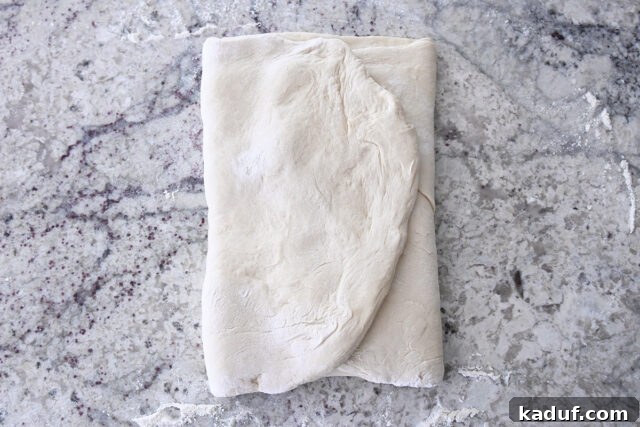
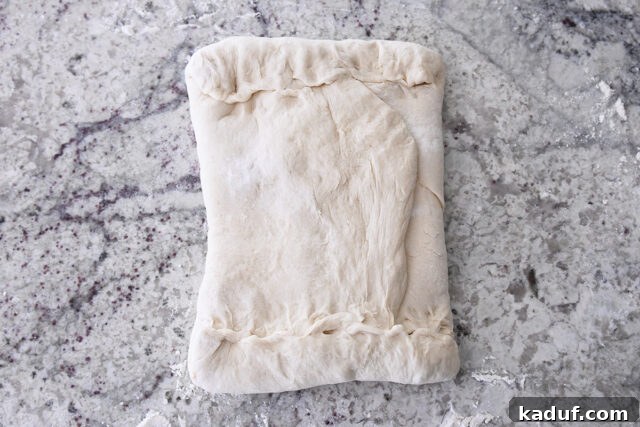
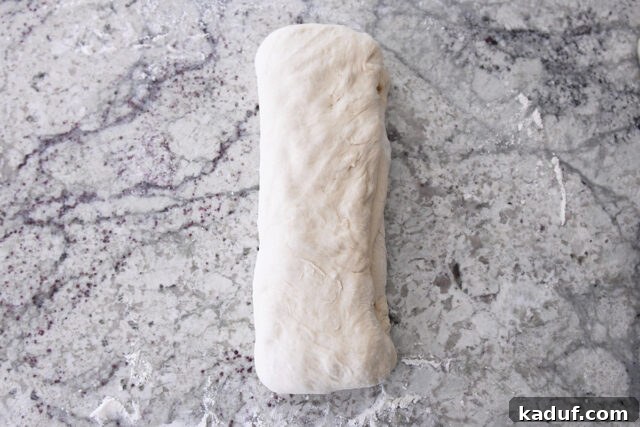
The Art of Rolling and the Second Essential Fold
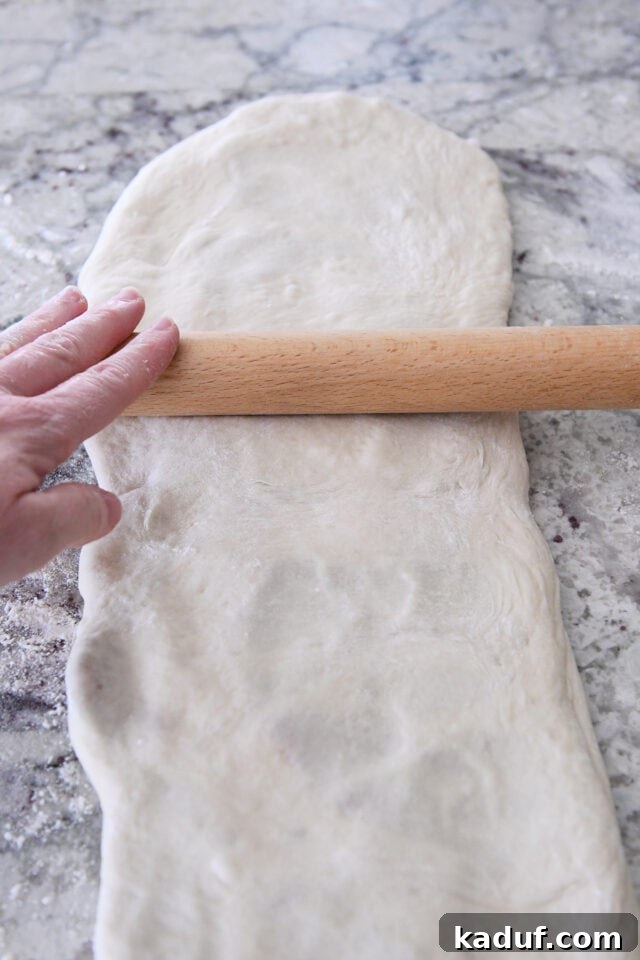
With your dough now holding its precious butter core, it’s time for the next rolling and folding sequence, a crucial step for building those magnificent layers. Gently begin rolling the folded dough log into a long, thin rectangle. Aim for dimensions of approximately 22 inches in length and 8 inches in width. Don’t worry about absolute perfection; the key is to achieve an even thickness throughout the rectangle, allowing the butter to spread uniformly between the dough layers. Start rolling from the center outwards, applying gentle, consistent pressure.
If at any point during this rolling process the dough starts to resist, springs back, or becomes difficult to extend, don’t force it. This is a sign that the gluten in the dough needs to relax. Simply cover the dough with a clean kitchen towel and let it rest for 5-10 minutes. This short rest allows the gluten strands to loosen up, making the dough much more cooperative and easier to roll without tearing or excessive effort. Patience is truly a virtue when working with laminated doughs.
Once you’ve achieved your long rectangle, it’s time for another series of strategic folds:
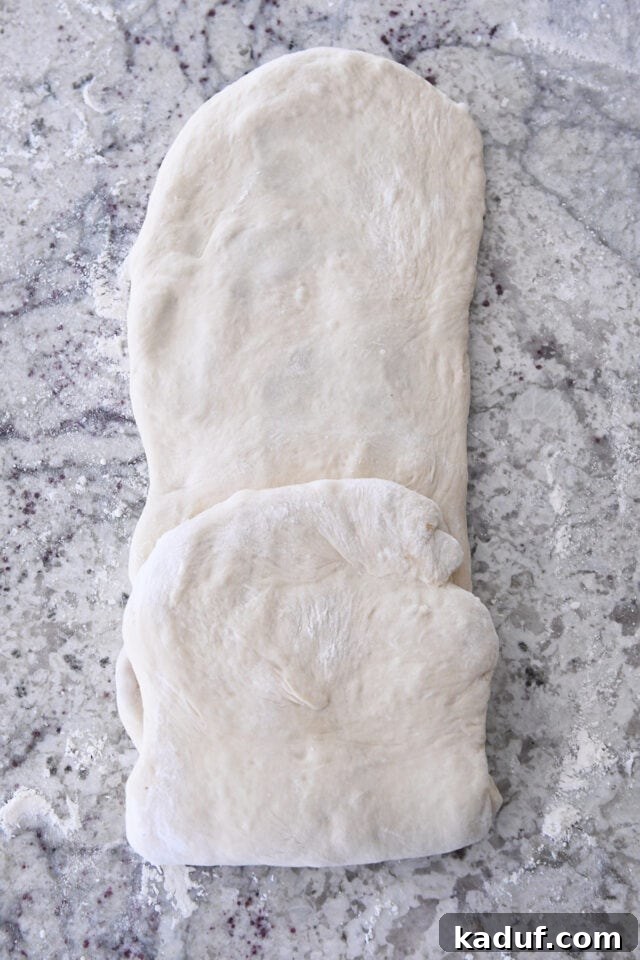
- Fold Top to Center: Take one of the shorter edges (the top) of the dough and fold it inwards towards the center of the rectangle.
- Fold Bottom to Center: Repeat this with the opposite shorter edge (the bottom), folding it so that it meets the first folded edge in the middle, much like closing a book.
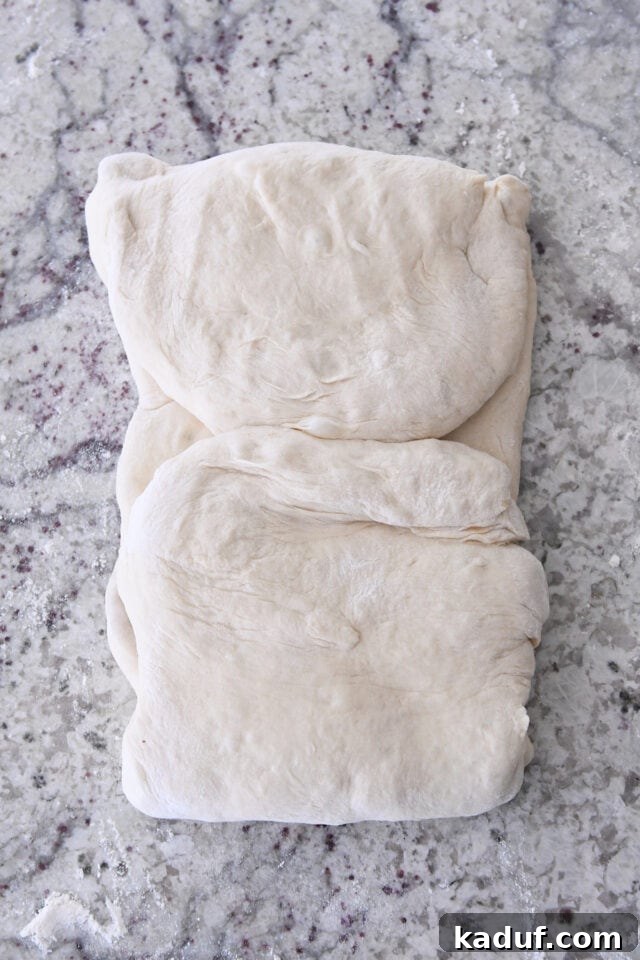
- Fold in Half: Finally, fold the entire dough in half along its length, bringing one of the folded short sides over the other. This creates a compact, layered package.
After this second set of folds, allow the dough another brief rest for 2-3 minutes. This quick relaxation helps the dough settle and prepares it for the final shaping stage.
Baking Tip: If the dough resists rolling or springs back, cover it and let it rest for 5-10 minutes. This allows the gluten to relax, making it easier to work with.
Butter Management: If your butter packet feels too soft or sticky at any stage, place the dough (on parchment) in the refrigerator for 10-20 minutes. A firm butter packet is essential for defined layers.
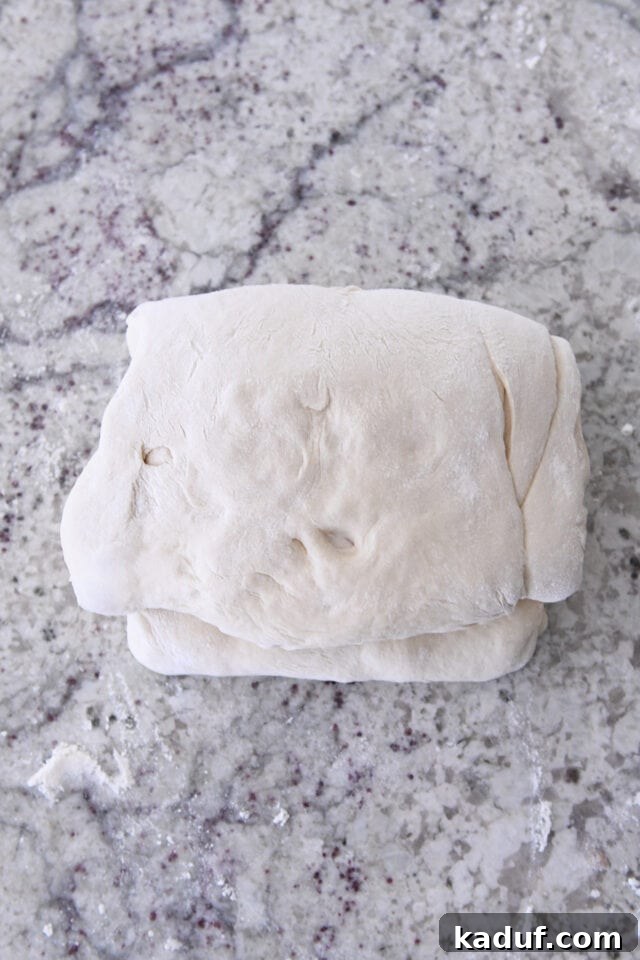
Shaping the Twists and the Crucial Final Rise
After the second round of rolling and folding, your dough is now a powerhouse of potential flaky layers. It’s time to give it its distinctive twisted shape. Lightly flour your work surface once more and roll the folded dough into a square, aiming for a dimension of about 12 or 13 inches on each side. Again, if the dough resists, allow it a quick 5-10 minute rest to relax the gluten. A well-rested dough will roll out smoothly and evenly.
Once you have your square, use a sharp knife or a pizza cutter to divide it into four equal strips. The uniformity of these strips will ensure your finished loaves bake evenly and look consistently beautiful. Prepare two half-sheet baking pans by lining them with parchment paper – this prevents sticking and makes cleanup a breeze. Each pan will comfortably accommodate two loaves, spaced several inches apart to allow for proper airflow and rising.
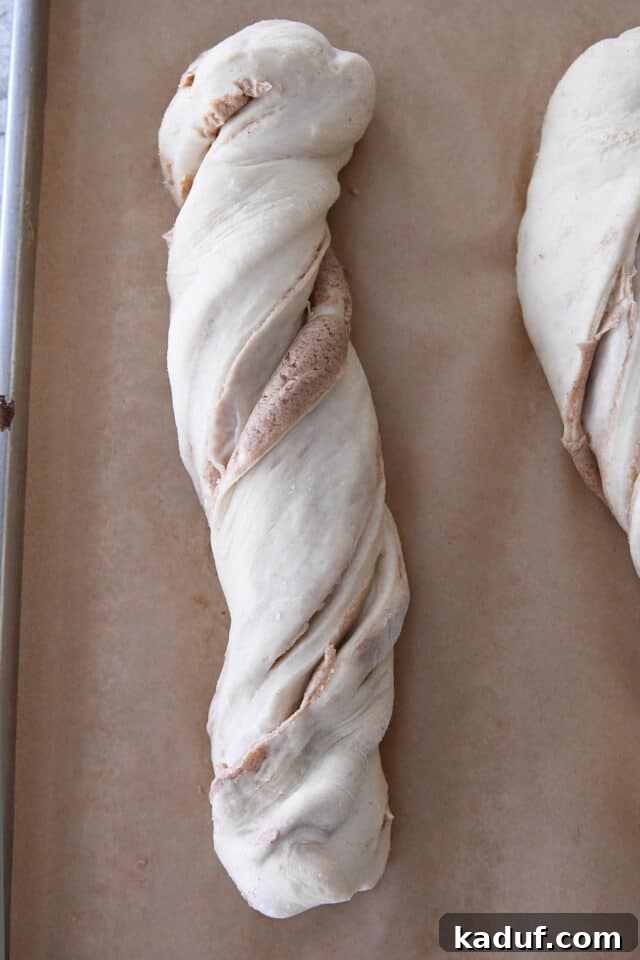
Now for the fun part: shaping the twists! Take each strip of dough and gently twist it several times, aiming for 3-4 full twists per strip. The number of twists is flexible; find a pattern that you like and that creates an appealing, spiraled effect. Be mindful not to twist too tightly, as this can inhibit the rise. Place the twisted strips onto your prepared baking sheets.
The final rise is a critical stage that demands specific conditions to achieve the perfect flaky texture. Cover your twisted loaves loosely with plastic wrap or a clean kitchen towel and allow them to rise until they are noticeably puffy. This dough thrives at cooler temperatures during its final proofing. If the environment is too warm, the butter within the layers will soften and melt before the bread even enters the oven. This premature melting will cause the butter to leak out and prevent the formation of those distinct, airy, buttery layers we’re striving for. A cool room temperature or even a stint in the refrigerator (allowing it to come to room temperature and finish rising if needed) is ideal. This slow, cool rise ensures the butter stays firm and creates steam in the oven, leading to an incredibly flaky result.
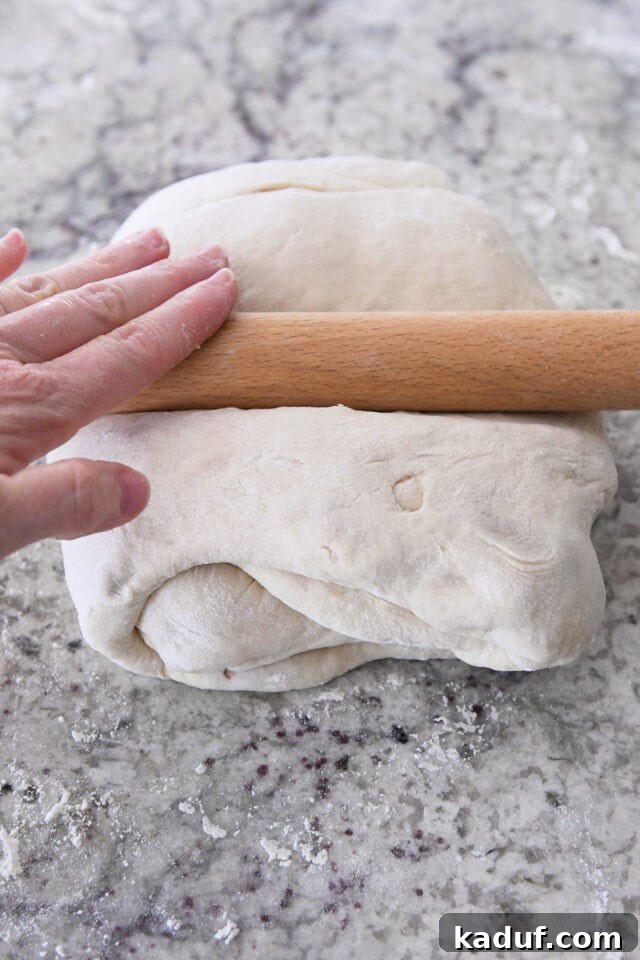
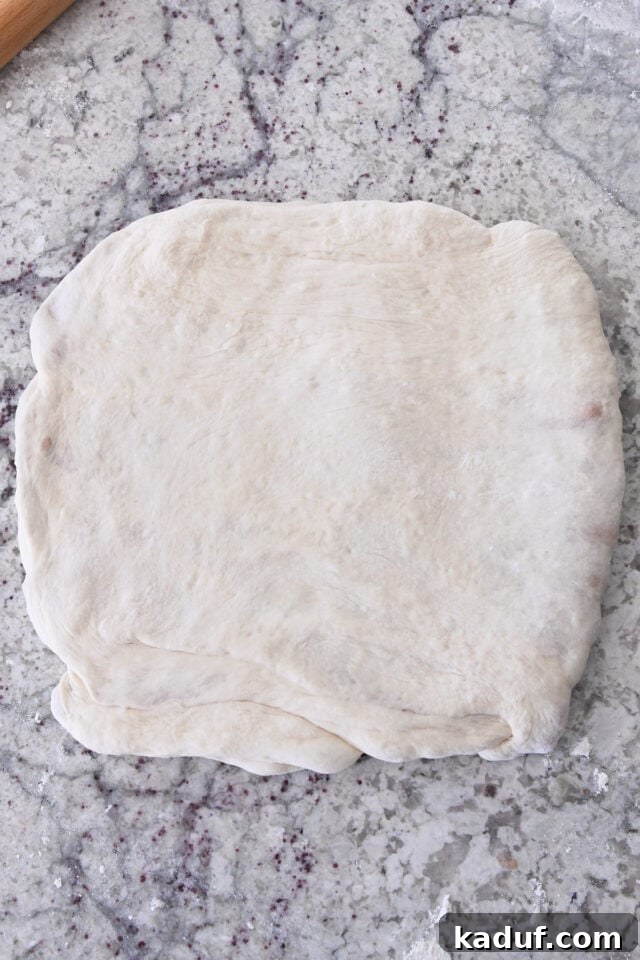
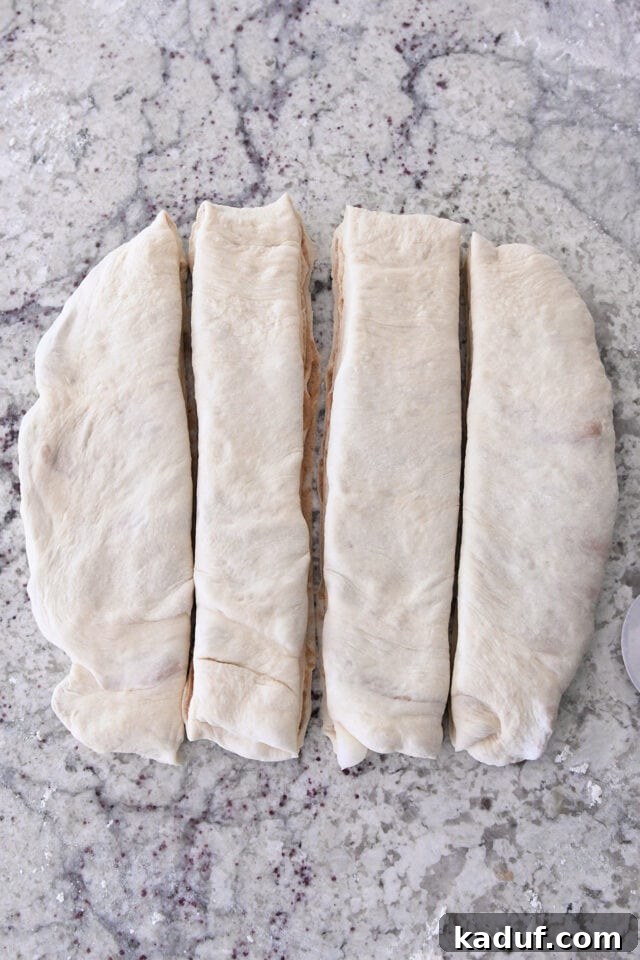
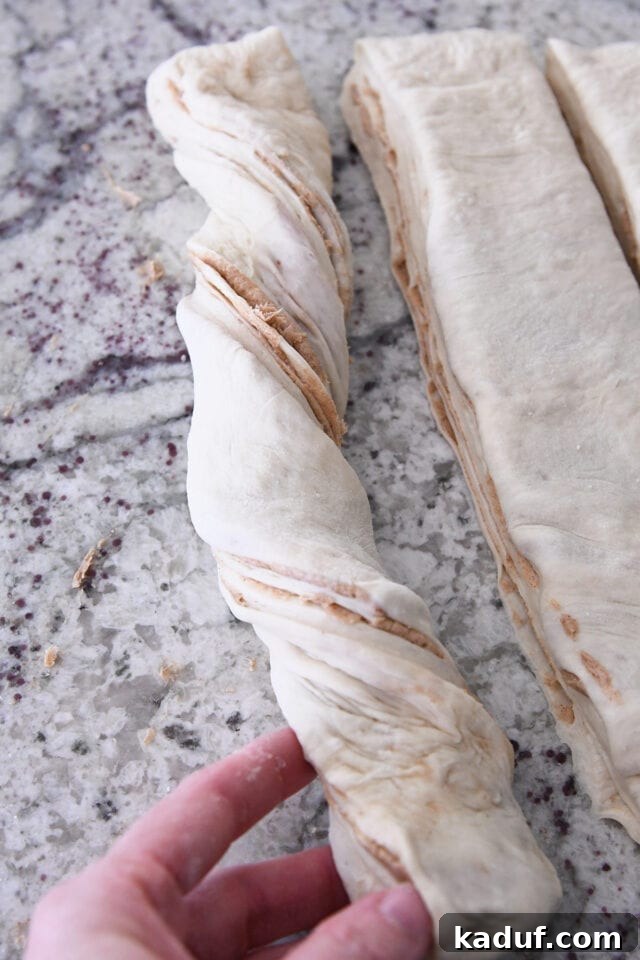
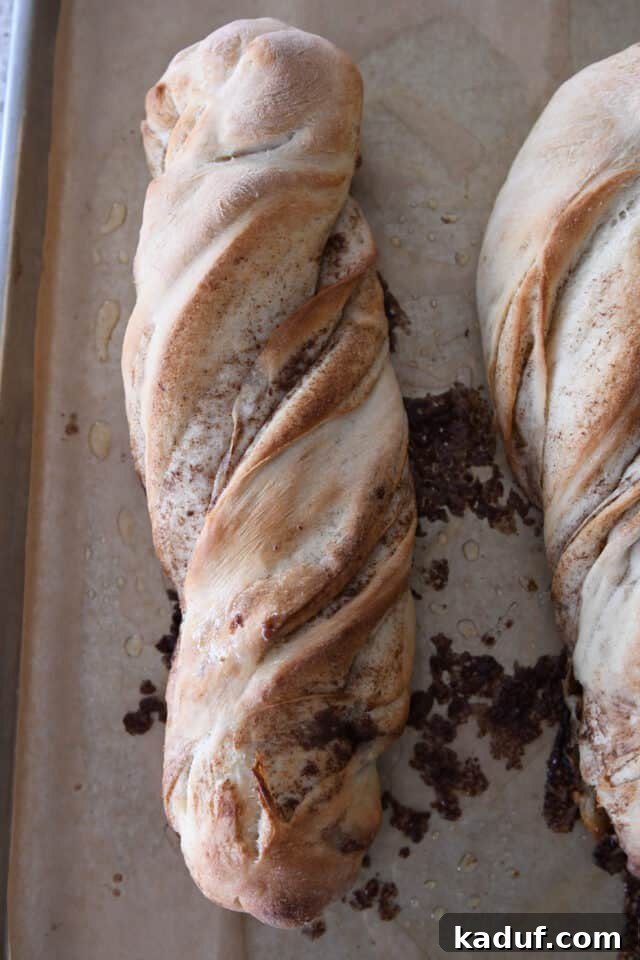
Once risen, preheat your oven to 375°F (or 400°F for a slightly darker crust). Bake the loaves until they achieve a beautiful golden-brown hue, typically for 20-22 minutes. The enticing aroma filling your kitchen will be your first clue that something truly special is baking!
The Final Flourish: More Cinnamon and Sugar
As your Cinnamon Sugar Twisted Croissant Bread emerges from the oven, golden and fragrant, you might notice a small amount of melted butter pooling on the parchment-lined baking sheet. Do not despair – this is completely normal and, in fact, an advantage! We’re going to put that delectable butter to good use.
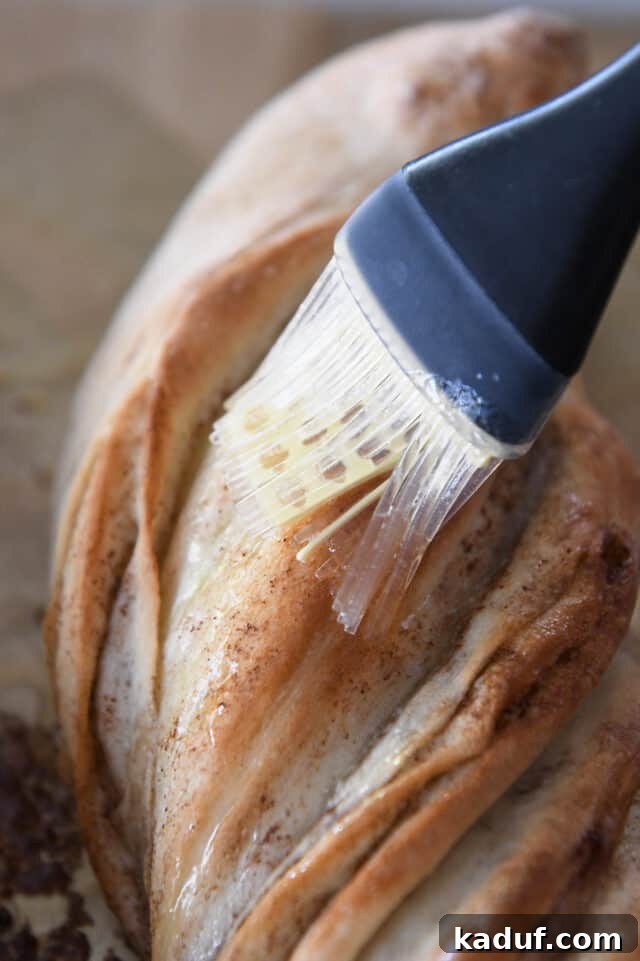
Immediately after removing the loaves from the oven, take a pastry brush and generously brush any leaked butter from the sheet pan directly over the warm tops of the bread. This adds an extra layer of richness and moisture, enhancing the flavor and ensuring a perfect surface for our final dusting. If, for some reason, there isn’t enough leaked butter (which is rare but possible), simply melt 1 to 2 tablespoons of fresh butter and use that for brushing.
Next, it’s time for the ultimate indulgence: a generous sprinkle of cinnamon sugar. There are no strict rules here; follow your heart and your taste buds! Some prefer a lighter dusting, while others love a thick, sweet coating. This final touch adds an irresistible crunch and a burst of intense cinnamon sweetness that perfectly complements the buttery, flaky bread beneath.
Perfect Cinnamon Sugar Ratio: For a balanced and flavorful topping, combine ½ cup of granulated sugar with 4 teaspoons of ground cinnamon. Feel free to increase the cinnamon for a bolder spice profile. Any extra cinnamon sugar mixture can be stored in an airtight container at room temperature for several weeks, ready for your next batch of bread or other sweet treats!

Why You’ll Adore This Cinnamon Sugar Croissant Bread
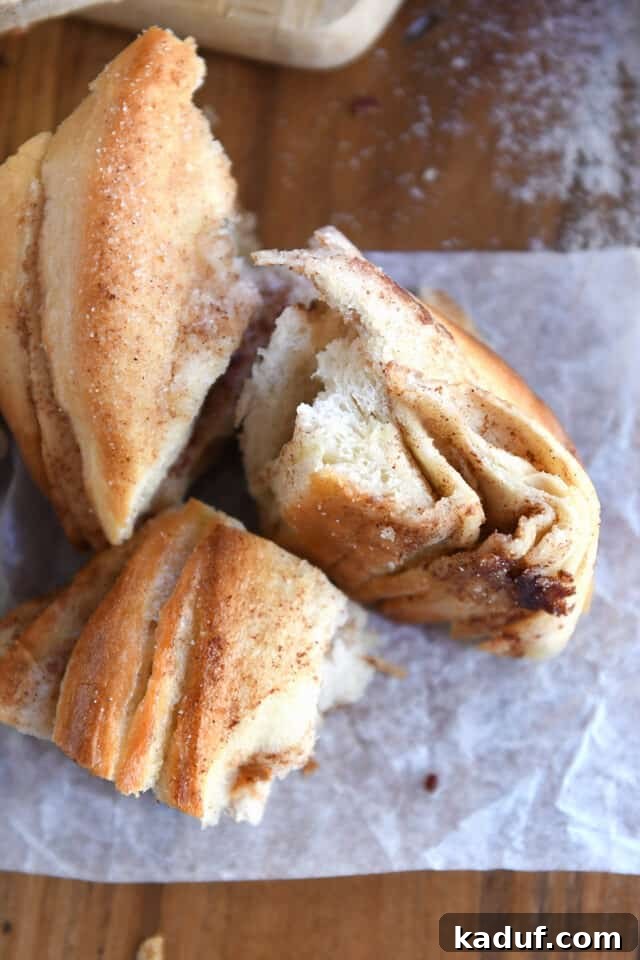
This bread is a sensory delight, living up to every expectation its name conjures. It’s an extraordinary blend of textures and flavors that will captivate your palate. The exterior boasts a delicate, golden crust, yielding to an interior that is remarkably soft and tender. Each twist in the loaf reveals a labyrinth of buttery, sweet cinnamon layers, making every bite an experience in indulgence.
What sets this bread apart is its exquisite balance. It possesses a distinct sweetness from the cinnamon sugar filling, yet the bread itself is not overly sweet. This isn’t a traditional cinnamon roll, heavy with frosting and a dense crumb. Instead, think of it as a sophisticated hybrid—the comforting familiarity of cinnamon toast elevated by the incredible flakiness and rich butteriness of a croissant, all achieved through our simplified, “lazy-girl” method.
The versatility of this bread is another reason to fall in love. It’s absolutely divine when served warm, with the butter and sugar still slightly molten and fragrant. It remains equally delicious at room temperature, making it a perfect make-ahead option for gatherings or a satisfying snack throughout the day. You can slice it into thick pieces, pull it apart to reveal the stunning layers, or even gently tear off smaller portions to savor the buttery goodness.
If you’ve previously enjoyed other variations of our twisted croissant bread, this cinnamon sugar version is an absolute must-try—it truly stands out. And if you haven’t yet experienced the sheer joy and ease of twisted croissant bread, what are you waiting for? This recipe is your invitation to indulge in a homemade pastry that looks impressive but is delightfully simple to create. Prepare to make this a new favorite in your baking repertoire!
Recipe: Cinnamon Sugar Twisted Croissant Bread
Yield: 4 loaves
Prep Time: 1 hour 20 mins
Cook Time: 22 mins
Rising Time: 2 hrs
Total Time: 3 hrs 42 mins
Ingredients
For the Butter Packet:
- 1 cup salted butter, cool room temperature
- ¼ cup granulated sugar
- 1 tablespoon ground cinnamon
For the Dough:
- 2 cups warm water, 105-110 degrees F
- 1 tablespoon instant or active dry yeast
- 2 tablespoons granulated sugar
- 1 ½ teaspoons salt
- 4 ¾ cups all-purpose flour, plus more for dusting
- Cinnamon sugar for sprinkling (see notes)
Instructions
- For the butter packet: Grab a piece of parchment paper approximately 16.25 inches by 12 inches. Fold the two shorter edges of the parchment inwards by about 4.5 inches each. They will slightly overlap. Crease these folds well.
- Keeping the short edges folded, fold the top and bottom edges in by approximately 1.75 inches. This should form a parchment packet with a center rectangle measuring about 8.5 inches by 7 inches. Set this aside.
- Using an electric mixer (handheld or stand mixer), whip the softened butter together with the granulated sugar and ground cinnamon until it is light, fluffy, and well-combined.
- Unfold the parchment paper. Scrape the whipped cinnamon sugar butter into the center square of the parchment. Refold the packet along the pre-creased lines and flip it over so the folded edges are on the bottom, securing the butter.
- Use a rolling pin (or simply press with your hands if the butter is soft enough) to gently roll the butter into a thin, even sheet, filling all the edges of the parchment packet. Chill this butter packet in the refrigerator until it is firm. This is crucial for successful layering.
- For the dough: In the bowl of a stand mixer fitted with the dough hook, combine the warm water, yeast, and granulated sugar. Let this mixture sit for 2-3 minutes until it becomes foamy, indicating the yeast is active.
- Add the salt and all-purpose flour to the yeast mixture. Mix on low speed until a soft, cohesive dough forms that pulls away cleanly from the sides of the bowl. If the dough is too sticky, add a little extra flour, one tablespoon at a time, until it reaches the right consistency (soft but not overly sticky).
- Increase the mixer speed slightly and knead the dough for 3-4 minutes until it becomes smooth and elastic. Transfer the dough to a lightly greased bowl, or simply cover the mixing bowl with plastic wrap. Let the dough rise in a warm, draft-free spot until it has doubled in size, typically about 1 hour.
- Gently deflate the risen dough and turn it out onto a lightly floured countertop. Roll the dough into a large rectangle, approximately 18 inches by 11-12 inches.
- Retrieve the firm butter packet from the refrigerator. Unfold the parchment, but leave the butter sheet resting on one side of the paper. Carefully place the butter packet face down onto the center of your rolled-out bread dough. Gently peel the parchment paper off the butter, leaving the firm butter slab on the dough.
- Work quickly during the subsequent folding and rolling steps to prevent the butter from becoming too soft. If the butter softens excessively, chilling the dough again will be necessary.
- Fold one short side of the dough over, covering about two-thirds of the butter. Then, fold the other short side of the dough over, overlapping the first fold by approximately an inch.
- Fold the top and bottom edges of the dough inwards by about ½ to 1 inch, and firmly pinch them to seal the butter completely within the dough.
- Fold the entire dough packet in half once more (from right to left or vice versa). You now have your first series of turns completed.
- Starting from the center, gently roll the dough out into a long, thin rectangle, aiming for dimensions of about 8 inches by 22 inches. If the dough resists or springs back, cover it and let it rest for 5-10 minutes to allow the gluten to relax before continuing to roll.
- Take one of the shorter edges of the long rectangle and fold it towards the center. Repeat this with the other shorter edge, so both folded edges meet in the middle.
- Finally, fold the dough in half once more (from one of the short sides), creating a compact, layered block. Let the dough rest for 2-3 minutes.
- While the dough rests, prepare two half-sheet baking pans by lining them with parchment paper. Preheat your oven to 375°F (200°C), or 400°F (205°C) for a darker, crisper crust.
- On a lightly floured surface, roll the dough into a 12-inch or 13-inch square. If the dough springs back, allow it to rest for 5-10 minutes. Use a sharp knife or pastry wheel to cut the square into four even strips.
- Take each individual strip and gently twist it 3-4 times to create an appealing spiral. Place the twisted strips onto the prepared baking sheets, ensuring they are spaced several inches apart (two strips per pan).
- Cover the twisted loaves loosely and let them rise until noticeably puffy. It is crucial for this final rise to occur in a cool spot. If the dough rises in an overly warm environment, the butter layers will melt before baking, preventing the formation of flaky layers. You can also let the dough rise slowly in the refrigerator overnight or for several hours; if it hasn’t fully risen upon removal, let it come to room temperature and continue rising until nearly doubled in size.
- Bake the loaves in the preheated oven for 20-22 minutes, or until they are beautifully golden brown and cooked through.
- Immediately upon removing the bread from the oven, observe any melted butter that may have pooled on the parchment paper. Use a pastry brush to generously brush this butter over the warm tops of the loaves. (If minimal butter has leaked, melt 1-2 tablespoons of fresh butter for this step.)
- Generously sprinkle the tops of the buttered loaves with your prepared cinnamon sugar mixture.
- Serve warm or at room temperature. The bread can be sliced or elegantly torn into pieces, revealing its magnificent layers.
Notes
- Cinnamon Sugar Topping: For the sprinkling topping, combine ½ cup granulated sugar with 4 teaspoons ground cinnamon. Adjust cinnamon quantity to your preference. Store any leftover mixture in an airtight container at room temperature; it will keep for several weeks.
- Parchment Folding Visual: For a visual guide on folding the parchment paper for the butter packet, refer to the image examples provided in our Easy Twisted Croissant French Bread post.
Author: Mel Gunnell
Course: Bread
Cuisine: American
Method: Bake