
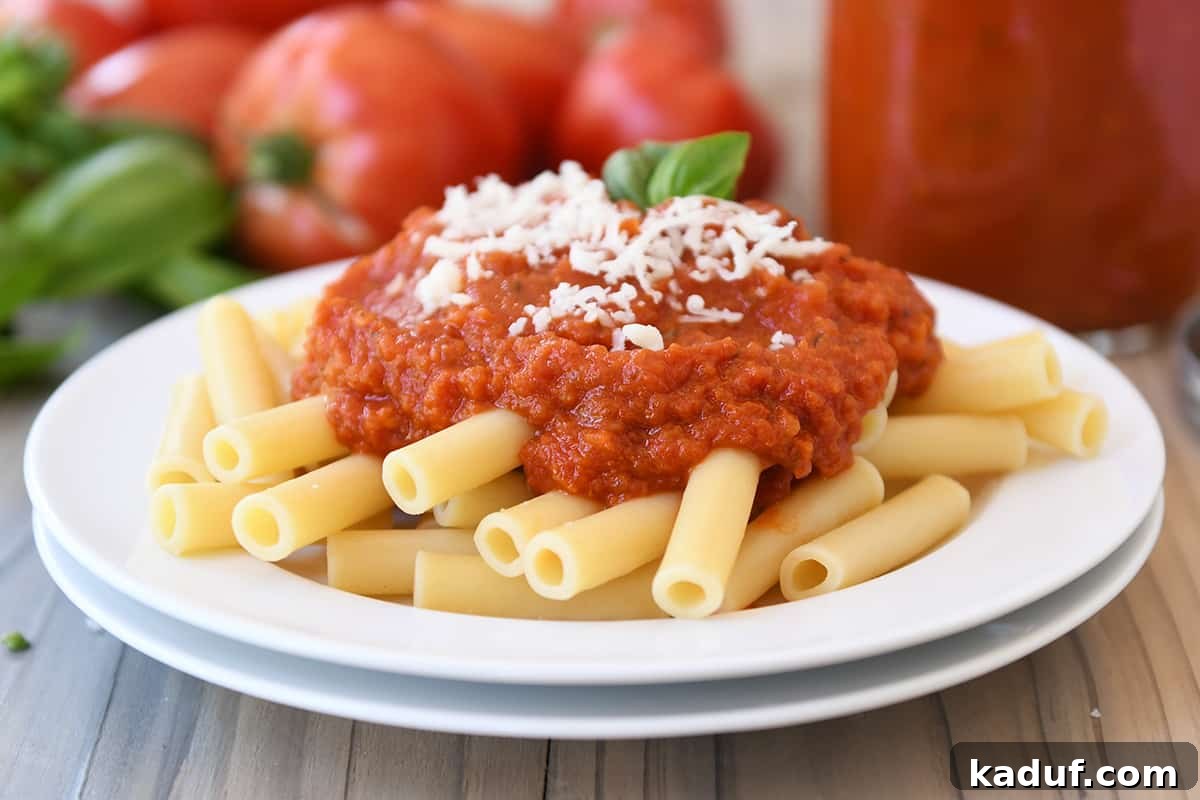
Transform your abundant garden harvest into rich, flavorful Homemade Canned Spaghetti Sauce. This easy-to-follow recipe, complete with step-by-step instructions and essential canning tips, ensures you can enjoy the taste of summer all year long!
There’s nothing quite like the taste of fresh, sun-ripened tomatoes, especially when they come straight from your own garden. As the season peaks, many of us find ourselves with an overwhelming bounty, searching for the perfect way to preserve that incredible flavor. Look no further! This comprehensive guide will walk you through creating a delicious homemade canned spaghetti sauce – a perfect solution for all those glorious garden tomatoes.
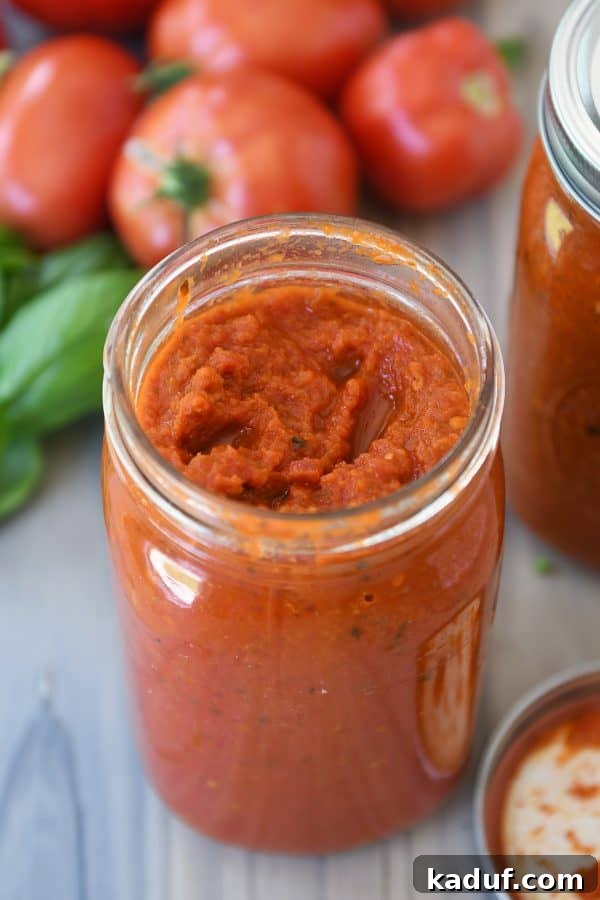
This recipe yields a thick, hearty, and intensely flavorful marinara sauce, versatile enough for any culinary creation. Whether you’re topping a simple plate of pasta, layering it into a lasagna, or using it as a base for other Italian-inspired dishes, this homemade sauce will elevate your meals. It’s a wonderful way to capture the essence of peak-season tomatoes, ensuring your pantry is stocked with wholesome, homemade goodness.
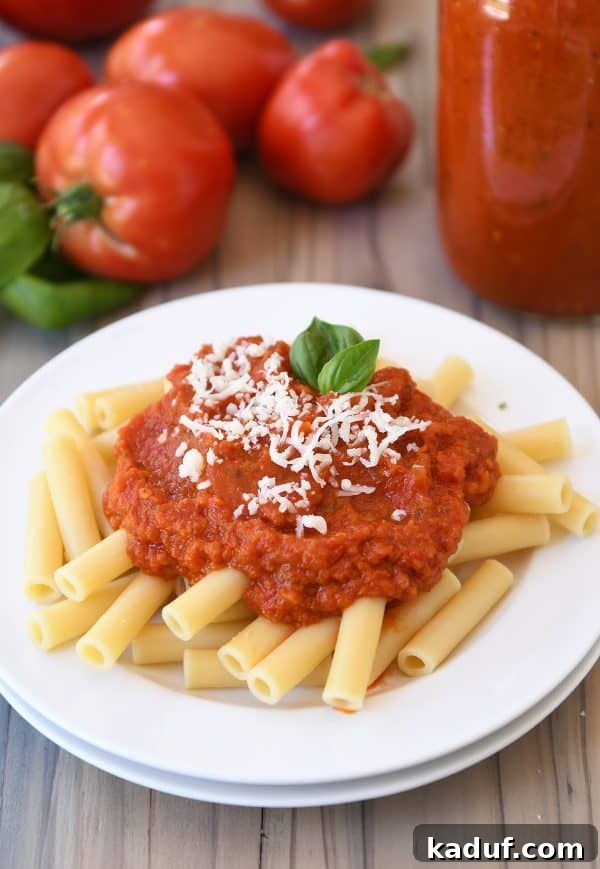
While I often use other beloved spaghetti sauce recipes for everyday dinners – like my tried-and-true classic or a speedy weeknight version – those haven’t been rigorously tested for canning safety. This specific recipe, however, is formulated and tested for safe home canning, making it the ideal choice for preserving your tomato harvest. Its unique flavor profile is incredibly satisfying, offering a delightful alternative to store-bought options.
There’s immense satisfaction in watching fresh tomatoes transform into beautifully sealed jars of delicious sauce. It’s a skill that brings a sense of accomplishment and self-sufficiency, turning you into a canning rock star in no time!
Canning Basics: Getting Started with Preserving
For those new to the world of home canning, understanding the fundamentals is key to a successful and safe experience. Canning might seem daunting at first, but with the right knowledge and tools, it’s an incredibly rewarding endeavor. I’ve previously shared resources to help demystify the process:
- Canning 101: Water Bath Canning Basics
- Small Batch Canning 101
This homemade canned spaghetti sauce recipe primarily uses a steam bath canner, a convenient alternative to the traditional water bath canner. Both methods are suitable for processing high-acidity foods like tomato sauce. The main advantage of a steam canner is its efficiency: it uses significantly less water, heats up faster, and is generally less bulky, making it ideal for smaller batches or those with limited kitchen space. You can delve deeper into the benefits and safety of steam canners in this post. Additionally, the National Center for Home Food Preservation provides an informative article on steam canners here, offering further guidance and assurance.
The essence of safe canning, especially for high-acid foods like this spaghetti sauce, lies in maintaining proper acidity levels and ensuring an airtight seal. This process prevents the growth of harmful bacteria and preserves the food’s quality for extended periods, allowing you to enjoy your delicious homemade sauce months down the line.
Essential Canning Tools for Homemade Spaghetti Sauce
Having the right tools makes the canning process much smoother and more efficient. Here are the essential items you’ll need to successfully make and can this delicious spaghetti sauce:
- **Over-the-Sink Colander:** Incredibly practical for draining tomatoes efficiently, saving counter space and making cleanup a breeze.
- **Food Processor:** A trusty food processor is invaluable for quickly chopping peppers, onions, garlic, and even blending tomatoes, drastically reducing prep time and knife work.
- **Steam Bath Canner:** (or a water bath canner) Choose one with a reliable dial for accurate temperature and safety monitoring.
- **Canning Toolset:** A basic set typically includes a jar lifter (for safely moving hot jars), a canning funnel (for neat filling), a headspace tool, and a magnetic lid wand. These tools are indispensable for proper jar handling and sealing.
- **Extra Canning Funnel with Measurements:** While optional, a funnel with measurements can be very useful for precise liquid additions and minimizing spills.
- **Large 8-Quart Pot:** Necessary for simmering your sauce to the perfect consistency.
- **Quart-sized Canning Jars with Lids and Rings:** Ensure your jars are clean and sterilized before use.
Prepping Your Tomatoes for the Best Sauce
To begin crafting this exceptional canned spaghetti sauce recipe, you’ll need approximately 18-19 pounds of fresh tomatoes, which translates to about 60 medium-sized tomatoes. A mix of Roma (paste) tomatoes and everyday garden varieties like Early Girl works wonderfully, offering a balance of meatiness and rich flavor. Paste tomatoes are generally preferred for sauces due to their lower water content and firmer flesh, resulting in a thicker sauce.
Peeling the Tomatoes with Ease
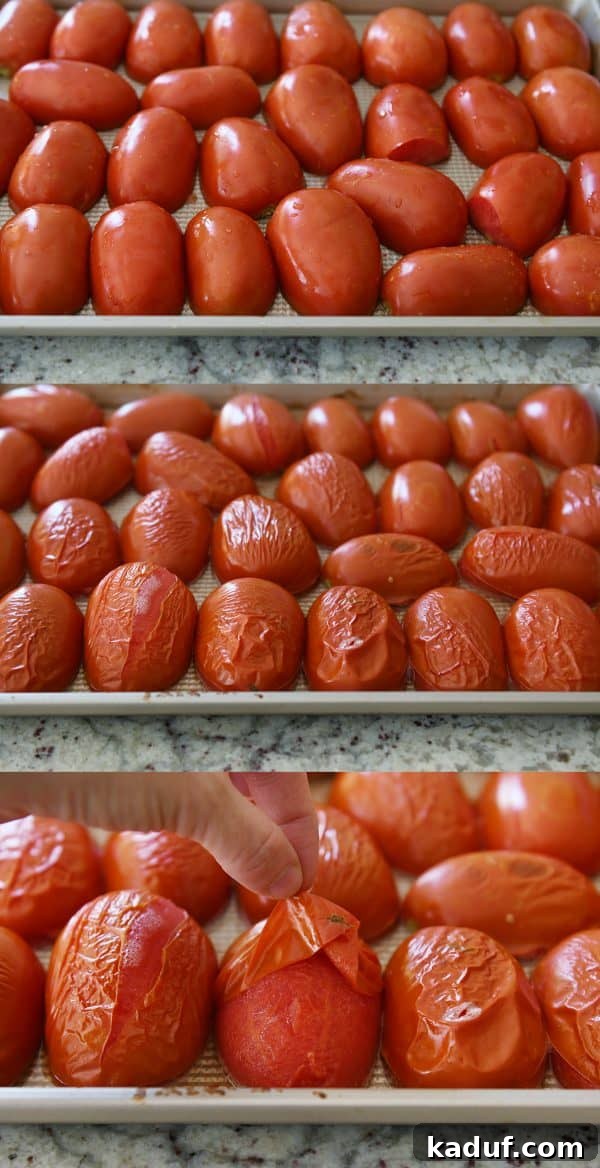
Removing the skins from your tomatoes is a crucial step for achieving a smooth, palatable sauce, free from bitter skin fragments. While the traditional method involves blanching tomatoes in boiling water followed by an ice bath, I’ve found a much simpler and less messy technique: broiling.
To use the broiling method: simply cut your tomatoes in half and arrange them cut-side down in a single layer on a sheet pan. Place the pan under a hot oven broiler for just a few minutes, until the skins begin to wrinkle and pucker. Once removed from the oven and allowed to cool briefly, the skins will effortlessly peel right off. This method not only simplifies the peeling process but also makes cleanup of the sheet pans incredibly easy.
While some sources suggest leaving tomato peels on, be aware that they can sometimes impart a slightly bitter taste to the sauce. Furthermore, there’s some debate regarding whether skins might affect the pH level and overall safety of canned goods, though this is not definitively confirmed across all canning guidelines. For a consistently smooth, flavorful, and safe product, peeling is highly recommended.
Draining, Chopping, and Measuring for Optimal Thickness
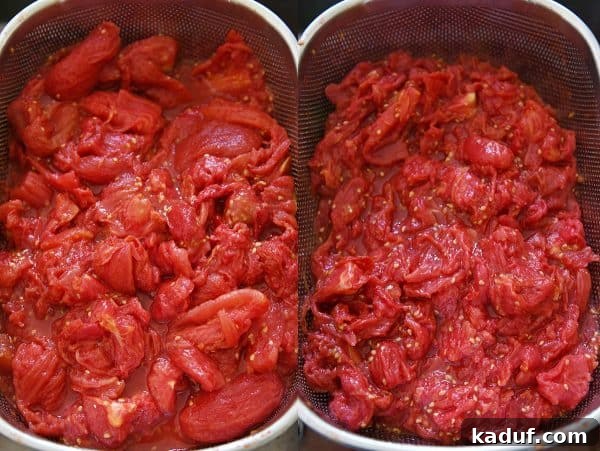
After the tomatoes are peeled (discard the skins), the next vital step for a thick, non-watery sauce is draining. Place the peeled tomatoes in a colander set over a large bowl or directly in your sink. Allow them to drain for 30 minutes to an hour, or until most of the excess watery liquid has runoff. You can gently mash and squeeze the tomatoes with your hands or a spoon to expedite this process, ensuring a denser sauce base.
Observe the significant difference in liquid content after draining. This step is crucial for achieving that rich, concentrated flavor and desired thickness in your marinara sauce. Once drained, transfer the tomatoes to your food processor and pulse until they are well blended to your preferred consistency. I also find my food processor indispensable for finely chopping the bell peppers, onions, and garlic, saving a lot of time and effort.
It’s important to measure your tomatoes *after* they have been peeled, drained, and chopped. This ensures accuracy in your ingredient ratios and contributes to the canning safety of the recipe by controlling the overall liquid content and acidity.
Simmering Your Homemade Spaghetti Sauce to Perfection
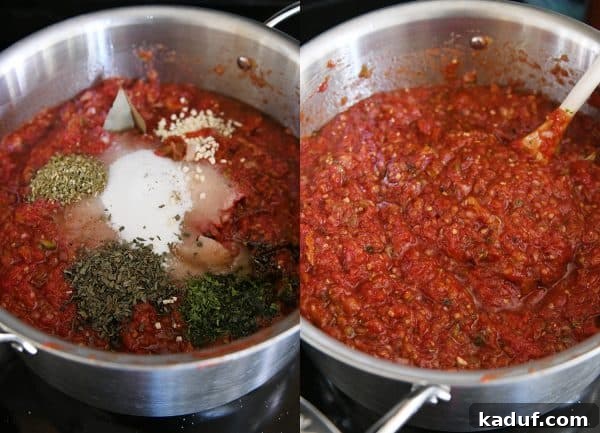
Now it’s time to bring all those fresh ingredients together. Combine all the spaghetti sauce ingredients, *excluding the lemon juice*, in a large 8-quart pot. Stir thoroughly, paying special attention to fully incorporate the tomato paste. Unmixed tomato paste can clump at the bottom and potentially burn, imparting an undesirable flavor to your entire sauce.
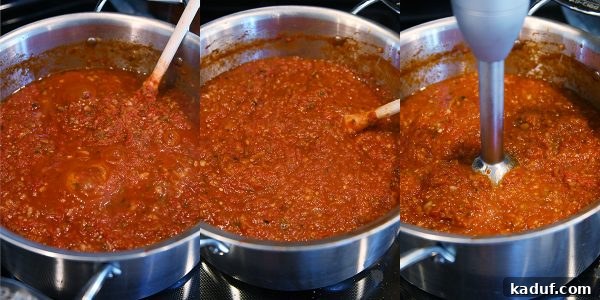
Bring the sauce to a gentle simmer, then reduce the heat and let it cook for approximately an hour. This simmering period is crucial for the flavors to meld and deepen, and for the sauce to achieve a rich, thick consistency. If the sauce appears too watery after an hour, continue simmering until it reaches your desired thickness. For an extra smooth texture, use an immersion blender directly in the pot, or carefully transfer the sauce in batches to a regular blender, processing until silky. The level of smoothness is entirely up to your preference.
Pro Tip for Efficiency: While your spaghetti sauce simmers, get a head start on preparing your canning equipment. Fill your steam bath canner with the appropriate amount of water and begin heating it on another burner. As it heats, place your clean canning jars on the canner rack, cover with the lid, and let them steam and sterilize. This way, your jars will be hot and ready as soon as the sauce finishes simmering, streamlining the entire canning process.
Fill the Jars and Prepare for Processing
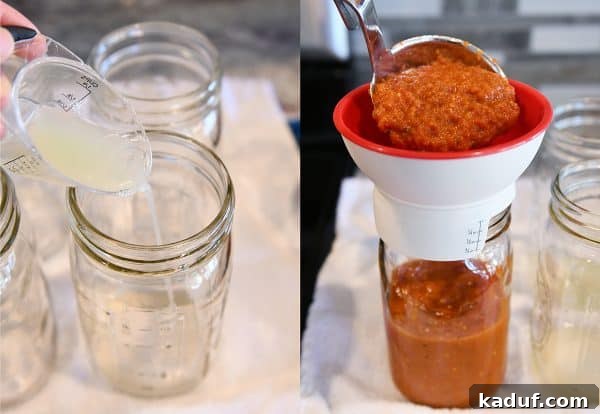
Before ladling in your freshly cooked sauce, carefully pour two tablespoons of *bottled* lemon juice into each sterilized, hot quart-sized jar. Bottled lemon juice is highly recommended over fresh lemon juice for canning, as its acidity level is standardized and consistent, which is critical for food safety in canning. This recipe typically yields about four quarts of sauce.
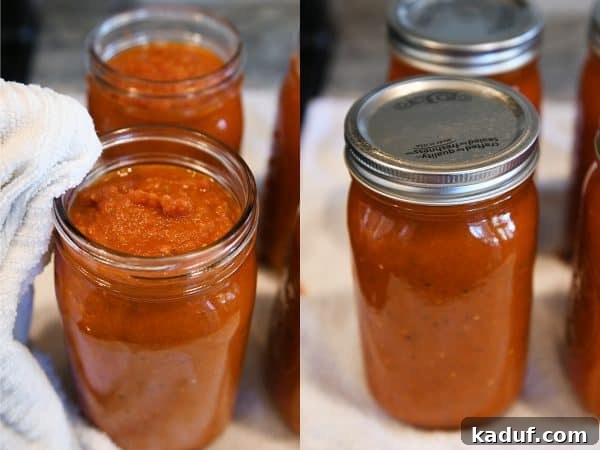
Once the lemon juice is in, use a canning funnel to neatly ladle the hot spaghetti sauce into each jar, leaving a ½-inch headspace from the top. Headspace is essential for proper sealing and to prevent food from bubbling out during processing. Carefully wipe the rim of each jar clean with a damp cloth to ensure no food particles interfere with the seal. Finally, place a canning lid and then a ring on each jar, tightening them only until fingertip-tight – avoid overtightening.
Process the Spaghetti Sauce for Safe Storage
Carefully place the filled and sealed quart jars into your steam bath or water bath canner. Process the jars for 40 minutes. It’s crucial to adjust processing time for higher elevations to ensure food safety: add 5 minutes for elevations between 1,001 – 3,000 feet; 10 minutes for 3,001 – 6,000 feet; and 15 minutes for 6,001 – 8,000 feet. Note that steam canners generally shouldn’t be used for processing times exceeding 45 minutes, so for very high elevations requiring longer processing, a water bath canner is the safer choice.
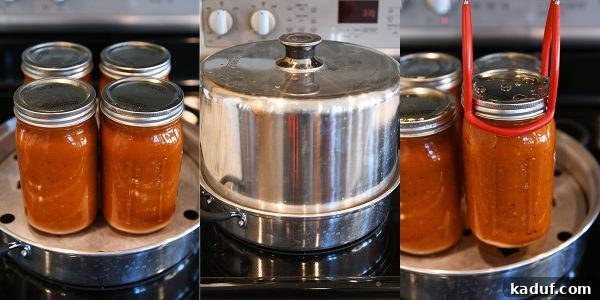
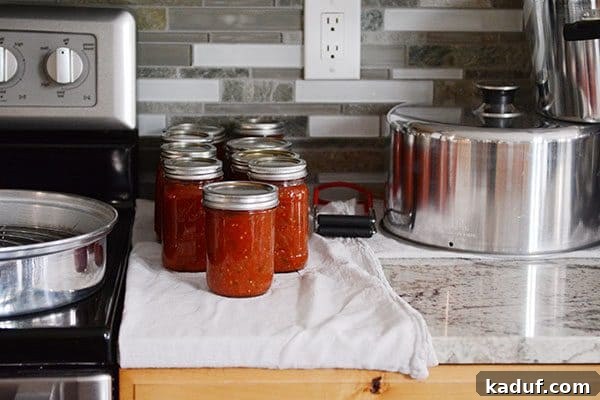
Once the processing time is complete, carefully remove the hot jars from the canner using a jar lifter. Place them on a cooling rack or a towel-lined surface on your counter, ensuring there is space between each jar for air circulation. Allow them to cool naturally to room temperature without disturbing them. As they cool, you’ll eagerly await that satisfying “ping” sound, indicating that the jars have properly sealed. This sound is truly one of the best parts of home canning, a small celebration of your successful efforts!
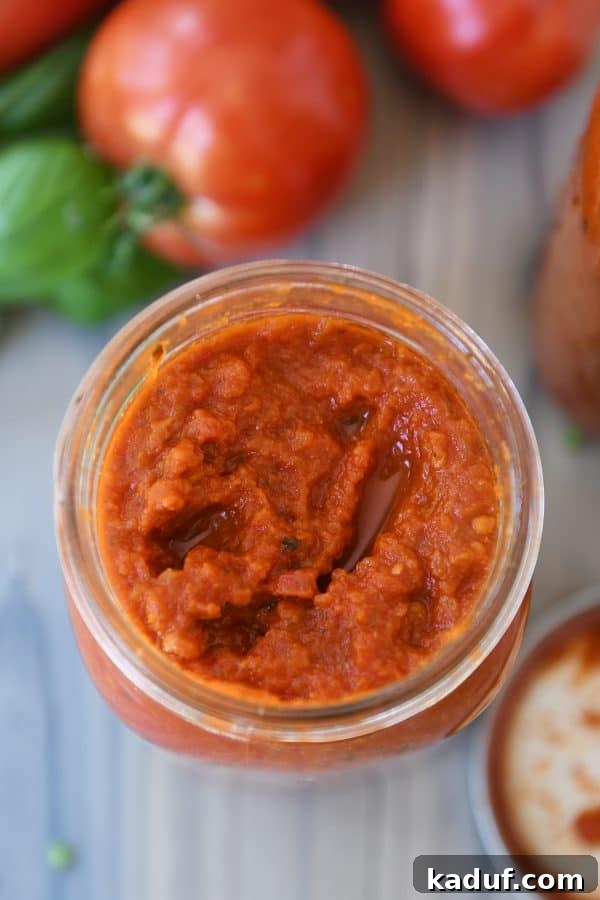
And there you have it! Beautiful, delicious, rich, and hearty homemade canned spaghetti sauce, ready to be stored and enjoyed whenever you crave a taste of summer. These jars are not just food; they are a testament to your hard work and a promise of future comforting meals.
Canning Safety: Why Tested Recipes are Paramount
Home canning is a passion, and I love sharing recipes that allow others to experience the joy of preserving their own food. While I frequently experiment with various ingredients and flavor combinations for fresh meals, when it comes to canning, safety is my absolute top priority. You will only find canning recipes here that have been thoroughly tested for pH levels and adhere to established, safe canning guidelines.
This commitment to safety is crucial because altering ingredients, especially when it comes to high or low-acid components, can compromise the pH balance of a recipe. In canning, an incorrect pH level can create an environment where dangerous bacteria, such as those that cause botulism, can thrive. Therefore, while creativity is encouraged in cooking, it must be exercised with extreme caution in canning.
Over the years, I’ve developed many delicious spaghetti sauce recipes. Some have been incredibly flavorful and even shared by enthusiastic readers. However, if they haven’t undergone rigorous testing for canning safety, I cannot responsibly share them as a canning recipe. It’s a non-negotiable aspect of preserving food for long-term storage, especially when sharing with a wide audience.
The good news is that this homemade canned spaghetti sauce recipe is not only delicious but also widely recognized as safe for home canning, having been developed to meet stringent safety standards. This means you have a tried-and-true recipe you can rely on to preserve your garden’s bounty year after year. Rest assured, with this recipe, you’re canning confidently and safely.
Now, with all the essential information at hand, let’s get canning and fill those pantries with homemade goodness!
One Year Ago: Cheesy Baked Ziti {Make-Ahead/Freezer Meal}
Two Years Ago: The Best Homemade Salsa {Fresh or For Canning}
Three Years Ago: Portillo’s Chopped Salad with Sweet Italian Dressing
Four Years Ago: Peanut Butter Granola
Five Years Ago: Chocolate Zucchini Cake with Brown Sugar Streusel
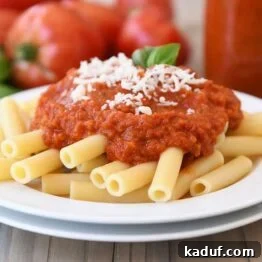
Homemade Canned Spaghetti Marinara Sauce
Yield: 4 quarts
Prep Time: 2 hrs
Cook Time: 2 hrs
Total Time: 4 hrs
Average Rating: 4.62 stars (220 ratings)
Pin
Rate
Ingredients
- 12 cups peeled, drained, and chopped tomatoes (see note)
- 1 cup finely chopped green bell pepper (about 1 large pepper)
- 1 cup finely chopped red bell pepper (about 1 large pepper)
- 2 cups finely chopped white or yellow onions (about 3 medium onions)
- 3 cans (6-ounces each) tomato paste
- ½ cup vegetable or canola oil
- ¼ to ½ cup granulated or brown sugar
- 3 tablespoons salt (I use canning salt, see note for options)
- 2 tablespoons finely minced garlic (about 6 cloves)
- 1 ½ tablespoons dried oregano
- 1 ½ tablespoons dried basil
- 1 ½ teaspoons dried parsley
- 2 teaspoons Worcestershire sauce
- 1 bay leaf
- ½ cup bottled lemon juice
Instructions
-
Combine all the ingredients except the lemon juice in a large 8-quart pot, stir to combine well, and bring to a boil. Reduce the heat and simmer for 1 hour, stirring often. Take out the bay leaf and discard. For a smoother consistency, use an immersion blender or transfer the sauce to a blender to process until smooth (optional).
-
Pour 2 tablespoons of lemon juice into the bottom of sterilized, hot quart jars. Ladle in spaghetti sauce within 1/2-inch of the top. Wipe the rim of the jar with a clean, damp cloth. Place a canning lid and ring on each jar.
-
Process the spaghetti sauce in a water or steam bath canner for 40 minutes (add 5 minutes if you live at 1,001 to 3,000 feet – if you live at higher elevation than that, you’ll want to use a water bath canner since steam bath canners shouldn’t be used to process jars longer than 45 minutes).
-
Remove the jars carefully from the water or steam bath and let cool to room temperature. Check to make sure the jars have sealed correctly (lightly press the top of the lid; it should be firm – if the center bubbles up and down when you press on it, it hasn’t sealed correctly and will need to be refrigerated or re-processed).
Notes
Amount of Tomatoes: This recipe calls for 12 cups of peeled, drained, and chopped tomatoes. I used a mix of Roma and non-paste tomatoes (I think I have early girl variety in my garden) – about 60 tomatoes/18-19 pounds. Measuring the tomatoes after they have drained and been chopped (I use my food processor) will ensure accuracy for measuring and for canning safety – and it also will eliminate any variances if using different varieties of tomatoes.
Also, a quick note about the peppers: You can use 2 green peppers instead of 1 green/1 red or 2 red peppers. I prefer one of each for flavor.
Salt: If you don’t have canning or pickling salt and/or would prefer not to buy it, you can use coarse, kosher salt (or experiment with table salt) but make sure it doesn’t have added iodine or any other additives.
Peeling Tomatoes: I don’t like messing with a water bath and bowl of ice water to peel the tomatoes; instead, I cut them in half and place them cut side down on a large baking sheet (really cram them in there in a single layer). Broil the tomatoes for 3-4 minutes until the skins begin to pucker. Once they come out of the oven, the skins will wrinkle and peel right off and the baking sheet is easily cleaned. See pictures in the post for a visual.
Easy Chopping: For easy and fast chopping, I throw the peppers, onion, and garlic in the food processor and process until finely chopped.
Canning Safety: As with all canning recipes, this recipe has been developed and tested specifically to make sure the pH level is safe for canning. Altering the ingredient amounts, particularly increasing low acid vegetables and decreasing tomatoes, can affect the pH making the recipe unsafe for canning. I have not canned this recipe in a pressure canner, but I have given details here about steam canners vs. water bath canners. Please do your own research to decide what method is best for you.
Steam Canning: The only canning processing method I use these days is steam bath canning. It is used to process high acidity foods (the same foods that can be processed in a water bath canner). I’ve given more details above in the post. However, since this recipe requires a longer processing time (and that increases even more with higher elevations), if you live about 3,000 feet elevation, you’ll need to use a water bath canner instead of a steam bath canner to safely process this sauce. You can read more here.
Doubling Recipe: This recipe can be doubled or tripled (make sure you have a big pot ready!) or halved.
Author: Mel
Cuisine: American, Italian
Method: Stovetop
Serving: 1 Quart,
Calories: 456 kcal,
Carbohydrates: 49 g,
Protein: 6 g,
Fat: 29 g,
Saturated Fat: 2 g,
Sodium: 5302 mg,
Fiber: 10 g,
Sugar: 32 g
Recommended Products
Recipe Source: Adapted from this recipe, with quantities adjusted to yield 4 quarts while maintaining critical acidity levels for canning safety.