
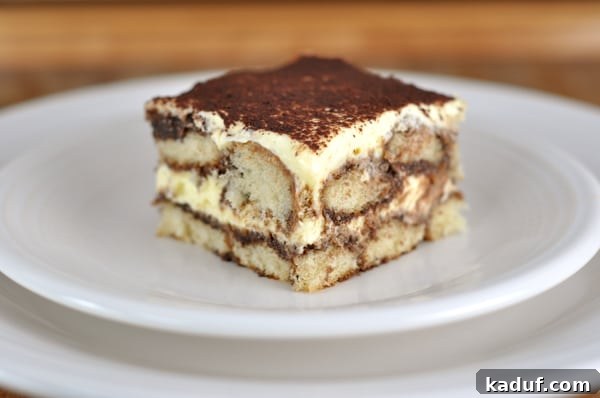
Decadent Chocolate Tiramisu: A Non-Traditional Delight
Prepare your taste buds for an extraordinary experience! This unique take on classic tiramisu is a true revelation, crafted with rich hot cocoa and a subtle hint of rum extract. The result is a decadently wonderful dessert that will leave you craving more with every bite.
To the purists of Italian cuisine, we extend a gentle invitation to explore a different path. This recipe, while deeply inspired by the beloved tiramisu, intentionally deviates from tradition. It’s not designed to replace the classic; rather, it aims to offer a new, exciting chocolate-infused adventure for your palate.
The genius behind this delightful variation comes from my brilliant brother, Nate. He envisioned a tiramisu that substituted the traditional espresso with cocoa powder, along with a few other creative adaptations. His innovation birthed what we now proudly call a truly decadent chocolate tiramisu.
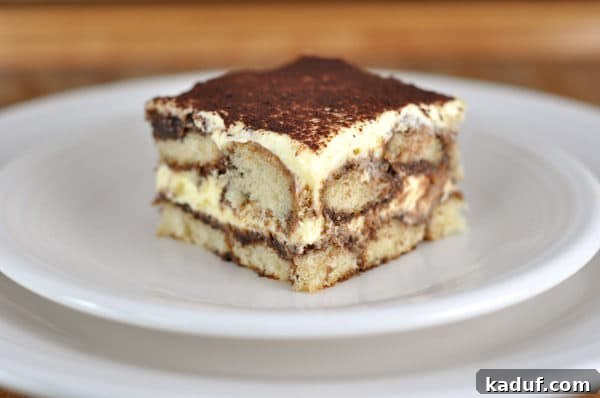
What you ultimately create is a remarkable dessert, a symphony of textures and flavors. Layers of tender ladyfinger cookies, generously infused with a deep chocolate essence, intertwine with a velvety, rich mascarpone custard. Every spoonful delivers a harmonious blend of creamy, moist, and cocoa-rich goodness.
I can honestly declare that I have never tasted anything quite so magically delicious in my entire life. From the very first bite, I found myself savoring each moment, sighing with pure contentment. And while preparing this dessert might mean a few extra bowls to wash – a minor transgression in my kitchen ethics – I have unequivocally declared it our new Christmas Eve tradition. The anticipation for this dessert will now linger with me all year long.
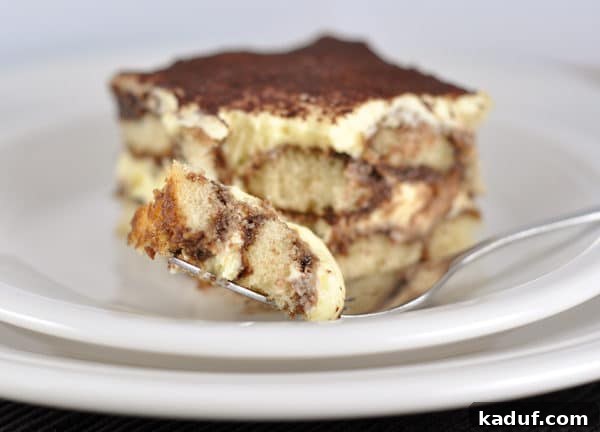
Why You’ll Fall in Love with This Chocolate Tiramisu
This isn’t just another dessert; it’s an experience. Here’s why this particular chocolate tiramisu will become a cherished recipe in your collection:
- Unique Flavor Profile: Moving beyond the traditional coffee, this recipe embraces the comforting, deep notes of hot cocoa, perfectly complemented by the warm, sweet aroma of rum extract. It’s a chocolate lover’s dream come true.
- No Raw Eggs: For those concerned about consuming raw eggs, our recipe uses a cooked egg yolk custard, providing a safe yet incredibly luscious and thick mascarpone layer that is smooth and rich, similar to a decadent pudding.
- Approachable Elegance: While it presents as a sophisticated dessert, the steps are straightforward and achievable for home bakers of all skill levels. It’s the perfect dish to impress guests without the stress.
- Perfect for Any Occasion: Whether it’s a festive holiday gathering, a special birthday, or simply a treat for yourself, this tiramisu elevates any moment into a celebration.
- Make-Ahead Convenience: Tiramisu is one of those rare desserts that actually tastes better the next day, making it an ideal candidate for preparing in advance and reducing last-minute kitchen chaos.
Sinfully Sinless Tiramisu
8 Servings
4 hrs 25 mins
20 mins
4 hrs 45 mins
Average rating: 4.65 out of 5 stars based on 97 ratings.
Ingredients
- 1 ½ cups good-quality hot chocolate, made with water and using 1 ½ times the hot chocolate powder
- ½ teaspoon rum extract
- ½ tablespoon pure vanilla extract
- 4 large egg yolks
- ½ cup granulated sugar
- ⅛ teaspoon salt
- ¼ cup heavy whipping cream
- 8 ounces mascarpone cheese, can sub cream cheese in a pinch
- ½ cup heavy whipping cream (for whipping)
- 36 crisp ladyfingers cookies/biscuits
- 1 tablespoon natural cocoa powder (for dusting)
Instructions
-
Prepare the Hot Cocoa Infusion: Make the hot cocoa according to the instructions above – using water instead of milk and incorporating 1 ½ times the hot chocolate powder you would typically use for a drinking cup. Allow the prepared hot cocoa to cool thoroughly while you proceed with the rest of the recipe. Once it has reached a lukewarm temperature, stir in the pure vanilla extract and the imitation rum extract. Due to the concentrated cocoa-to-water ratio, whisk the cocoa mixture frequently to ensure the cocoa powder remains suspended and doesn’t settle at the bottom.
-
Create the Egg Yolk Custard Base: Set a medium saucepan over medium heat and fill it with approximately 1-2 inches of water. Bring the water to a gentle simmer while you prepare the egg yolk mixture. In a separate medium-sized bowl (one that can be comfortably placed over the simmering saucepan without touching the water), lightly beat the four large egg yolks at low speed with either a hand or electric mixer until they are just combined. Gradually add the ½ cup of granulated sugar and the ⅛ teaspoon of salt. Increase the mixer speed to medium-high and continue beating for 1 ½ to 2 minutes, or until the mixture becomes pale yellow and slightly thickened. Remember to scrape down the sides of the bowl with a rubber spatula once or twice during this process. Next, pour in the ¼ cup of heavy cream to the yolks and beat at medium speed for 20 to 30 seconds, just until incorporated. Scrape the bowl once more. Carefully place the bowl containing the egg yolk mixture over the simmering saucepan (creating a double boiler setup). Cook the mixture, stirring constantly and scraping along the bottom and sides of the bowl with a heatproof rubber spatula, until the custard thickens sufficiently to coat the back of a spoon – this usually takes about 4 to 7 minutes. Immediately remove the bowl from the heat and stir vigorously for a minute or two to cool it slightly. Set it aside to cool completely to room temperature, which should take about 15 minutes.
-
Assemble the Mascarpone Cream: Once the egg yolk custard has cooled, add the 8 ounces of mascarpone cheese to the mixture. Beat at medium speed until the mixture is smooth and no lumps of mascarpone remain, which typically takes about a minute. Transfer this mascarpone mixture to a large bowl and set it aside. In the now-empty bowl (there’s no need to clean it), beat the remaining ½ cup of heavy whipping cream at medium-high speed until firm, stiff peaks form. Using a rubber spatula, gently fold one-third of the whipped cream into the mascarpone mixture to lighten it. Then, carefully fold in the remaining whipped cream until no white streaks are visible, ensuring the mixture remains light and airy. Set this creamy mascarpone mixture aside.
-
Layer the First Half: Give the cooled hot cocoa mixture a thorough whisk to ensure it’s well combined and ready for dipping. Pour the cocoa mixture into a shallow baking dish, such as a pie plate. Take one ladyfinger cookie at a time and quickly dip it into the hot cocoa. Allow it to soak for approximately 1-2 seconds per side – be careful not to oversoak, or they will become mushy. Immediately transfer each soaked ladyfinger to an 8-inch square baking dish, arranging them side-by-side to form a single, even layer at the bottom of the pan. You may need to gently trim or break some of the soaked cookies to ensure a snug fit and complete coverage. After completing the first layer of ladyfingers, spread half of the prepared mascarpone cream mixture evenly over them, carefully spreading it to the very edges of the pan. Using a small, fine-mesh strainer, evenly sprinkle ½ tablespoon of the natural cocoa powder over this mascarpone layer.
-
Complete the Layers and Chill: Repeat the ladyfinger soaking process, creating a second layer of chocolate-infused ladyfinger cookies directly over the first mascarpone/cocoa layer. Once the second cookie layer is in place, spread the remaining half of the mascarpone mixture evenly over it, ensuring it reaches all edges of the dish. For the final touch, dust the top evenly with the remaining ½ tablespoon of natural cocoa powder using your fine-mesh strainer. Carefully cover the dish with plastic wrap and refrigerate for at least 4 hours. This crucial chilling time allows the tiramisu to properly set and for the flavors to meld beautifully. For best results, it can be made up to 1 day in advance. When ready to serve, cut the decadent chocolate tiramisu into squares and enjoy!
Notes
Traditional Tiramisu vs. Our Version: Classic tiramisu is famously made with ladyfingers soaked in a strong espresso and rum mixture, providing a distinct coffee and alcohol flavor profile. The creamy layer typically incorporates silky, fluffy beaten raw egg whites, contributing to its light and airy texture. In contrast, our unique chocolate tiramisu, envisioned by my brother Nate and further refined by me, completely reimagines these elements. We’ve replaced the espresso with rich hot cocoa and opted for rum extract to achieve a similar aromatic warmth without the alcohol. Furthermore, recognizing the common apprehension about consuming raw eggs, I’ve chosen to cook the egg yolks into a delightful custard. This technique results in a mascarpone layer that is wonderfully rich and dense, akin to a velvety pudding. While it departs from the traditional light texture, the incredible flavor and peace of mind from cooked eggs make it a worthwhile adaptation. I promise, the outcome is utterly divine!
Mel
Dessert
Italian-inspired
Stovetop, No-Bake
Nutrition Information (per serving)
Serving: 1 Serving
Calories: 489kcal
Carbohydrates: 49g
Protein: 10g
Fat: 28g
Saturated Fat: 16g
Cholesterol: 261mg
Sodium: 170mg
Fiber: 1g
Sugar: 17g
Recommended Products
Expert Tips for a Perfect Chocolate Tiramisu
Achieving tiramisu perfection, even with a non-traditional recipe, benefits from a few key considerations:
- Quality Ingredients Matter: Since this recipe relies on strong chocolate flavor, use a good-quality hot chocolate mix. The same goes for mascarpone cheese; fresh, full-fat mascarpone will yield the creamiest results.
- Ladyfinger Soaking – The Golden Rule: This is arguably the most crucial step. Ladyfingers are like sponges; they absorb liquid quickly. Dip them *just* enough – a quick 1-2 second dip per side is usually sufficient. Over-soaking will result in a soggy, unappealing texture.
- Proper Chilling is Essential: Tiramisu needs ample time in the refrigerator to set properly and allow the flavors to meld. Don’t rush this step. At least 4 hours is necessary, but overnight is always best for the most cohesive and delicious outcome.
- Whipping Cream Consistency: When whipping the heavy cream, aim for stiff peaks. This ensures the mascarpone mixture has a light, airy texture once folded in. Be careful not to over-whip, which can turn it grainy.
- Cooking the Egg Yolks: When cooking the egg yolk custard over the double boiler, constant stirring is key to prevent scrambling and ensure a smooth, velvety consistency. The mixture is ready when it coats the back of a spoon.
- Even Cocoa Dusting: For a beautiful presentation and a balanced chocolate flavor, use a fine-mesh sieve to dust the cocoa powder evenly over each mascarpone layer.
Variations & Customizations
While this chocolate tiramisu is fantastic as is, feel free to get creative and make it your own:
- Extract Swaps: Experiment with other extracts! A hint of orange extract could brighten the chocolate, or a touch of mint extract could create a delightful mint chocolate tiramisu.
- Add Chocolate Texture: For an extra chocolate boost, sprinkle mini chocolate chips or finely shaved dark chocolate between the mascarpone layers.
- Fruity Twist: Fresh raspberries or sliced strawberries can add a lovely tart contrast and a pop of color when served alongside or as a garnish.
- Individual Servings: Instead of a large baking dish, assemble the tiramisu in individual glasses or ramekins for elegant single-serve portions.
- Liqueur Option: If you prefer a touch of alcohol, you could replace the rum extract with a tablespoon or two of a coffee liqueur (like Kahlúa, though this would reintroduce coffee flavor), a dark rum, or even an orange liqueur (like Grand Marnier) in the cocoa soaking liquid. Adjust to taste.
Storage and Make-Ahead Instructions
One of the best qualities of tiramisu is its ability to be made in advance, making it a perfect dessert for entertaining.
- Refrigeration: This chocolate tiramisu should be stored in the refrigerator, covered tightly with plastic wrap, for up to 3-4 days. The flavors actually deepen and improve over time, so making it a day ahead is highly recommended.
- Freezing: While not ideal for preserving the delicate texture of the ladyfingers, tiramisu can be frozen. Wrap the assembled tiramisu (without the final cocoa dusting) very tightly in plastic wrap, then in foil. It can be frozen for up to 1 month. Thaw overnight in the refrigerator before dusting with cocoa and serving. Note that the ladyfingers might be slightly softer after freezing.
This chocolate tiramisu recipe, originally conceived by my incredibly brilliant brother, Nate, and further refined by incorporating techniques from culinary experts like America’s Test Kitchen, promises a dessert experience unlike any other. It’s a testament to how creative adaptations can yield truly spectacular results. Give it a try, and prepare to be enchanted by its rich, cocoa-infused layers and silky-smooth cream. It might just become your family’s next cherished tradition too!