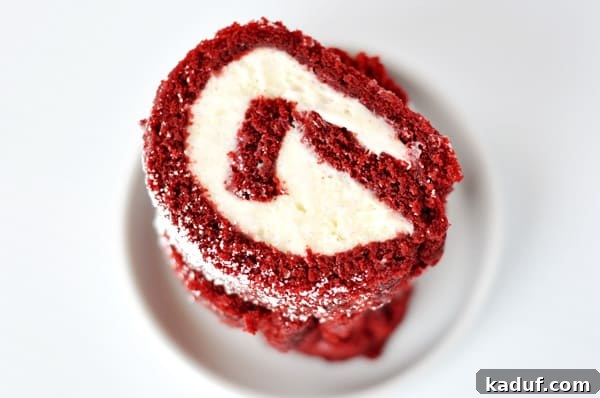
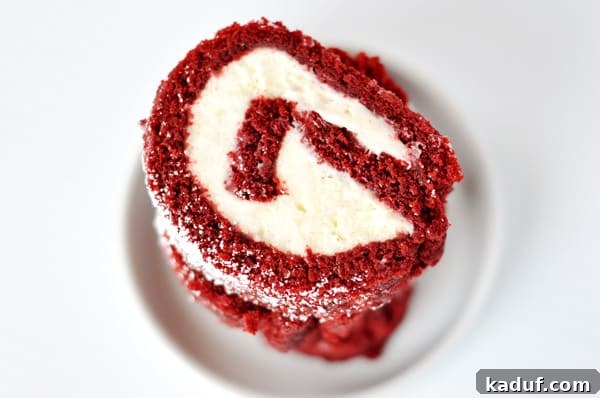
Indulge in a dessert masterpiece with this exquisite Red Velvet Cake Roll. Featuring a tender, moist cake expertly wrapped around a luxurious, rich cream cheese and white chocolate filling, this recipe promises both stunning presentation and an unforgettable flavor experience.
The Ultimate Red Velvet Cake Roll: A Decadent Delight
For years, I confess, the hype surrounding red velvet cake eluded me. I mistakenly believed it was merely a “red cake,” a novelty created by food coloring with no distinct flavor profile to truly set it apart. Why bother, I thought, when you could simply dye any cake batter blue or yellow and call it “blue velvet” or “yellow velvet”? This narrow-minded view prevented me from appreciating the true magic of this classic dessert.
My culinary conversion happened unexpectedly a few months ago. My husband, on a whim, ordered red velvet cake for dessert at a restaurant. Out of sheer curiosity, I took a bite – and then another, and another. Before I knew it, most of his dessert was gone, and I was utterly smitten. It was a revelation! Red velvet is so much more than just a red-colored cake. It’s an exceptionally light and incredibly moist cake, boasting the barest, most subtle hint of cocoa that adds a profound depth without overpowering the palate.
What truly elevates red velvet to iconic status is its indispensable companion: a luxurious, tangy cream cheese frosting. The delicate cocoa notes of the cake, combined with its tender crumb, find their perfect balance against the sweet and creamy tang of the frosting, creating an undeniably delicious symphony of flavors and textures. This pairing is non-negotiable for an authentic red velvet experience, and it was this perfect harmony that finally won me over.
From Skeptic to Enthusiast: My Red Velvet Journey
Since that unforgettable dessert, my kitchen has become a red velvet testing ground. I’ve experimented with red velvet cupcakes and a traditional red velvet layer cake. But, without a doubt, the true showstopper, the recipe that outshines all others and truly captures my heart, is this spectacular Red Velvet Cake Roll. This format, I’ve discovered, takes the classic red velvet experience to an entirely new level, surpassing the charm of both cupcakes and traditional cakes.
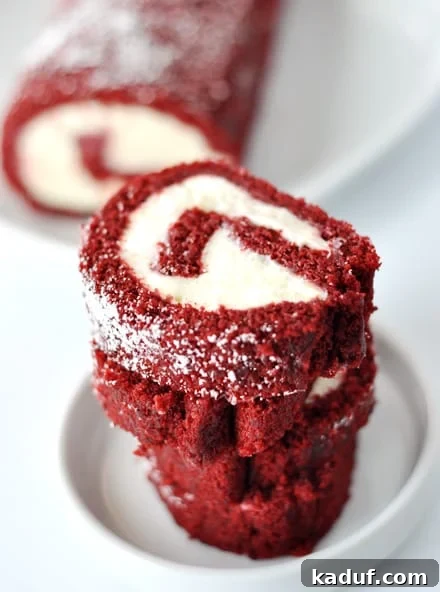
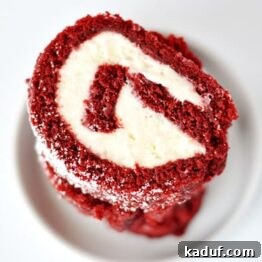
The cake roll isn’t just a dessert; it’s an experience. Imagine a delicate, moist cake, perfectly tender, gracefully wrapped around a decadent and rich cream cheese and white chocolate filling. The visual appeal alone is captivating, with its vibrant red spiral contrasting beautifully with the creamy white center. But beyond its stunning presentation, it is utterly irresistible to the taste buds, a perfect blend of sweetness, tang, and subtle cocoa.
My newfound affection for red velvet (or more specifically, the Red Velvet Cake Roll) has even sparked my adventurous side. This past St. Patrick’s Day, I channeled my inner food scientist, confidently swapping red food coloring for green. The result was a whimsical green velvet cake roll, proving that while the color might change, the irresistible combination of tender cake and creamy filling remains universally delightful. The delicate balance of flavors, the velvety texture, and the creamy richness of the filling truly make this cake roll a standout.
One Year Ago:
Giant Cookie
Two Years Ago:
Baked Chicken Taquitos
Three Years Ago:
Tender Grilled Salmon
Red Velvet Cake Roll
12
Servings
1 hour
15 minutes
10 minutes
1 hour
25 minutes
Pin
Rate
Ingredients
For the cake:
-
1
cup
(142
g)
all-purpose flour -
2
tablespoons
unsweetened natural cocoa powder -
½
teaspoon
baking soda -
⅛
teaspoon
salt -
½
cup
milk -
1
teaspoon
pure vanilla extract -
1
teaspoon
apple cider or white vinegar -
½
cup
(113
g)
room temperature butter -
¾
cup
(159
g)
granulated sugar -
1
large
egg -
1
tablespoon
liquid red food coloring,
1/2 fluid ounce
For the white chocolate–cream cheese filling:
-
1 (8-ounce)
package
(228
g)
room temperature cream cheese -
5
ounces
(142
g)
white chocolate,
melted -
4
tablespoons
(56
g)
butter,
softened -
⅓
cup
(38
g)
powdered sugar,
sifted -
Powdered sugar for dusting
Instructions
-
Prepare the Pan: Center a rack in your oven and preheat it to 375°F (190°C). Lightly coat a small area in the center of a 15 1/2 X 10 1/2-inch jelly-roll pan with nonstick spray. This small amount of spray helps to anchor the aluminum foil. Line the pan with aluminum foil, pressing it firmly into the contours and leaving a generous 2-inch overhang at each of the shorter ends. This overhang will be crucial for lifting and rolling the cake later. Next, butter the foil thoroughly, then lightly flour it, tapping out any excess flour. Alternatively, a baking spray that combines oil and flour works wonderfully for this step, ensuring a non-stick surface.
-
Combine Dry and Wet Ingredients: In a medium bowl, sift together the all-purpose flour, unsweetened natural cocoa powder, baking soda, and salt. Sifting helps to aerate the dry ingredients and prevent lumps, ensuring a smooth cake batter. Set this mixture aside. In a separate small bowl, whisk together the milk, pure vanilla extract, and apple cider or white vinegar. The vinegar, when combined with milk, acts as a buttermilk substitute, reacting with the baking soda to create a light, tender cake and helping to activate the red food coloring for a vibrant hue.
-
Mix the Batter: In a large mixing bowl, using an electric mixer (either handheld or stand mixer), beat the room temperature butter on medium-low speed for approximately 1 minute until it becomes creamy and smooth. Gradually increase the speed to medium and slowly add the granulated sugar in a steady stream. Continue beating for about 2 minutes, until the mixture is noticeably light in color and fluffy in texture. Remember to stop the mixer occasionally and scrape down the sides of the bowl to ensure all ingredients are well incorporated. Add the large egg and mix on medium speed until fully combined. Reduce the mixer speed to its lowest setting. Add the flour mixture in three additions, alternating with the milk mixture in two additions. Begin by adding 1/3 of the flour mixture, mixing just until combined. Follow with 1/2 of the milk mixture, mixing again until just combined. Repeat with another 1/3 of the flour, then the remaining 1/2 of the milk, and finally the last 1/3 of the flour. Scrape down the sides of the bowl as needed between additions. While maintaining the lowest speed, carefully add the liquid red food coloring (watch out for splatters!). Mix thoroughly until the batter is evenly colored a deep, vibrant red. Immediately spoon the batter into your prepared jelly-roll pan, spreading it evenly with a rubber spatula to the edges.
-
Bake and Cool the Cake: Bake the cake for approximately 10 minutes, or until the top is set and springs back gently when lightly pressed in the center. Avoid overbaking, as this can lead to a dry cake that cracks easily when rolled. Once baked, carefully transfer the hot pan to a wire rack. If the cake seems stuck, run a thin knife blade around the perimeter of the pan to loosen its sides. Using the aluminum foil overhangs, gently lift the entire cake (still on its bottom sheet of foil) and transfer it to a separate wire rack. Without delay, place another sheet of foil loosely over the cake, forming a shallow tent. This tent traps moisture as the cake cools, preventing it from drying out, but also ensures the foil doesn’t stick to the delicate surface of the cake. Allow the cake to cool for about 45 minutes on the wire rack before proceeding to assemble the dessert. This initial cooling period is crucial for the cake to set enough to be handled but remain pliable for rolling.
-
Prepare the White Chocolate–Cream Cheese Filling: While the cake cools, begin preparing your decadent filling. In a medium bowl, using either a handheld or stand mixer, beat the room temperature cream cheese on medium-low speed until it is completely smooth and free of any lumps. Next, pour in half of the melted white chocolate and continue beating until the mixture is smooth and thoroughly combined. Remember to stop the mixer occasionally and scrape down the sides of the bowl to ensure even mixing. Add the remaining melted white chocolate and beat just until it is incorporated. Overmixing at this stage can change the texture. Finally, add the softened butter and then the sifted powdered sugar. Beat on medium speed until the filling is smooth, creamy, and wonderfully light. This filling should be thick enough to hold its shape but spreadable.
-
Prepare for Assembly: Once the cake has cooled sufficiently (after about 45 minutes), gently remove the tented foil from the top. Transfer the cake, still on its original bottom sheet of aluminum foil, to a clean work surface. Position the cake so that one of its long sides is parallel to the edge of the surface closest to you. Lay out another long sheet of aluminum foil on the work surface nearby; this will be used to help roll the cake. Having everything ready before you start rolling will ensure a smoother process.
-
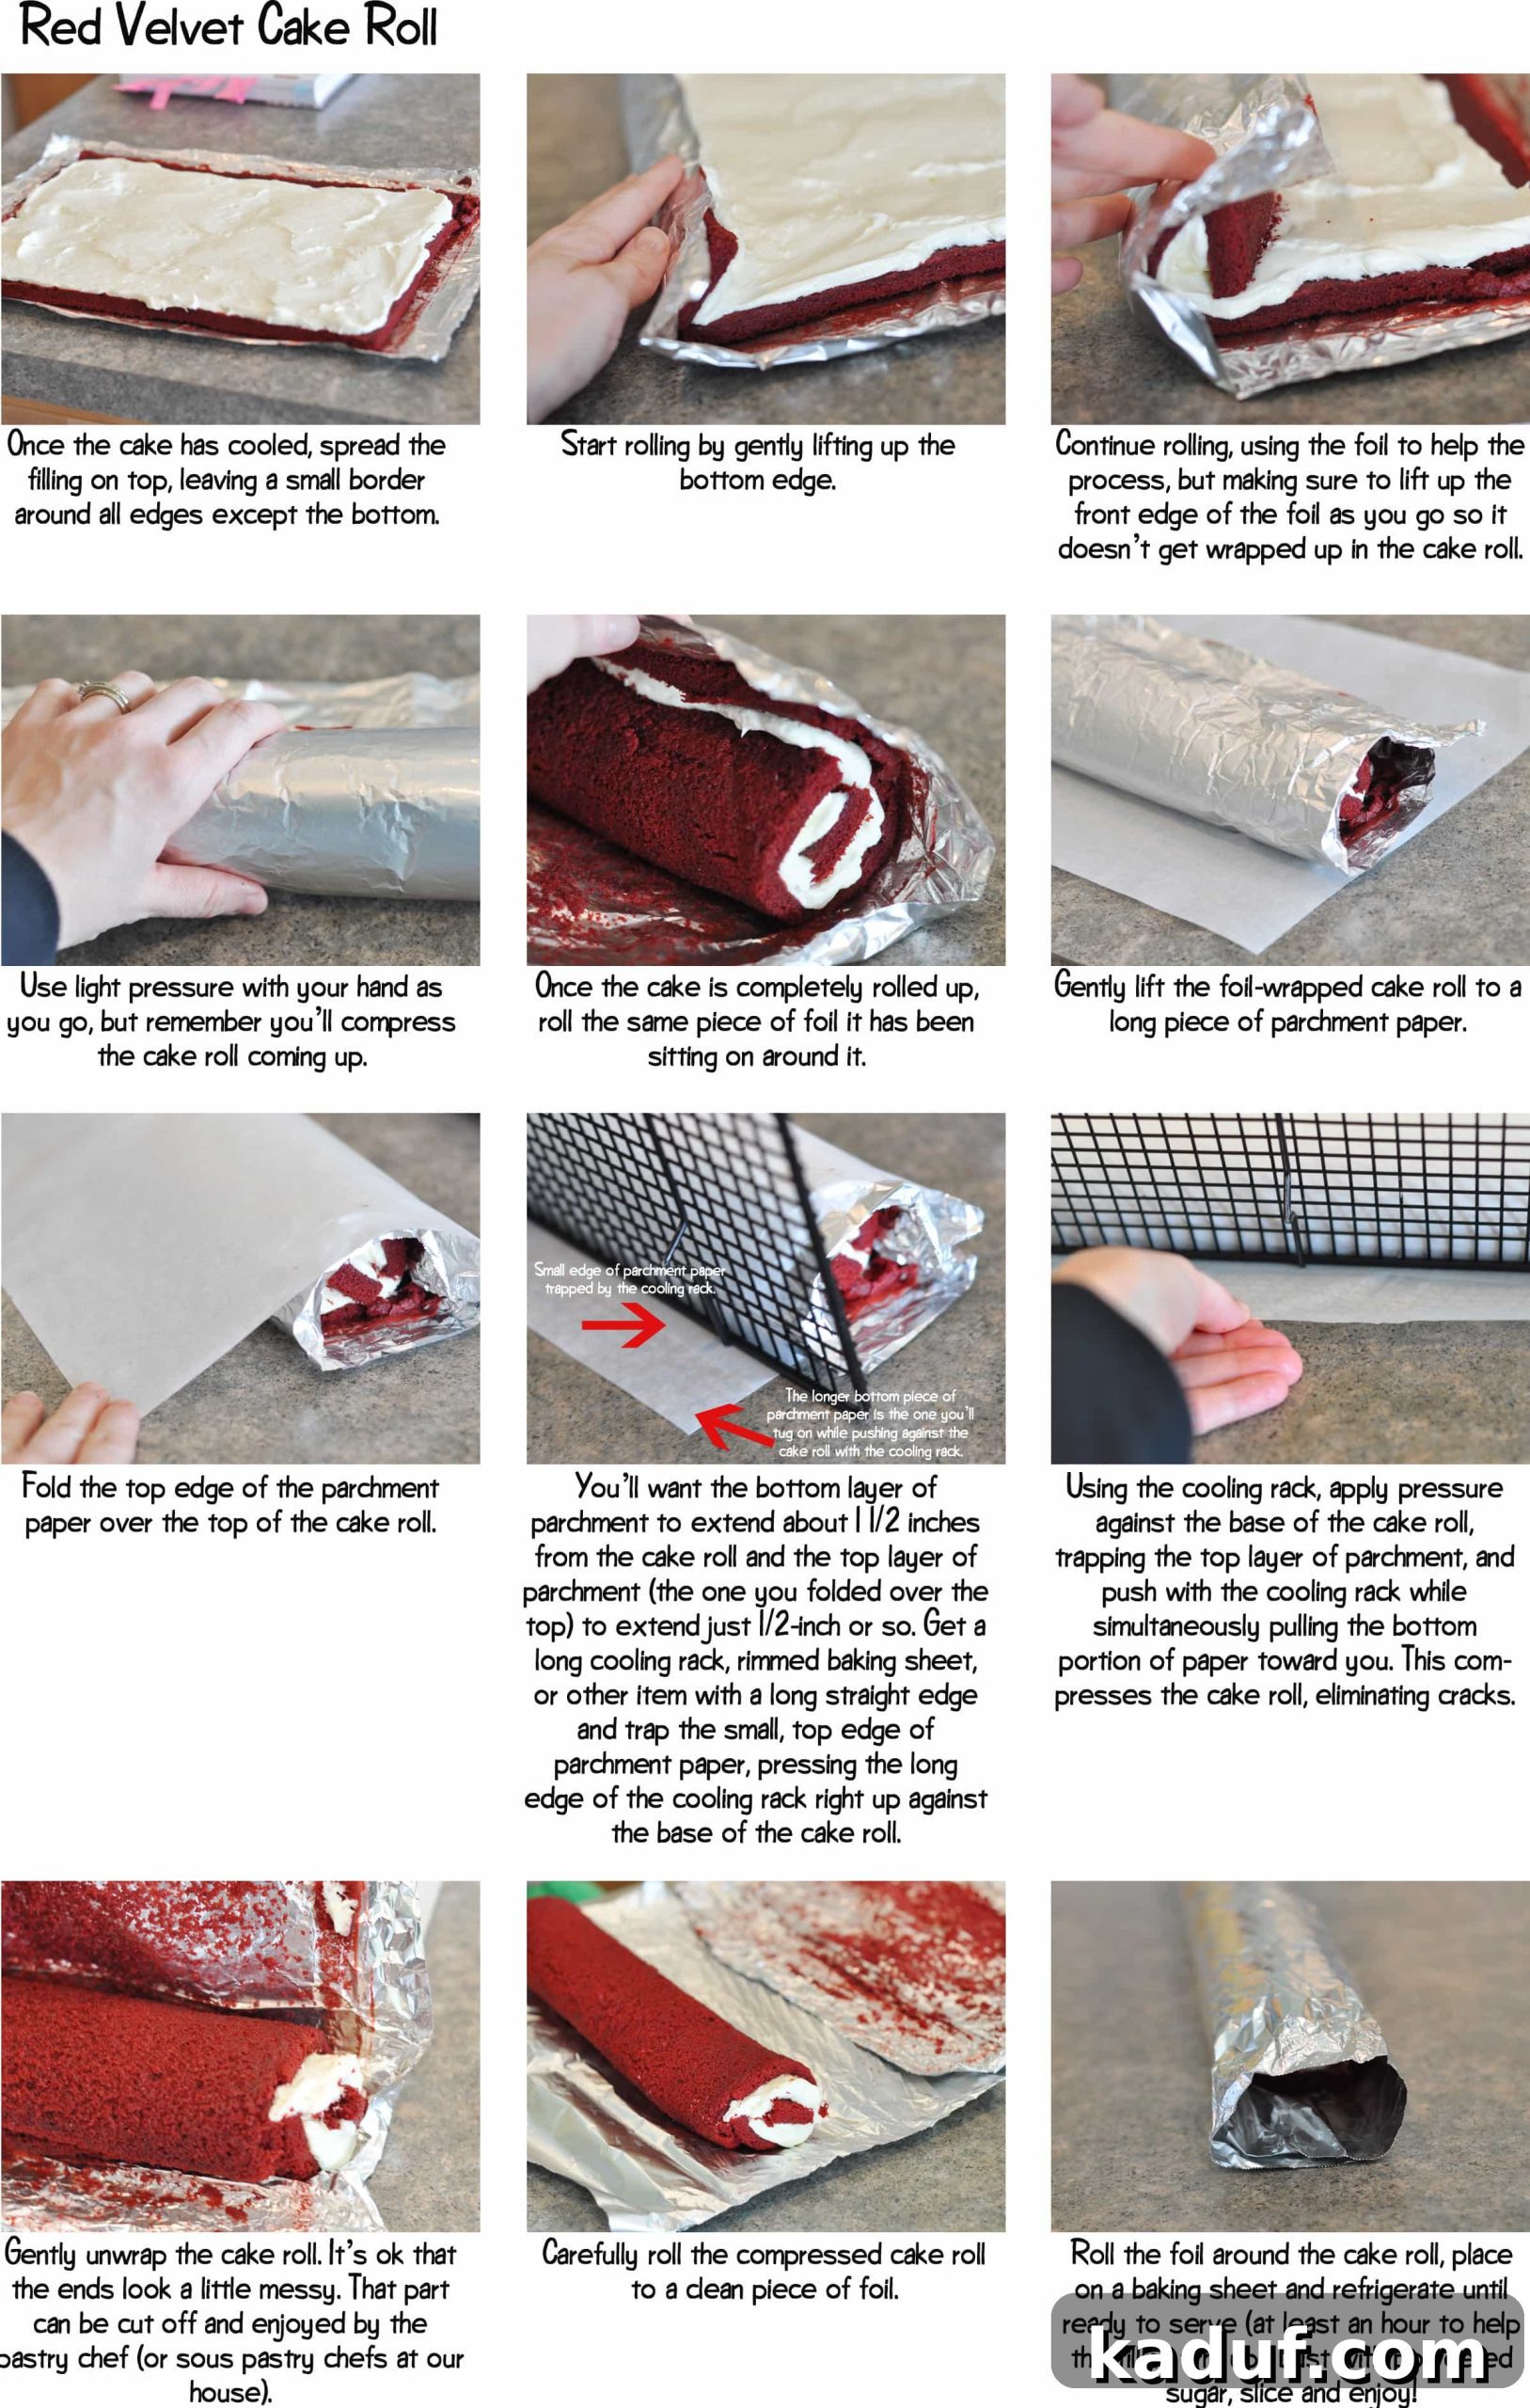
Spread the Filling and Initial Roll: Using an offset spatula, carefully spread the prepared white chocolate–cream cheese filling evenly over the entire surface of the cake. Be sure to leave a 1/2-inch border along the long side farthest from you. This border prevents the filling from squeezing out excessively as you roll. Now, begin the rolling process: gently flip the edge of the cake nearest to you over onto itself, initiating the roll. With the help of the foil extending beyond the short sides of the cake, continue to roll the cake lengthwise, steadily and firmly, until you reach the far long side. As you roll, use the aluminum foil to assist in shaping the roll, gently wrapping it around the cake. This prevents the delicate cake from sticking to your hands and helps maintain a uniform shape.
-
The Compression Technique for a Perfect Roll: To ensure your cake roll is perfectly uniform, round, and free of unsightly cracks, employ this simple compression technique. Once the cake is rolled up within its foil, place it across the bottom third of a long (about 24-inch) piece of parchment paper. Bring the top edge of the parchment paper toward you, draping it over the top of the cake roll, allowing a 2-inch overhang on the side closest to you. Next, place the straight edge of a rimless baking sheet, a cooling rack, or any other long, sturdy, flat object at a 45-degree angle to the cake roll and your work surface. Apply gentle but firm pressure against the roll with this edge, trapping the 2-inch parchment paper overhang. Simultaneously, push the baking sheet against the roll while pulling the bottom portion of the parchment paper towards you. This push-pull motion creates a resistance that compresses the cake log into a beautifully uniform, tight shape. Any minor cracks that may have appeared during the initial rolling will be consolidated and effectively “disappear” during this crucial compression step, resulting in a flawless exterior.
-
Chill the Cake Roll: Carefully lift the compressed cake roll (still encased in its aluminum foil and parchment paper) and gently transfer it, seam side down, to a fresh sheet of aluminum foil. Wrap the cake securely in this new layer of foil. This double layer of wrapping helps maintain its shape and prevents drying. Transfer the foil-wrapped roll to a baking sheet or a shallow tray, then refrigerate it for at least 30 minutes. This chilling time is essential, allowing the cream cheese and white chocolate filling to set properly, making the cake much easier to slice neatly and ensuring the roll holds its exquisite form.
-
Serve and Enjoy: When ready to serve, remove the cake roll from the refrigerator and carefully peel off and discard all the foil and parchment paper. Using a long, wide spatula or a rimless baking sheet, gently lift the roll onto your chosen serving plate. If you’re not planning to serve the cake immediately, loosely cover it with plastic wrap to prevent the cake’s surface from drying out and return it to the refrigerator. It’s best served the same day for optimal freshness and texture. Before slicing, dust the entire cake roll generously with powdered sugar for a beautiful finishing touch. Using a sharp serrated knife and a gentle sawing motion (rather than pressing down), carefully cut the roll into elegant 1/2-inch-thick slices. Each slice will reveal the stunning red cake and white filling spiral, making every portion a work of art.
Notes for a Flawless Red Velvet Cake Roll
Recipe Length vs. Difficulty:
Don’t be intimidated by the seemingly lengthy instructions for this recipe. While detailed, this Red Velvet Cake Roll is truly not difficult to prepare or assemble. The extensive instructions are specifically designed to provide clear guidance, especially on the critical step of rolling the cake tightly and effectively compressing it. Following these steps precisely will help you avoid cracks and achieve a beautifully uniform roll every time. Many cake roll recipes omit these crucial details, leading to common frustrations like cracking. Trust the process!
The Importance of Room Temperature Ingredients:
For both the cake batter and the cream cheese filling, ensuring your butter, eggs, and cream cheese are at proper room temperature is paramount. This allows for better emulsification of ingredients, resulting in a smoother, more uniform batter and a truly creamy, lump-free filling. Cold ingredients can lead to a lumpy batter or filling that separates.
Baking Time is Key:
The cake bakes quickly in a thin layer, usually around 10 minutes. It’s crucial not to overbake it, as this will dry out the cake and make it prone to cracking when rolled. The cake should be set and spring back lightly when touched in the center. A slightly underbaked cake is better for rolling than an overbaked one.
Rolling While Warm:
The instruction to roll the cake while it’s still warm (after 45 minutes of cooling) is vital. Warm cake is pliable and flexible, allowing it to be rolled without breaking. If you let it cool completely, it will stiffen and almost certainly crack. The initial shaping helps it “remember” the rolled form.
Storage Tips:
This Red Velvet Cake Roll stores beautifully in the refrigerator. For best results, keep it securely wrapped in plastic wrap to prevent drying. It will maintain its delicious flavor and moist texture for up to 3-4 days. You can also freeze slices or the entire roll (well-wrapped) for up to one month. Thaw in the refrigerator before serving.
Flavor Variations:
While the white chocolate-cream cheese filling is divine, feel free to experiment! A classic cream cheese frosting (without white chocolate) is also a fantastic choice. For a different twist, consider adding a hint of orange zest to your cream cheese filling for a brighter note, or a sprinkle of finely chopped toasted pecans for added texture.
Tutorial:
For visual learners, I’ve provided a picture tutorial at the end of the recipe. This step-by-step guide offers detailed images on how to effectively roll and compress the cake roll, ensuring you achieve that perfect, crack-free spiral. These visuals will complement the written instructions, giving you extra confidence in your baking adventure.
Mel
Dessert
American
Bake
Serving:
1
Serving
,
Calories:
342
kcal
,
Carbohydrates:
33
g
,
Protein:
4
g
,
Fat:
22
g
,
Saturated Fat:
13
g
,
Cholesterol:
70
mg
,
Sodium:
253
mg
,
Fiber:
1
g
,
Sugar:
24
g
Recommended Products for Your Baking Adventure
Recipe Source: adapted slightly from Flo Braker’s
Baking For All Occasions