
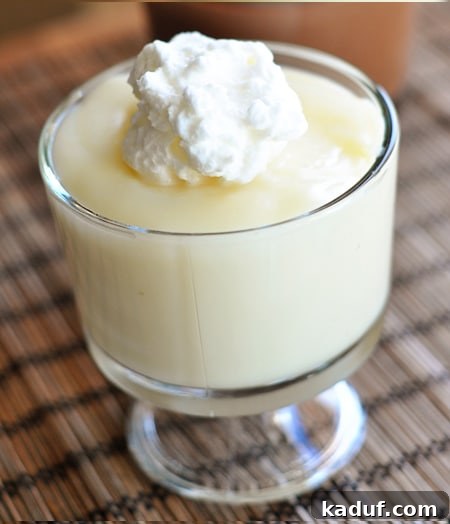
The Best Homemade Vanilla Pudding: A Rich & Velvety Classic From Scratch
Forget the box mixes and embrace the joy of baking! Once you taste this incredible homemade vanilla pudding, you’ll understand why it’s a timeless favorite. It’s surprisingly simple to make and yields a velvety-smooth, deeply flavorful dessert that’s pure comfort in every spoonful. Perfect for satisfying that sweet craving or as an elegant addition to any meal.
Why Homemade Vanilla Pudding is Always the Best Choice
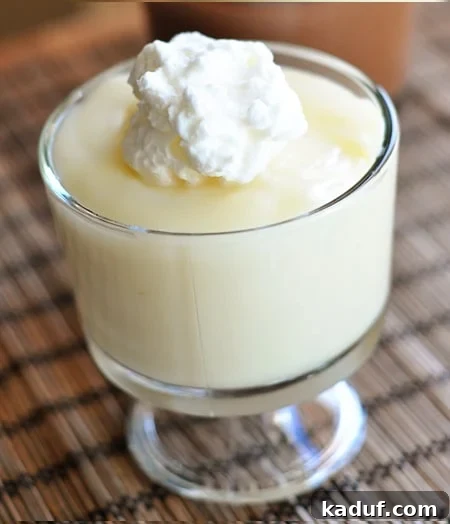
There’s an undeniable magic in a dessert made from scratch, and homemade vanilla pudding is no exception. While boxed mixes offer undeniable convenience, they simply can’t compare to the depth of natural flavor, the luxurious texture, and the overall satisfaction that comes from a batch prepared with fresh, wholesome ingredients. This recipe is a testament to that fact, transforming humble pantry staples into a dessert that’s both elegant and incredibly comforting.
This delightful, creamy, and wonderfully rich vanilla pudding recipe was once part of a larger blog post, sharing the spotlight with an equally decadent chocolate pudding. However, its immense popularity and distinct charm demanded its own dedicated space, and for good reason. Whether your preference leans towards vanilla or chocolate, the underlying philosophy remains steadfast: homemade pudding offers an unparalleled experience. And the best part? Crafting it yourself is much easier and quicker than you might anticipate.
The next time a craving for that sweet, custardy vanilla goodness strikes – a hankering for something truly satisfying – skip the artificial flavors and mysterious ingredients often found in store-bought options. Instead, embrace the simple pleasure and rewarding process of creating something truly special in your own kitchen. Whip up this homemade batch, and you’ll immediately understand the difference, savoring each delicious, creamy, from-scratch bite and rediscovering the true essence of classic vanilla pudding. It’s more than just a dessert; it’s a nostalgic journey back to genuine flavors and wholesome goodness.
The Best Creamy Homemade Vanilla Pudding
Yield: 6 Servings (approximately 3 cups of pudding)
Prep Time: 2 hours (primarily chilling time)
Cook Time: 10 minutes
Total Time: 2 hours 10 minutes
Rating: 4.64 stars (based on 92 ratings)
Pin Recipe
Ingredients You’ll Need
- 2 ⅔ cups whole milk, divided
- ½ cup (106 g) granulated sugar
- ¼ cup cornstarch
- ¼ teaspoon salt
- 2 teaspoons vanilla extract (pure vanilla extract recommended)
- 1 large egg
Step-by-Step Instructions for Flawless Pudding
- Heat the Milk: In a medium saucepan, bring 2 cups of the whole milk to a gentle boil over medium heat. Keep a close eye on it to prevent scorching. This initial heating creates the warm base for your creamy pudding and helps dissolve the sugar more effectively later.
- Prepare the Thickening Mixture: While the milk is heating, prepare your cornstarch-egg slurry. In a separate medium, heatproof bowl, combine the granulated sugar, cornstarch, and salt. Gradually whisk in the remaining ⅔ cup milk, adding just a little at a time to ensure a completely smooth paste forms without any lumps. Once smooth, whisk in the large egg until it’s fully incorporated and the mixture is uniform. The egg adds richness, stability, and contributes significantly to the pudding’s luxurious texture.
- Temper the Egg Mixture: Once the 2 cups of milk in the saucepan are boiling, carefully and very gradually add this hot milk to the cornstarch and egg mixture in your bowl. This is a critical step known as “tempering.” It’s crucial to whisk quickly and continuously while pouring to slowly raise the egg’s temperature, preventing it from scrambling. This process ensures a silky-smooth pudding without any cooked egg bits.
- Cook and Thicken: Return the entire tempered mixture from the bowl back into the saucepan. Continue stirring constantly with a silicon spatula, whisk, or wooden spoon over medium heat. As it heats, you’ll notice the pudding gradually begin to thicken. Once it comes to a visible simmer (you’ll observe large bubbles popping at the surface), continue to cook and stir for one minute longer. This minute of simmering is vital to fully cook out the cornstarch and egg, ensuring a stable, lump-free, and delicious pudding with a perfect consistency.
- Add Vanilla: Remove the saucepan from the heat immediately after the minute of simmering. Stir in the pure vanilla extract. Adding the vanilla at this stage, off the heat, preserves its delicate flavor and aromatic qualities, which can diminish if cooked for too long.
- Strain for Silkiness (Optional but Recommended): For an impeccably smooth pudding, strain the hot mixture through a fine mesh strainer into a clean medium bowl. This step will effectively catch any small lumps or accidental tiny pieces of cooked egg, guaranteeing a flawlessly silky finish. If you don’t have a fine mesh strainer, simply whisk very vigorously and thoroughly during all the combining and cooking steps to minimize lumps.
- Chill Properly: To prevent a thick, rubbery “skin” from forming on the surface as it cools, cover the pudding with plastic wrap. Press the plastic wrap directly onto the entire surface of the pudding, ensuring there are no air bubbles trapped between the pudding and the wrap. Allow it to cool slightly at room temperature for about 15-20 minutes, then refrigerate until completely chilled and set, typically for at least 2 hours. Chilling allows the pudding to fully firm up, develop its final creamy consistency, and meld all the flavors.
Author: Mel
Course: Dessert
Cuisine: American
Method: Stovetop
Nutrition Information (per serving)
Serving: 1 Serving, Calories: 167kcal, Carbohydrates: 27g, Protein: 4g, Fat: 4g, Saturated Fat: 2g, Cholesterol: 42mg, Sodium: 156mg, Fiber: 1g, Sugar: 22g
Nutrition values are approximate and may vary based on specific ingredients and preparation methods.
Recommended Kitchen Tools
Recipe Source: Adapted from Smitten Kitchen
Expert Tips for Perfect Homemade Vanilla Pudding Every Time
Achieving that dreamily smooth, thick, and perfectly flavored vanilla pudding is easier with a few insider tips. Pay attention to these details, and you’ll be rewarded with a dessert that rivals any gourmet custard:
- Use Whole Milk for Best Results: While you can experiment with lower-fat milk, whole milk unequivocally provides the richest, creamiest texture and the most authentic, satisfying flavor. The higher fat content contributes significantly to that luxurious mouthfeel. It’s truly worth opting for whole milk for this classic dessert.
- Don’t Skip Tempering the Egg: This is arguably the most crucial step to prevent unsightly and unappetizing scrambled egg bits in your otherwise perfect pudding. Gradually adding the hot milk to the egg mixture while whisking constantly slowly raises the egg’s temperature, allowing it to incorporate smoothly and safely without cooking too fast. Patience here pays off!
- Whisk Vigorously and Continuously: Consistent and energetic whisking is absolutely key throughout the entire process. This is especially important when initially combining the cornstarch and sugar, when tempering the hot milk with the egg mixture, and most critically, when cooking the pudding on the stovetop. Continuous whisking ensures even cooking, prevents lumps from forming, and helps create that desirable, homogenous, and smooth consistency.
- Cook to the Right Thickness: The pudding will thicken considerably as it simmers. The tell-tale sign that it’s ready is when large bubbles begin to burst at the surface, and the mixture feels quite thick and resistant when stirring. Don’t be tempted to overcook it, as this can result in a pudding that is too stiff, gummy, or even slightly burnt at the bottom.
- The Strainer is Your Best Friend: If you’re a purist about texture and desire an absolutely flawless finish, straining the hot pudding through a fine-mesh sieve or colander is a game-changer. It effectively removes any minuscule lumps of cornstarch or accidental small egg curds, guaranteeing an impeccably smooth, velvety, and professional-looking dessert.
- Preventing “Skin” Formation: To avoid the formation of a thick, rubbery skin on top of your cooling pudding, apply plastic wrap directly onto the surface of the pudding while it’s still warm. Ensure the wrap is pressed down firmly, eliminating any air pockets between the pudding and the plastic. This seals the surface, preventing moisture evaporation and maintaining perfect smoothness from top to bottom.
- Embrace Quality Vanilla Extract: The quality of your vanilla extract makes a noticeable difference in the final flavor profile. Opt for a good quality pure vanilla extract for the best results. For an even more profound, complex vanilla flavor, you could consider scraping the seeds from half a vanilla bean into the milk when you initially heat it, then remove the spent pod before tempering. You can still add the extract at the end for an extra aromatic boost.
Serving, Storage, and Creative Variations
This homemade vanilla pudding is incredibly versatile, lending itself beautifully to various serving styles and flavor adaptations.
Serving Suggestions
Homemade vanilla pudding is exquisite on its own, offering a pure, unadulterated taste of comfort. However, it also shines brightly with simple accompaniments. A generous dollop of freshly whipped cream is a classic and highly recommended choice, enhancing its richness and adding a delightful, airy lightness. For a touch of spice, sprinkle a pinch of cinnamon or nutmeg over the top. If you prefer a fresh contrast, add vibrant fresh berries like raspberries, sliced strawberries, or blueberries for a burst of color and tartness. For a more decadent treat, consider layering it with crushed vanilla wafers, graham crackers, cake pieces, or chocolate shavings in elegant parfait glasses for a visually appealing and texturally exciting dessert.
Storing Your Homemade Pudding
Once your glorious homemade vanilla pudding is completely chilled and set, it can be stored in an airtight container in the refrigerator for up to 3-4 days. It’s crucial to remember the plastic wrap trick: always keep the plastic wrap pressed directly against the surface of the pudding, even during storage. This vital step maintains its smooth texture, prevents any unwanted skin from forming, and keeps it fresh. It is best enjoyed cold, straight from the fridge, for optimal taste and texture.
Creative Variations to Explore
This basic vanilla pudding recipe is a phenomenal foundation, ripe for endless flavor explorations and creative adaptations. Don’t be afraid to experiment!
- Bright Citrus Zest: For a wonderfully bright and refreshing twist, add a teaspoon of finely grated lemon, orange, or lime zest to the milk as it heats. The citrus oils will infuse beautifully into the pudding.
- Warm Spiced Pudding: Infuse your pudding with warming spices by adding a cinnamon stick, a few star anise pods, or a couple of crushed cardamom pods to the milk as it heats. Be sure to remove the whole spices before whisking the milk into the egg mixture.
- Coffee or Mocha Delight: Dissolve a teaspoon of instant coffee or espresso powder into the warm milk for a subtle, sophisticated coffee flavor. For a mocha delight, add a tablespoon of good quality unsweetened cocoa powder along with the sugar and cornstarch.
- Tropical Coconut Vanilla: Substitute half of the whole milk with full-fat coconut milk (canned) for a delightful tropical hint and an extra layer of creaminess. This also offers a dairy-free friendly alternative.
- Nutty Almond or Other Extracts: Experiment with other extracts! Replace half of the vanilla extract with almond extract for a distinct, nutty aroma, or try a touch of peppermint extract for a festive twist (especially with a drop of green food coloring!).
Frequently Asked Questions About Homemade Vanilla Pudding
Q: Why did my pudding turn out lumpy?
A: Lumps are a common issue but entirely preventable! They usually occur for a few key reasons: not thoroughly whisking the cornstarch and sugar with the initial portion of milk before adding the egg, adding the hot milk to the egg mixture too quickly without constant and vigorous whisking (which can cause the egg to cook unevenly), or not stirring constantly while the pudding cooks on the stovetop. Remember, patient tempering and continuous whisking are your best defenses against lumps!
Q: Can I use a vanilla bean instead of extract?
A: Absolutely, and it will elevate the flavor even further! For an even richer, more complex vanilla flavor, you can split one vanilla bean lengthwise and scrape out the tiny seeds. Add both the seeds and the scraped pod to the 2 cups of milk as it heats. Once the milk boils, remove the vanilla pod before proceeding to temper the milk with the egg mixture. You can still add a touch of vanilla extract at the very end if you desire an even stronger, more pronounced aromatic finish.
Q: My pudding is too thin/thick. What went wrong?
A: If your pudding is too thin, it most likely didn’t cook long enough on the stovetop, or your cornstarch might be old and less effective. You can try returning it to the heat and gently simmering for another minute or two, stirring constantly, until it reaches the desired thickness. If it’s too thick, you might have overcooked it. While still warm, you can try whisking in a tablespoon or two of additional cold milk or cream to loosen it slightly, then rechill it. Be careful not to add too much liquid at once.
Q: How do I prevent a skin from forming on top of my pudding?
A: This is a common concern! The absolute best way to prevent a thick, rubbery skin from forming on top of your pudding is to place plastic wrap directly onto the entire surface of the pudding while it’s still warm. Ensure that the plastic wrap touches every part of the pudding surface, eliminating any air pockets between the pudding and the wrap. This creates a seal that prevents moisture from evaporating, which is the cause of the skin. Allow it to cool slightly at room temperature before refrigerating.
Q: Can I make this pudding dairy-free or gluten-free?
A: Yes, with some considerations! For dairy-free, you can experiment with non-dairy milks like almond milk, soy milk, or oat milk. Full-fat canned coconut milk often works very well for a similar rich consistency, though it will impart a distinct coconut flavor. Be aware that the texture might vary slightly with different non-dairy alternatives. This recipe is naturally gluten-free as it uses cornstarch, not flour, as the thickener. Just ensure all your other ingredients are also certified gluten-free if strict adherence is required.
Discover More Delicious Desserts from Our Kitchen!
If you loved this homemade vanilla pudding, you’re in for a treat! Explore some of our other cherished dessert recipes that promise to bring joy to your taste buds and impress your guests.