

Tired of expensive, greasy takeout pizza? Unlock the secrets to crafting the ultimate homemade pizza right in your kitchen!
Mastering Homemade Pizza: Your Guide to a Perfect, Flavorful Pie Every Time
There’s nothing quite like the aroma of freshly baked pizza filling your home. For many families, including ours, homemade pizza isn’t just a meal; it’s a cherished ritual, a canvas for culinary creativity, and a delicious excuse for family time. Forget the lukewarm, often disappointing delivery – once you experience the superior taste and satisfaction of a truly homemade pizza, you’ll never look back. This comprehensive guide will walk you through creating a truly exceptional pizza, from the foundational dough to the perfect toppings, ensuring a memorable meal that’s both healthier and more economical.
The Foundation: Crafting the Perfect Pizza Dough
The secret to an outstanding pizza begins with its crust, and that means starting with an exceptional dough. While there are many recipes out there, I’ve refined my favorite over the years, adapting it slightly from Savory Seasonings. This particular recipe consistently yields a dough that is wonderfully chewy, incredibly flavorful, and bakes up to a magnificent golden perfection. It has become my absolute go-to for its unparalleled texture and depth.

This remarkable dough benefits immensely from a little forethought and planning. Preparing it the night before or early in the morning allows for a slow, cold rise in the refrigerator, which develops incredible flavor and a more complex texture. While I do have a Fast and Easy recipe for those spur-of-the-moment pizza cravings, the extended fermentation of this dough truly sets it apart. The addition of whole wheat flour isn’t just for health; it contributes significantly to the crust’s robust depth of flavor and unique texture, making every bite satisfyingly chewy with just the right amount of crispness.
Elevating Your Pizza: Essential Tips & Topping Wisdom
Beyond the dough, a few simple yet crucial techniques can transform your homemade pizza from good to extraordinary. Over countless pizza nights with my family, I’ve gathered these insights to ensure every pie is a masterpiece:
The Cheese Factor: Freshly Grated Mozzarella is Non-Negotiable
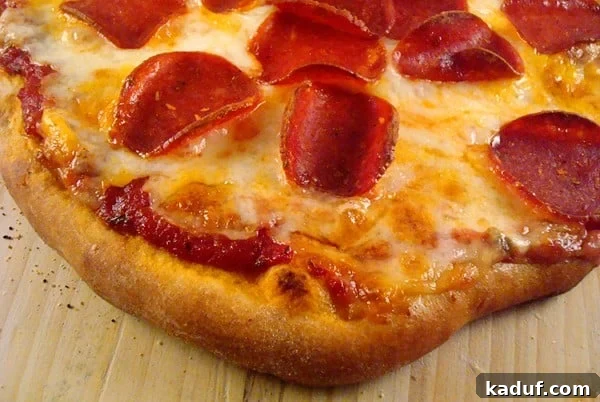
This is a hill I will gladly die on! Always, and I mean *always*, use freshly grated mozzarella cheese for your pizza toppings. I’ve often emphasized this point, and as someone who considers myself a “half-scientist” in the kitchen, I can confidently tell you why. Pre-shredded mozzarella often contains anti-caking agents like cellulose or potato starch to prevent the shreds from clumping together in the bag. While harmless, these agents interfere with the cheese’s ability to melt smoothly and evenly, resulting in a slightly gritty or less luscious texture. Freshly grated mozzarella, on the other hand, melts into a beautifully gooey, stretchy, and golden blanket that is simply unparalleled. My husband, who once worked for a cheese company (even if it was a desk job, he agrees!), backs me up on this. Do a side-by-side comparison, and you’ll be a convert, officially earning your own “half-scientist” badge!
A Sprinkle of Sophistication: The Parmesan Finish
While we prefer to keep our pizza toppings relatively simple – often just classic cheese and savory turkey pepperoni – I’ve discovered a quick and easy trick to elevate the flavor profile to a gourmet level. Just before your pizza goes into the oven, sprinkle a generous amount of freshly grated Parmesan cheese over all the other toppings. The slightly salty, intensely savory kick from the Parmesan adds a fantastic depth and umami richness that complements the other flavors beautifully. It’s a small step that makes a huge difference in taste.
The Perfect Sauce: The Heart of Your Pizza
A great pizza needs a great sauce. While the toppings and crust steal the show, a well-balanced sauce ties everything together. My favorite homemade pizza sauce recipe offers a vibrant, fresh flavor that perfectly enhances this dough. It’s simple to make and yields far better results than store-bought alternatives.
Family Fun: Making Pizza Together
One of the most satisfying aspects of making pizza at home is involving the whole family. My kids absolutely love getting their “grubby little hands” right into the dough, stretching it, adding sauce, and arranging their favorite toppings. It’s an excellent way to teach them about cooking, encourage creativity, and spend quality time together. Even if it gets a little messy, the joy and pride they take in creating their own pizza are priceless.
Frequently Asked Questions for Homemade Pizza
Absolutely! Freezing pizza dough is a fantastic way to prepare ahead and have fresh pizza readily available. I recommend freezing the dough after its initial rise. Simply punch it down to deflate, then divide it into individual portions (sized for your pizzas). Place each portion into a lightly greased, airtight freezer-safe bag or container, ensuring as much air is removed as possible. When you’re ready to use it, transfer the frozen dough to the refrigerator the night before to allow it to defrost slowly. The next day, remove it from the fridge about 1-2 hours before baking to let it come to room temperature, then proceed with the recipe as usual. This slow defrosting and warming ensures the yeast reactivates properly for a perfect rise.
Yes, you certainly can! While a stand mixer makes the kneading process quicker and easier, making this dough by hand is perfectly achievable and a rewarding experience. Just be prepared for a good arm workout – you’ll need to knead the dough for about 10 minutes by hand until it’s smooth and elastic. It’s a great way to feel connected to your ingredients and the baking process!
If you only have active dry yeast on hand, you’ll need to “proof” it first. Increase the amount of active dry yeast to 2 ¾ teaspoons. In a small bowl, combine the warm water (from the recipe) with a pinch of sugar and the active dry yeast. Let this mixture sit for 5-10 minutes until it becomes foamy and bubbly. This indicates the yeast is active and alive. Once proofed, you can proceed with the recipe, mixing in the sugar, honey, and oil as directed. For a more detailed explanation of yeast types and how to work with them, check out my tutorial on yeast.
Absolutely! A homemade sauce complements this dough beautifully. You can find my highly recommended Homemade Pizza Sauce recipe here. It’s fresh, flavorful, and incredibly easy to make.
This is a common issue and usually means the gluten in your dough needs a little time to relax. When you experience the dough springing back, don’t force it. Instead, lightly cover the dough and let it rest for 10-15 minutes on your countertop. This resting period allows the gluten strands to relax, making the dough much more pliable and easier to roll out to your desired shape. Another effective method is to divide your dough into the number of pizzas you plan to make (e.g., two medium pizzas) and form each into a ball. Let these dough balls rest for 10-15 minutes before you begin rolling them out; this often prevents the problem before it even starts. Also, be mindful of over-flouring your surface, as excessively floured dough can sometimes contribute to this issue; a slightly softer, less-floured dough is often easier to work with.
What to Serve With Your Homemade Pizza
- Crisp cut-up carrots and cucumbers with a side of Homemade Ranch Dressing for a refreshing contrast.
- A simple bowl of fresh seasonal fruit to brighten the meal.
- Sweet Cinnamon and Sugar Breadstick Twists for a delightful dessert or side treat.
One Year Ago: Pesto Pizza with Pine Nuts and Feta
Two Years Ago: Red Berry Risotto Oatmeal

Homemade Pizza – New and Improved
1 large or 2 medium pizzas
3 hrs 10 mins
10 mins
3 hrs 20 mins
Ingredients for Homemade Pizza Dough
- 1 ¼ cups warm water
- 2 teaspoons instant yeast
- 2 tablespoons sugar
- 1 tablespoon honey
- 1 tablespoon olive oil
- 2 teaspoons salt
- 1 ½ cups (213 g) all-purpose flour
- 1 ½ cups (213 g) whole wheat flour
Instructions for the Best Homemade Pizza
-
Prepare the Dough (Night Before or Early Morning): In a large mixing bowl (or the bowl of a stand mixer fitted with a dough hook), combine the warm water, instant yeast, sugar, honey, and olive oil. If you are using active dry yeast, increase the amount to 2 ¾ teaspoons, and first proof it in the warm water with a pinch of sugar for 5-10 minutes until foamy, then add the honey and oil. Next, add 1 cup of all-purpose flour and the salt to the liquid mixture, mixing until just combined. Gradually add the remaining all-purpose flour and then the whole wheat flour, mixing until a soft dough forms. Knead the dough until it is soft and smooth; this will take approximately 10 minutes by hand or 5 minutes with a stand mixer.
-
First Rise (Cold Fermentation): Shape the kneaded dough into a ball and place it in a lightly greased bowl. Cover the bowl tightly with a lid or plastic wrap to prevent a skin from forming. Transfer the covered bowl to the refrigerator and allow the dough to slowly rise for at least 8 hours, or preferably overnight. This slow rise is crucial for developing deep flavor. Three hours before you plan to bake your pizza, remove the dough from the refrigerator and let it come to room temperature, keeping it lightly covered.
-
Preheat Oven and Pizza Stone: Approximately 45-60 minutes before baking, adjust an oven rack to the lowest position (or one notch up if the lowest rack is too close to the oven floor, as you want to prevent burning the bottom crust). Place your pizza stone on this rack and preheat your oven to a blazing 500 degrees Fahrenheit (260 degrees Celsius). Don’t be timid about this high temperature! While it might seem daunting, 500 degrees is truly the optimal temperature for achieving a perfectly crisp and chewy pizza crust. If your oven tends to run hot or unevenly at this temperature, baking at 475 degrees Fahrenheit (245 degrees Celsius) is a good alternative. Proper preheating ensures the stone is piping hot, mimicking a professional pizza oven.
Notes on Baking and Equipment
Methods for Transferring and Baking Pizza:
Using a Pizza Paddle/Peel: My preferred method involves a wooden pizza paddle (or peel). I generously sprinkle it with cornmeal to prevent sticking, then carefully place my stretched pizza dough on it. After layering on the sauce and toppings, I swiftly slide the pizza off the paddle directly onto the screaming hot pizza stone in the oven. Bake for approximately 8 to 9 minutes, or until the crust is golden brown and the cheese is bubbly and slightly browned. Retrieve the pizza with the paddle and transfer it to a cutting board for slicing and serving.
Alternative Pizza Paddle/Peel: If you don’t own a dedicated pizza paddle, you can easily improvise! The underside of a large baking sheet (an 11×17 inch size works well) or a sturdy, large cutting board can serve as a makeshift peel. Lightly dust your chosen surface with cornmeal or flour, or line it with parchment paper. Assemble your pizza on this surface. When ready to bake, gently slide the pizza (and parchment paper, if using) onto the preheated baking stone. Bake for 8-9 minutes until the crust is beautifully browned. Use tongs or a wide spatula to carefully transfer the baked pizza to a cooling rack.
Rimmed Baking Sheet Method (Less Mess!): The cornmeal on a pizza paddle can sometimes create a bit of a mess in the oven. For a slightly cleaner approach, I sometimes use a rimmed baking sheet. While my pizza stone is preheating, I stretch the dough directly onto a lightly greased rimmed baking sheet, letting it take on a rustic, irregular shape rather than forcing it into perfect corners. Add your toppings, then slide the entire baking sheet onto the hot pizza stone. Bake for 9-10 minutes, or until the crust is nicely browned. While this method might not yield the *exact* same authentic char as direct-to-stone baking, it still produces a wonderfully crisp crust, and the convenience of baking multiple pizzas simultaneously without the mess is a definite bonus.
Mel
Main Course
American
Bake
Recommended Products for Pizza Making
Pizza Dough Recipe Source: adapted slightly from Emily at Savory Seasonings