
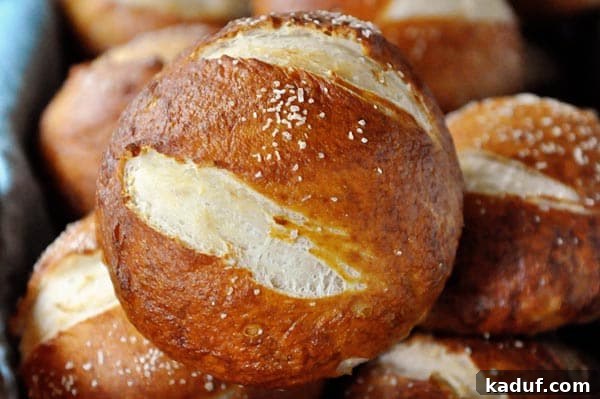
Experience the delightful crunch and tender chew of these homemade soft pretzel rolls, fresh from your oven. They boast a perfectly puffy texture, an inviting golden-brown crust, and a wonderfully salty finish that rivals any gourmet bakery. Get ready to elevate your bread-making game!
Unlock Bakery-Quality Pretzel Rolls at Home
Prepare to be amazed! While I might be a little enthusiastic about food, I truly believe these soft pretzel rolls are a standout among all the breads I’ve ever baked. And believe me, I’ve baked countless loaves and rolls over the years. These aren’t just good; they’re extraordinary, inspiring genuine disbelief and joy.
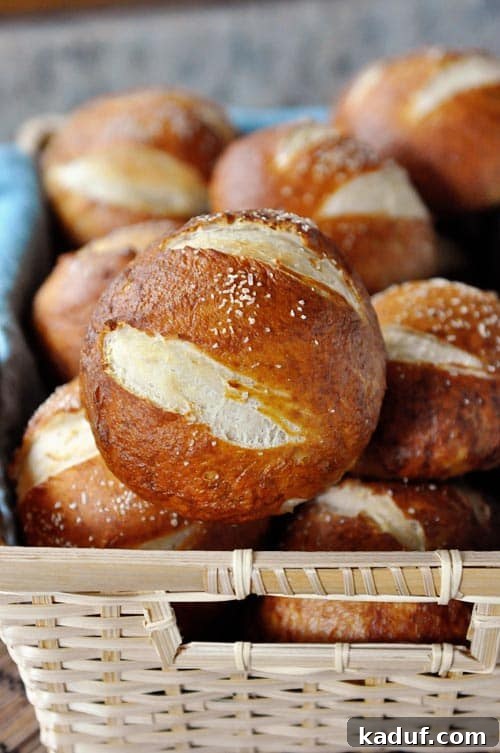
My own family couldn’t believe these didn’t come from a high-end bakery or a fancy restaurant – places not exactly in abundance in our charming small town. In their defense, I have to admit, I let out a genuine squeal of delight when the first batch emerged from the oven, looking exactly like the perfect soft pretzel rolls I’d envisioned: rich, dark brown, perfectly puffed, and wonderfully salty and chewy. I promise you, these aren’t just achievable; they will earn you instant rockstar status in your kitchen. Just look at that irresistible crust!
The allure of these homemade soft pretzel rolls is undeniable. One glance, and you’ll want to devour a whole basket right away. For those new to the world of pretzel roll baking, don’t worry! I’ve included a detailed step-by-step guide below, breaking down the process to make it approachable and enjoyable for everyone.
The Secret to Irresistibly Chewy Pretzel Rolls: The Baking Soda Bath
The magic behind the distinctive texture and flavor of these homemade pretzel rolls lies in a crucial step: the baking soda water bath. Before baking, the dough is briefly boiled in a solution of water and baking soda. This alkaline bath is what gives pretzels their signature dark, shiny crust and that wonderfully chewy interior. It’s a game-changer, transforming ordinary dough into something truly special. This process not only develops the unique “pretzel” flavor but also helps the outside of the roll crisp up beautifully while baking, sealing in moisture and creating an unforgettable bite. Without this step, you’d simply have regular bread rolls, no matter how perfectly shaped. It’s the secret weapon for authentic soft pretzel rolls that taste like they came from a master baker.
And seriously, can I just emphasize it one more time? Oh, my heavens, these rolls are utterly amazing. They’ve become a staple in our home, adaptable to so many meals. Through countless revisions of this recipe, we’ve enjoyed these delicious soft pretzel rolls with everything from hearty soups and comforting spaghetti to serving as perfect buns for juicy sandwiches and grilled hamburgers. Their versatility is just one more reason to fall in love with them.
Beyond the Bun: Creative Ways to Enjoy Your Homemade Pretzel Rolls
While these pretzel rolls make fantastic companions to various meals, often they don’t even make it to the dinner table! More often than not, we find ourselves gobbling up these perfectly baked, warm pretzel rolls right after they exit the oven. Our absolute favorite way to savor them is slightly warm, with a thick, generous wedge of sharp cheddar cheese. The combination of salty, chewy bread and creamy, tangy cheese is pure culinary bliss. It’s a simple pleasure that truly highlights the incredible flavor of these homemade delights.
But the possibilities don’t stop there. Imagine these soft pretzel rolls sliced horizontally, lightly toasted, and filled with your favorite deli meats and fresh veggies for an elevated sandwich experience. They are also phenomenal dipped in a warm bowl of creamy tomato soup or used to sop up rich sauces from pasta dishes. For breakfast, a pretzel roll toasted and topped with a fried egg and a slice of bacon offers a delicious savory start to the day. Or, for a sweet twist, spread a little honey butter or cinnamon sugar on a warm roll – a surprisingly delightful combination!
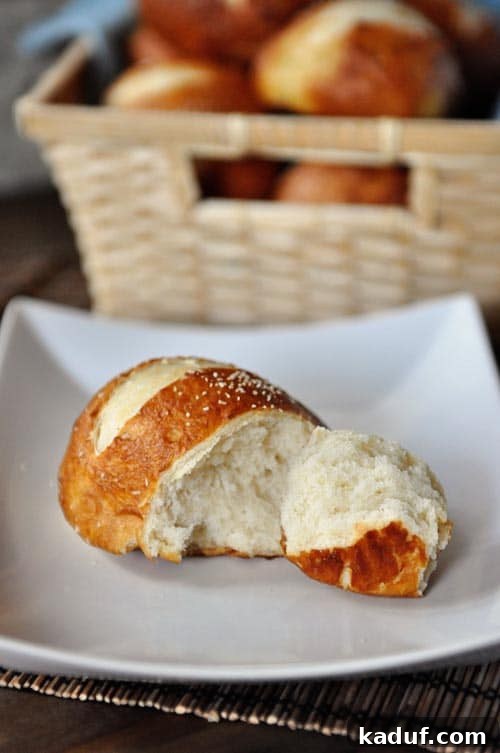
These soft pretzel rolls truly achieve rockstar status, baby, rockstar status!
Baking Confidence: Mastering the Pretzel Roll Process
For many home bakers, the idea of making pretzel rolls might seem daunting. Visions of complex dough, precise shaping, and the unusual boiling step can be intimidating. However, I assure you, the process is far more straightforward than you might imagine, and the reward is absolutely worth the effort. Let’s walk through the journey of creating these amazing soft pretzel rolls, building your confidence with each step.
1. The Dough: Foundation of Flavor and Texture
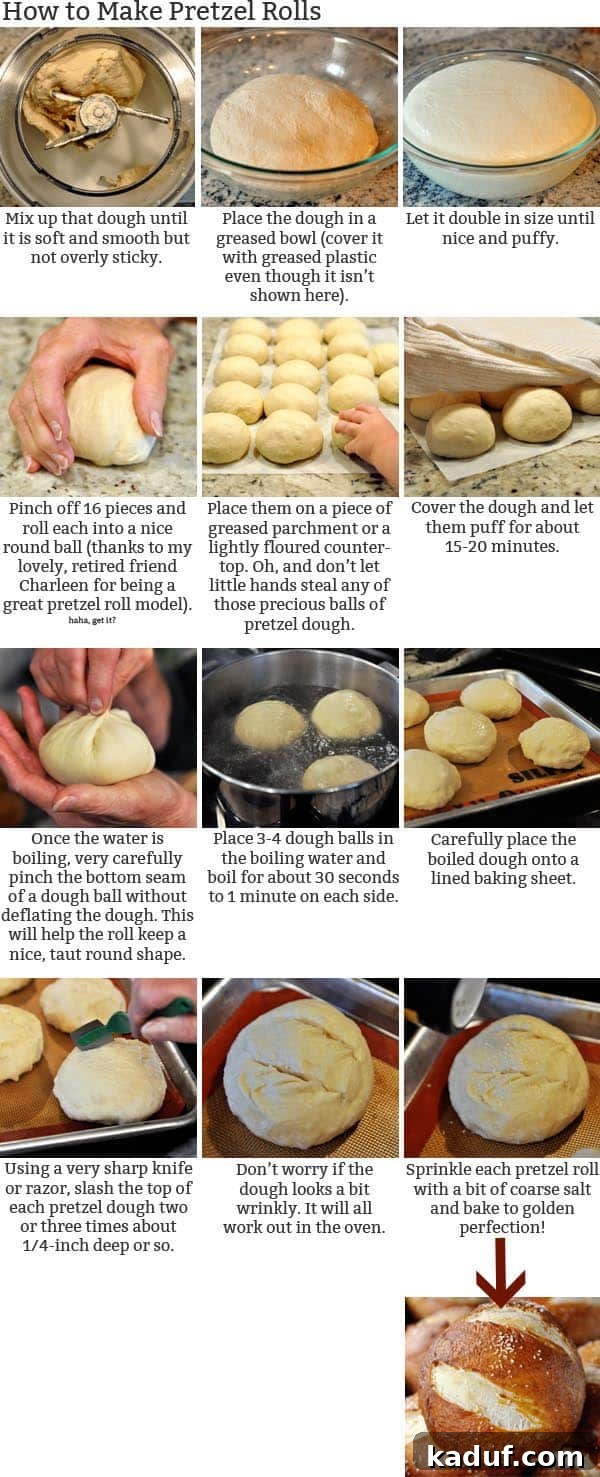
Starting with the right dough is key. Our recipe calls for a blend of warm milk and water, which contributes to a tender crumb. Instant yeast makes the process quicker, eliminating the need for proofing the yeast separately. The addition of a touch of oil keeps the dough soft and manageable, while salt is essential for flavor development. When adding flour, remember the golden rule of yeast doughs: the amount can vary. Humidity, temperature, and even your specific brand of flour can affect how much is needed. Aim for a soft, slightly stiff dough that cleans the sides of your mixing bowl, much like bagel dough, but avoid over-flouring at all costs. An over-floured dough will result in dry, tough rolls. Kneading for the recommended 3-4 minutes helps develop the gluten, which is crucial for the chewy texture we’re after.
2. The Rise: Patience is a Virtue
After kneading, transfer your dough to a lightly greased bowl, cover it with greased plastic wrap, and let it rise in a warm place until it has doubled in size. This can take anywhere from 1 to 2 hours, depending on your kitchen’s temperature. This primary rise allows the yeast to work its magic, creating air pockets that contribute to the rolls’ light and fluffy interior. Don’t rush this step; proper rising is fundamental to the roll’s final texture.
3. Shaping Perfection: Crafting Individual Rolls
Once risen, gently deflate the dough and divide it into 16 equal pieces. Precision here helps ensure even baking. The next step is to roll each piece into a smooth, round ball. This isn’t just for aesthetics; a taut surface helps the roll hold its shape during boiling and baking. A simple technique involves cupping the dough in your hand and rolling it against a clean counter with light pressure, creating surface tension. After shaping, allow the rolls to rest for 15-20 minutes. This short rest period, often called bench rest, relaxes the gluten, making the dough easier to handle and preventing it from shrinking when boiled.
4. The Boiling Bath: Where the Magic Happens
This is the quintessential step for authentic pretzel rolls. While the dough rests, prepare your water bath by bringing 3 quarts of water, 1 tablespoon of sugar, and 1/4 cup of baking soda to a rolling boil in a large saucepan. The baking soda is alkaline, and it’s this alkalinity that promotes the Maillard reaction during baking, giving pretzels their characteristic dark, shiny crust and distinct flavor. Work with 3-4 dough balls at a time to prevent overcrowding. Carefully place them in the boiling water and boil for 30 seconds to 1 minute per side. The longer the boil, the chewier your final pretzel roll will be. Gently remove them with a slotted spoon or spatula, letting excess water drip off, and place them on a baking sheet lined with lightly greased parchment paper or a silicone mat. A critical tip here is to carefully “pinch” the bottom of each roll after shaping and before boiling to create a taut top surface, which helps maintain that beautiful round shape.
5. Scoring and Salting: The Finishing Touches
Before baking, preheat your oven to a hot 425 degrees F. Using a very sharp knife or razor blade, make 2-3 shallow cuts (about 1/4-inch deep) on the top of each unbaked roll. This scoring allows the steam to escape evenly during baking, preventing the rolls from bursting irregularly and encouraging a beautiful “bloom” or opening in the crust. It’s crucial to use a sharp blade to make clean cuts without deflating the dough. Finally, lightly sprinkle each dough ball with coarse salt. This not only adds that iconic pretzel flavor but also contributes to the visual appeal. Don’t worry if the dough looks a little wrinkly after boiling; it will smooth out and puff up beautifully in the oven.
6. The Bake: Golden Perfection
Bake the rolls for 20-22 minutes, or until they achieve a deep, rich golden brown. The aroma filling your kitchen will be incredible! While these soft pretzel rolls are undeniably best enjoyed fresh on the day they’re made, any leftovers can be lightly warmed in the microwave for a few seconds to restore their softness and appeal. They are perfect for snacking, alongside a meal, or as a unique bun for your favorite sandwiches.
Making these pretzel rolls is an experience that builds confidence and delivers truly rewarding results. Each step contributes to their incredible texture and flavor, making them a homemade treat you’ll be proud to share.
One Year Ago: Glazed Chocolate Chip Scones
Two Years Ago: Hearty Turkey and Bean Chili
Three Years Ago: Autumn Minestrone Soup
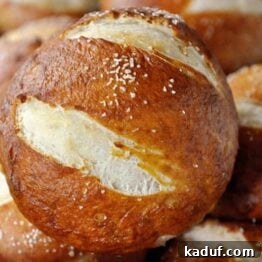
Amazing Soft Pretzel Rolls
16
pretzel rolls
2 hours
40 minutes
20 minutes
3 hours
Pin
Rate
Ingredients
Dough:
- 1 tablespoon instant yeast
- 2 tablespoons canola or vegetable oil
- 2 cups warm milk, about 100-110 degrees F
- 1 ½ cups warm water, about 100-110 degrees F
- 2 teaspoons salt
- 6 ½ – 8 cups unbleached all-purpose flour
Water Bath and Extras:
- 3 quarts water
- 1 tablespoon sugar
- ¼ cup baking soda
- Coarse salt for sprinkling
Instructions
-
In the bowl of an electric mixer (or you can do this by hand in a large bowl), stir together the yeast, oil, milk and water. Add the salt and two cups of the flour. Add the rest of the flour gradually until a soft dough is formed and knead for 3-4 minutes. You may not need to use all the flour depending on many different factors (see the note) – add the flour until a soft dough is formed that clears the sides of the bowl. It is similar in texture to bagel dough and should be slightly more stiff and less sticky than, say, roll dough, but definitely still soft and not overfloured.
-
Transfer the dough to a lightly greased bowl, cover it with greased plastic wrap and let it rise until doubled in size (1-2 hours).
-
Portion the dough into 16 pieces and roll each piece of dough into a lovely little round ball. Here’s a great tutorial on how to do that quickly and efficiently.
-
Lay out the rolls on lightly greased parchment or a lightly floured counter. Make sure the dough balls won’t stick! Let them rest for 15-20 minutes.
-
While the dough rests, bring the water, sugar and baking soda to a boil in a large 5-6 quart saucepan.
-
Working with one piece of dough at a time, carefully take it off the parchment or counter, flip it over in your hand and pinch the bottom to form a little pucker and help the dough form a nice, taut ball. Take care not to deflate the dough; you should pinch just the very edge of the dough.
-
Place 3-4 dough balls in the boiling water and boil for 30 seconds to 1 minute on each side (the longer you boil, the chewier the baked pretzel roll will be).
-
With a spatula, remove the dough from the boiling water and let the excess water drip off into the pan. Place the boiled dough balls onto lined baking sheets (lined with lightly greased parchment or a silpat liner).
-
Preheat the oven to 425 degrees F.
-
Using a very sharp knife or razor, slice 2-3 cuts into the top of each unbaked roll about 1/4-inch deep or so. It’s important to use a very sharp blade so that it cuts the dough without deflating it. It’s ok if the dough looks wrinkly and kind of funny. It will work itself out during baking. Lightly sprinkle each dough ball with coarse salt.
-
Bake for 20-22 minutes until the rolls are deep golden brown. These rolls definitely taste best the same day they are made; however, lightly warmed in the microwave for a few seconds will do wonders for pretzel rolls 1-2 days old.
Notes
Yeast: this tutorial on yeast may help identify how a perfectly floured dough should be. For this pretzel dough, you are going for a slightly stiffer dough than regular roll dough (but it should still be soft and not overfloured).
Mel
Bread
American
Bake
Recommended Products
Recipe Source: Mel’s Kitchen Cafe (originally inspired by many versions online that made me decide to create my own variation; I wanted more milk in the dough than water, different amount of salt and instant yeast, simpler method for mixing the dough, among many other factors)