
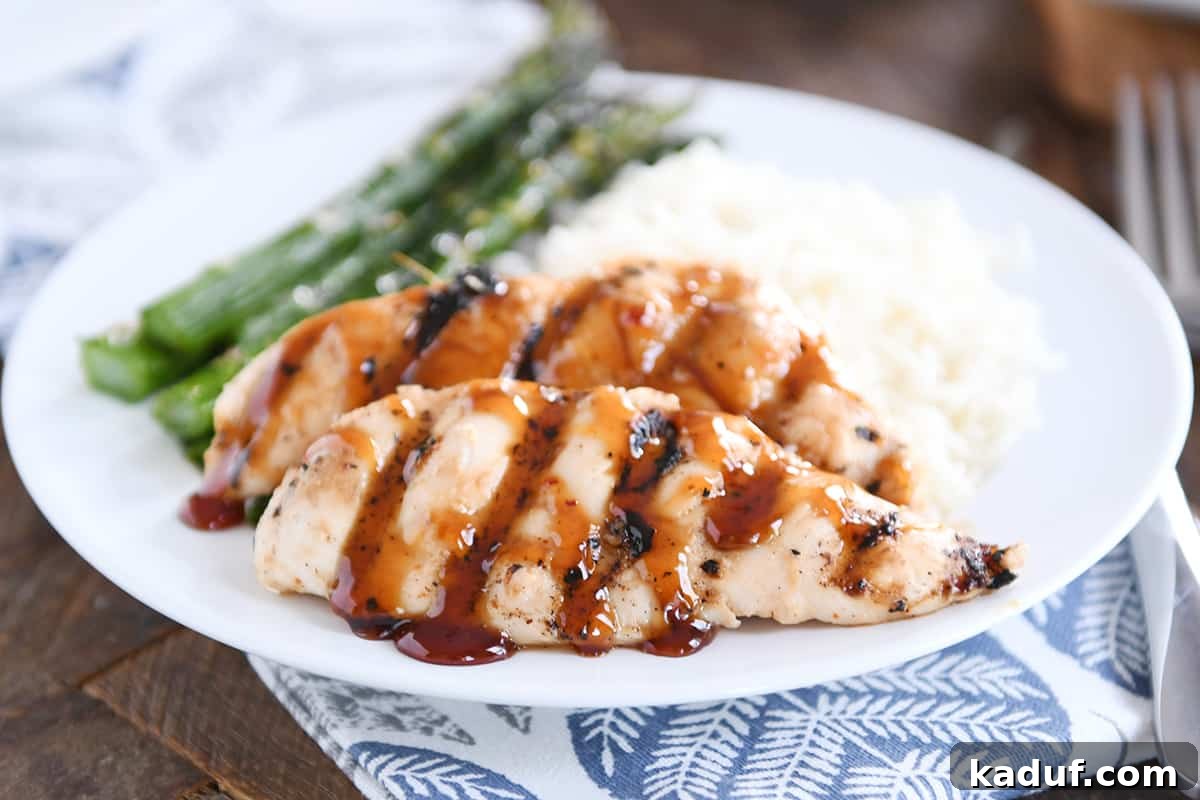
Welcome to a culinary journey that promises to tantalize your taste buds and become an instant classic in your kitchen. This easy sticky coconut chicken isn’t just a meal; it’s a celebration of flavor, a dish that has consistently won hearts and earned its spot as one of our all-time favorite meals. Imagine succulent chicken, deeply infused with the creamy essence of coconut milk and vibrant ginger, then generously coated in a shimmering, sweet, and subtly spicy glaze. It’s truly extraordinary, a testament to how simple ingredients can create something so incredibly memorable!
You know a recipe has achieved legendary status when it gracefully withstands the test of time, proving its enduring appeal for more than a decade. This sticky coconut chicken holds that very distinction, reigning as a steadfast family favorite in our home for over ten years.
From lively birthday dinners where it’s a requested star, to being our trusted go-to meal for entertaining company – or even for preparing thoughtful take-in meals for friends – its versatility is unmatched. And for those busy weeknights when you crave something truly special without the fuss, this recipe steps up as the perfect solution, delivering gourmet taste with surprising ease.
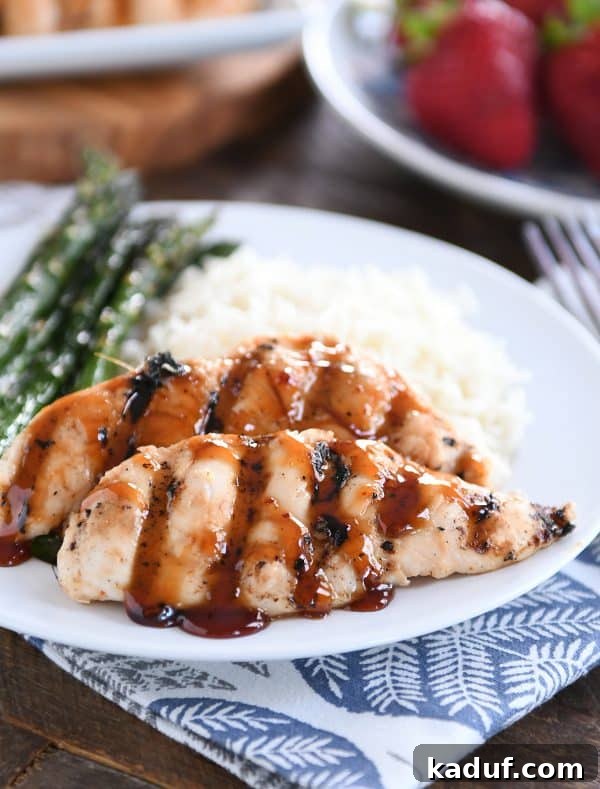
The flavor profile of this glazed chicken is absolutely phenomenal, achieving a harmonious balance that is truly out of this world delicious. It’s a dish so consistently delightful that we honestly can’t envision ever tiring of it. It’s a keeper, through and through!
Unlocking the Irresistible Flavor of Sticky Coconut Chicken
The profound and complex flavor of this sticky coconut chicken is meticulously crafted and built in two distinct, yet complementary, stages. Each component plays a vital role in creating the incredible taste sensation that makes this dish so popular:
- The Aromatic Coconut Milk Marinade: This foundational step infuses the chicken with a rich, creamy, and deeply aromatic base, tenderizing the meat while layering it with exotic flavors.
- The Sweet, Spicy, and Sticky Glaze: Applied during the final stages of cooking, this glaze caramelizes beautifully, forming a tantalizing crust that delivers a punch of sweet, savory, and just a hint of spicy goodness.
The Secret Ingredient: Fresh Ginger and Its Versatility
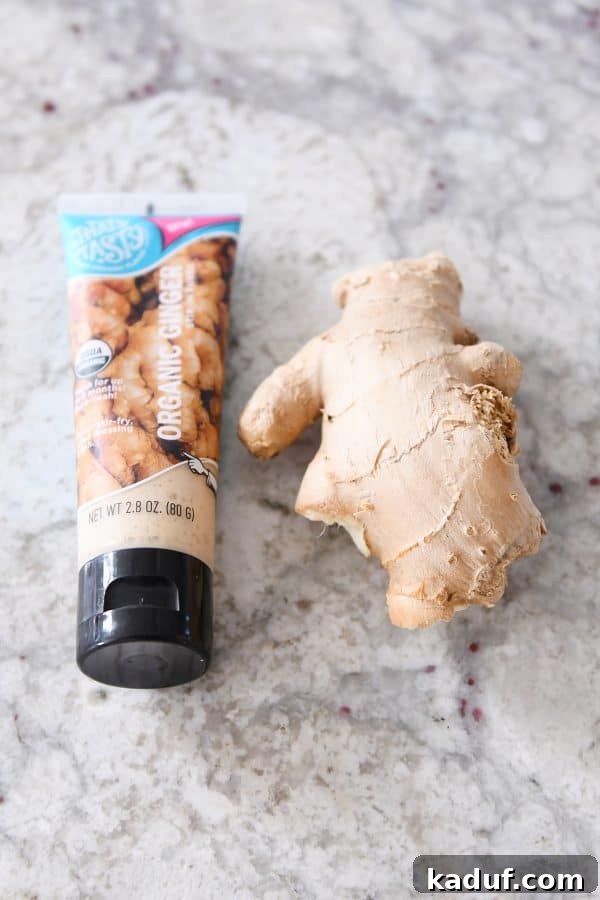
Central to the enchanting aroma and vibrant taste of our marinade is ginger, specifically fresh ginger. Its pungent, spicy, and slightly sweet notes are simply transformative in this dish, elevating it from good to extraordinary. We cannot stress enough: please do not be tempted to omit it!
For those who find dealing with fresh ginger a bit daunting, or for convenience, the availability of ginger paste has become increasingly common in most grocery stores and specialty markets (look for it in the produce section or among international ingredients). This paste offers a fantastic, time-saving alternative to fresh ginger, delivering similar robust flavor, and is especially recommended for marinades where it disperses beautifully.
Effortless Fresh Ginger Preparation: A Game-Changer Tip
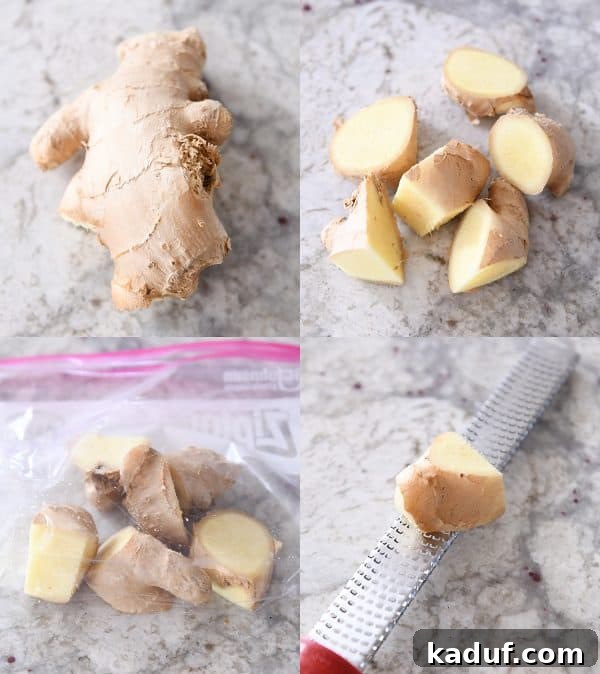
Many home cooks find fresh ginger a bit intimidating due to its knobby, irregular shape and the perceived hassle of peeling and mincing it. However, we have a simple trick that makes using fresh ginger incredibly easy and eliminates any hesitation:
- Purchase a Fresh Knob: Buy a good-sized piece of fresh ginger root from your grocery store.
- Chop and Freeze: Without peeling, simply cut the ginger into manageable 1-inch chunks. Place these pieces into a resealable freezer bag and pop them into your freezer. This preserves its freshness and makes it ready for use anytime you need it.
- Grate from Frozen: When your recipe calls for fresh ginger, take a frozen chunk directly from the freezer. Use the small holes of a box grater or a rasp grater/zester to grate the ginger. The frozen state makes it firm and incredibly easy to grate, and there’s absolutely no need to peel it! The peel is thin and tender, adding to the flavor without any noticeable texture.
This method is a true game-changer, ensuring you always have fresh ginger on hand for this sticky coconut chicken and countless other recipes. It’s convenient, efficient, and guarantees the best possible flavor without any of the usual fuss!
Crafting the Perfect Coconut Ginger Marinade
The foundation of our incredibly flavorful sticky coconut chicken lies in its wonderfully simple yet potent marinade. This blend not only infuses the chicken with rich, aromatic notes but also helps tenderize the meat, ensuring every bite is succulent. Here’s what you’ll need for this essential step:
- Canned Coconut Milk: You can opt for either light or regular (full-fat) coconut milk. Full-fat will lend a richer, creamier texture and more intense coconut flavor, while light coconut milk offers a lighter option without compromising too much on taste. Ensure it’s unsweetened.
- Fresh Ginger: As emphasized earlier, fresh ginger is non-negotiable for its bright, zesty, and slightly peppery kick. Use minced fresh ginger or the convenient ginger paste for ease.
- Salt and Pepper: Essential seasonings that enhance all the other flavors. We recommend coarse kosher salt and freshly ground black pepper for the best results, as they provide a more robust flavor.
- Red Pepper Flakes: This is where you control the heat! A quarter teaspoon will provide a very subtle warmth, while a full teaspoon will deliver a noticeable, yet balanced, spicy kick. Don’t skip them entirely, as even a tiny amount adds depth and complexity to the flavor profile, awakening the palate.
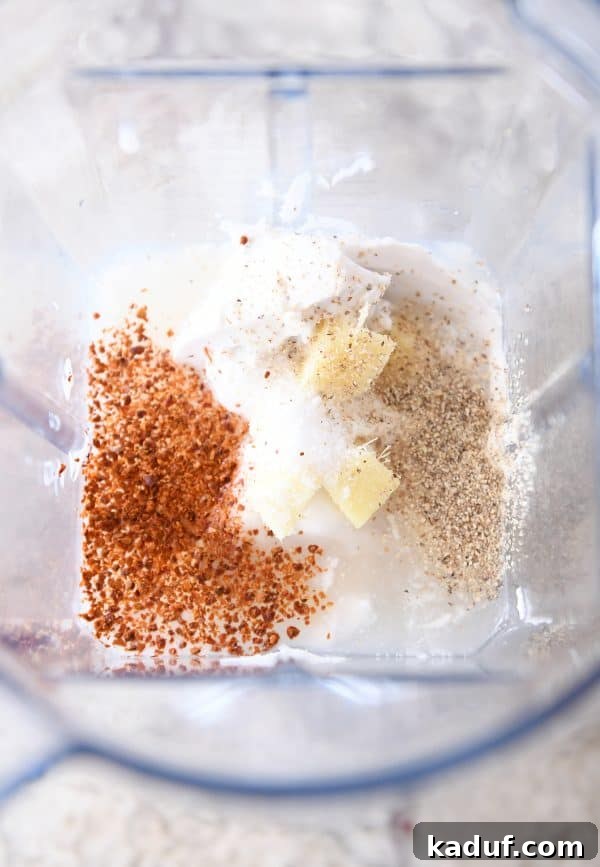
Combining these marinade ingredients is straightforward. If you’re using finely grated ginger or ginger paste, a simple whisk will blend everything perfectly, distributing the flavors evenly. However, for maximum convenience and if you’re using larger chunks of fresh ginger (especially when grating from frozen), tossing all the ingredients into a blender and giving them a quick whirl works beautifully. The blender ensures a perfectly smooth and homogenous marinade, allowing the ginger and spices to integrate seamlessly throughout.
Optimal Marination Time and Chicken Choices
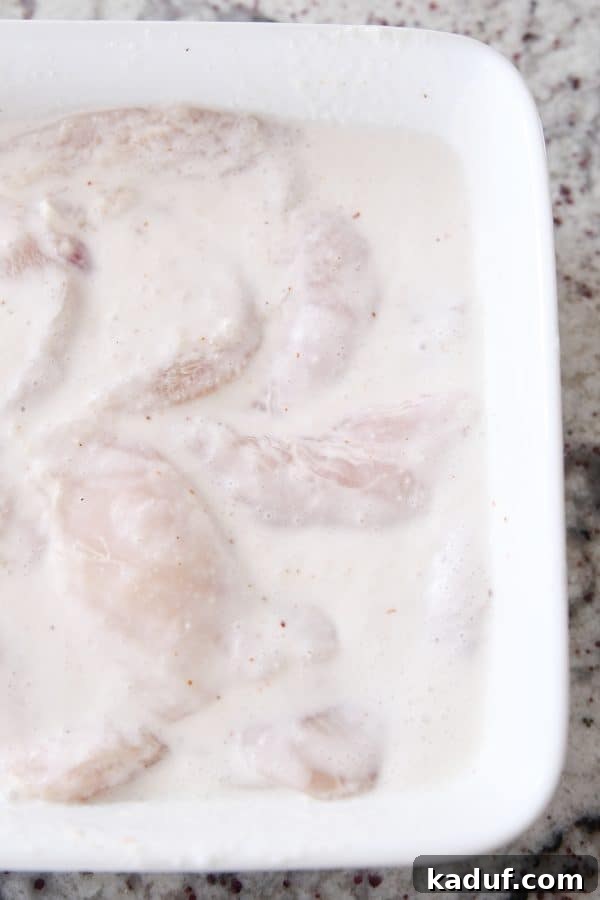
Once your marinade is ready, submerge your chosen chicken pieces, ensuring they are thoroughly coated on all sides. Cover the dish and refrigerate for at least one hour, allowing the flavors to meld and infuse into the meat. For deeper flavor, you can marinate the chicken for up to eight hours, which allows for maximum flavor absorption.
However, a crucial tip: avoid marinating the chicken for much longer than eight hours. Especially with leaner cuts like chicken breasts and tenders, prolonged exposure to acidic marinades can sometimes alter the texture of the meat, making it a bit too soft or mushy. Eight hours is the sweet spot for maximum flavor absorption without compromising the delightful texture of the chicken.
Regarding the choice of chicken, while I typically lean towards other cuts for various recipes, boneless, skinless chicken thighs are absolutely magnificent in this recipe. Their inherent richness and tendency to stay moist make them my preferred option for this dish, ensuring a tender and flavorful outcome. That said, chicken breasts or chicken tenders also yield excellent results and are fantastic alternatives. If you opt for chicken breasts and they are particularly thick, we highly recommend slicing them into thinner, more uniform pieces (about 1/2 to 3/4 inch thick). This not only ensures more even cooking but also significantly maximizes the surface area for that delicious marinade and glaze to adhere to, intensifying the flavor in every single bite.
The Irresistible Sweet and Spicy Glaze
While the chicken is marinating, you’ll prepare the star of the show: the sticky, sweet, and lightly spicy glaze. This is what truly brings the “sticky” magic to our coconut chicken, creating a delectable caramelized coating. Towards the end of your marinating time, combine all the glaze ingredients in a saucepan and bring them to a gentle simmer over medium heat.
A little secret for glaze lovers (and highly recommended): I almost always double the glaze recipe, or at the very least, make 1.5 times the amount. Why? Because this luscious glaze is utterly fantastic for drizzling extra over the cooked chicken and accompanying rice, ensuring every forkful is coated in that delightful stickiness. It elevates the entire meal and allows everyone to customize their glaze level. You’ll definitely thank me later!
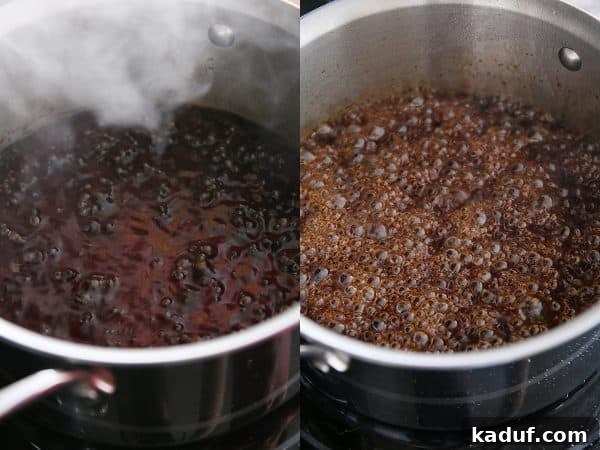
Cook the glaze over medium heat, allowing it to simmer vigorously until it reduces by approximately half. This reduction process concentrates the flavors, creating a deeper, more intense taste, and thickens the glaze to the perfect sticky consistency. It’s important to note that the glaze might appear relatively thin while it’s still hot on the stove. However, trust the process – it will continue to thicken considerably as it cools once removed from the heat. Be careful not to cook it too long, or you risk turning it into a very firm, unmanageable “vinegar taffy,” which is far from our desired luscious, pourable glaze.
Look for key visual cues to know when your glaze is perfectly reduced. The bubbles on the surface will intensify, becoming smaller, more numerous, and much closer together, almost clinging to each other, as subtly illustrated in the right-hand image below. Once you observe this change, it’s generally time to remove the saucepan from the heat, preventing over-reduction and preserving that perfect sticky, syrupy consistency.
Cooking Your Coconut Chicken: Grill, Bake, or Pan-Fry!
One of the many beauties of this sticky coconut chicken recipe is its adaptability to various cooking methods. While grilling is my personal ultimate preference for that irresistible smoky char and beautiful caramelization, it performs wonderfully whether cooked in a hot skillet on the stovetop or baked to perfection in the oven. Choose the method that best suits your equipment, weather, and desired outcome.
Grilling: For a truly authentic flavor and beautiful grill marks, preheat your grill to medium heat. The intense heat quickly cooks the chicken while sealing in juices, and the grill’s open flame adds a delightful smokiness that perfectly complements the rich coconut and zesty ginger flavors.
Baking: If you prefer a hands-off approach, are cooking for a crowd, or simply don’t have a grill, baking is an excellent option. Preheat your oven to 375°F (190°C). Line a baking sheet with foil and grease it lightly for easy cleanup. The oven provides even, consistent heat, ensuring the chicken cooks thoroughly and remains tender and moist.
Pan-Frying: For a quick weeknight meal when time is of the essence, a hot skillet on the stovetop works wonders. Use a cast-iron or heavy-bottomed skillet over medium-high heat. A quick sear creates a lovely golden-brown crust, and the chicken cooks relatively fast, locking in moisture and flavor.
Regardless of your chosen cooking method, the magic truly happens towards the end of the cooking time when you introduce that magnificent glaze. Begin brushing the savory-sweet glaze generously over the chicken pieces during the last few minutes of cooking. The heat will cause the syrupy glaze to thin out slightly and drip off, so for a thicker, more pronounced coating, repeat the brushing process frequently during these final moments. This layering technique builds up that desired sticky, caramelized finish that defines the dish and makes it so utterly irresistible.
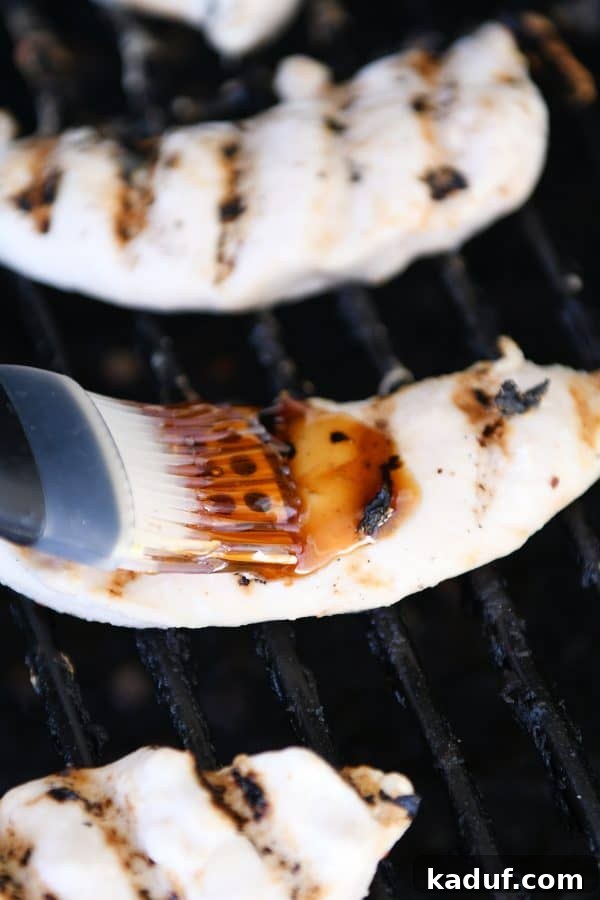
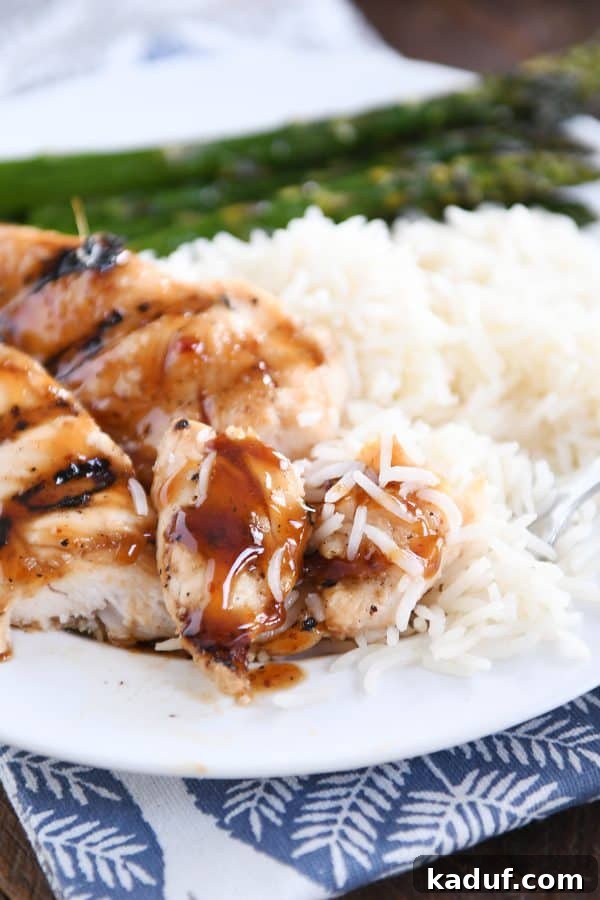
Any remaining glaze is a precious commodity! Don’t let it go to waste. Drizzle it generously over the finished chicken and any accompanying side dishes, especially if you’re serving it with fluffy rice, to add an extra layer of luscious flavor and that signature stickiness.
Enhance Your Meal with Homemade Coconut Rice
To truly complete the experience of this delightful sticky coconut chicken, consider serving it alongside a quick and flavorful homemade coconut rice. This simple addition elevates the entire meal, complementing the chicken with its subtly sweet and aromatic profile. I almost always use the remaining half of the canned coconut milk from the marinade for this modified coconut rice recipe, making it both economical and extra flavorful.
The process is incredibly simple: when preparing your rice, replace a portion of the water or broth with the leftover coconut milk. For instance, if you’re cooking 1 cup of long-grain basmati or jasmine rice, you’d typically use 2 cups of liquid. You can use 1 cup of broth or water combined with the remaining 1 cup of coconut milk, along with a pinch of salt. This creates a wonderfully fragrant and slightly creamy rice that perfectly soaks up all the extra sticky glaze. It’s a game-changer and makes the meal even more amazing! You’ll find more thorough details on preparing perfect coconut rice in the recipe notes below.
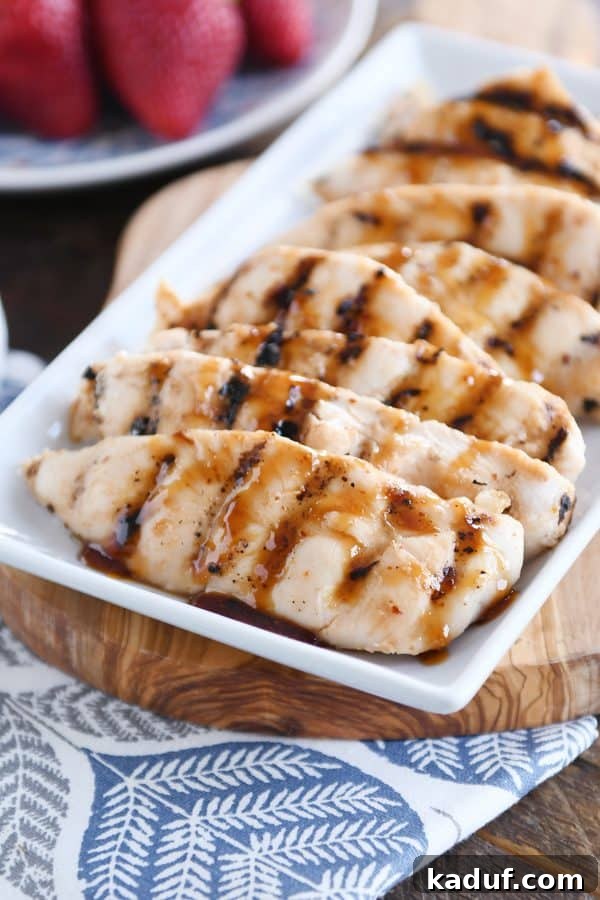
If you haven’t yet had the pleasure of trying this incredible sticky coconut chicken recipe, now is absolutely the time! Its enduring popularity and rave reviews from countless satisfied cooks speak volumes about its undeniable appeal and deliciousness.
Over the years, countless home cooks have fallen head over heels in love with this dish, sharing their heartwarming experiences:
- Keri: “This is my absolute go-to grilled chicken dish. I’ve prepared it so many times over the years, and it never fails to impress everyone. We especially love it served with a side of grilled vegetables!”
- Erica: “We just had this for dinner tonight, and I can honestly say it might be the best thing I’ve ever eaten! Absolutely yum!”
- Rebecca: “Thank you so much for sharing this recipe! My husband declared it the best chicken he has ever had, and my 3-year-old, who usually just picks at her food, licked her plate clean and even asked for more. This is definitely going to be a regular meal in our household!”
We genuinely hope you’ll love it just as much as we and so many others do! It truly is, without exaggeration, one of my all-time favorite meals. Prepare to be amazed by the delightful flavors and simple preparation of this iconic dish.
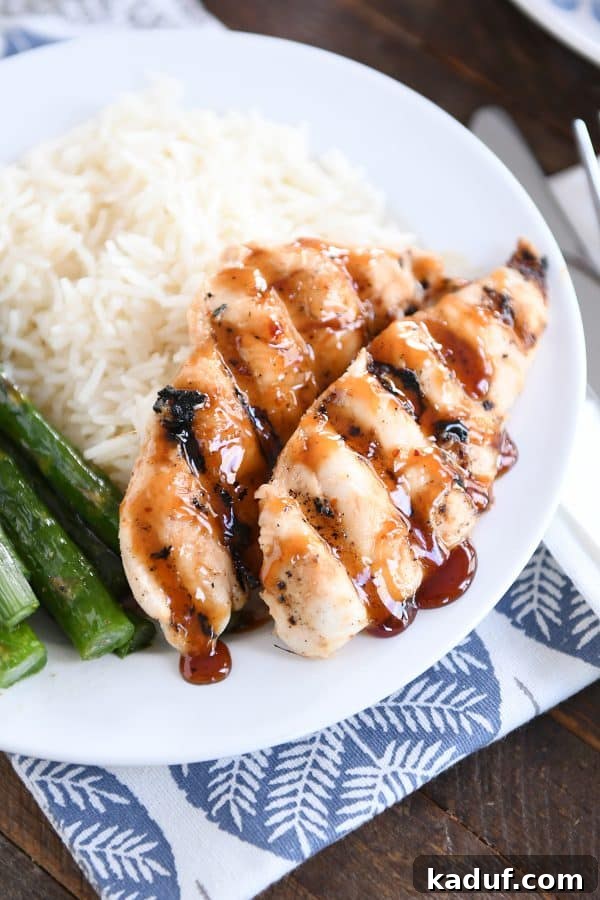
What To Serve With Sticky Coconut Chicken:
To create a truly complete and unforgettable meal, pair your irresistible sticky coconut chicken with these fantastic side dishes:
- Rice: A classic pairing that perfectly complements the rich flavors of the chicken.
- Or, even better, homemade Coconut Rice for an added layer of aromatic sweetness and tropical flair.
- Grilled Pineapple or Fresh Tropical Fruit: The natural sweetness and slight tartness of pineapple, especially when grilled to caramelize its sugars, cuts through the richness of the chicken beautifully. Other fresh tropical fruits like ripe mango or papaya would also be delightful.
- 5-Minute Skillet Broccoli: A quick and vibrant green vegetable side that adds a fresh contrast, texture, and essential nutrients to your plate.
- Simple Green Salad: A light, crisp salad with a tangy vinaigrette dressing can offer a refreshing counterpoint to the rich, sweet, and savory glaze.
- Steamed Asparagus or Green Beans: Lightly steamed vegetables maintain their crispness and natural flavors, providing a healthy and colorful addition that doesn’t overpower the main dish.
Looking for more culinary inspiration? Here are some other cherished recipes from our archives that you might enjoy:
- One Year Ago: Mel’s Buddha Bowls {With Super Tasty Peanut Sauce}
- Two Years Ago: Mandarin Spinach Bowtie Pasta Salad with Teriyaki Dressing
- Three Years Ago: The Best Ground Beef or Turkey Tacos {20-Minute Meal}
- Four Years Ago: {Pressure Cooker or Stovetop} Chicken Coconut Curry
- Five Years Ago: Grilled Honey Mustard Rosemary Chicken
- Six Years Ago: Grilled Asian Chicken with Peanut Noodles and Cucumber Sambal
- Seven Years Ago: Tex-Mex Enchilada Casserole
- Eight Years Ago: Brown Sugar Crackle Cookies
Sticky Coconut Chicken
6
servings
8 hrs 10 mins
15 mins
8 hrs 25 mins
Pin
Ingredients
-
6-8
boneless skinless chicken thighs, breasts or tenders, about 1 1/2 to 2 pounds of high-quality chicken; slice thicker breasts for even cooking
For the Marinade:
-
1 cup
canned coconut milk, either light or full-fat for richer flavor (unsweetened) -
1 tablespoon
minced fresh ginger or quality ginger paste (see note below for preparation tips) -
½ teaspoon
salt, preferably coarse kosher salt for optimal flavor enhancement -
¼ teaspoon
black pepper, freshly coarsely ground is best for aromatic depth -
¼ to 1 teaspoon
red pepper flakes (adjust to your preferred heat level; see note for guidance)
For the Sweet & Sticky Glaze (consider doubling; see note):
-
¾ cup
rice vinegar (mild and slightly sweet, crucial for flavor balance) -
½ cup
granulated sugar -
¼ cup
soy sauce (low sodium recommended to control saltiness) -
¼ to 1 teaspoon
red pepper flakes (to taste, for a hint of heat that complements the sweetness)
Instructions
-
Prepare the Marinade: In a medium bowl, whisk together all marinade ingredients until well combined. For a smoother marinade and to ensure ginger is fully incorporated, you can also blend all ingredients in a blender until smooth. This ensures an even flavor distribution.
-
Marinate the Chicken: Place the chicken pieces in a shallow dish or a large resealable bag. Pour the prepared marinade over the chicken, ensuring each piece is thoroughly coated. Cover the dish (or seal the bag) and refrigerate for a minimum of one hour, or ideally for up to eight hours, allowing the flavors to deeply penetrate the meat. Avoid marinating for longer than eight hours, especially with chicken breasts or tenders, as the texture can become overly soft or mushy.
-
Make the Glaze: Towards the end of the chicken’s marinating time, combine the rice vinegar, granulated sugar, soy sauce, and red pepper flakes in a small saucepan. Bring the mixture to a vigorous boil over medium heat, then reduce the heat to a steady simmer. Continue to simmer, stirring occasionally, until the liquid has reduced by about half and begins to thicken slightly. This usually takes 10-15 minutes. Remember that the glaze will thicken considerably more as it cools off the heat. Do not overcook, or it may turn into a stiff, candy-like consistency.
-
Cook the Chicken:
- Grilling: Preheat your grill to medium heat. Place the marinated chicken directly on the grates (discard excess marinade) and grill for 4-5 minutes per side, or until cooked through and an internal temperature of 165°F (74°C) is reached. Cooking time will vary based on chicken thickness and type (thighs generally take longer than breasts/tenders).
- Baking: Preheat oven to 375°F (190°C). Arrange the chicken on a greased, foil-lined baking pan (discard excess marinade). Bake for 15-25 minutes, flipping halfway through, until cooked through and golden, ensuring an internal temperature of 165°F (74°C).
- Pan-Frying: Heat a lightly oiled skillet over medium-high heat. Cook chicken (discard excess marinade) for 4-7 minutes per side, depending on thickness, until golden brown and cooked through to 165°F (74°C).
-
Apply the Glaze: During the last few minutes of grilling, baking, or pan-frying, generously brush the warm, reduced glaze over all sides of the chicken. For a thicker, stickier coating, repeat this brushing process several times until a desirable glaze layer forms and caramelizes slightly.
-
Serve: Remove the chicken from the heat and let it rest for a few minutes to allow the juices to redistribute. Serve hot, optionally drizzled with any leftover glaze, and paired with fragrant coconut rice and your favorite side vegetables. Enjoy this delightful sticky coconut chicken!
Notes
Ginger: Both fresh minced ginger and high-quality ginger paste work perfectly in this recipe. For fresh ginger, try our freezer trick: buy a knob, chop into 1-inch pieces (no need to peel!), store in a resealable freezer bag, and simply grate from frozen on a microplane or box grater when needed. This method makes using fresh ginger incredibly easy and efficient.
Red Pepper Flakes: The amount of red pepper flakes is entirely up to your heat preference. A full teaspoon will provide a noticeable spicy kick, offering a delightful warmth. For a more family-friendly subtle warmth, use between a quarter and half teaspoon. Do not omit them entirely, as even a small amount adds essential depth and a pleasant zing to the flavor profile.
Glaze: We highly recommend doubling the glaze recipe, or at least making 1.5 times the amount. This ensures you have plenty for generously brushing onto the chicken during cooking and for drizzling over your finished dish and rice at the table. A single batch is sufficient for just glazing, but extra is always a good idea for those who love extra stickiness and flavor!
Vinegar: Rice vinegar’s mild, slightly sweet acidity is ideal for this dish, providing a perfect balance to the sweet and spicy elements. While you could experiment, we strongly recommend sticking with rice vinegar for the best and most authentic flavor profile. Other vinegars may alter the delicate balance.
Nutrition Facts: Please note that the nutrition facts provided for this recipe are calculated assuming the entire marinade is consumed, even though a significant portion of it is typically discarded during cooking. Therefore, the actual nutritional intake per serving may be lower than stated. Use these values as a general dietary guide.
Mel
Main Course
American, Asian-Inspired
Grilled, Baked, Pan-Fried
Carbohydrates: 20g,
Protein: 24g,
Fat: 14g,
Cholesterol: 107mg,
Sodium: 844mg,
Fiber: 1g,
Sugar: 18g
Recommended Products / Equipment
Recipe Source: Expertly adapted from Leigh Anne’s original recipe with my subtle modifications and enhancements for home cooks.
Originally published June 2008; comprehensively updated April 2020 with new photos, expanded recipe notes, and enhanced instructions for clarity and ease of use, ensuring an even better cooking experience.
Explore More Delicious Chicken Recipes: