
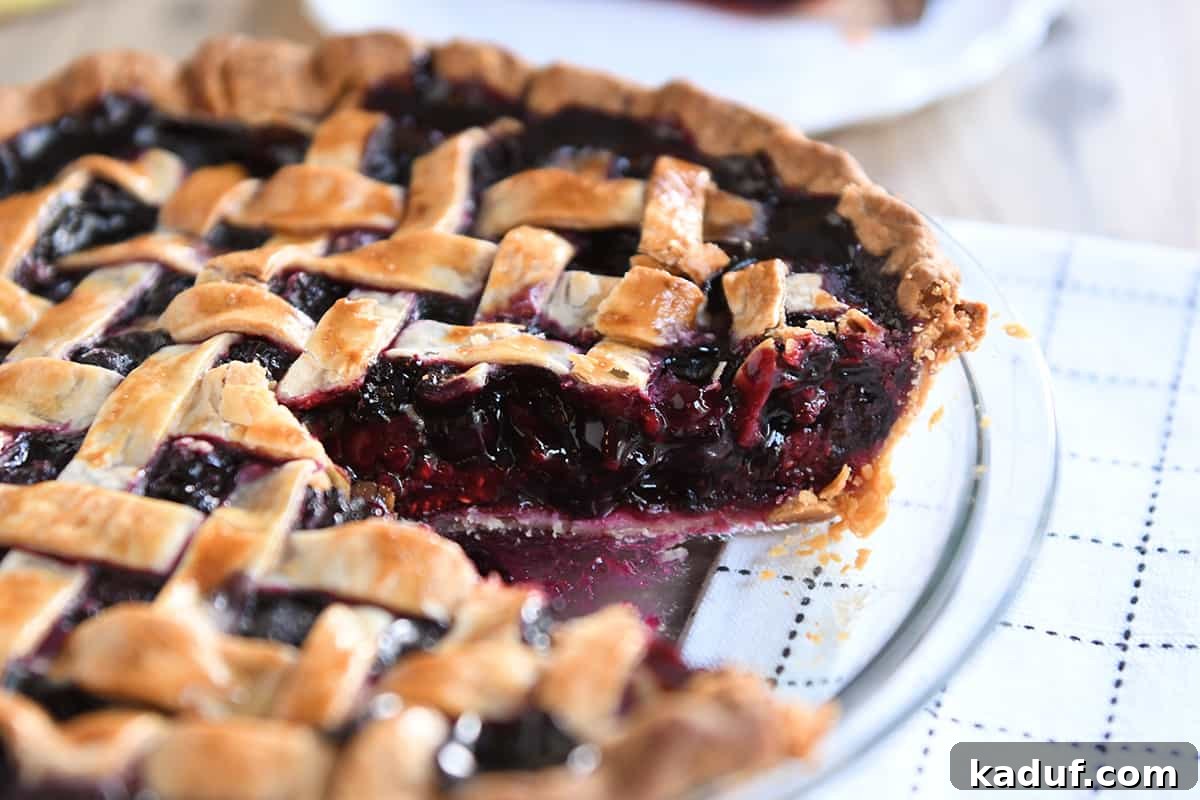
Welcome to the ultimate guide for creating a show-stopping Triple Berry Pie! This recipe promises an absolutely incredible dessert, featuring a perfectly flaky pie crust generously filled with a harmonious blend of sweet and tart berries. It’s more than just a pie; it’s an experience—a vibrant burst of summer flavor captured in every irresistible slice.
Many dessert spreads are dominated by rich, heavy options. This triple berry pie stands out as a refreshing counterpoint, offering a delightful lightness that cleanses the palate while still satisfying your sweet cravings. Its natural tang from the berries perfectly balances the sweetness, making it a beloved choice for any occasion, from casual family dinners to grand holiday feasts.
One of the best features of this recipe is its incredible versatility. Whether you have an abundance of fresh, ripe berries from your garden or farmer’s market, or you’re reaching for convenient frozen berries during the off-season, this pie adapts beautifully. You can enjoy the taste of summer sunshine year-round, proving that a truly magnificent dessert doesn’t have to be complicated.
Crafting the Perfect Triple Berry Pie Filling
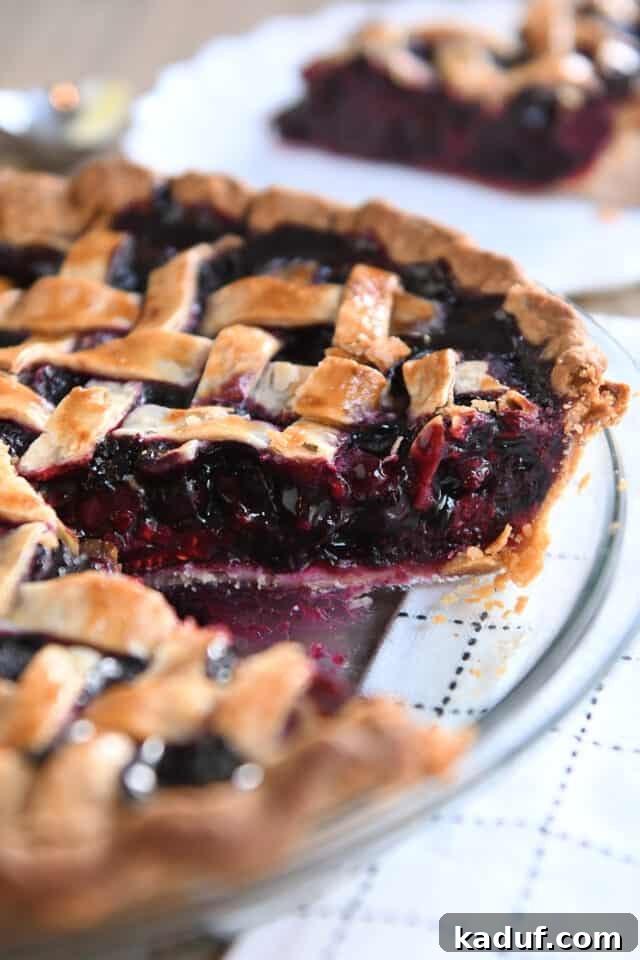
The heart of any exceptional pie lies in its filling. For many home bakers, the most challenging aspect of homemade pie is achieving a thick, luscious filling that holds its shape beautifully when sliced, rather than turning into a soupy mess. This recipe for triple berry pie filling takes all the guesswork out of it, delivering a consistently delightful texture without the need for pre-cooking the fruit.
Our method ensures the filling thickens magnificently right in the oven as it bakes, infusing the entire pie with incredible aroma and flavor. The secret lies in a careful balance of ingredients that work together to create that coveted syrupy consistency without compromising the fresh taste of the berries.
Here’s what you’ll need to create this effortlessly thickened and flavorful filling for your triple berry pie:
- 5 1/2 cups fresh or frozen mixed berries. For optimal flavor and color, we highly recommend a classic triple berry blend that includes raspberries, blackberries, and blueberries. This combination offers a perfect balance of tartness and sweetness.
- 1 cup granulated sugar. This provides the necessary sweetness to complement the natural tartness of the berries.
- 1/4 cup cornstarch*. This is our thickening agent, crucial for achieving a firm, sliceable filling.
- 1 tablespoon lemon juice. A splash of lemon juice brightens the berry flavors and adds a hint of acidity that prevents the pie from tasting overly sweet.
- A pinch of salt (not listed in initial text but often used for flavor balance, adding here for completeness).
*Understanding cornstarch and its role is key to a perfect pie. With 1/4 cup of cornstarch, your pie filling will thicken flawlessly, provided the pie is allowed to cool completely. If you anticipate serving your pie slightly warm – a common preference for many pie enthusiasts – we recommend increasing the cornstarch to 5 tablespoons. However, remember that extending the baking time is crucial when using more cornstarch; under-baked filling will not only be runny but can also have an unpleasant starchy taste. Patience during baking is paramount to avoid disappointment.
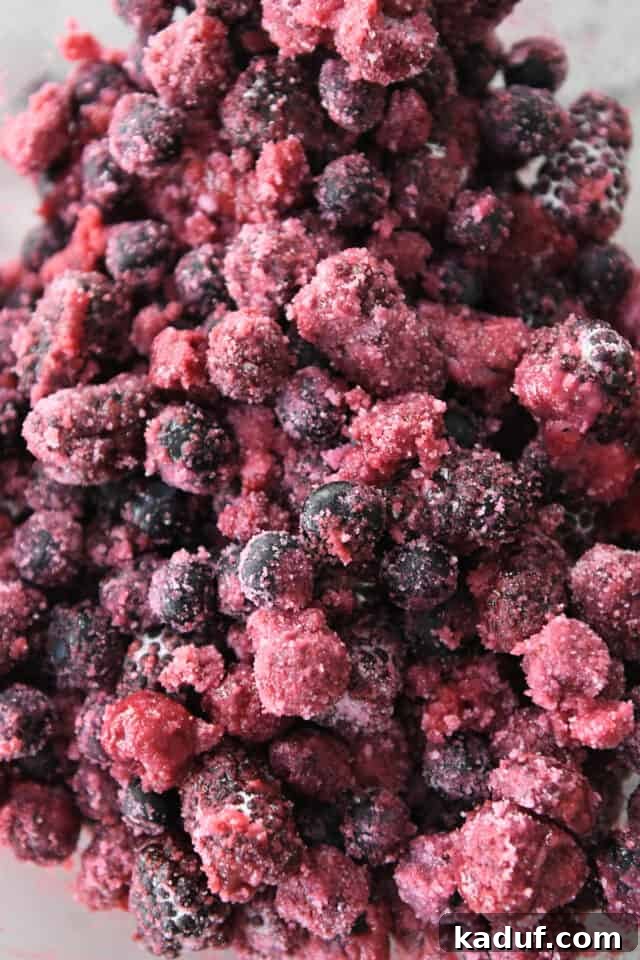
Preparing the filling is remarkably straightforward. In a large bowl, combine your berries. If using frozen berries, let them sit at room temperature for about 5-10 minutes. This slight thaw helps the sugar and cornstarch adhere better, ensuring even distribution and proper thickening during baking. Gently fold in the granulated sugar, cornstarch, lemon juice, and a pinch of salt until the berries are thoroughly coated and there are no visible dry pockets of ingredients. This gentle mixing prevents the delicate berries from being crushed, maintaining their individual shapes and juices. Once mixed, the filling is ready to be transferred to your prepared pie crust.
Mastering the Art of a Lattice Top for Your Berry Pie
A beautifully woven lattice top isn’t just a decorative element; it’s a signature touch that elevates the visual appeal of any pie, especially this vibrant triple berry creation. While you always have the option of a fully covered top crust (just be sure to cut a few vents to allow steam to escape!), the classic lattice allows glimpses of the gorgeous berry filling underneath and provides extra textural contrast.
Crafting a perfect lattice top might seem intimidating at first, but with a few simple steps and a key tip, you’ll be weaving like a pro in no time. It’s a rewarding process that adds a professional and homemade charm to your dessert.
For a stunning lattice top crust, follow these instructions:
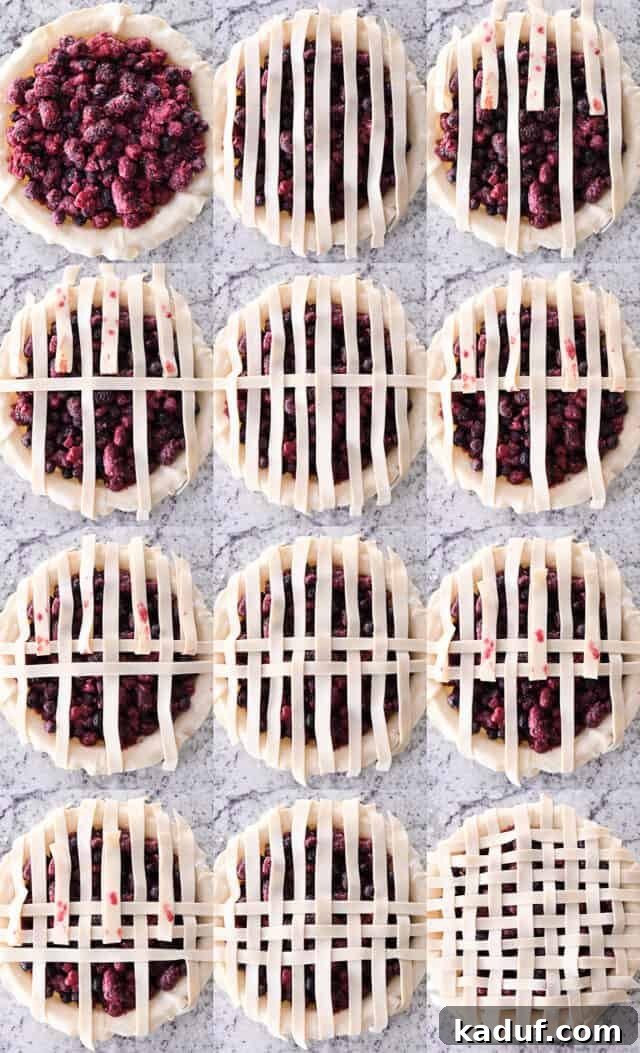
- Begin by rolling out your second pie dough disc to a uniform thickness. Using a sharp knife or a pastry wheel, cut the dough into strips. Aim for strips that are approximately 1/4- to 1/2-inch wide. Consistency in width will result in a more even and attractive lattice.
- Carefully lay half of your dough strips vertically across the filled pie, ensuring they are parallel to each other. Leave an even amount of space between each strip. These will form the foundation of your lattice pattern.
- Now, gently fold back every other vertical strip (e.g., the first, third, fifth, etc.) about halfway. Place one of your remaining dough strips horizontally, perpendicular to the folded-back strips, close to the edge.
- Carefully fold the previously lifted vertical strips back down over the newly placed horizontal strip. You should now see the start of your woven pattern.
- Next, lift up the alternate set of vertical strips (e.g., the second, fourth, sixth, etc.) – the ones that are *underneath* the horizontal strip you just laid down. Place another horizontal strip perpendicular to them, parallel to the first horizontal strip, leaving an even space between them.
- Fold these lifted vertical strips back down. You will notice the woven pattern beginning to emerge clearly.
- Continue repeating this alternating pattern of lifting vertical strips and placing horizontal strips until your entire pie is covered with a beautiful lattice design. Take your time to ensure the strips are evenly spaced and snugly woven for the best aesthetic.
Lattice Crust Pro Tip: The most crucial piece of advice for creating a flawless lattice top is to consistently lift and fold up the strips that are underneath the perpendicular strip you are about to lay down. This ensures a true woven effect, rather than just laying strips on top of each other.
Once your lattice is complete, it’s time to finish the edges. Trim the excess dough from both the lattice strips and the bottom pie crust, leaving a neat overhang of about 1/2-inch. Then, carefully fold the bottom crust up and over the ends of the lattice strips, pressing gently but firmly all around the perimeter of the pie. This creates a secure seal and a beautiful base for your fluted edge.
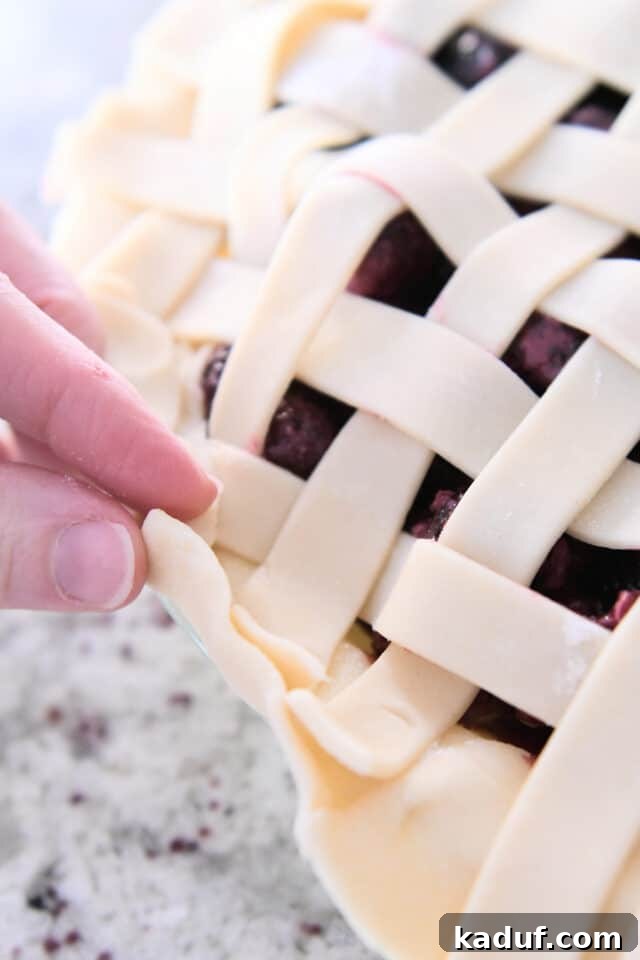
With the edges folded, you can now flute them using your fingers or a fork to create a decorative crimped pattern. This not only seals the pie completely but also adds another layer of visual appeal. Step back, take a moment to admire your gorgeous, unbaked masterpiece. The intricate lattice work over the vibrant berry filling is truly a sight to behold! 😍
For an extra touch, you can brush the top crust with an egg wash (a whisked egg with a tiny splash of water or milk). This simple step will result in a shinier, richer golden-brown crust as it bakes, making your triple berry pie even more enticing. This final flourish prepares your pie for its journey into the oven, where it will transform into a truly delectable dessert.
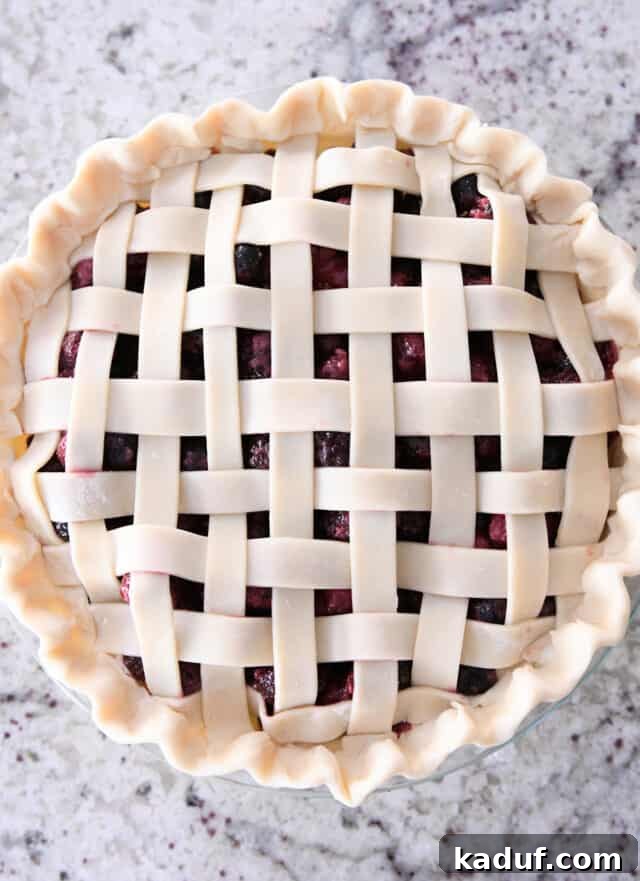
Baking Your Triple Berry Pie to Golden Perfection: Patience is a Virtue
While the ingredients and preparation are vital, the baking process is arguably the most critical stage for any pie, especially this triple berry delight. We cannot emphasize this strongly enough: **it is absolutely essential to bake this triple berry pie for a sufficient amount of time!** Many home bakers tend to pull their pies from the oven too soon, leading to a runny filling and a less-than-perfect result. For this pie, truly plan on baking it longer than you might initially think necessary.
Begin by preheating your oven to 375 degrees F (190 degrees C). Place your pie on a foil-lined baking sheet to catch any potential drips and ensure easy cleanup. After the initial 45-60 minutes of baking, it’s time to check on your pie. If you notice the edges of the crust or the delicate lattice top beginning to brown too quickly, it’s a good sign to protect them. You can gently tent the pie with aluminum foil, or use a reusable pie crust shield, to prevent over-browning while allowing the filling to continue cooking thoroughly.
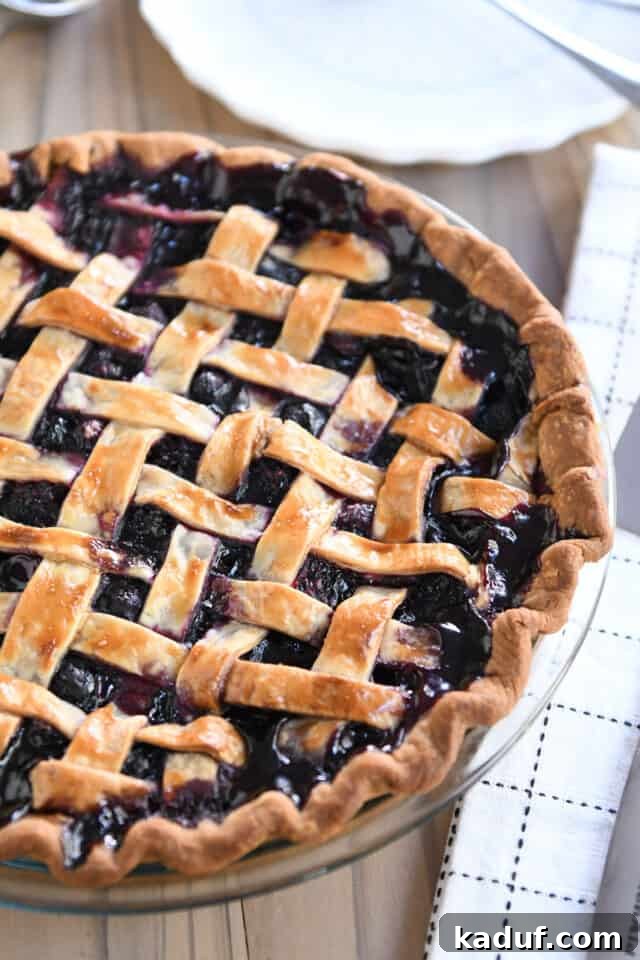
In most ovens, a pie of this size and type will require a significant baking duration. In our test kitchen, **this pie typically needs between 75-80 minutes to bake fully**. The goal is for the filling to reach a thick, bubbling, and syrupy consistency. A key indicator of readiness is observing the bubbles of filling visible through the lattice top: they should appear thick and slow-moving, not thin and watery. If the filling is bubbling but still seems thin and runny, it simply needs more time in the oven. Resist the urge to remove it prematurely!
Oven temperatures can vary significantly, so monitor your pie carefully and check its progress often. Ideally, peer through your oven window to minimize heat loss that occurs with every open door check. A properly baked pie will have a deeply golden-brown crust, and the filling will be visibly thickened and bubbling vigorously. This extended baking time is what transforms the cornstarch into a stable, luscious gel, ensuring your triple berry pie slices hold their shape beautifully.
The Art of Cooling: Why Patience Pays Off for a Perfect Slice
The debate between warm pie and cooled pie is a classic one among dessert enthusiasts. I completely understand the allure of a warm, comforting slice of berry or apple pie, perhaps topped with a scoop of melting vanilla ice cream. It’s a truly delightful experience that many pie lovers cherish.
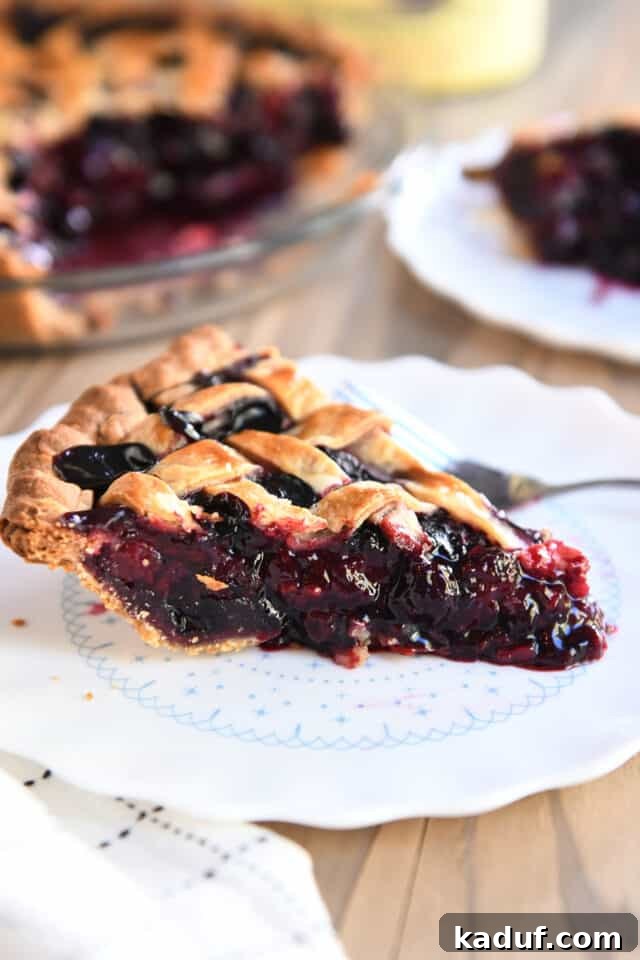
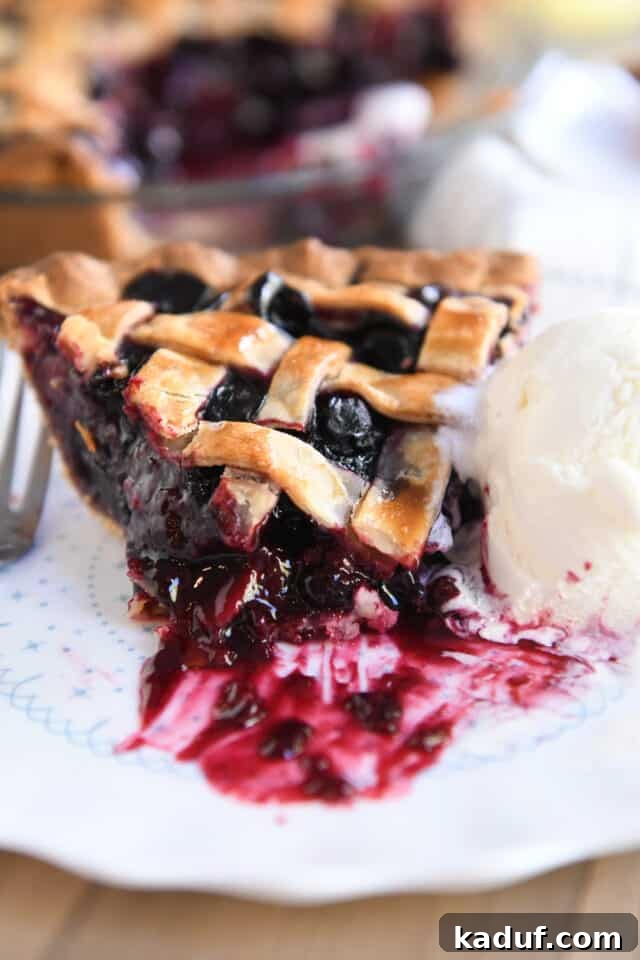
However, when it comes to this particular triple berry pie, exercising patience and allowing it to cool completely yields significant benefits. The filling, which contains cornstarch, needs ample time to properly set and reach its ideal, thick consistency. Cutting into the pie while it’s still warm can disrupt this setting process, often resulting in a runny filling that spills out rather than holding its beautiful shape.
For the most impeccably set filling and perfectly sliceable pieces, let your freshly baked pie cool for at least 2-3 hours, or even longer, until it reaches room temperature. We promise, the wait is worth it! Once completely cooled, if you still crave that warm pie vibe, simply reheat individual slices for a few seconds in the microwave. This allows you to enjoy the best of both worlds: a perfectly set filling and a touch of warmth.
If you absolutely cannot resist serving the pie while it’s still slightly warm, please refer back to the recipe notes regarding the cornstarch amount. Increasing the cornstarch slightly will help the filling to set up better even when warm, though complete cooling is still recommended for the firmest results.
It’s worth reiterating a common troubleshooting point: if your pie filling is runny when you serve it, the most probable causes are either insufficient baking time, not allowing enough time for it to cool and set, or needing a slightly higher amount of cornstarch in the filling. Each of these factors plays a crucial role in achieving that sought-after, thick, and delicious berry filling.
The Epitome of Homemade Pie Perfection
This triple berry pie truly embodies perfection in every sense. It’s not just a dessert; it’s a celebration of fresh, vibrant flavors encased in a buttery, flaky crust. One of its most appealing aspects is its remarkable simplicity – there’s no need for the extra steps of pre-baking pie crusts or pre-cooking the fruit filling. This streamlined approach makes it accessible for bakers of all skill levels, allowing you to create a stunning homemade dessert without unnecessary hassle.
Beyond its ease of preparation, this pie is an absolute stunner, both visually and gastronomically. The golden lattice top peeking over the jewel-toned berry filling is a feast for the eyes, promising the deliciousness within. And the taste? It’s an exquisite balance of sweet and tart, with each berry contributing its unique essence to a harmonious symphony of flavors that will leave everyone craving another slice.
For those passionate about foraging, a personal touch for an extra “wow” factor involves adding a small handful of precious huckleberries to the mixed berries. Their intense flavor and unique sweetness elevate the pie to an even more extraordinary level. Whether you stick to the classic triple berry blend or experiment with seasonal additions, this pie offers endless possibilities for customization.
We hope this detailed guide empowers you to bake a magnificent triple berry pie that will impress your family and friends. Happy pie baking! We are confident you will adore this recipe. 💗
One Year Ago: Easy No-Knead Peasant Bread
Two Years Ago: A Lazy Girl’s Guide to Sourdough
Three Years Ago: Perfect Homemade Caramel Apples
Four Years Ago: Perfect Small Batch Cinnamon Rolls
Five Years Ago: Easy Homemade French Bread
Six Years Ago: Harvest Pasta Sauce {Trader Joe’s Copycat}
Seven Years Ago: Peanut Butter Cup Cheesecake with Chocolate Cookie Crust
Eight Years Ago: Easy Homemade Egg Noodles
Nine Years Ago: Black Bean and Butternut Enchilada Skillet
Ten Years Ago: Peanut Butter Oatmeal Chocolate Chip Cookies

Triple Berry Pie
Pin
Rate
Save
Ingredients
- 2 unbaked pie crusts (see note)
- 5 ½ cups (780 g) fresh or frozen triple berry blend (raspberries, blackberries, blueberries)
- 1 cup (212 g) granulated sugar
- 4 tablespoons (37 g) cornstarch (see note!)
- 1 tablespoon lemon juice
- Pinch of salt
- 1 large egg, for egg wash (optional)
Instructions
-
Preheat oven to 375 degrees F (190 degrees C).
-
Roll out the bottom pie crust and carefully place it into your pie pan, gently easing it into the edges without stretching. Trim the edge, leaving a 1/2-inch overhang.
-
In a large bowl, add the mixed berries. If using frozen berries, let them sit at room temperature for 5-10 minutes to partially thaw; this helps the sugar and cornstarch bind better.
-
Add the granulated sugar, cornstarch, lemon juice, and a pinch of salt to the berries. Stir gently to avoid crushing the berries, ensuring all ingredients are evenly coated with no dry pockets.
-
Scrape the prepared berry filling into the pie plate with the bottom crust and spread it evenly.
-
Roll out the second pie crust and cut it into strips for the lattice top. Lay half the strips vertically across the pie, spaced apart. Fold up every other vertical strip, then place a horizontal strip perpendicular to them. Fold the vertical strips back down. Repeat this process, lifting the alternate vertical strips each time, until the lattice top is complete (refer to the images in the post for visual guidance).
-
Trim the lattice strips and bottom crust evenly, leaving about a 1/2-inch overhang. Fold and press the bottom crust over the top of the lattice strips around the edge of the pie. Flute the edge decoratively. For a golden crust, you may brush with an egg wash (optional).
-
Place the pie on a foil-lined baking sheet and bake for 75-90 minutes, or until the filling is visibly bubbling thickly throughout. Check the pie around 60-65 minutes; if the crust is browning too quickly, loosely tent the top with foil. It is crucial to bake the pie long enough for the filling to thicken properly and avoid a starchy taste. The bubbles of filling seen under the lattice should be thick and syrupy, not thin.
-
Remove the pie from the oven and allow it to cool for at least 2-3 hours on a wire rack. For the firmest, most perfectly set filling, let the pie cool completely to room temperature. (Individual slices can be gently reheated in the microwave for a few seconds if desired.)
Notes
Cornstarch for Thickening: My preferred amount for this recipe is 4 tablespoons (1/4 cup) of cornstarch. This ensures the filling sets up perfectly when the pie is allowed to cool completely. If you plan to serve the pie while it’s still slightly warm, I recommend increasing the cornstarch to 5 tablespoons. However, please remember that using more cornstarch requires extended baking time to prevent a starchy, uncooked taste and to ensure the filling properly thickens. As an alternative, 1/3 cup of tapioca flour can be substituted for the cornstarch.
Troubleshooting Runny Filling: If you find your pie filling is runny when you serve it, there are a few common culprits. It’s most likely due to the pie needing more time to bake in the oven, insufficient cooling time (the filling needs to set as it cools), or requiring a slightly increased amount of cornstarch in the recipe. Adjusting these factors will help achieve that perfectly thick and luscious berry filling.