

Crafting Your Own Destiny: The Ultimate Guide to Homemade Fortune Cookies
Imagine the delight of biting into a crisp, sweet cookie only to discover a message crafted just for you. These homemade fortune cookies are more than just a dessert; they are an experience, and the most enchanting part is their complete customizability. Forget generic sayings; with this recipe, you can personalize every single fortune with whatever message your heart desires.
Homemade fortune cookies might sound like a project reserved for master bakers, but I’m here to tell you that’s far from the truth. If you have even a spark of ambition in the kitchen, then you are absolutely capable of making these!
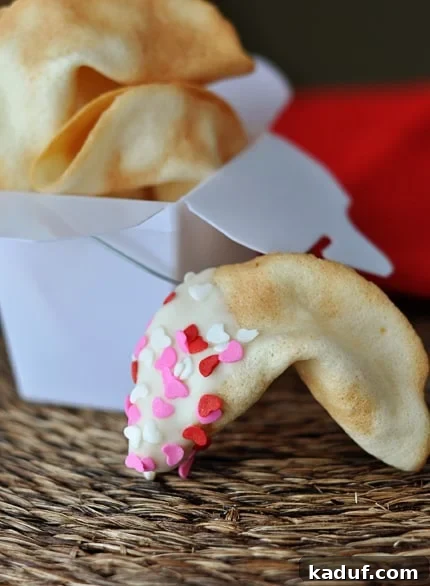
Demystifying the Art of Fortune Cookie Making
My journey into homemade fortune cookies involved a dedicated morning of experimentation. I rigorously tested various baking methods, navigating the often-temperamental nature of these delicate, sticky cookies. Trust me, I encountered and conquered all the frustrations that come with baking methods that simply don’t work, so you don’t have to!
Essentially, I’ve taken the guesswork and challenge out of this delightful baking project for you. This comprehensive guide, complete with step-by-step photos, ensures your success. There’s truly no excuse not to embark on this fun and rewarding culinary adventure!
The Joy of Personalized Messages and Festive Decorations
I find these little treats utterly adorable, and their best feature is undoubtedly the ability to personalize the fortunes. You can insert any message your imagination conjures, making them perfect for any occasion or simply for spreading a little joy.

For a recent Valentine’s Day, I filled mine with a collection of slapstick jokes I found online, knowing my boys would get a kick out of them. However, your creative options are endless. Consider crafting romantic messages for an anniversary, inspirational quotes for a friend, witty inside jokes for a family gathering, or even gender reveal clues for a baby shower. The possibilities are only limited by your imagination!
I once playfully stuffed a cookie with the fortune, “You’ll lose all your baby weight in a matter of seconds!” but then made the cardinal mistake of forgetting to grab it for myself. Instead, my four-year-old opened it, leading to a hilariously confused expression. I was left with a less exciting fortune: “What do squirrels give for Valentine’s Day? Forget-me-nuts.” A lesson learned in fortune cookie distribution!
Frequently Asked Questions for Homemade Fortune Cookies
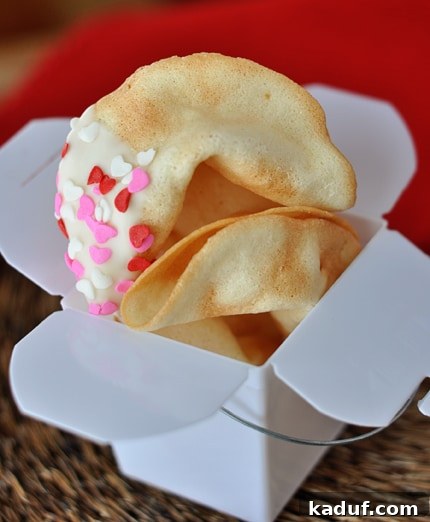
I used melting wafers, which are similar to almond bark but come in various colors. These melt smoothly and set quickly, creating a beautiful and delicious coating.
For optimal crispness and flavor, homemade fortune cookies are best enjoyed within 1-2 days when stored at room temperature in an airtight container.
The most effective storage method is to arrange them in a single layer within an airtight container. Because the batter is a simple concoction without butter or significant fat, the cookies can be quite delicate. Storing them in a single layer prevents them from knocking against each other and breaking, preserving their perfect shape.

Homemade Fortune Cookies
24-30 cookies
1 hr 15 mins
5 mins
1 hr 20 mins
Pin
Rate
Ingredients
Cookies:
- ½ cup (71 g) all-purpose flour
- ½ cup (106 g) sugar
- 1 teaspoon vanilla extract
- 2 large egg whites
Optional Extras:
- Fortunes for stuffing: I recommend printing them at 10pt font. For Valentine’s Day, I used red text for jokes.
- Candy melts for dipping, in various colors to match your theme.
- Sprinkles, for a festive touch.
Instructions
-
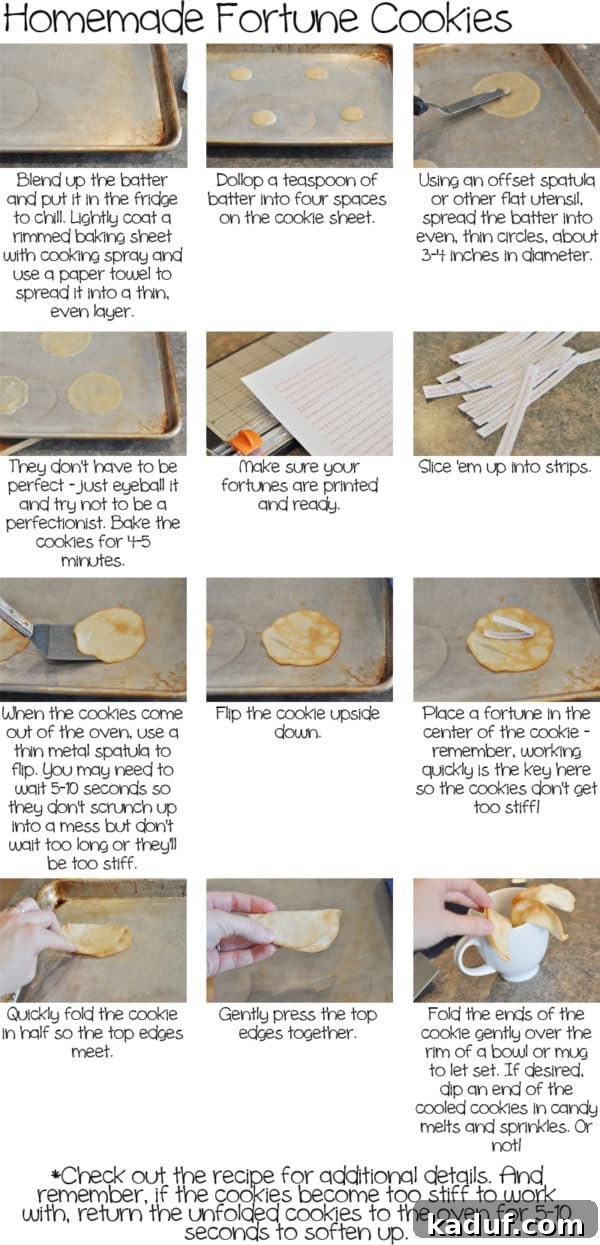
Combine all the cookie ingredients (flour, sugar, vanilla, egg whites) in a food processor. Blend until the mixture is completely smooth and uniform. Transfer the batter to a liquid measuring cup or another suitable container and refrigerate for at least one hour. Chilling the batter helps it to thicken slightly, making it easier to spread thinly and evenly, which is crucial for crisp fortune cookies.
-
When you are ready to bake, preheat your oven to 400 degrees F (200 degrees C). This high temperature is key to achieving that signature fortune cookie crispness.
-
Lightly coat a rimmed baking sheet (an 11×17-inch size works well) with cooking spray. Then, use a paper towel to gently rub the spray across the surface, ensuring an even, thin layer and removing any excess droplets. For best results, opt for a light-colored, aluminum sheet pan rather than a dark, nonstick pan, as dark pans can cause the cookies to brown too quickly and unevenly.
-
Spoon out four teaspoon-sized dollops of cookie batter onto four separate quadrants of the prepared baking sheet. Working quickly, use an offset spatula, the back of a spoon, or a flat knife to spread each dollop into a thin, approximately 3-inch diameter circle. Don’t worry about perfection; eyeing them up is perfectly fine. The key is thinness for a crispy result.
-
Bake the cookies for 4-5 minutes, keeping a very close eye on them to prevent over-browning. They should develop golden edges and might have a few slightly browner patches, but the overall color should remain relatively pale. While the cookies are baking, ensure your printed fortunes are at hand and ready. Also, prepare a mug or a small bowl next to your workspace; this will be essential for shaping the hot cookies after they come out of the oven.
-
Promptly remove the baking sheet from the oven. Allow it to rest for a very brief 5-10 seconds – this crucial pause prevents the cookies from collapsing when flipped. Then, swiftly use a flat metal spatula to flip each cookie upside down. Immediately place a fortune in the center of a cookie and fold it in half, pressing the very top edges together lightly to seal. Without delay, gently drape the folded cookie over the rim of your prepared mug or bowl to create the classic fortune cookie curve. Hold it in place for a few moments until it sets and cools, which typically takes just a few minutes. Repeat this quick process for the remaining cookies on the sheet. If any cookies become too stiff to fold, return the pan to the oven for a quick 5-10 seconds to soften them again. Work in small batches of 4 cookies at a time to manage the shaping process effectively before they cool and harden.
Chef’s Notes & Tips
Baking Surface: Through extensive testing with various surfaces (parchment paper, silicone mats), I found that a lightly greased baking sheet consistently yielded the most successful and easiest-to-handle cookies. This method provides the perfect balance of non-stick and slight grip for spreading.
Dipped & Decorated Cookies: While plain fortune cookies are wonderfully delicious on their own, dipping a corner or two in melted candy wafers and adding sprinkles adds an extra layer of festivity and visual appeal. This is especially fun for themed events like holidays or parties.
Mel
Dessert
American
Bake
Nutrition Facts (per cookie)
Serving: 1 Cookie,
Calories: 28 kcal,
Carbohydrates: 6g,
Protein: 1g,
Fat: 1g,
Saturated Fat: 1g,
Sodium: 5mg,
Fiber: 1g,
Sugar: 4g
Recommended Products
Recipe Source: This recipe’s core idea and initial framework originated from Cooking Light, which I then extensively experimented with and adapted to develop my refined method for optimal success.