
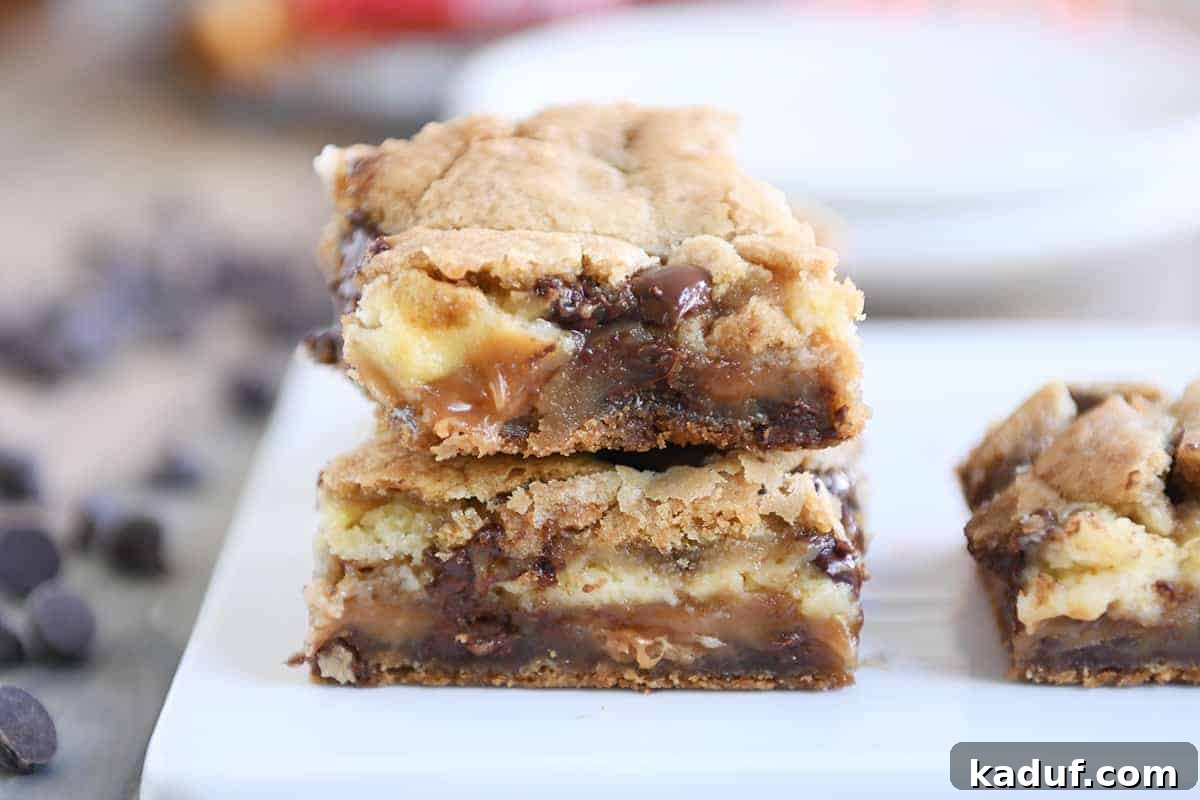
Unlock Your Inner Kitchen Rock Star: 5 Simple Tips to Elevate Your Cooking
There’s an undeniable thrill that comes from creating something truly delicious with your own hands. That moment when a dish you’ve prepared tastes as good, if not better, than anything you’d splurge on at a fancy restaurant – it’s pure culinary euphoria. And when friends and family rave about your creations, that feeling multiplies. My entire purpose is to help you experience that joy, to make you feel like an absolute rock star in your kitchen, no matter your skill level.
The secret isn’t a culinary degree, spending hours slaving over a hot stove, or investing in exorbitantly priced ingredients. More often than not, it’s a deceptively simple technique, an unassuming recipe, or a clever kitchen hack that can radically transform your cooking and boost your confidence. You don’t need to be a professional chef to produce incredible meals; you just need a few impactful tips to guide you.
Today, I’m thrilled to share five straightforward yet powerful ways you can instantly elevate your culinary game, all without excessive effort or specialized equipment. These easy-to-adopt suggestions are designed to empower you, bringing a newfound swagger to your kitchen. If you haven’t yet embraced any of these techniques, consider this your personal challenge: pick just one tip from the list below, integrate it into your cooking routine, and prepare to be amazed by the results. I can’t wait to hear how these simple changes transform your cooking experience!
Tip #1: Master the Art of Browning Butter
Browning butter might sound like a gourmet technique reserved for experienced chefs, but it is, without a doubt, one of the quickest and most impactful ways to infuse unparalleled depth and richness into both sweet and savory dishes. For years, the idea of browning butter filled me with trepidation. The fear of burning it, a common warning from many, almost kept me from ever trying. But once I finally took the leap and realized just how incredibly simple and forgiving the process is, I was genuinely frustrated with all the misinformation that had deterred me. It’s a game-changer that opens up a world of flavor.
If you’ve never browned butter, prepare to be amazed by its simplicity and the profound impact it has on your food. The process involves gently heating unsalted butter in a light-colored pan over medium heat. As the butter melts, it will foam, then eventually start to turn golden brown, releasing a distinctly nutty, toasted aroma. This transformation is due to the Maillard reaction, a chemical process that creates hundreds of new flavor compounds, imparting notes of hazelnut and caramel. Swirl the pan occasionally to ensure even browning and to monitor the color. Once it reaches a beautiful amber hue and smells delightfully nutty, immediately remove it from the heat and pour it into a heatproof bowl to prevent it from burning.
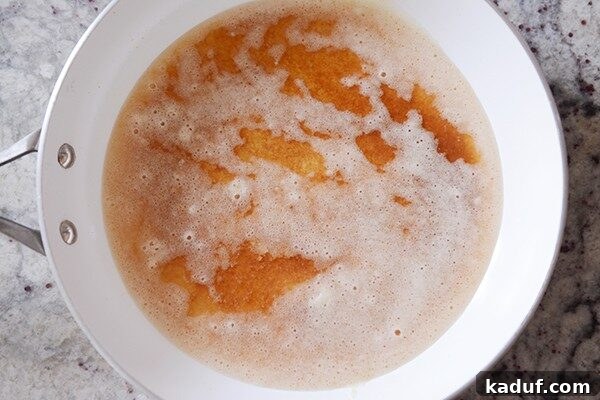
For a comprehensive visual guide, check out this super easy tutorial on How to Brown Butter.
Once you’ve mastered this incredibly easy technique, you’ll want to incorporate brown butter into everything. Its nutty, caramelized notes elevate a wide array of dishes. Here are a few irresistible recipes where browned butter truly shines, showcasing its versatility from comforting desserts to savory mains:
- Salted Caramel Brown Butter Chocolate Chip Cookie Bars
- Browned Butter Vanilla Rice Krispie Treats
- Banana Bars with Browned Butter Frosting
- Butternut Squash Shells with Sage Brown Butter Sauce
- Penne with Roasted Asparagus and Balsamic Browned Butter
Tip #2: Bake This Incredible No-Knead Rustic Crusty Bread
Perhaps for years, you’ve maintained that homemade bread just isn’t your culinary territory. Too time-consuming, too complicated, or simply not worth the effort. Or maybe a past disastrous encounter with yeast has sworn you off bread-making entirely. If any of this resonates, it’s time to cast those doubts aside. Because this extraordinary easy no-knead rustic crusty bread recipe is about to revolutionize your kitchen experience and redefine what you thought was possible with minimal effort.
The beauty of this recipe lies in its profound simplicity. It requires no special stand mixer, no laborious kneading, and absolutely no advanced bread-making skills. The foolproof dough is effortlessly mixed in a bowl with nothing more than a wooden spoon, then left to rest and ferment until it’s wonderfully bubbly and alive. This long, slow fermentation is the secret to its incredible flavor and texture, developing complex notes that would typically require hours of active work. After its rest, with hands generously greased with oil or cooking spray, the dough is simply formed into a rustic, freeform loaf, allowed a final rise, and then baked to a magnificent golden brown. The result is a showstopper: a loaf with an irresistibly crackly, deeply browned crust and an interior that’s soft, airy, and full of glorious holes. I guarantee, not a single person will suspect how incredibly easy this impressive bread was to create.
If your goal is to feel like a true culinary maestro, producing a fresh, warm loaf of homemade bread is an unparalleled achievement. And this easy rustic crusty bread is the quintessential starting point. It’s not just a recipe; it’s an invitation to experience the pure magic of bread baking without the intimidation. The comprehensive recipe post offers in-depth instructions, complete with step-by-step pictures, ensuring your success every time.
Tip #3: Embrace the Power of Coarse, Kosher Salt
And once you do, consider storing it in a super cute yet eminently functional bamboo salt box {affiliate link} that sits right by your stove. There’s a certain culinary gravitas, an immediate elevation of your cooking game, that comes from confidently pinching a bit of coarse kosher salt between your fingers and flicking it over a sizzling skillet of eggs, perfectly roasted vegetables, or any dish that needs that perfect kiss of seasoning. Kosher salt isn’t just a trend; it’s a fundamental ingredient that truly makes a difference in flavor and seasoning control. I use it constantly, in almost every savory dish I prepare. While some traditional recipes might caution against interchangeable use with fine table salt, I often make the swap, living a little on the edge, and I encourage you to understand why it’s so beneficial.
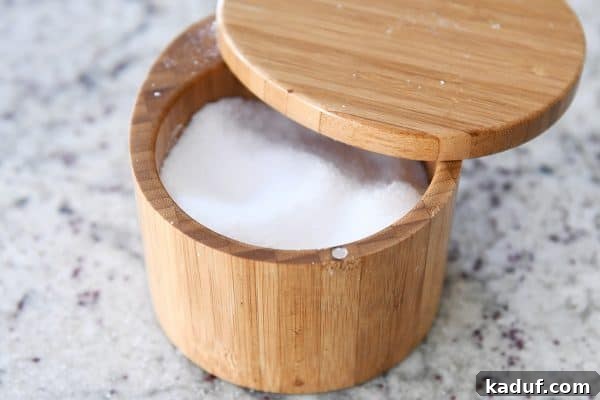
The key distinction between kosher salt and table salt lies in their crystal structure. Kosher salt has larger, flatter, more irregular crystals, which allows for more precise control when seasoning by hand. You can truly “feel” how much salt you’re adding. Table salt, on the other hand, consists of finer, denser crystals, often with anti-caking agents, which can lead to over-seasoning if not measured carefully. Generally speaking, a good rule of thumb is: if a recipe calls for 1 teaspoon of table salt, you’ll typically want to use about 1 1/4 to 1 1/2 teaspoons of coarse kosher salt. This is because the larger, less compact crystals of kosher salt take up more volume for the same amount of salinity compared to the denser granules of table salt. Always taste as you go!
While I still opt for fine table salt in most baking recipes for consistent dissolution in batters and doughs (think cookies, cakes, and brownies), for virtually everything else, I reach for my bamboo salt box and the glorious coarse kosher salt. I primarily use the Diamond Crystal brand, known for its distinctive flake-like crystals, though I sometimes use Morton’s. (Note: Diamond Crystal is generally coarser than Morton’s, so you might use slightly more if opting for Diamond Crystal to achieve the same saltiness.) Over the past year, I’ve made a conscious effort to specify when I use coarse kosher salt in my recipes, encouraging everyone to make the switch. It’s an incredibly inexpensive way to feel more confident and skilled in the kitchen, and most importantly, it ensures your food tastes amazingly and perfectly seasoned every single time.
Tip #4: Cultivate a Love Affair with Fresh Aromatics & Herbs (Especially Basil, Garlic, and Ginger)
I am, undeniably, a huge advocate for dried herbs and spices. My pantry shelves are laden with them, and they are staples in my daily cooking. So, let me be clear: there’s absolutely no judgment here for using dried basil or granulated garlic. They serve an invaluable purpose. However, if you’re looking to infuse your dishes with an explosion of vibrant, fresh flavor that will literally transform them into something truly revolutionary, I wholeheartedly encourage you to embrace these three fresh powerhouses: basil, garlic, and ginger. The difference they make is profound, creating layers of aroma and taste that dried alternatives simply can’t replicate.
-
Fresh Basil: There is simply nothing quite like the sweet, peppery, slightly anise-like aroma of fresh basil. It’s my absolute favorite herb, perhaps rivaled only by rosemary (though that’s largely thanks to this incredible bread). Fresh basil is an indispensable ingredient in Italian, Mediterranean, and many Asian cuisines. I have a multitude of recipes that specifically call for fresh basil, but you can also substitute it in recipes that list dried basil. The general rule of thumb for conversion is to use double or even triple the amount of fresh basil to dried. So, if a recipe calls for 1 teaspoon of dried basil, aim for about a tablespoon (or more, to taste) of fresh basil. The crucial tip for using fresh herbs like basil is to add them toward the very end of the cooking process. Fresh herbs are delicate, and prolonged simmering or cooking can cause them to lose their vibrant flavor and color, leaving your dish tasting dull.
-
Fresh Garlic: The pungent, savory, and subtly sweet kick of fresh garlic is incomparable. It builds a foundation of flavor that is essential in countless cuisines worldwide. Investing in a good garlic press, particularly one that doesn’t require peeling the garlic first {affiliate link}, will make the process of incorporating fresh garlic incredibly easy and rewarding. Using fresh garlic will literally transform the way your food tastes, adding a depth and brightness that garlic powder simply can’t achieve. You don’t have to commit to using fresh garlic in every single recipe, forever. Start by using it in dishes that you really want to impress with, and you’ll quickly begin to notice the remarkable difference. And when convenience calls for garlic powder now and then, don’t feel guilty; moderation is key in all things, even culinary endeavors.
-
Fresh Ginger: I could wax poetic about fresh ginger all day – its spicy, warm, pungent, and subtly sweet notes are truly unique and invigorating! While the gnarly, nobby root can appear a little intimidating to work with, I promise there’s a brilliant and simple way to manage it. My favorite method: simply cut the unpeeled fresh ginger into 1-inch pieces, toss them into a freezer-safe ziploc bag, and freeze. When a recipe calls for ginger, pull out a chunk from the freezer and grate it from frozen (again, no need to peel!) using a rasp grater (like a Microplane) or the small holes of a box grater. This method makes quick work of ginger prep and ensures you always have fresh ginger on hand. I’m also a big fan of ginger paste as a convenient alternative. While culinary purists might detect a difference, for most home cooks, ginger paste is an excellent stand-in for fresh ginger, and I use it frequently. Explore some of my favorite recipes that feature fresh ginger and prepare to be delighted.
Tip #5: Bid Farewell to Bottled Lemon Juice
No, really. It’s time to break up with bottled lemon and lime juice. My culinary journey, like many others, began with a heavy reliance on convenience ingredients. I grew up savoring lemon bars crafted with bottled lemon juice, and it wasn’t until my mid-twenties that I actually purchased a real, vibrant lemon or lime from the grocery store. It took a few more years, well into my late twenties, to even figure out how to properly zest one of these delightful citrus fruits. So believe me, I completely understand if you feel a little late to this particular culinary party.
However, after decades of embracing the real thing, the distinction is unequivocally clear: bottled lemon or lime juice simply cannot compete with the bright, zesty zing and complex aromatics of freshly squeezed citrus. Bottled varieties often taste flat, somewhat metallic, and artificial compared to their fresh counterparts. While I still occasionally use bottled lemon juice for specific home canning recipes where acidity levels are critical, for virtually every other culinary application, fresh lemons or limes are the absolute gold standard. The intoxicating fragrance and vibrant flavor they impart are unmatched, instantly brightening and elevating any dish or beverage. Incorporating real lemons and limes is such a simple, yet incredibly effective, way to enhance your cooking. Try rubbing fresh lemon zest into granulated sugar for an intensely aromatic and punchy lemon kick – you’ll be amazed by the incredible scent alone, let alone the flavor!
To make the transition even smoother, I highly recommend a couple of inexpensive yet indispensable tools. For everyday juicing in cooking and baking, this inexpensive citrus juicer is a workhorse. And for capturing all those precious, aromatic oils from the peel, this microplane grater is an absolute must-have for zesting lemons, limes, and even oranges {affiliate links}. These small investments will pay huge dividends in flavor.
Bonus Tip: Get Yourself a Kitchen Torch
Seriously, go for it! It doesn’t even matter if you only ever use it for torching marshmallows for the most epic s’mores indoors; you will undeniably feel like the coolest and most professional cook in the kitchen the moment you fire that thing up. Beyond the sheer fun factor, it’s also absolutely fabulous for creating that signature crisp, caramelized sugar crust on crème brûlée. This is my favorite easy-to-use kitchen torch {affiliate link} that offers reliability and power without being overly complicated. It’s a small tool that adds a touch of culinary drama and allows you to achieve restaurant-quality finishes right at home.
So, there you have it: five simple, yet incredibly effective tips to transform your cooking and help you truly shine in the kitchen. Which one will you try first? Or do you have a secret weapon in your own culinary arsenal that instantly boosts your kitchen confidence? Please share your quick tips on how to instantly feel like a rock star in the kitchen! (And yes, expertly ordering pizza like a champ totally counts as a culinary skill in my book!)
Disclaimer: I am a participant in the Amazon Services LLC Associates Program, an affiliate advertising program designed to provide a means for me to earn fees by linking to Amazon.com and affiliated sites. As an Amazon Associate I earn from qualifying purchases.